The plugin WP-Rocket is now used on more than 4 million WordPress sites, and it still delivers some of the best speed gains you can get from a caching plugin. It’s easy to use and includes a few features you won’t find in most alternatives.
In this guide I’ll walk you through the less obvious options in WP-Rocket. If you make it to the end, there’s a good chance you’ll pick up at least one setting you haven’t used before.
If you’re a developer looking for PHP filters, WP-CLI commands, and deployment scripts, check out my WP Rocket for Developers post.
What is Caching?
Caching creates and stores static versions of your website’s pages (HTML, CSS, and JavaScript) on the server. This means visitors receive pre-generated content rather than dynamic pages that require PHP communication with the server or database.
By reducing server interactions and data transfer, caching significantly speeds up page loading times, enhancing user experience.
WP-Rocket Plugin Potentially Performs the Following Actions:
- Creates a static version of every page on your WordPress site and stores them on the server.
- Enables the browser to use its internal cache.
- Delays the loading of JavaScript.
- Enables GZIP compression.
- Optimizes Google Fonts.
- Minifies and combines JavaScript and CSS files.
- Delays the loading of images on your site, and more…
Let’s go through the settings screens under Settings > WP-Rocket.
Read more about What is Cache and What Types of Cache Exist?
Dashboard

There isn’t much to say about this screen. It’s mostly account and license information. The two actions that matter here are Clear Cache and Preload Cache.
Clear Cache does exactly what it says: it deletes the static files WP-Rocket saved on your server. I’ll get to the Preload Cache button later in the post.
Cache
In WP-Rocket 3.16 and above, the Cache tab was removed from the interface. The screenshot below shows the old layout, and this section should be read as a guide to where those settings live now.
The old Cache settings were redistributed in current versions. Mobile Cache is enabled by default and only appears in Tools if you need to re-enable it, User Cache lives in Add-Ons, and Cache Lifespan lives in Advanced Rules.
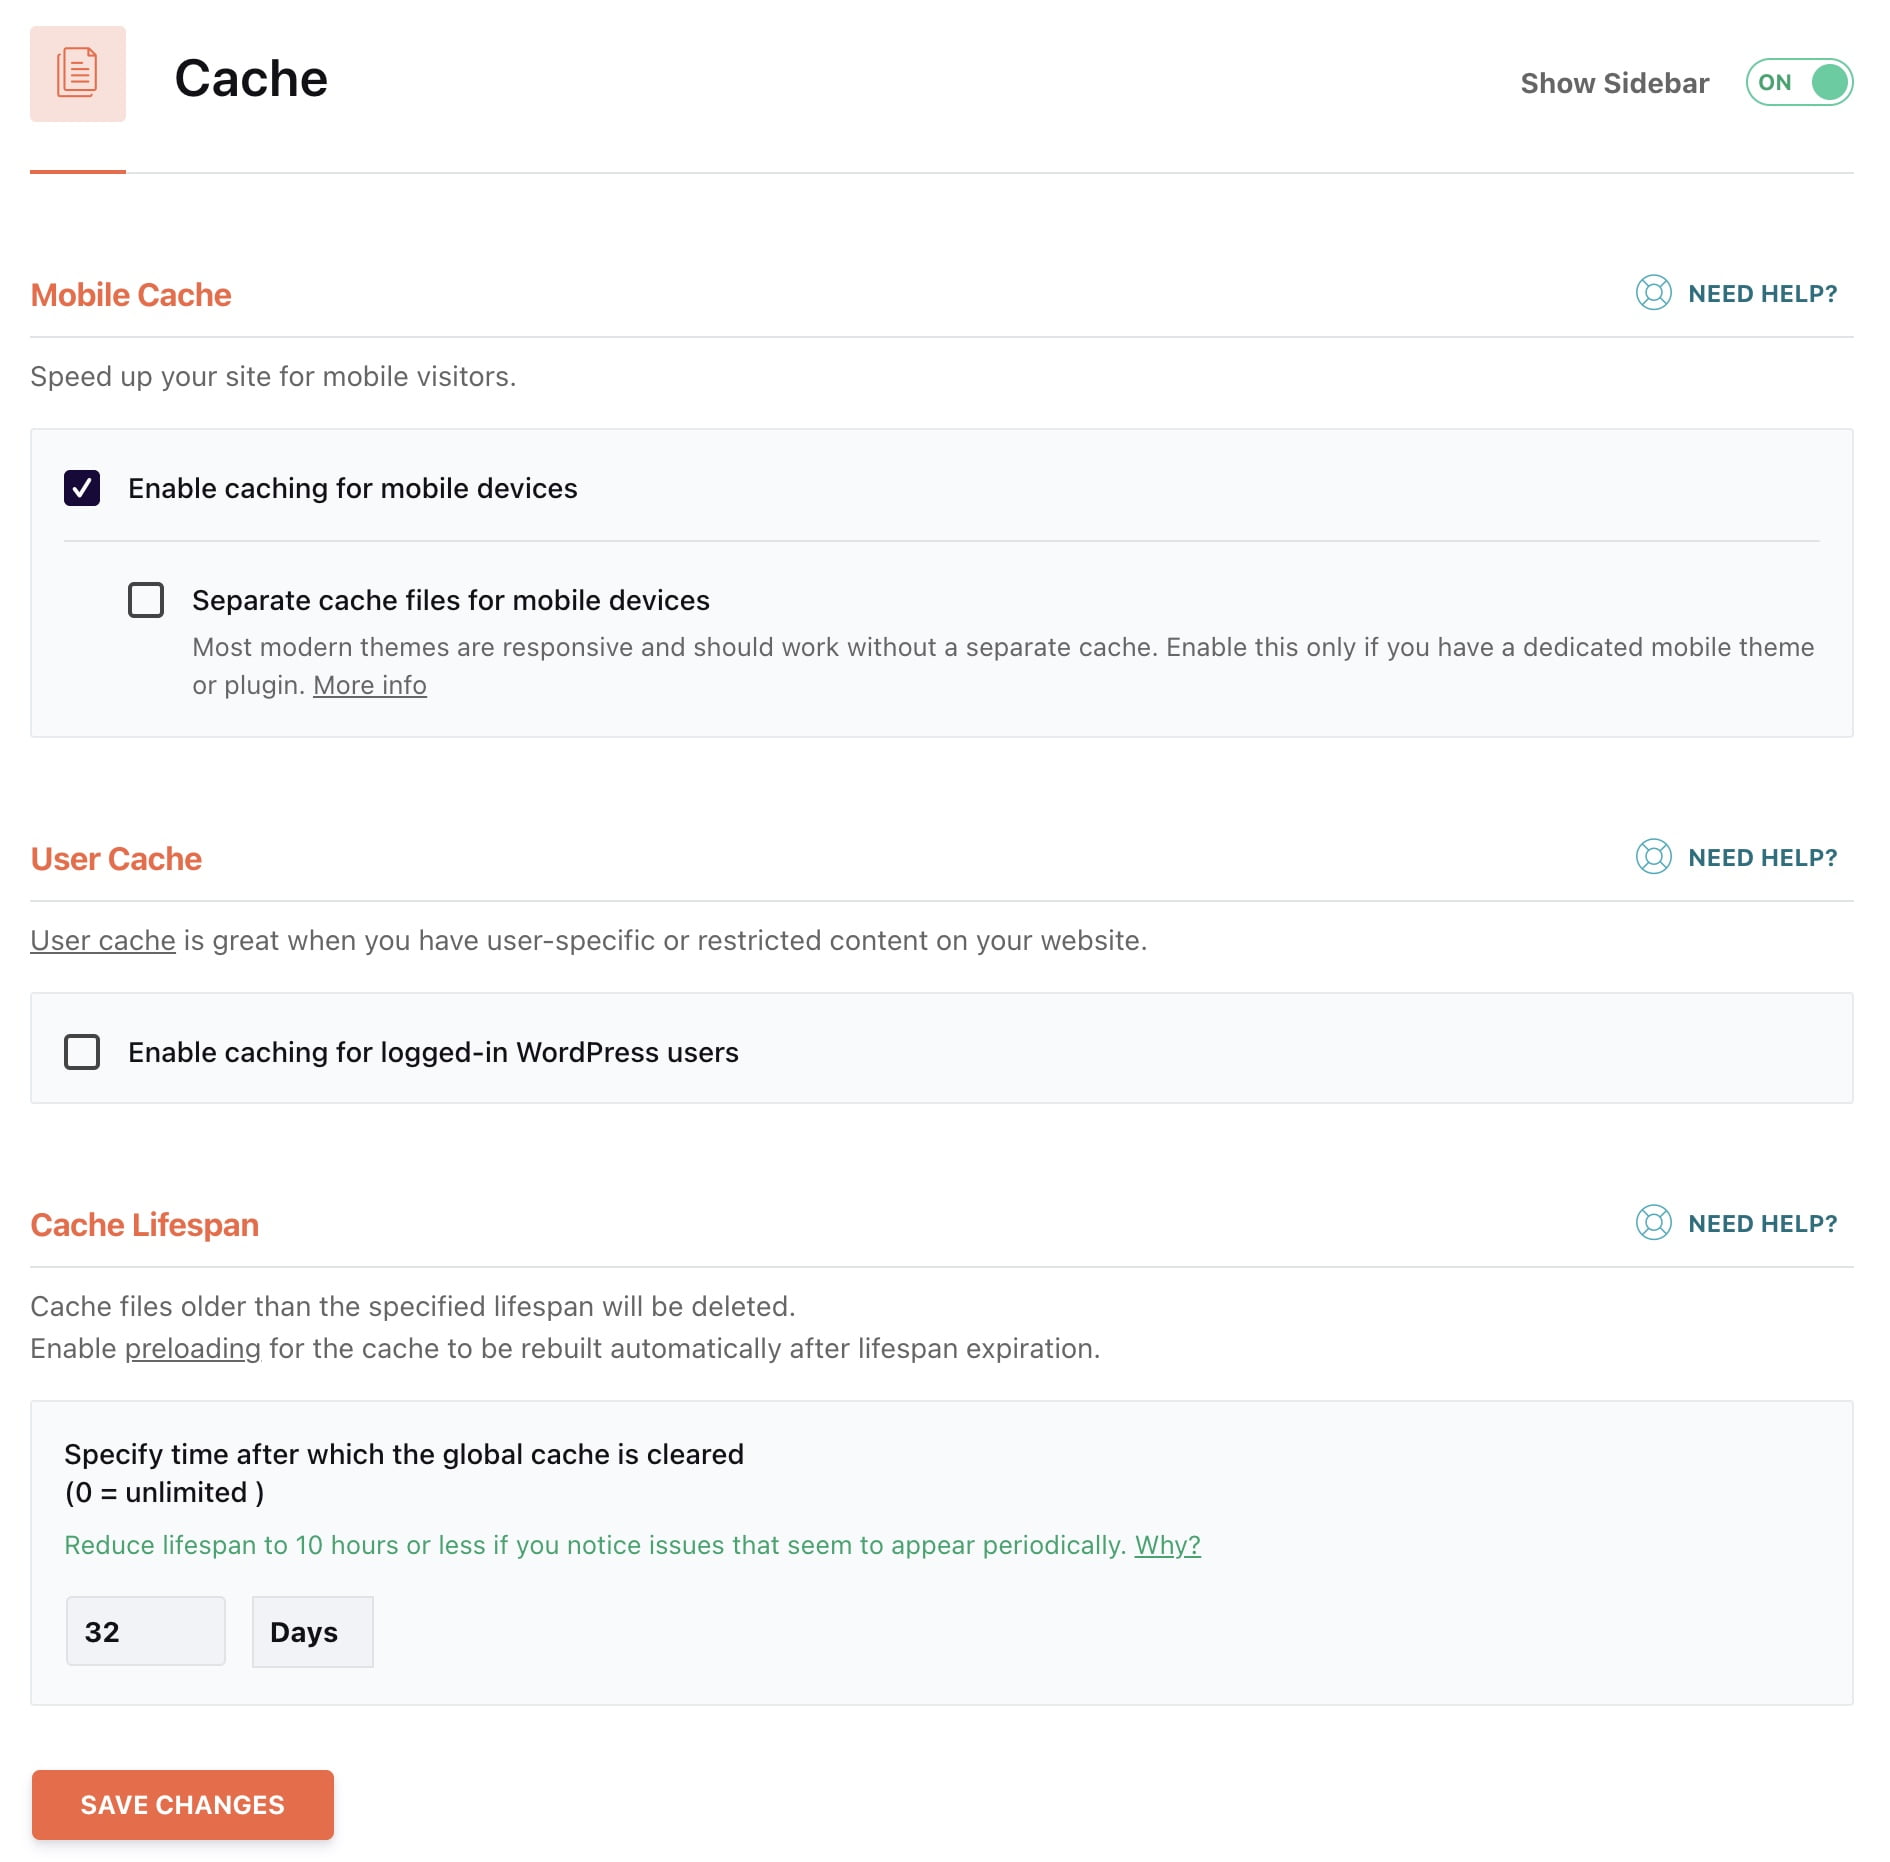
1. Mobile Cache
This feature allows WP-Rocket to serve optimized cached pages to mobile users. In current versions it is enabled by default, so most users will not see a dedicated Cache tab for it.
By default, WP-Rocket creates a separate mobile cache automatically. The old “Separate cache files for mobile devices” checkbox is no longer a separate UI setting, and if Mobile Cache was disabled you can re-enable it from the Tools tab.
If you need to disable mobile-specific cache behavior, you will need a helper plugin or a code-based solution. There is no regular checkbox for this in the current interface. The following filters disable both Mobile Cache and the old separate mobile cache behavior:
add_filter( 'pre_get_rocket_option_cache_mobile', '__return_zero' );
add_filter( 'pre_get_rocket_option_do_caching_mobile_files', '__return_zero' );
Either way, this action is very useful in situations where you are delivering different content to mobile users (or if you are using the wp_is_mobile function) in your theme.
For example, if you’ve created a menu loaded with JavaScript exclusively for mobile users, WP-Rocket will serve the same menu to tablet and desktop users unless you use this option to separate cache files.
If you use plugins like WP Touch or WP Mobile Detector, this option will be automatically enabled, and you won’t be able to change it.
In most cases, I recommend leaving the default behavior in place unless your site serves truly different mobile-specific content.
File Optimization
This tab is about front-end assets such as JavaScript, CSS, and fonts. These settings can make a real difference to how quickly your WordPress site loads.
Please note that depending on your site’s template and how it’s developed, changing these settings may cause visual issues or JavaScript errors.
You will find several options in this tab:
1. CSS Files

A. Minify CSS Files
This option minifies your site’s CSS files. That reduces file size and can help pages load faster. Enable it, then check that nothing broke visually.
Here’s a comprehensive post describing 12 proven ways to optimize CSS for better performance.
B. Combine CSS Files
This option combines CSS files, also known as concatenation. It reduces the number of HTTP requests, but in most modern setups it’s better to leave it off, especially in the following cases:
- There are visual issues or functionality problems on your site.
- There are JavaScript errors in your browser’s Dev Tools (try disabling only the JS option).
- Your site operates on the HTTP/2 protocol.
C. Excluded CSS Files
This option appears if you choose to combine CSS files. In this section, you can define CSS files that should not be included in the minification and concatenation process. If a specific file included in this action causes any issues, you can add it to this section.
D. Optimize CSS Delivery
Before a browser can render the content on the screen, it needs to process CSS files. As a result, the browser delays rendering until it downloads and processes all external CSS files on the site.
WP-Rocket lets you load CSS asynchronously so it doesn’t delay the initial render. Under this option you’ll find two methods:
Remove Unused CSS – This is the recommended option. It removes all CSS that is not actually used on each individual page, keeping only the styles that are needed. This significantly reduces page size and eliminates render-blocking CSS. The process runs asynchronously in the background, so it won’t slow down your site while generating the optimized CSS.
Load CSS Asynchronously – This option generates Critical CSS that is loaded as Inline CSS (as opposed to an external file) for the critical part of the page that the user sees when they enter a specific page on your site.
Since both methods prevent CSS from blocking the initial render, they improve performance, help with the LCP (Largest Contentful Paint) metric known from Core Web Vitals, and reduce the time needed to display the critical upper part of the page.
Note that WP-Rocket automatically generates the critical path CSS, but if it fails to do so or you want to generate it yourself, you can use a tool like this one and add it to the section called Fallback Critical path CSS.
WP-Rocket will use the Fallback only if it fails to generate the CSS on its own.
So yes, Optimize CSS delivery can be worth enabling if you’re comfortable fixing visual issues when they show up. If not, skip it.
2. JavaScript Files


The first three options in this section are identical to the options in the previous section, but they only refer to JavaScript files. Let’s focus on the fourth option:
A. Delay JavaScript Execution – Load JavaScript Deferred
When a page on your website loads, the browser goes through the code, and every time it encounters a call to a specific script, it loads that script but delays the loading of what’s really important – the content.
This option will defer the loading of JavaScript files, ensuring that those scripts won’t delay the page’s loading. I recommend enabling this option, but make sure to go through your site’s pages and check in Dev Tools that no new errors appear after activating it.
Need to exclude scripts from this feature? Check out our guide on excluding JavaScript files from WP Rocket’s Load Deferred.
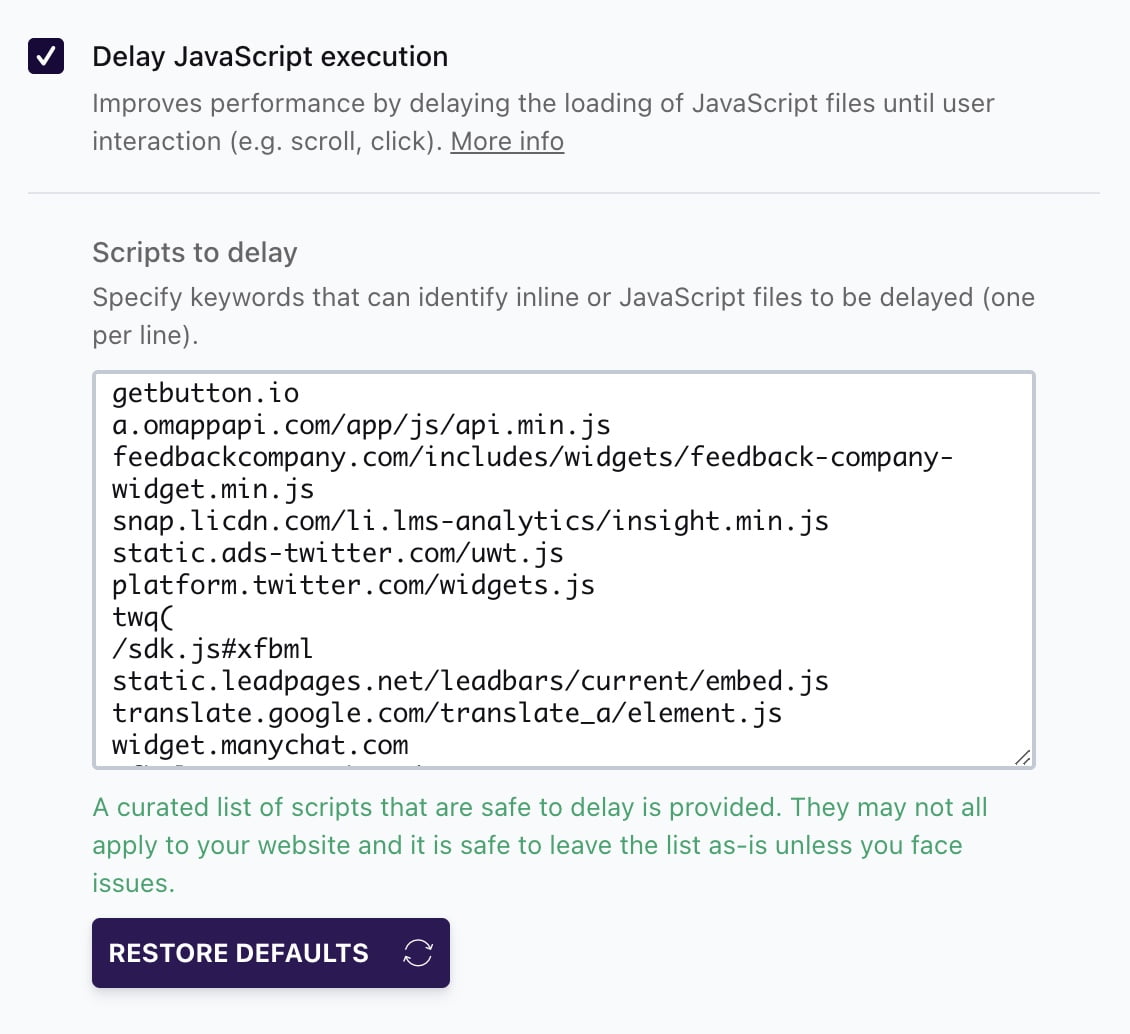
B. Delay Script Execution
This option can significantly improve your Core Web Vitals scores if used properly for relevant scripts only.
Delaying the execution of scripts allows you to specify that certain scripts will not load until after some user interaction with the page.
That interaction could be scrolling the page, clicking a specific button, moving the mouse, touching the screen (on mobile), and so on.
You can add additional scripts beyond the default list that comes with WP-Rocket. You can delay those scripts without worrying about potential issues.
You can find more information about this option in the WP-Rocket documentation…
Media Settings
This tab covers media optimization, including images, iFrames, and embeds.
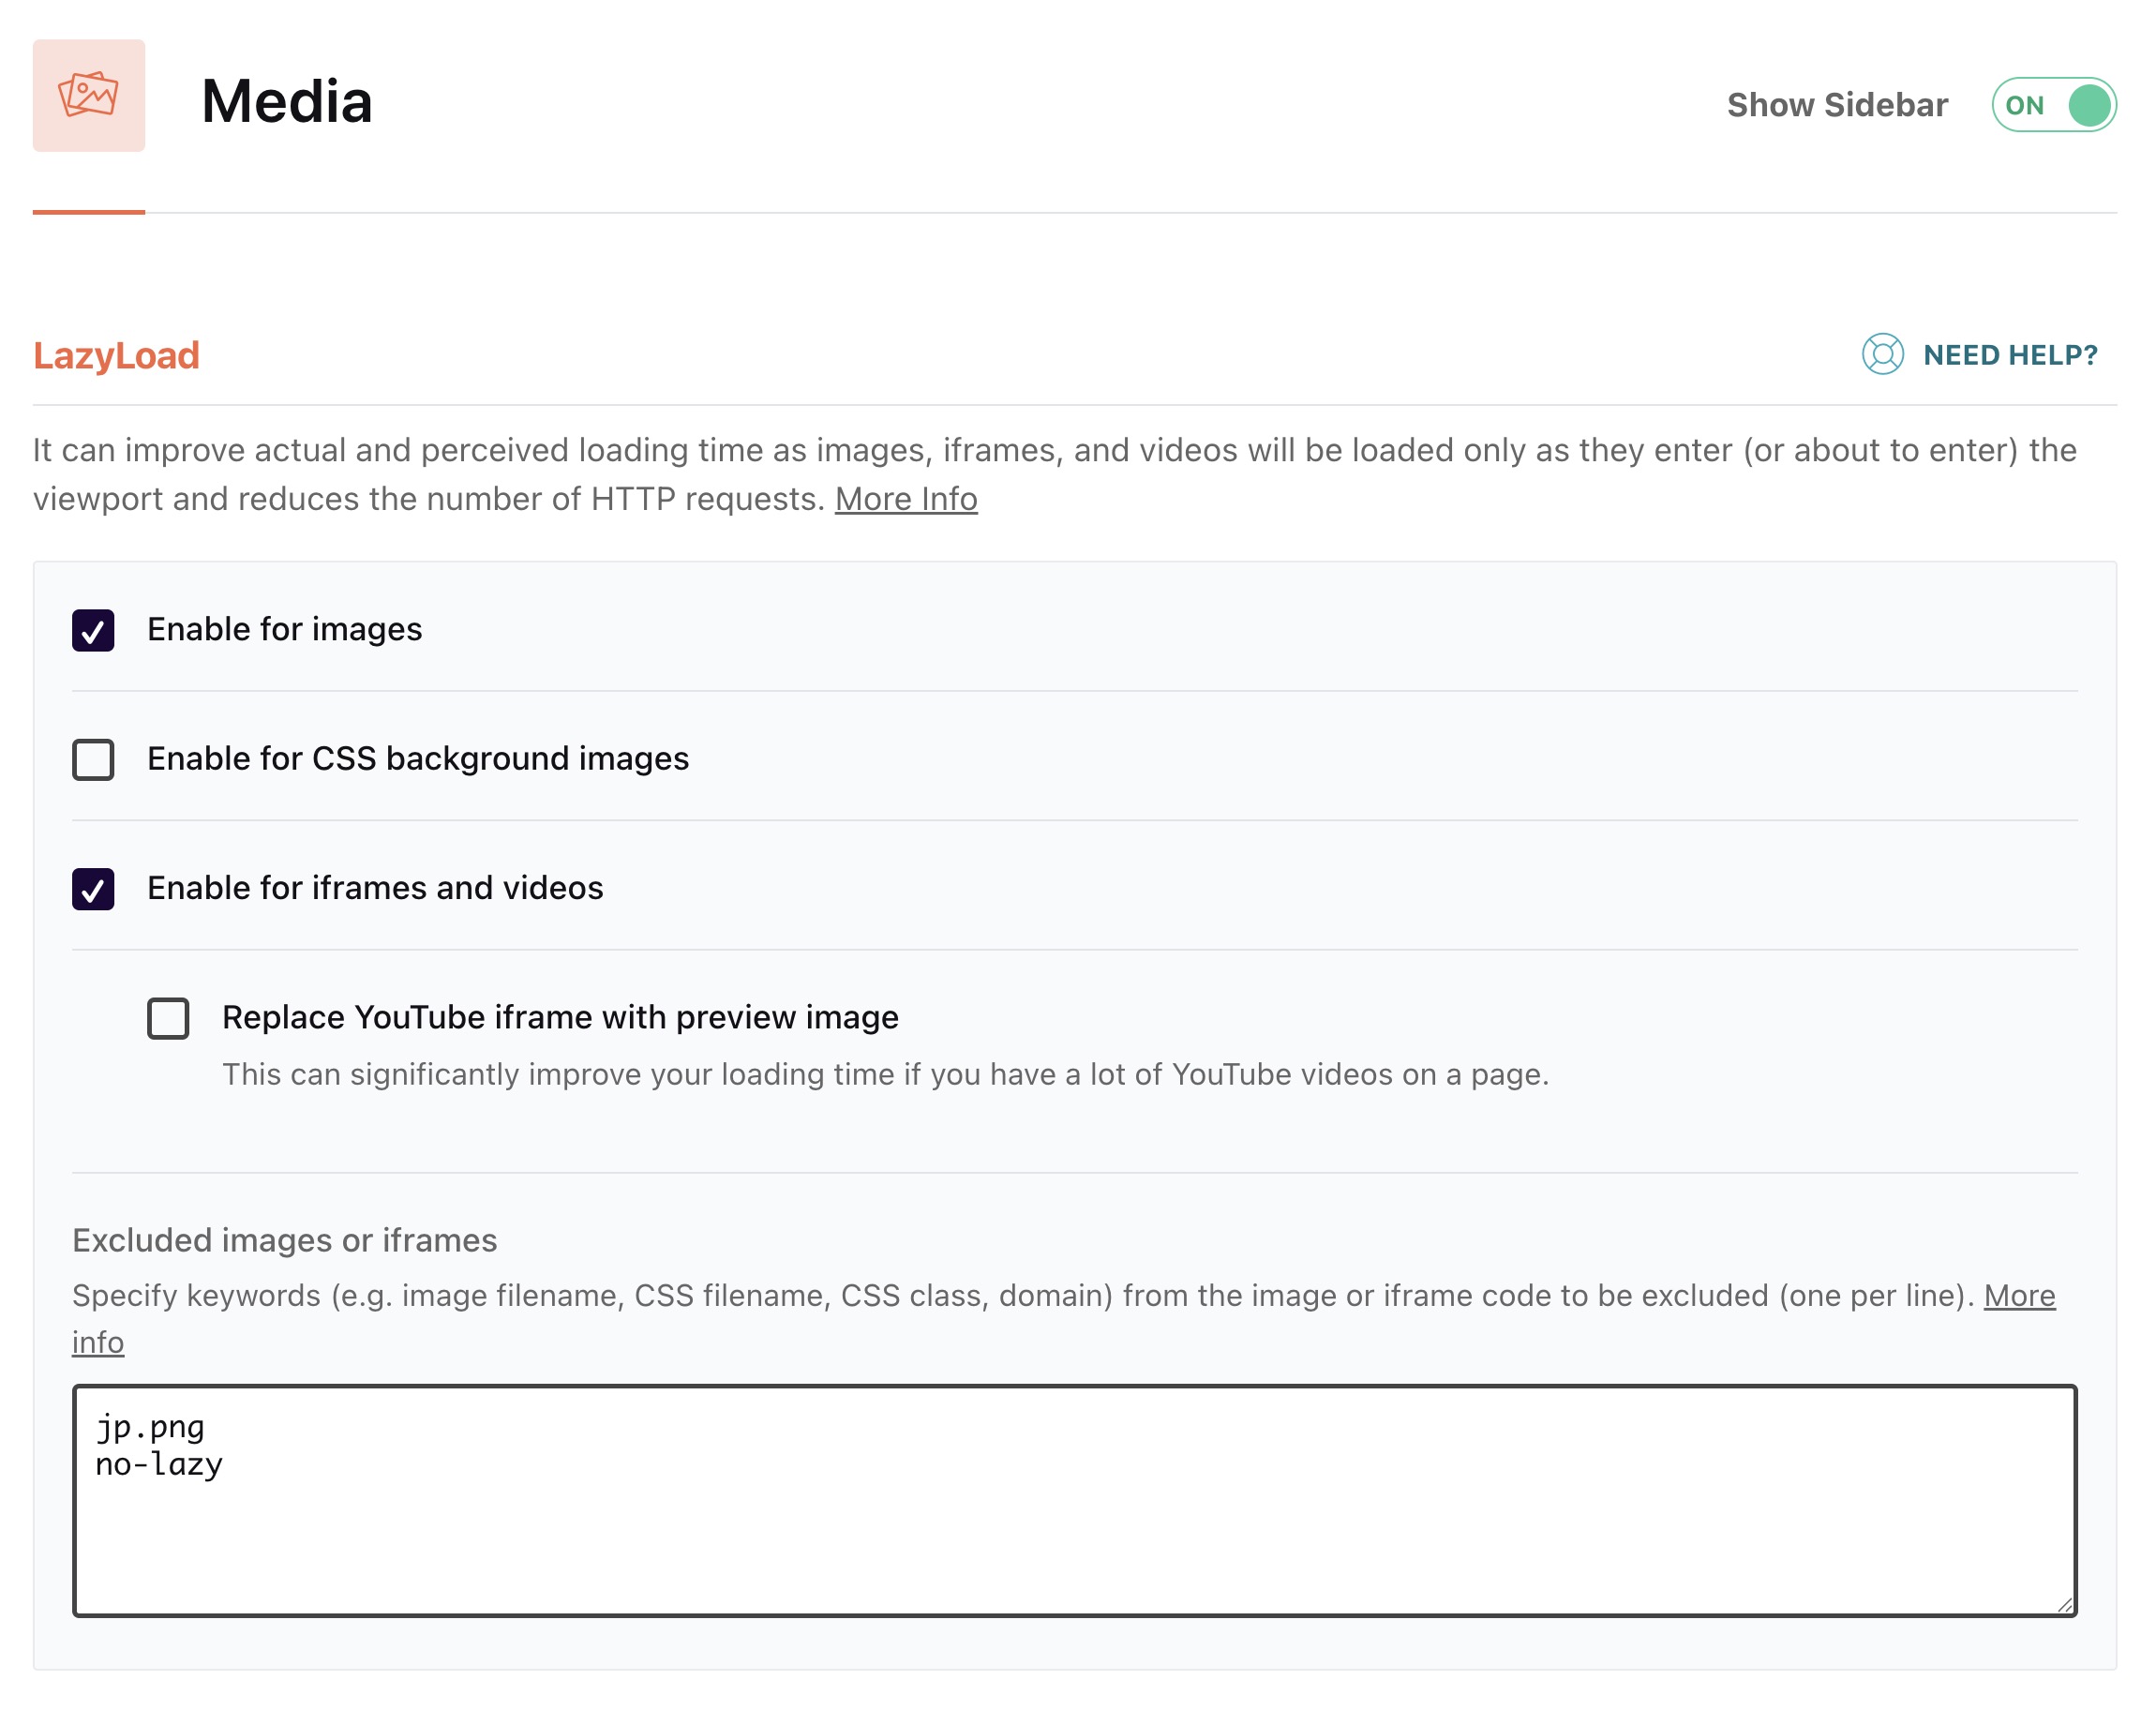
1. LazyLoad
LazyLoad delays images, iframes, and videos until the user scrolls near them. That cuts down initial requests and usually helps a lot on image-heavy sites.
I usually recommend enabling this option, but use it carefully. Critical images such as logos or above-the-fold images can be affected, so exclude specific images or iFrames when needed.
WP Rocket’s LazyLoad for CSS background images delays loading of offscreen backgrounds, improving performance with no extra setup needed. Learn more.
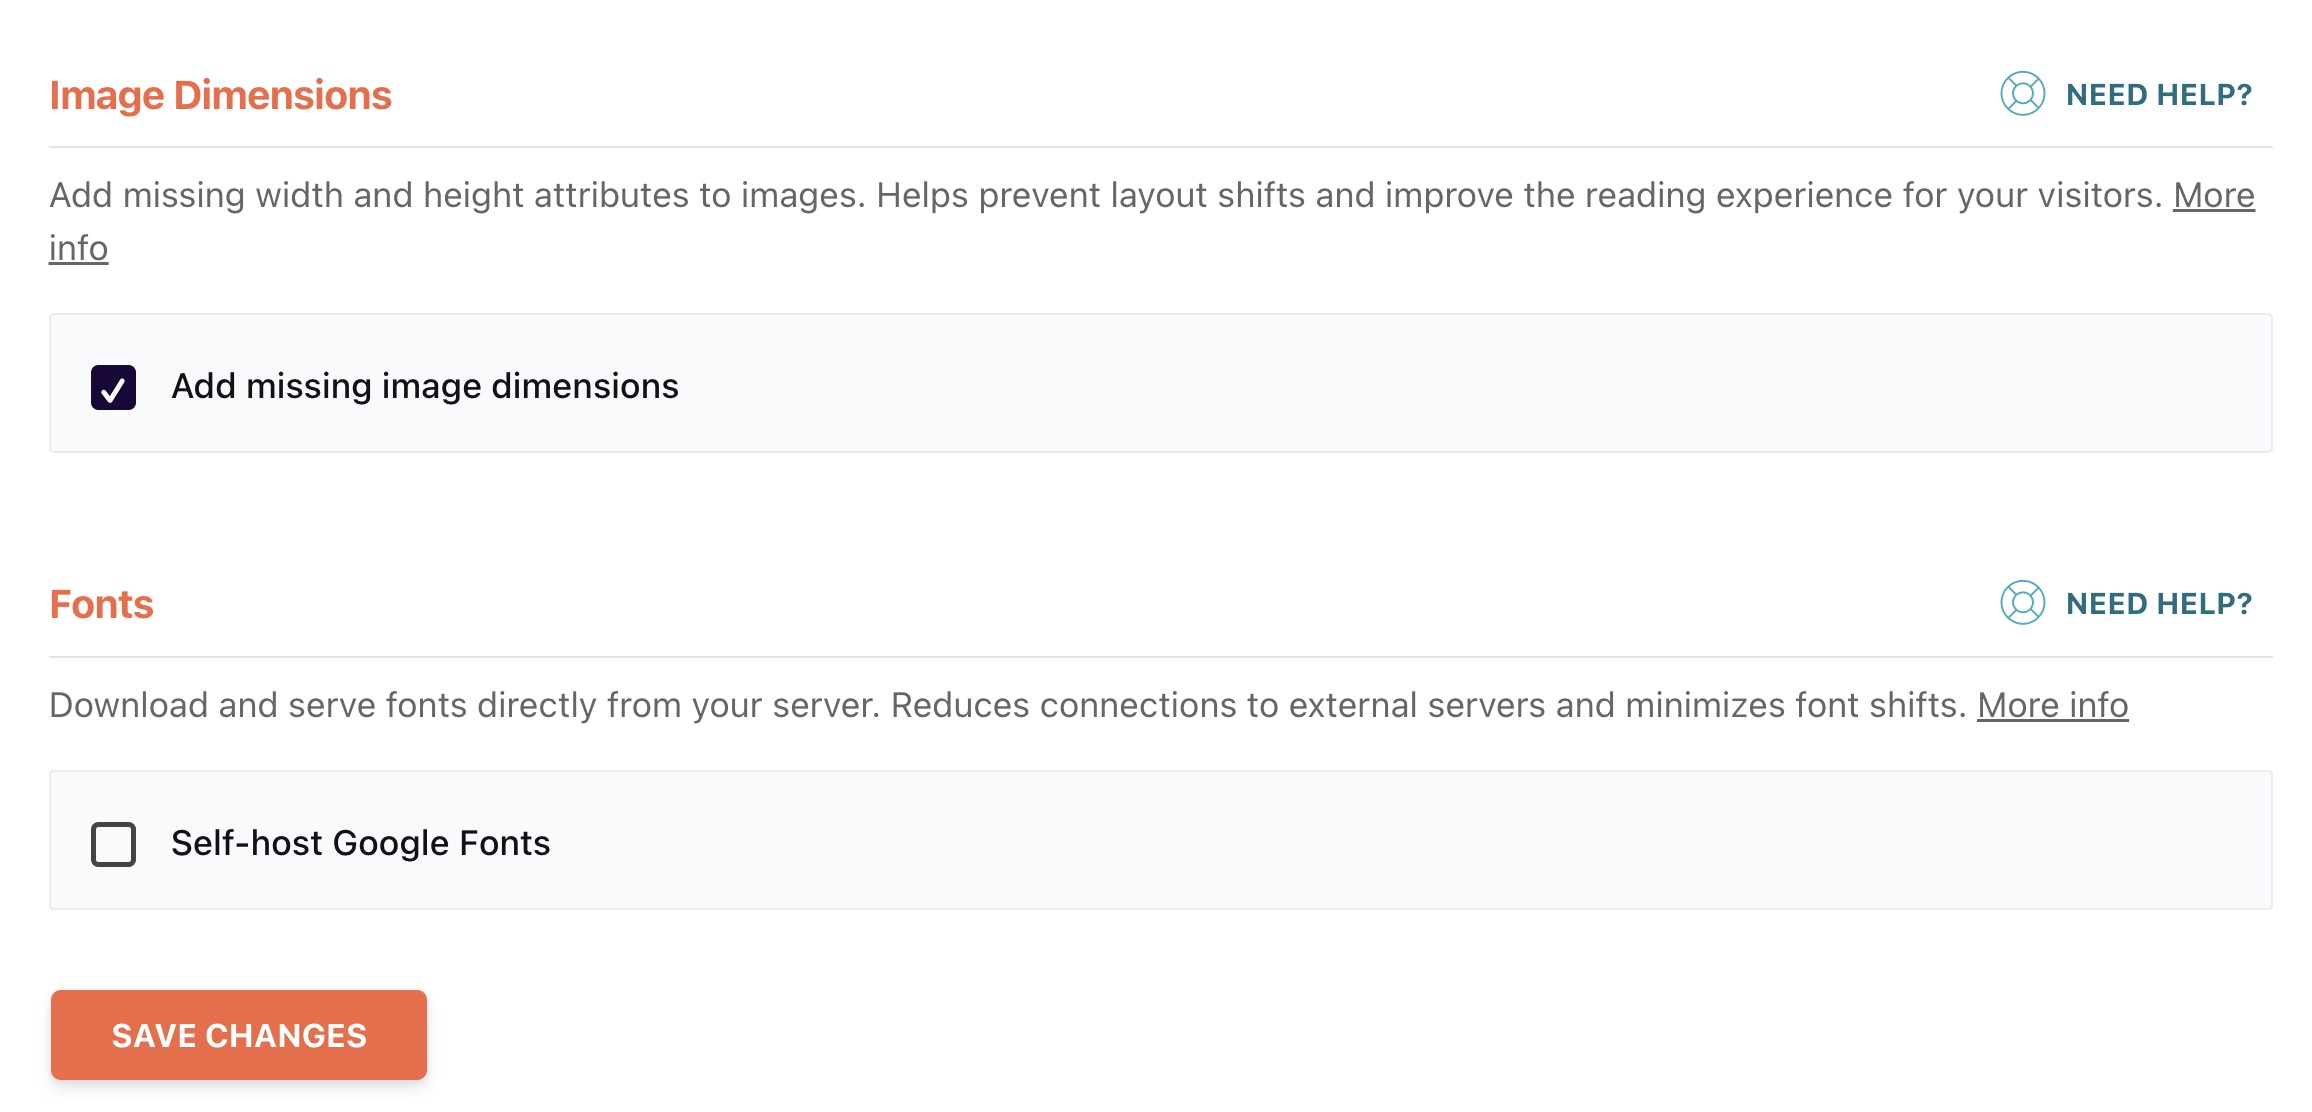
2. Image Dimensions
When a browser displays a web page, it loads HTML first and waits for all images to load. If image dimensions are defined, browsers use this information to allocate space for images correctly.
If image dimensions are not defined, the browser will adjust the content layout to accommodate images after downloading them from the server.
This layout shift is known as Layout Shift (CLS) and negatively impacts user experience. It’s one of the key metrics in Core Web Vitals.
This option adds dimensions to images that are missing them. Check the result afterward and see whether it improves your scores in the usual performance tools.
It’s worth noting that it’s often better to define image dimensions in code based on the specific size in which the image is displayed.
3. Optimize Critical Images
Since version 3.16, WP Rocket automatically detects the LCP image and other images above the fold and optimizes them without any manual configuration. This feature is enabled by default and runs asynchronously using a lightweight beacon script (wpr-beacon.min.js).
For each page, the plugin:
- Sets
fetchpriority="high"on the LCP image so the browser downloads it first. - Adds a
<link rel="preload">tag for the LCP image (including responsiveimagesrcsetandimagesizesattributes when applicable). - Excludes above-the-fold images from lazy loading automatically.
Mobile and desktop are processed independently, so the optimization is accurate for each device type.
For best results, combine this feature with the Remove Unused CSS option. Learn more in the WP Rocket documentation.
4. Fonts
WP Rocket 3.18 introduced the Self-host Google Fonts feature, which lets you host fonts locally on your server. That can improve load times, help Core Web Vitals, and make GDPR compliance a bit easier.
You can also do it manually if you want more control by following this guide I wrote about self-hosting Google Fonts.
Automatic Lazy Rendering
Introduced in WP Rocket 3.17, Automatic Lazy Rendering uses the CSS content-visibility property to delay rendering elements that sit far below the fold. Instead of rendering the whole page at once, the browser renders only what the visitor can see and leaves the rest for later.
This can have a direct impact on INP (Interaction to Next Paint), one of the three Core Web Vitals metrics, because it reduces main-thread work during the initial load. On content-heavy pages, it can also help LCP and FCP.
The feature is fully automatic, with no settings to configure. WP Rocket detects elements more than 1800px away from the viewport and applies the optimization separately for mobile and desktop.
If a specific element is causing layout issues due to lazy rendering, developers can exclude it using the
rocket_lrc_exclusionsfilter. See the documentation.
Preload Settings
1. Preload Cache
You can preload the cache based on your site’s sitemap. If you activate this option, WP-Rocket will automatically create a new cache for all the URLs in your site’s sitemap when the cache lifespan expires.
This action will also be performed if you click the “Preload Cache” button in the Dashboard tab.
WP-Rocket can automatically detect your site’s sitemap if you use plugins like WordPress Yoast SEO, All in One SEO, or Jetpack. If it detects one of these plugins, you’ll have the option to select that plugin’s sitemap.
Excluding URLs – Exclude URLs
In this box, you can add the URLs of pages or posts you want to exclude from the preload action.

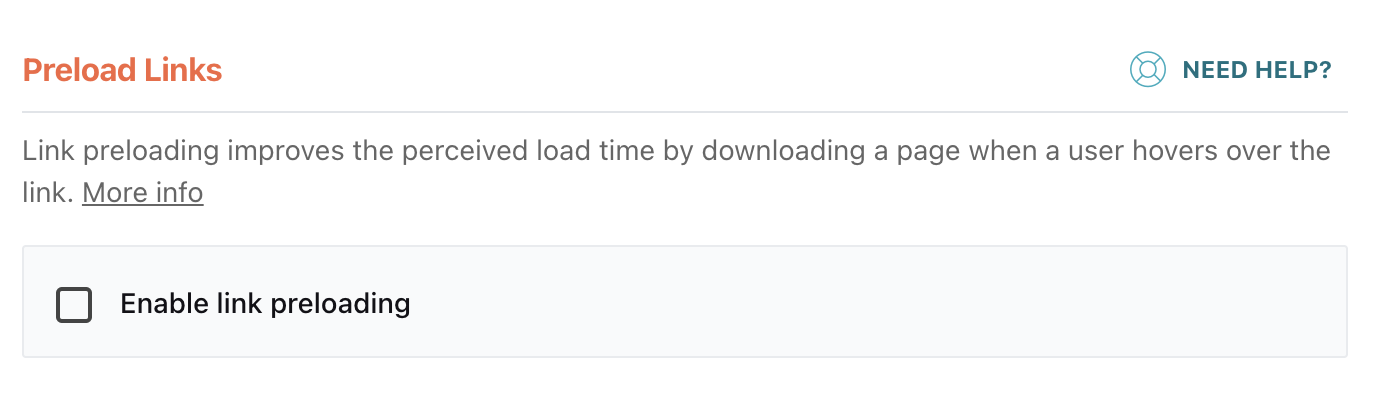
2. Preload Links
When “Preload Links” is enabled, hovering over an internal link starts loading the target page before the click happens. When the user actually clicks, the page usually opens much faster.
Test this carefully after enabling it. In some cases the target page may not load properly after the click.
Starting with WordPress 6.8, the core includes native Speculative Loading via the Speculation Rules API. This browser-level optimization can prefetch or even prerender pages before the user navigates to them, delivering near-instant page loads. It works alongside WP Rocket’s Preload Links feature and is supported in Chrome, Edge, and Opera (~74% of browsers).
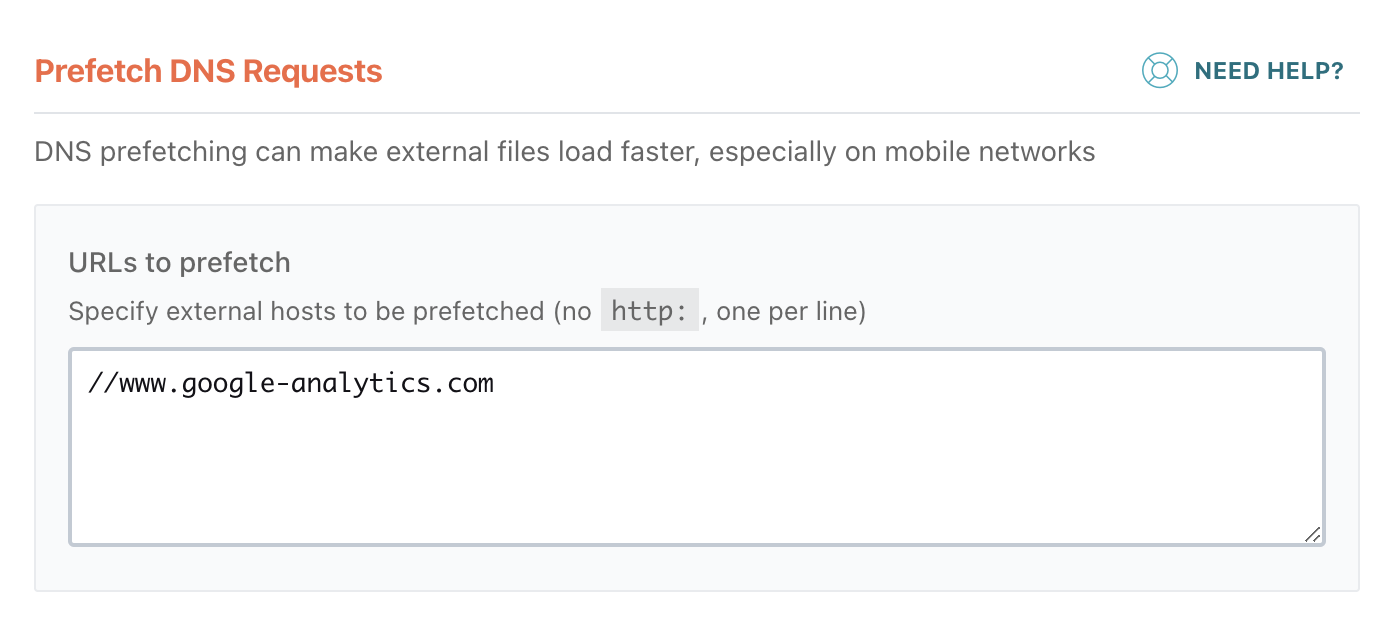
3. Preconnect to External Domains (formerly Prefetch DNS Requests)
If you have external content loading on your site, such as fonts from Google or videos from YouTube, WP-Rocket will now automatically detect those external domains and add the appropriate dns-prefetch hints for them. In older versions, you had to manually add the domain from which each request was made.
You can get more information on this in the article about improving loading time of Google Fonts using Preconnect. (Preconnect and DNS Prefetching actions are similar in nature).
4. Preload Fonts
It’s a good idea to preload fonts when it makes sense. You can also handle this manually outside the plugin. I won’t go deeper into preloading here because I already covered it in a separate post.
Starting with WP-Rocket 3.19, font preloading is automated. The plugin automatically detects and preloads custom fonts to prevent Flash of Unstyled Text (FOUT) and layout shifts, improving both perceived speed and LCP scores.

Advanced Rules
This is the advanced settings screen of WP-Rocket.

1. Cache Lifespan
In current WP-Rocket versions, this setting lives under Advanced Rules because it was moved here from the old Cache tab. It determines how often WP-Rocket will clear the cached files on your server, and you can safely change it to more than the default value of 10 hours.
You can think of this setting in relation to how often you update the content/code on your site, so if you don’t update your site frequently, you can increase this time.
If you want the cache to be automatically rebuilt after this action, you need to enable the preloading option, which will be discussed later.
2. Never Cache URLs
In this section, you can specify the addresses of pages or posts that should not be cached. Enter one address per line, and there is no need to add the domain itself.
If you are using any eCommerce store that is not recognized by WP-Rocket, it’s a good idea to add the cart and checkout page addresses in this section. See more information in the plugin’s documentation.
3. Never Cache Cookies
You can add the identifiers of cookies in this section, one identifier per line. Users with these cookies in their browsers will not receive content from WP-Rocket’s cache.
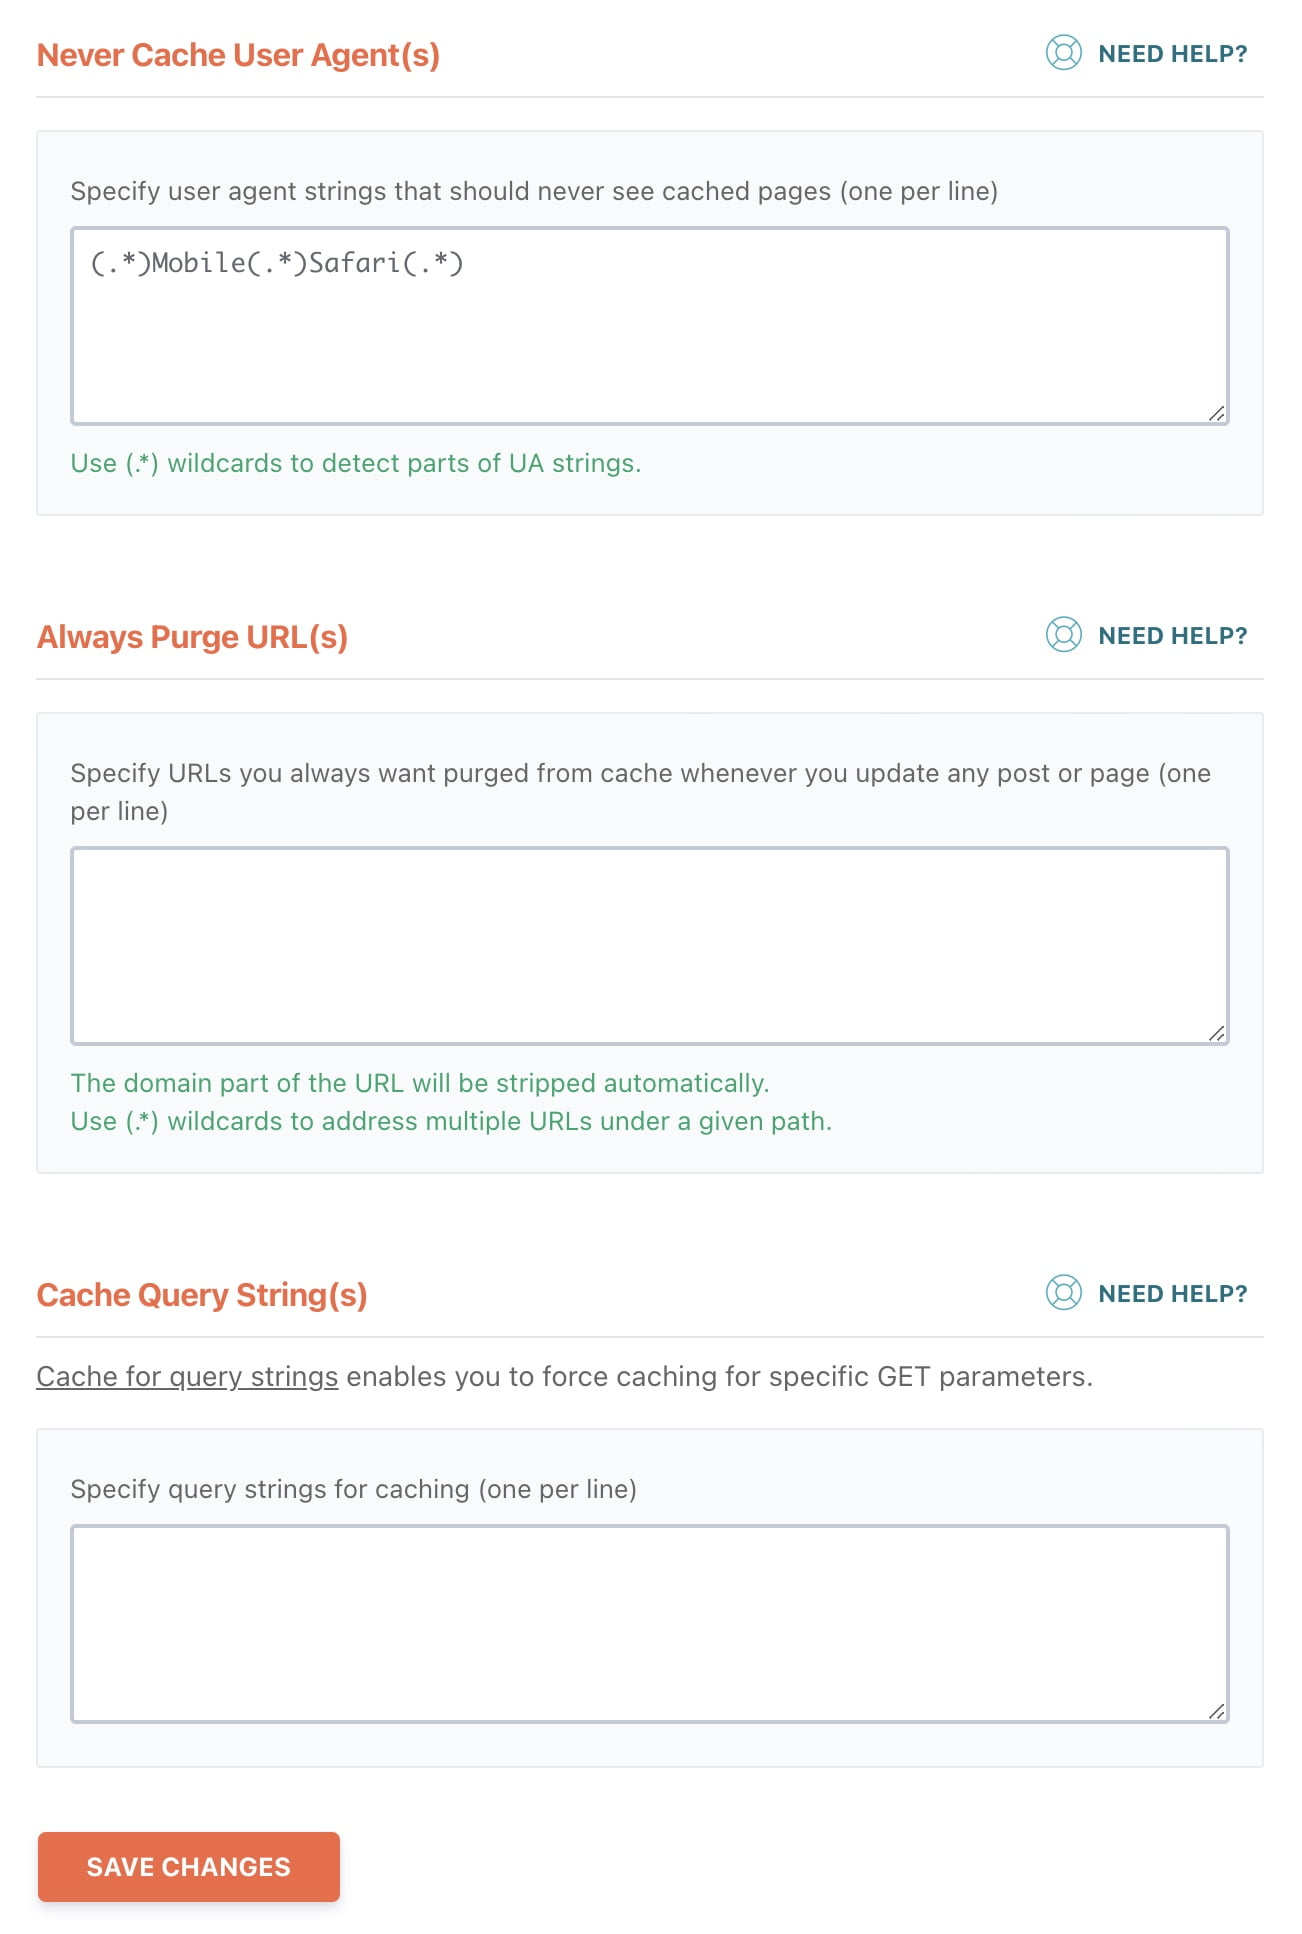
4. Never Cache User Agents
This allows you to determine whether caching will be enabled for specific User Agents. You can use this section to specify that caching should not be enabled for a particular browser like Firefox or for a specific mobile device, or even for Google’s crawler. There’s usually no need to modify this section.
5. Always Purge URLs
Suppose your homepage contains the latest blog posts. In that case, when you create a new post on your blog, you want WP-Rocket to immediately clear the cache for the homepage so that visitors see the updated content. In this case, you should enter the homepage address in this section.
Note that WP-Rocket does this automatically for your homepage, categories, and tags, so you don’t need to add them in this section. However, if there are other pages you want to clear the cache for, this is the place to do it.
6. Cache Query Strings
In most cases, WP-Rocket does not create a cache for pages with query strings at the end of the URL. For example, if the URL looks like this:
example.com/page/?country=italyand you still want to cache this address, you should enter the parameter country in this section.
There are exceptions, such as using UTM Parameters. If you are using Google Analytics, you are probably generating URLs containing those parameters like this:
example.com/page/?utm_source=this&utm_campaign=that&utm_medium=theother
If the URL contains all three parameters, WP-Rocket will serve the page from the standard cache and not one generated specifically for the URL with those parameters.
If you only use two UTM Parameters for your purpose, and you want the same behavior, this is where you should enter those parameters.
Database
In this section, you can optimize and clean the database and set the frequency at which it will be automatically performed if desired. Make sure you back up the database before performing any action in this section!
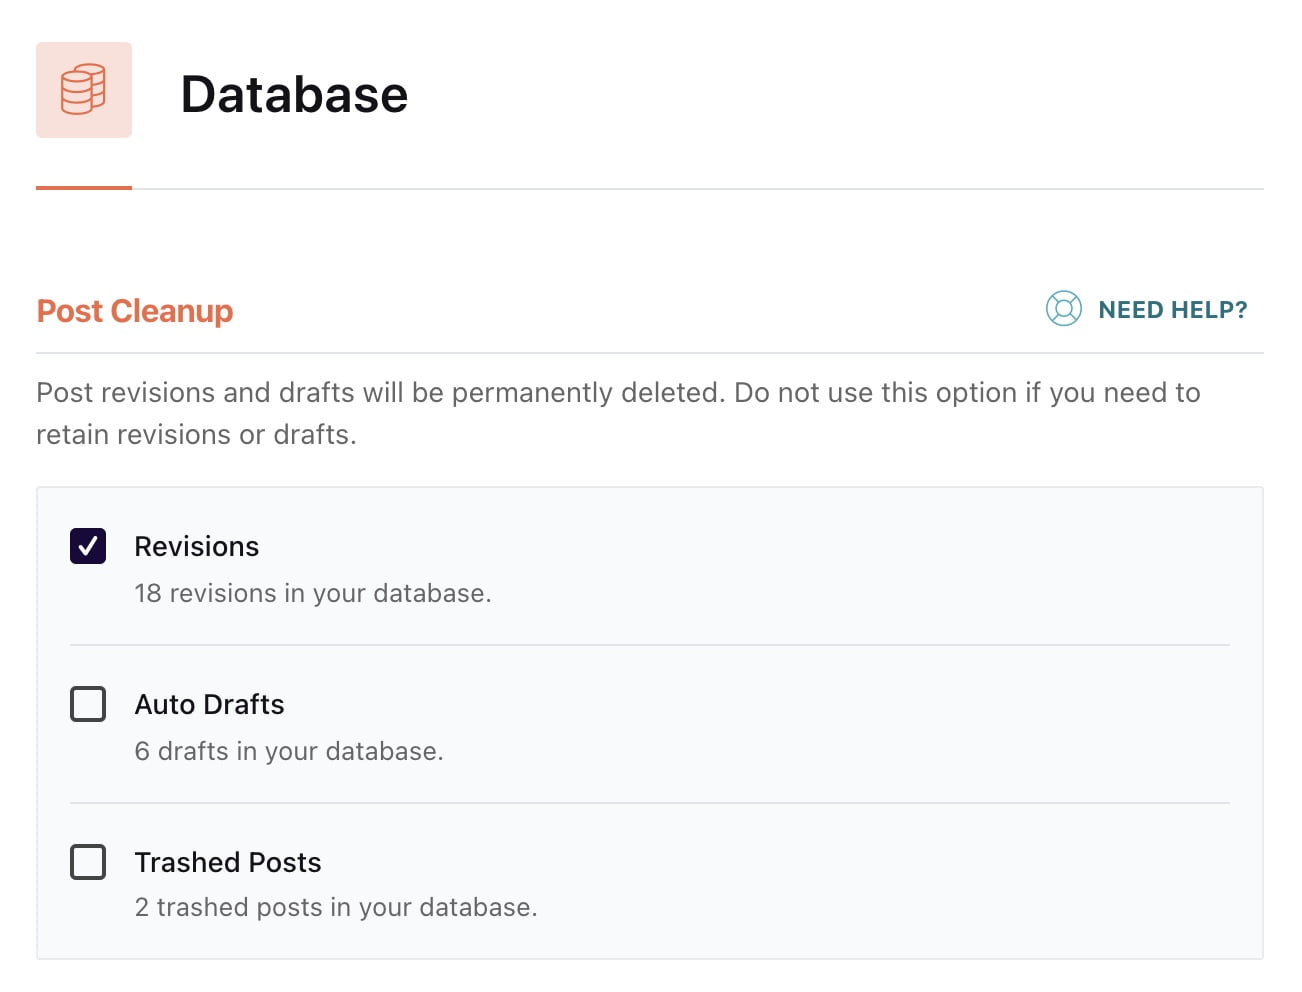
1. Post Cleanup – Cleaning Post and Draft Versions
In this section, you can delete old post versions, automatic drafts, and pages and posts in the recycle bin.
2. Comments Cleanup
You can delete spam comments and deleted comments from the database.
3. Transients Cleanup
Transients are stored in the database for data that takes relatively longer to retrieve, such as the number of shares for a specific post, and more. There are cases where these transients expire, but they remain in the database. This is the place to delete them.
4. Database Cleanup
When you delete a specific plugin, there are cases where its tables remain in the database (and this happens quite often). This option is meant to clean up these unnecessary tables.
5. Automatic Cleanup
Allows you to configure automatic deletion of the items marked in the previous sections.
Content Delivery Network (CDN) Settings
WP-Rocket supports most CDN providers, including Amazon, Cloudfront, Max CDN, and others. I won’t go too deep here because the exact setup depends on your CDN. If you need the details, check the WP-Rocket documentation.

Heartbeat API
The Heartbeat API in WordPress is often an overlooked source of extra server load and slower performance.
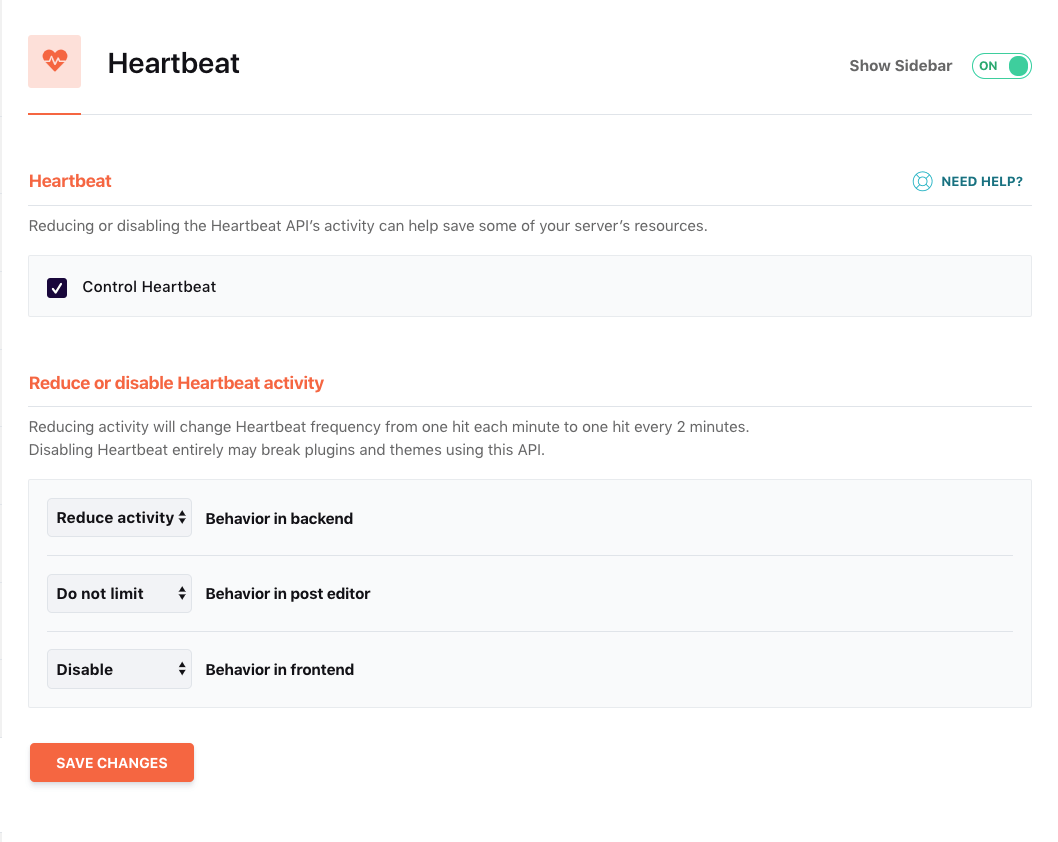
WP Rocket includes built-in controls for the Heartbeat API right in the plugin settings. Reducing or disabling Heartbeat requests in places like the admin dashboard, post editor, or frontend can improve performance in some cases.
For more details about the Heartbeat API and how to configure it effectively using WP Rocket, check out my guide on Optimizing Heartbeat API Settings with WP Rocket.
Add-Ons
In this tab, you will find several additional features of WP-Rocket:
1. User Cache
When this option is enabled, WP-Rocket creates a dedicated cache memory for each user logged into the system. In current versions, this setting lives here in Add-Ons, not in the removed Cache tab.
This option is useful for WordPress sites with specific content for different users connected to the system, such as membership sites. In most cases, this option should not be activated.
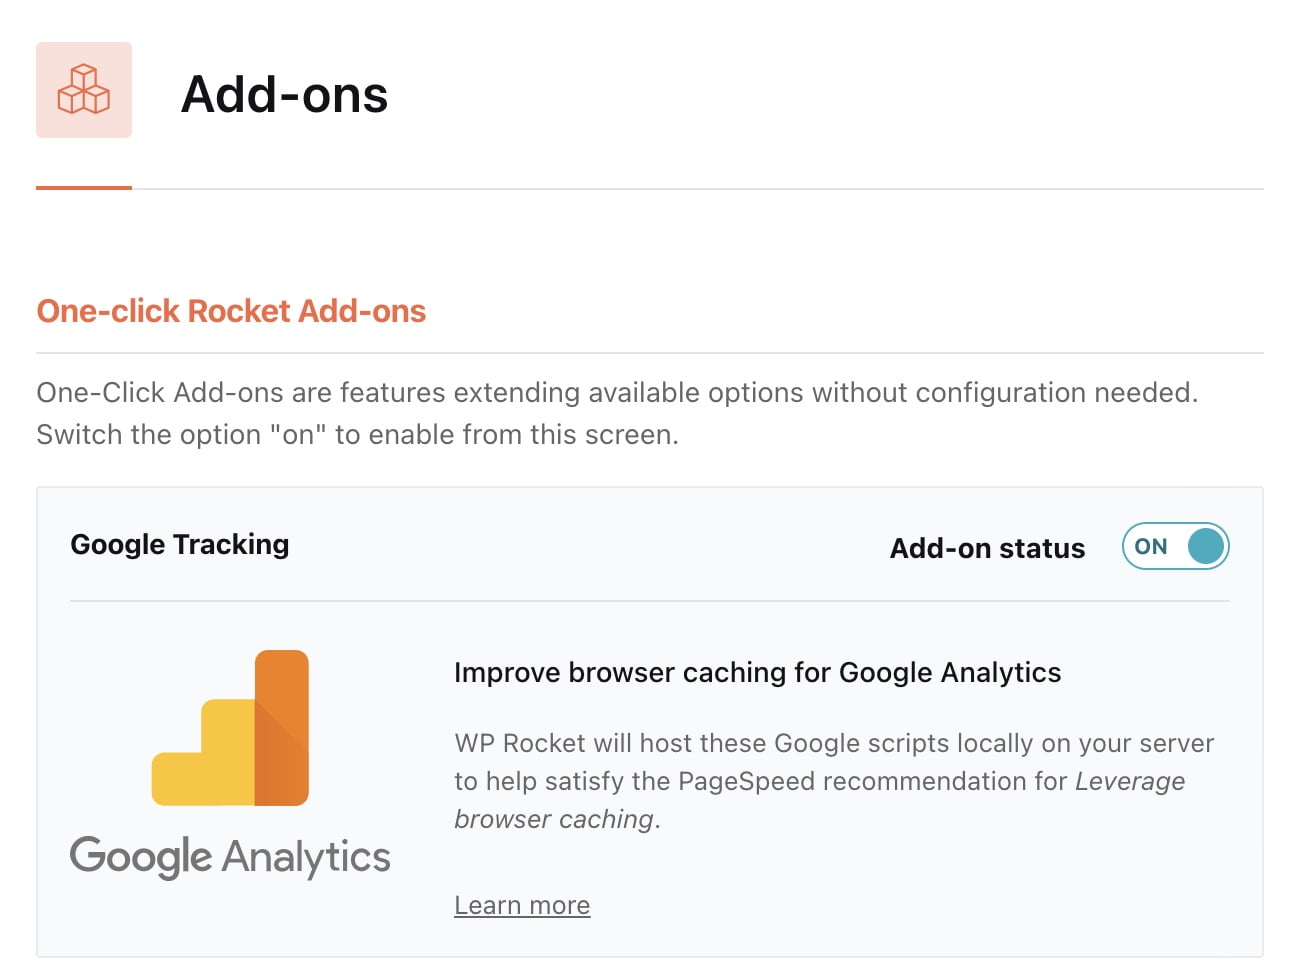
2. Google Tracking (Removed)
When you use Google Analytics on your site, the files you use are hosted on Google’s servers. Some speed testing tools may provide feedback on these files, such as “Leverage Browser Caching.”
Since these files are on a server you don’t control, you can’t set caching settings for them or extend their expiration time. The solution WP-Rocket previously offered was to locally store these files on your server or on the CDN you use.
The files WP-Rocket would locally store were:
https://www.google-analytics.com/analytics.js
https://www.googletagmanager.com/gtag/js
Today, the recommended approach is to use the Delay JavaScript Execution feature instead, which pre-populates a list of third-party scripts including Google Analytics.
3. Meta Pixel (Removed)
Similar to Google Tracking, the Meta Pixel (formerly Facebook Pixel) add-on has also been removed in newer versions of WP-Rocket. The Delay JavaScript Execution feature now handles Meta Pixel scripts more effectively.
The scripts that WP-Rocket previously targeted were:
https://connect.facebook.net/{{locale}}/fbevents.js
https://connect.facebook.net/signals/config/{{app_id}}?v={{version}}&r={{release_segment}}
https://connect.facebook.net/signals/plugins/{{plugin_name}}?v={{version}}
https://connect.facebook.net/{{locale}}/sdk.js
4. Varnish
Activate this option if your server uses Varnish Cache. If your site is hosted on WP-Engine or Flywheel, you won’t see this option because WP-Rocket automatically detects and integrates with Varnish Cache in those cases.
If your site is on Siteground servers, there’s no need to enable this option because WP-Rocket automatically clears the Varnish Cache whenever it clears WP-Rocket’s cache.
If you’re unsure whether your server uses Varnish Cache, it’s likely that it doesn’t. Don’t select this option if you’re uncertain.

5. CloudFlare
This option adds basic integration between your Cloudflare account and WP-Rocket. For example, it lets you clear the CDN cache directly from WP-Rocket’s settings. I won’t go deeper into it here.
Since version 3.20.2, WP Rocket’s Cache Lifespan also automatically purges the Cloudflare APO cache when it expires. If you’re using Cloudflare APO, you no longer need to worry about stale APO cache after WP Rocket regenerates its own cache.

Rocket Insights
Introduced in WP-Rocket 3.20, Rocket Insights is a GTmetrix-powered performance monitoring feature that lets you track, troubleshoot, and optimize your site’s top pages from the WordPress dashboard.
With Rocket Insights, you can monitor your key pages, get practical optimization suggestions, and catch performance drops before they start affecting SEO or user experience.
The free plan allows monitoring up to 3 URLs with 3 tests per month, while the premium plan supports up to 10 URLs with unlimited tests and automatic daily, weekly, or monthly monitoring.
Tools
In this tab, you can export and import WP-Rocket settings for another site. You can also roll back to an older plugin version if the current update causes problems. If Mobile Cache was disabled at some point, this is also where WP-Rocket shows the one-time option to enable it again.

Additional Information
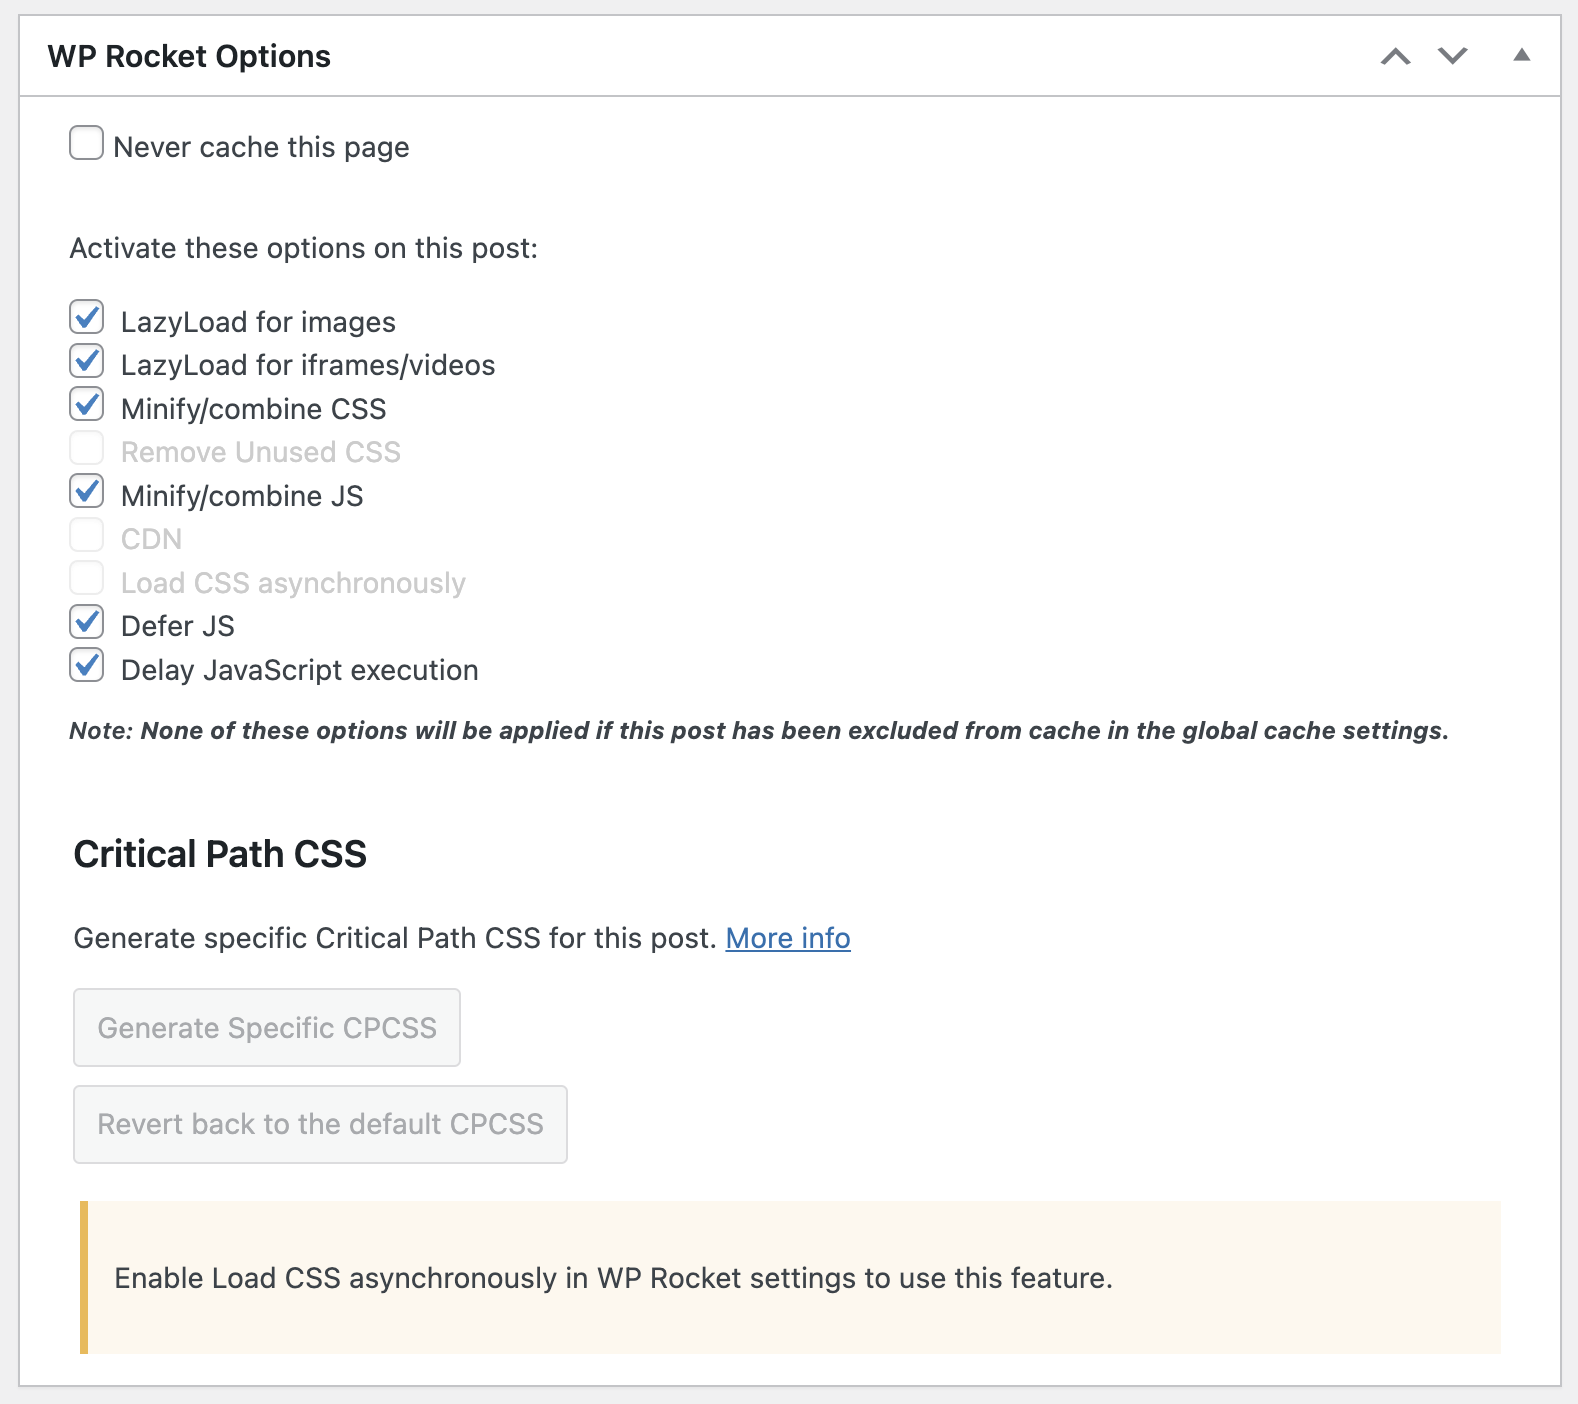
WP-Rocket lets you enable or disable specific options on individual pages and posts. Those per-page settings take priority over the plugin’s global settings.
If you added a page to “Never Cache URLs”, that page won’t be included in WP-Rocket’s cache. In that case, these per-page options won’t matter.
I don’t see this very often in other caching plugins, and in the right situation it can save you quite a bit of troubleshooting.
FAQs
Common questions about WP-Rocket:
In Summary
WP-Rocket is still one of the strongest caching plugins you can use on a WordPress site. I won’t call it the best in every situation, because that depends on the site and I obviously haven’t tested every setup on earth.
If you’re wondering what happens when you publish new content on a cached site, the short version is simple: WP-Rocket refreshes the cached version when content changes, so visitors get the updated page rather than an old one.
You are welcome to share which plugin you are using and your experience with WP-Rocket in the comments below. 🙂


Hi Roee,
The problem with wp rocket and woocommerce checkout page is that because they exclude the caching (and rightly so) all the other features are disabled for the checkout as well, like delaying and differing js and modification.
Do you know how one can address that?