A sitemap is a file where you list the pages, videos, and other files on your site, along with the relationships between them. Search engines like Google read this file to crawl your site more efficiently.
The sitemap tells crawlers which pages you consider most important and provides key metadata about each one – when it was last updated and whether it has versions in other languages.
Do You Need a Sitemap for Your Site?
If your pages are properly linked through internal links and the site has a clear hierarchy, search engines can usually discover most of your content on their own. A sitemap becomes more useful when:
- Your site is large – Google might skip new or recently updated pages.
- Pages are isolated – Content that isn’t linked from other pages can go unnoticed without a sitemap.
- Your site is new – Few inbound links means GoogleBot has fewer paths to find your pages.
Even outside these cases, a sitemap helps Google allocate crawl budget toward pages that were recently changed, thanks to the <lastmod> tag on each URL entry.
Bottom line – a sitemap won’t hurt your SEO. At worst, nothing changes.
“in most cases, your site will benefit from having a sitemap, and you’ll never be penalized for having one.”
Creating a Sitemap in WordPress
Creating a sitemap involves three steps:
- Decide which pages you want Google (in its canonical version) to scan.
- Choose the format of the sitemap you want. You can manually create a sitemap or use external tools to build it for you.
- Enable Google to access your sitemap, either through robots.txt or by submitting the sitemap directly through the Search Console.
In practice, most WordPress sites handle this with an SEO plugin. Both Yoast SEO and Rank Math generate a sitemap automatically on install – no manual XML editing required.
Creating a Sitemap with Yoast SEO
The Yoast SEO plugin generates an XML sitemap automatically on install. You’ll find it at:
http://your-domain.co.il/sitemap_index.xmlHere’s what Yoast’s generated sitemap looks like. Yoast creates the sitemap as an index that contains multiple sitemaps, each for a different content type on your WordPress site.

To enable or disable the sitemap, go to Yoast SEO > Settings > Site features and look under the Technical SEO section. You’ll find the toggle to enable or disable XML sitemaps globally.
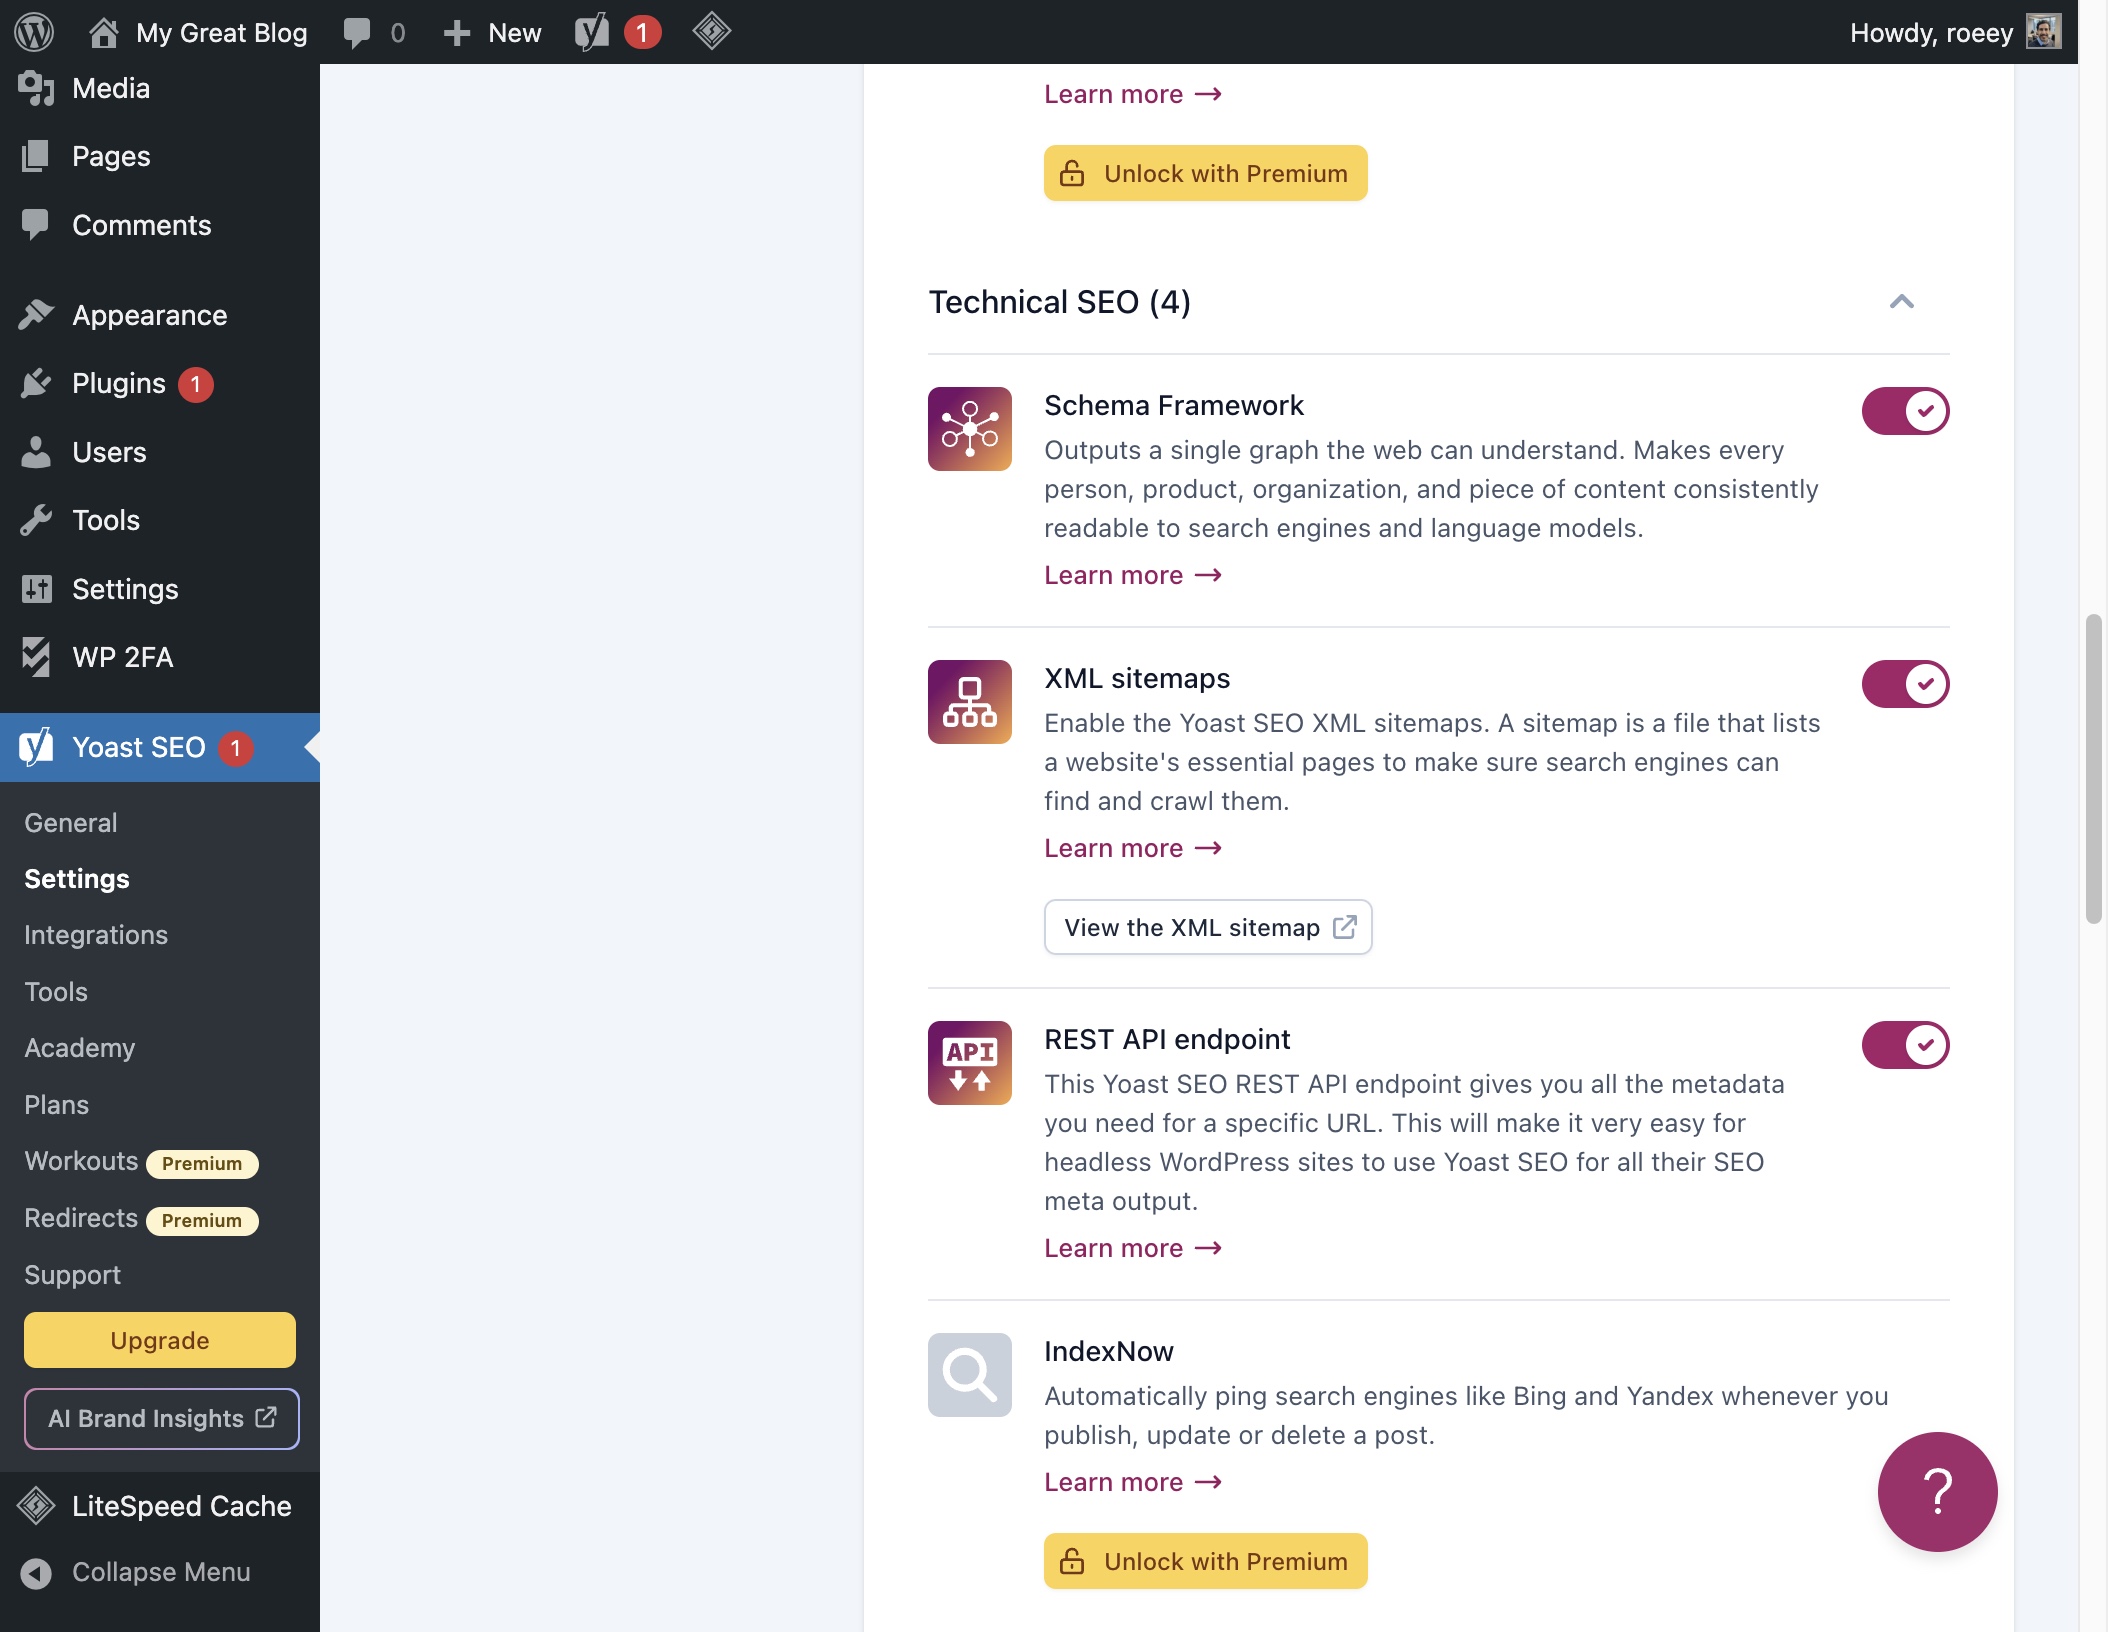
By default, all content on your site will be included in Yoast’s generated sitemap – pages, posts, tags, taxonomies, archive pages, and custom post types (CPTs).
Removing Content Types from Yoast’s Sitemap
To exclude a specific content type from the sitemap, go to Yoast SEO > Settings and select the content type under Content types or Categories & tags. Disable the Show in search results toggle for the type you want to remove. Here’s an example for categories:
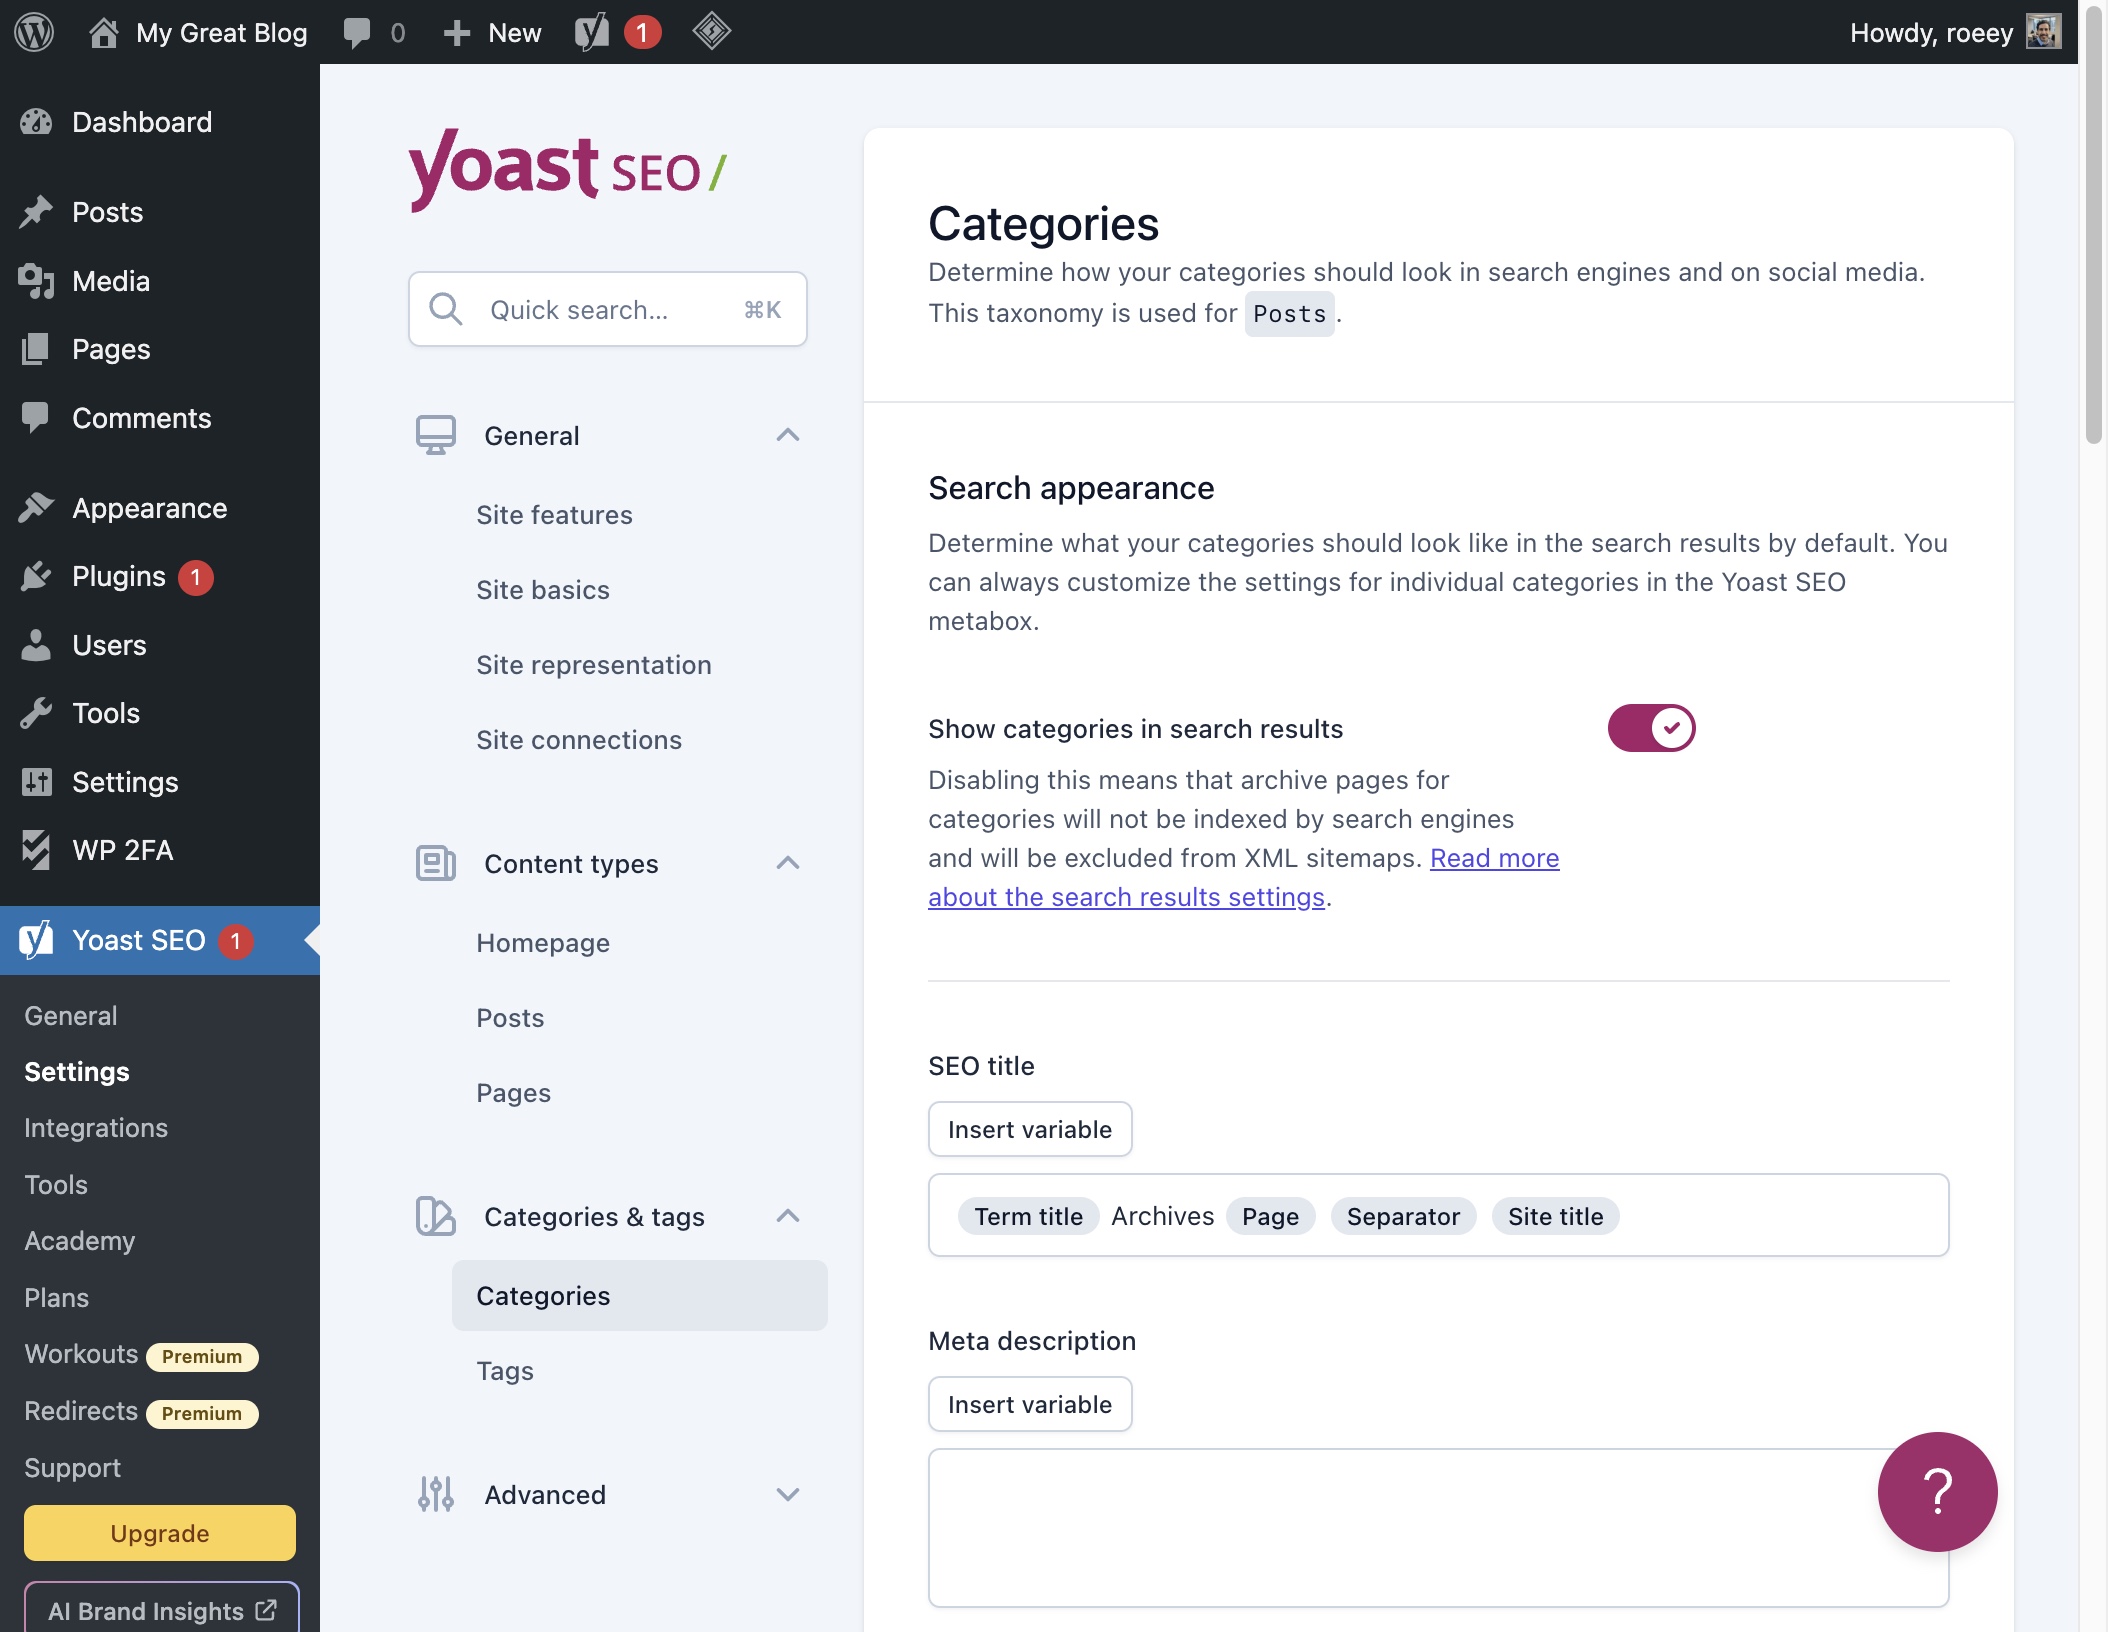
Note that this action also adds a noindex tag to that content type. As a result, those pages won’t appear in Google’s search results either. Be cautious.
To exclude a specific page or post, set it as noindex in the Yoast SEO meta box on that page.
What If Your Images Are Served from a CDN?
The wpseo_xml_sitemap_img_src filter allows you to manually change the URL of images that will appear in the sitemap generated by Yoast SEO. The following code will replace the URL when you update the sitemap:
function wpseo_cdn_filter( $uri ) {
  return str_replace( 'http://domain.co.il', 'http://cdn.domain.co.il', $uri );
}
add_filter( 'wpseo_xml_sitemap_img_src', 'wpseo_cdn_filter' );
Creating a Sitemap with Rank Math
Rank Math SEO is another popular WordPress SEO plugin that generates an XML sitemap automatically when you install and activate it. No extra configuration is needed to get started.
Your sitemap will be available at the same standard URL:
http://your-domain.co.il/sitemap_index.xmlTo configure which content types are included in the sitemap, go to Rank Math > Sitemap Settings. From there you can control posts, pages, categories, tags, and any custom post types individually.
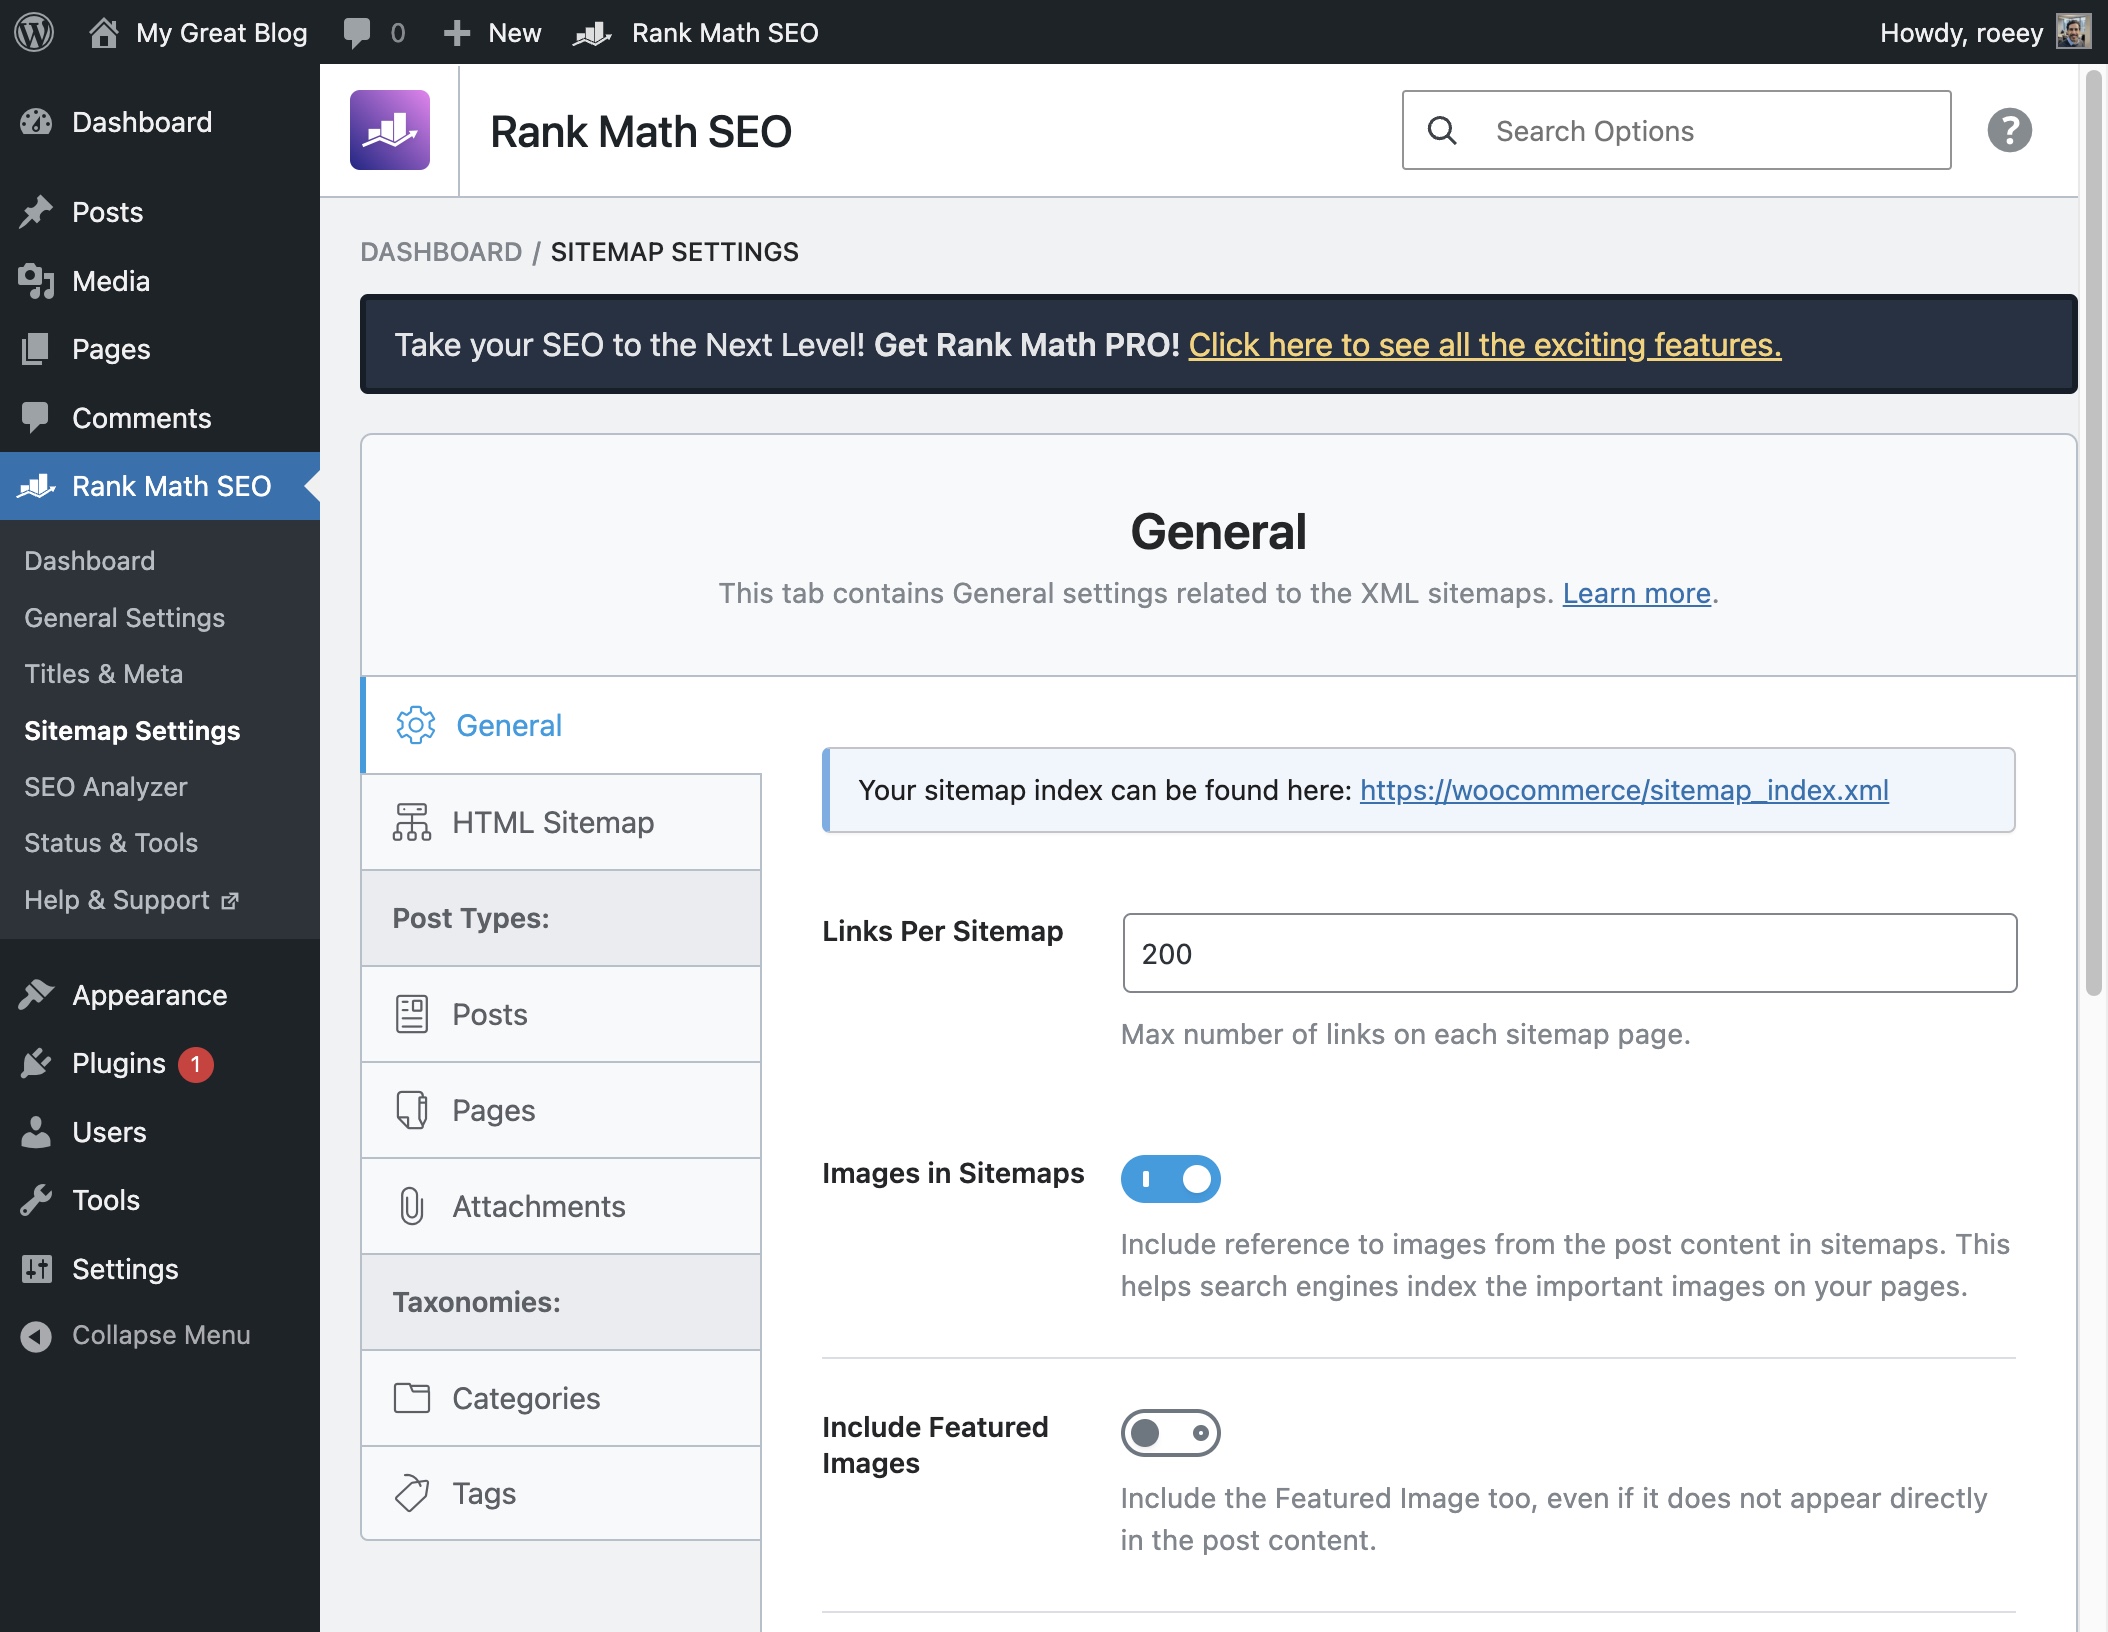
Rank Math also lets you set the maximum number of URLs per sitemap file, toggle image inclusion, and exclude specific posts or pages from the sitemap directly from their edit screens.
What Should You Leave Out of Your Sitemap?
Your sitemap should only contain canonical URLs you actually want indexed. Exclude:
- Pages with
noindexdirectives - Redirect URLs (301 or 302)
- Duplicate content or non-canonical versions of a page
- Low-value utility pages (login, thank you, internal search results)
- Paginated archive pages (page/2/, page/3/, etc.)
A clean sitemap signals to Google that every URL in it is worth crawling. Stuffing it with low-quality pages dilutes that signal. For more on optimizing how Google crawls your site, see our guide to technical SEO for WordPress.
How to Make the Sitemap Available to Google
After creating the sitemap, you need to notify Google about its existence. There are two main methods:
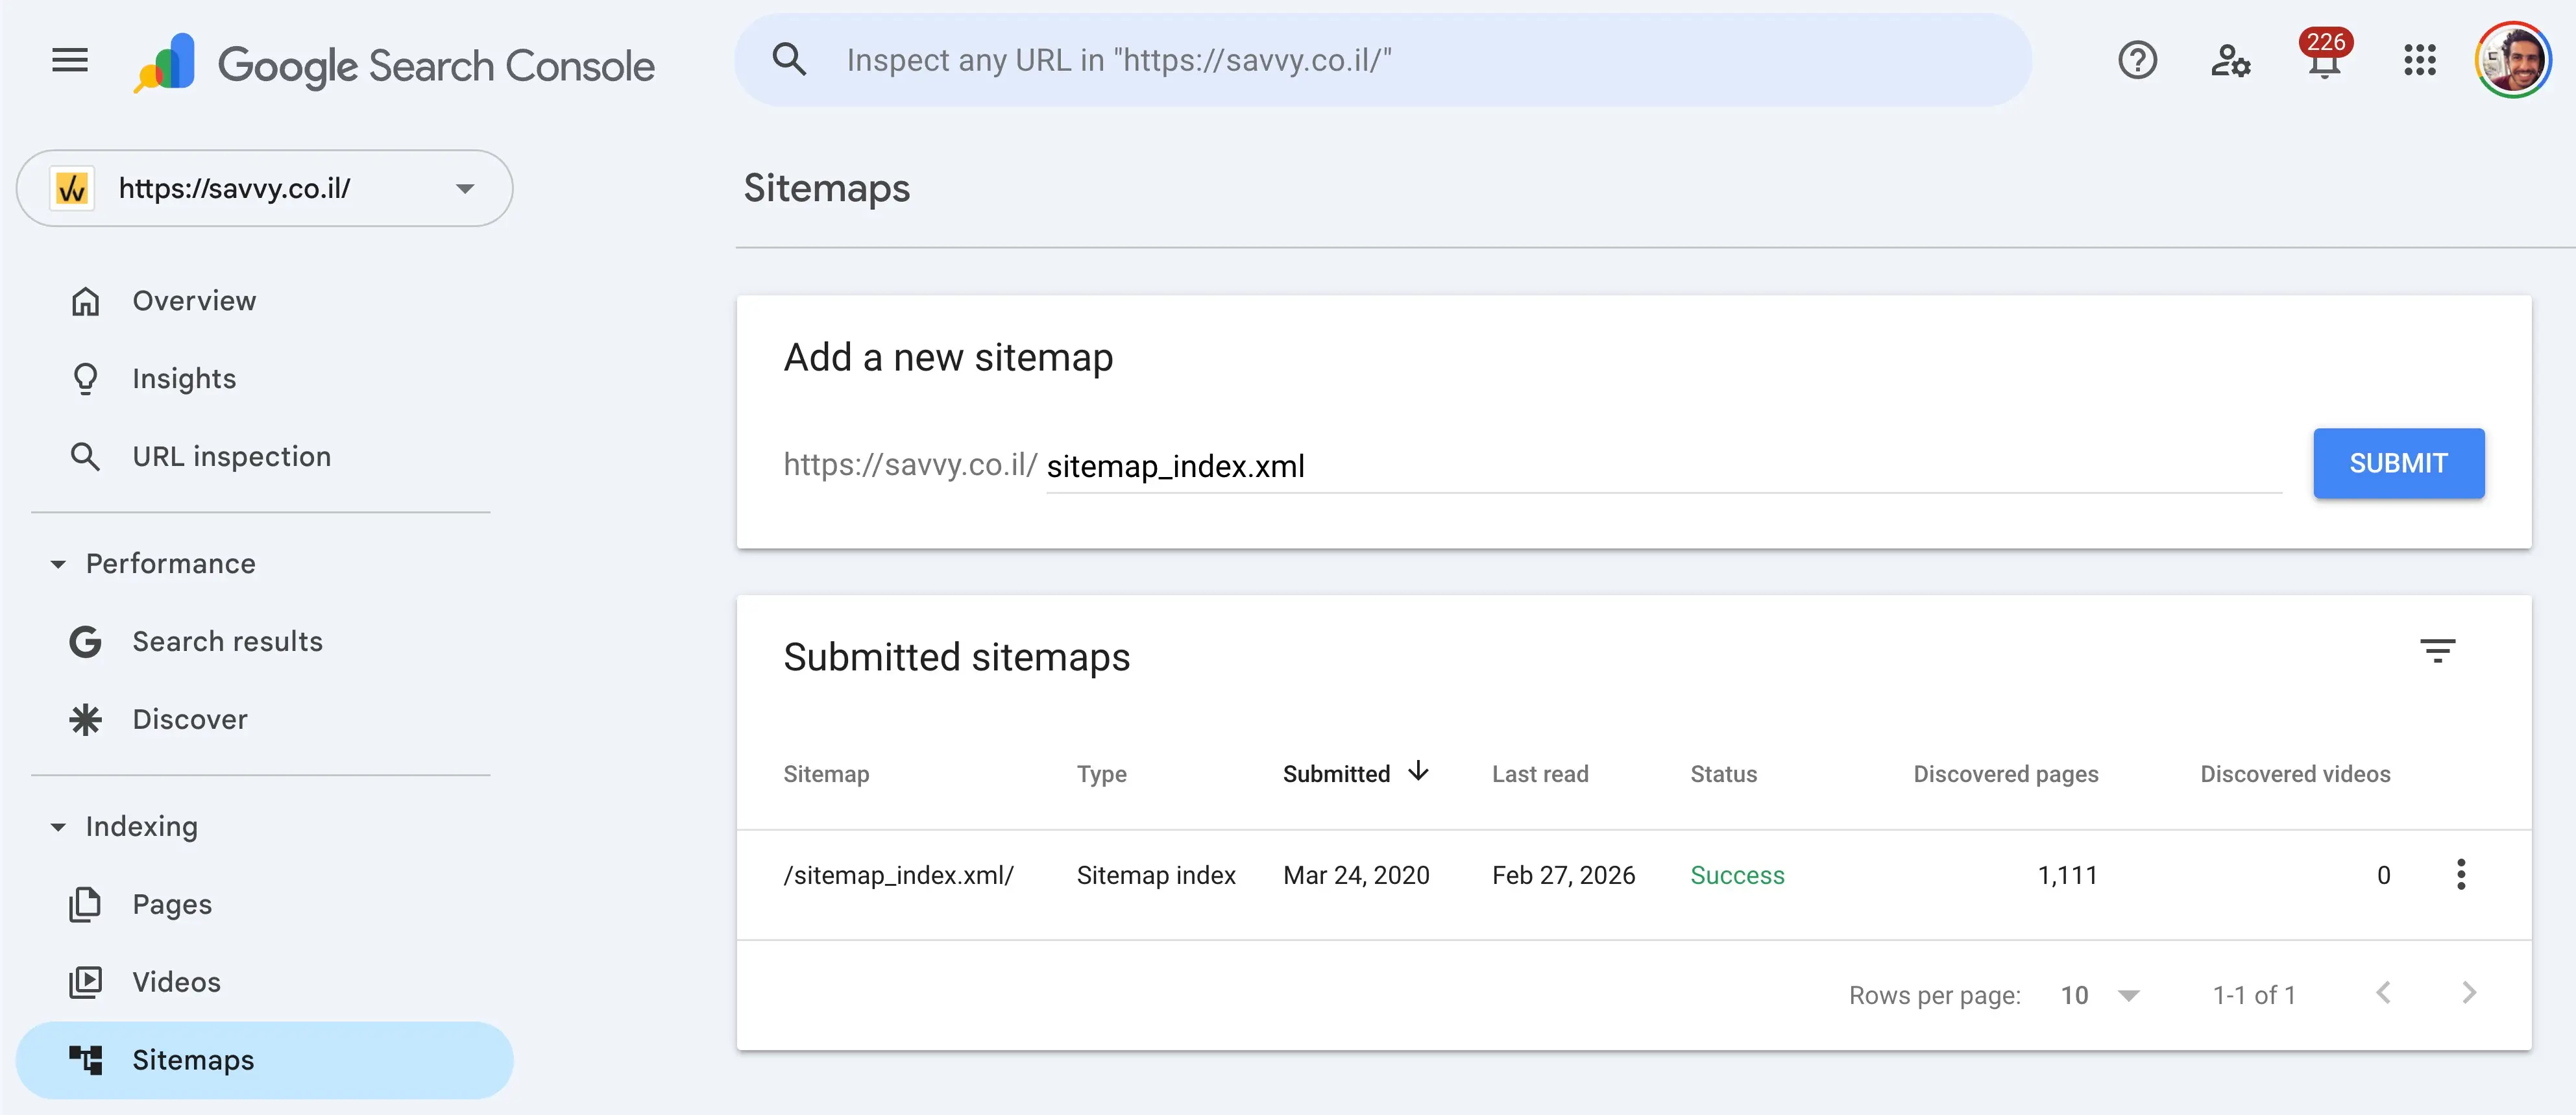
1. Submitting the Sitemap Using the Search Console. Go to the Sitemaps section in your site’s Search Console account, add the URL of your sitemap, and hit submit.
2. Using the robots.txt file. Very simply, add the following line wherever you want in the robots.txt file to indicate to Google the path to your sitemap:
Sitemap: http://domain.co.il/sitemap_index.xmlVarious Sitemap Formats
Google supports XML, Atom, RSS, and plain text formats per the Sitemaps protocol. XML is by far the most common.
A basic XML sitemap with one URL looks like this:
<?xml version="1.0" encoding="UTF-8"?>
<urlset xmlns="http://www.sitemaps.org/schemas/sitemap/0.9">
  <url>
    <loc>http://www.example.co.il/foo.html</loc>
    <lastmod>2019-06-01</lastmod>
  </url>
</urlset>
A single sitemap file cannot exceed 50MB (uncompressed) or 50,000 URLs. For larger sites, use a sitemap index file that points to multiple individual sitemaps – this is exactly what Yoast and Rank Math generate by default.
Google also supports video and image extensions in sitemaps. These use dedicated XML namespaces (video: and image:) and help Google discover media content that regular crawling might miss. Most SEO plugins include images in the sitemap automatically.
Sitemap – General Guidelines
- Use consistent and complete site addresses. Google will crawl the site addresses exactly as they are written. For example, if the site address is
https://www.domain.co.il/, don’t use the address ashttps://domain.co.il/(without www) or as a relative address. - Inform Google about alternative language versions of the site using the hreflang tag. Both Yoast SEO and Rank Math handle this automatically when paired with popular multilingual plugins.
- Sitemap files should be in UTF-8 encoding.
- Split large sitemap files into smaller files to prevent server load if Google frequently requests your sitemap. Each file should not contain more than 50,000 URLs and should be smaller than 50 MB uncompressed. In these cases, use an index file for the sitemap and list all the sitemap files within it. Send only this index file to Google instead of sending multiple separate files.
- Avoid including paginated pages in the sitemap. Google deprecated
rel=prev/nextin 2019, so make sure paginated content is discoverable through visible internal links instead. - Use recommended canonicalization methods to indicate to Google if your site is accessible with both www and non-www versions of the domain. Send the sitemap for your preferred domain only.
- Mobile-first indexing is now the default. If you still serve separate mobile and desktop URLs, Google recommends consolidating to a single responsive URL. If you must keep both, annotate the URLs to specify which is for mobile and which is for desktop.
FAQs
Common questions about WordPress sitemaps:
<lastmod> timestamp updates with each content change, which is what Google actually looks at.image:image namespace./sitemap_index.xml, with separate child sitemaps for each content type.<changefreq> and <priority> in XML sitemaps. The only metadata tag Google actively uses is <lastmod>. Neither Yoast SEO nor Rank Math include these deprecated tags in their generated sitemaps.In Conclusion
I don’t see a reason not to use a sitemap. The downside is practically zero, and the upside is better crawl efficiency – especially for larger sites or ones with content that updates frequently.
Don’t expect a sitemap to magically boost your rankings. But combined with proper internal linking and a clean site structure, it gives Google the clearest possible picture of your content. AI crawlers also rely on sitemaps – the AI Visibility Audit checks whether your sitemap is accessible and referenced in robots.txt.
If you have questions or spotted something I missed, the comments are right below.