The Polylang plugin is a type of extension that allows you to create a multilingual WordPress site, meaning a site with language diversity. You create pages, posts, categories, and tags as you normally would, define a language for each of those contents, and the Polylang plugin does the rest of the work.
In this guide, I will try to explain how to set up a bilingual/multilingual WordPress site using Polylang and show you how easy it is to use. Before we start, a few words about the options and features that the plugin offers.
For those who don’t know: a bilingual/multilingual site is a site built in two or more languages, allowing the user visiting the site to navigate the various languages defined in the system.
Polylang Plugin Options
- You can create as many languages as you want. There is support for right-to-left (RTL) languages. When possible, the plugin automatically downloads language files relevant to the added languages.
- The plugin allows you to translate pages, posts, categories, tags, menus, and widgets, as well as custom post types, taxonomies you create, sticky posts, post formats, and even feeds (RSS).
- If you choose, categories, tags, and other metadata fields are automatically copied when you add a translation to a specific page or post. There is also an option to synchronize these between a specific post and its counterpart in the additional language.
- The plugin supports Multisite, pretty permalinks, and a static front page.
- The language switch option comes with the plugin, either as a widget or as part of your WordPress site’s menu.
- The plugin provides an API for developers.
- The plugin is SEO-friendly and works with most market-leading SEO plugins. It also takes care of generating hreflang tags and
opengraphtags automatically. - Polylang Pro adds support for the Block Editor (Gutenberg) and the Full Site Editor, allowing you to translate template parts and navigation menus directly from the editor.
This guide covers the free version of Polylang. The Pro version adds features like machine translation via DeepL, Full Site Editing (FSE) support, and enhanced WooCommerce integration. Make sure to check which features require the Pro license before choosing a version.
Installation and Adding Languages in Polylang
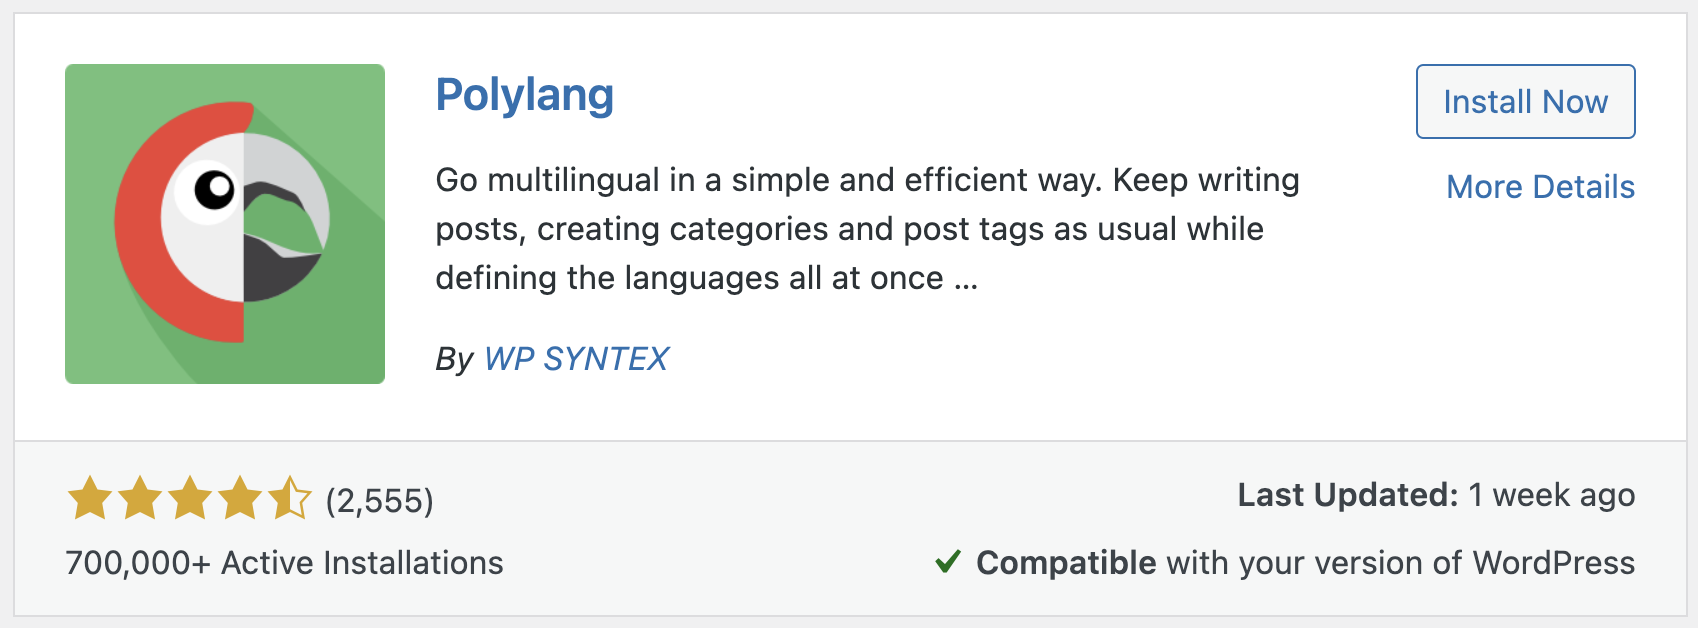
Install the Polylang plugin. After activating it, a wizard-like interface will be displayed to help you set basic settings, such as the languages you want to add, media handling, and more. You can use this wizard or manually configure the settings without using the wizard.
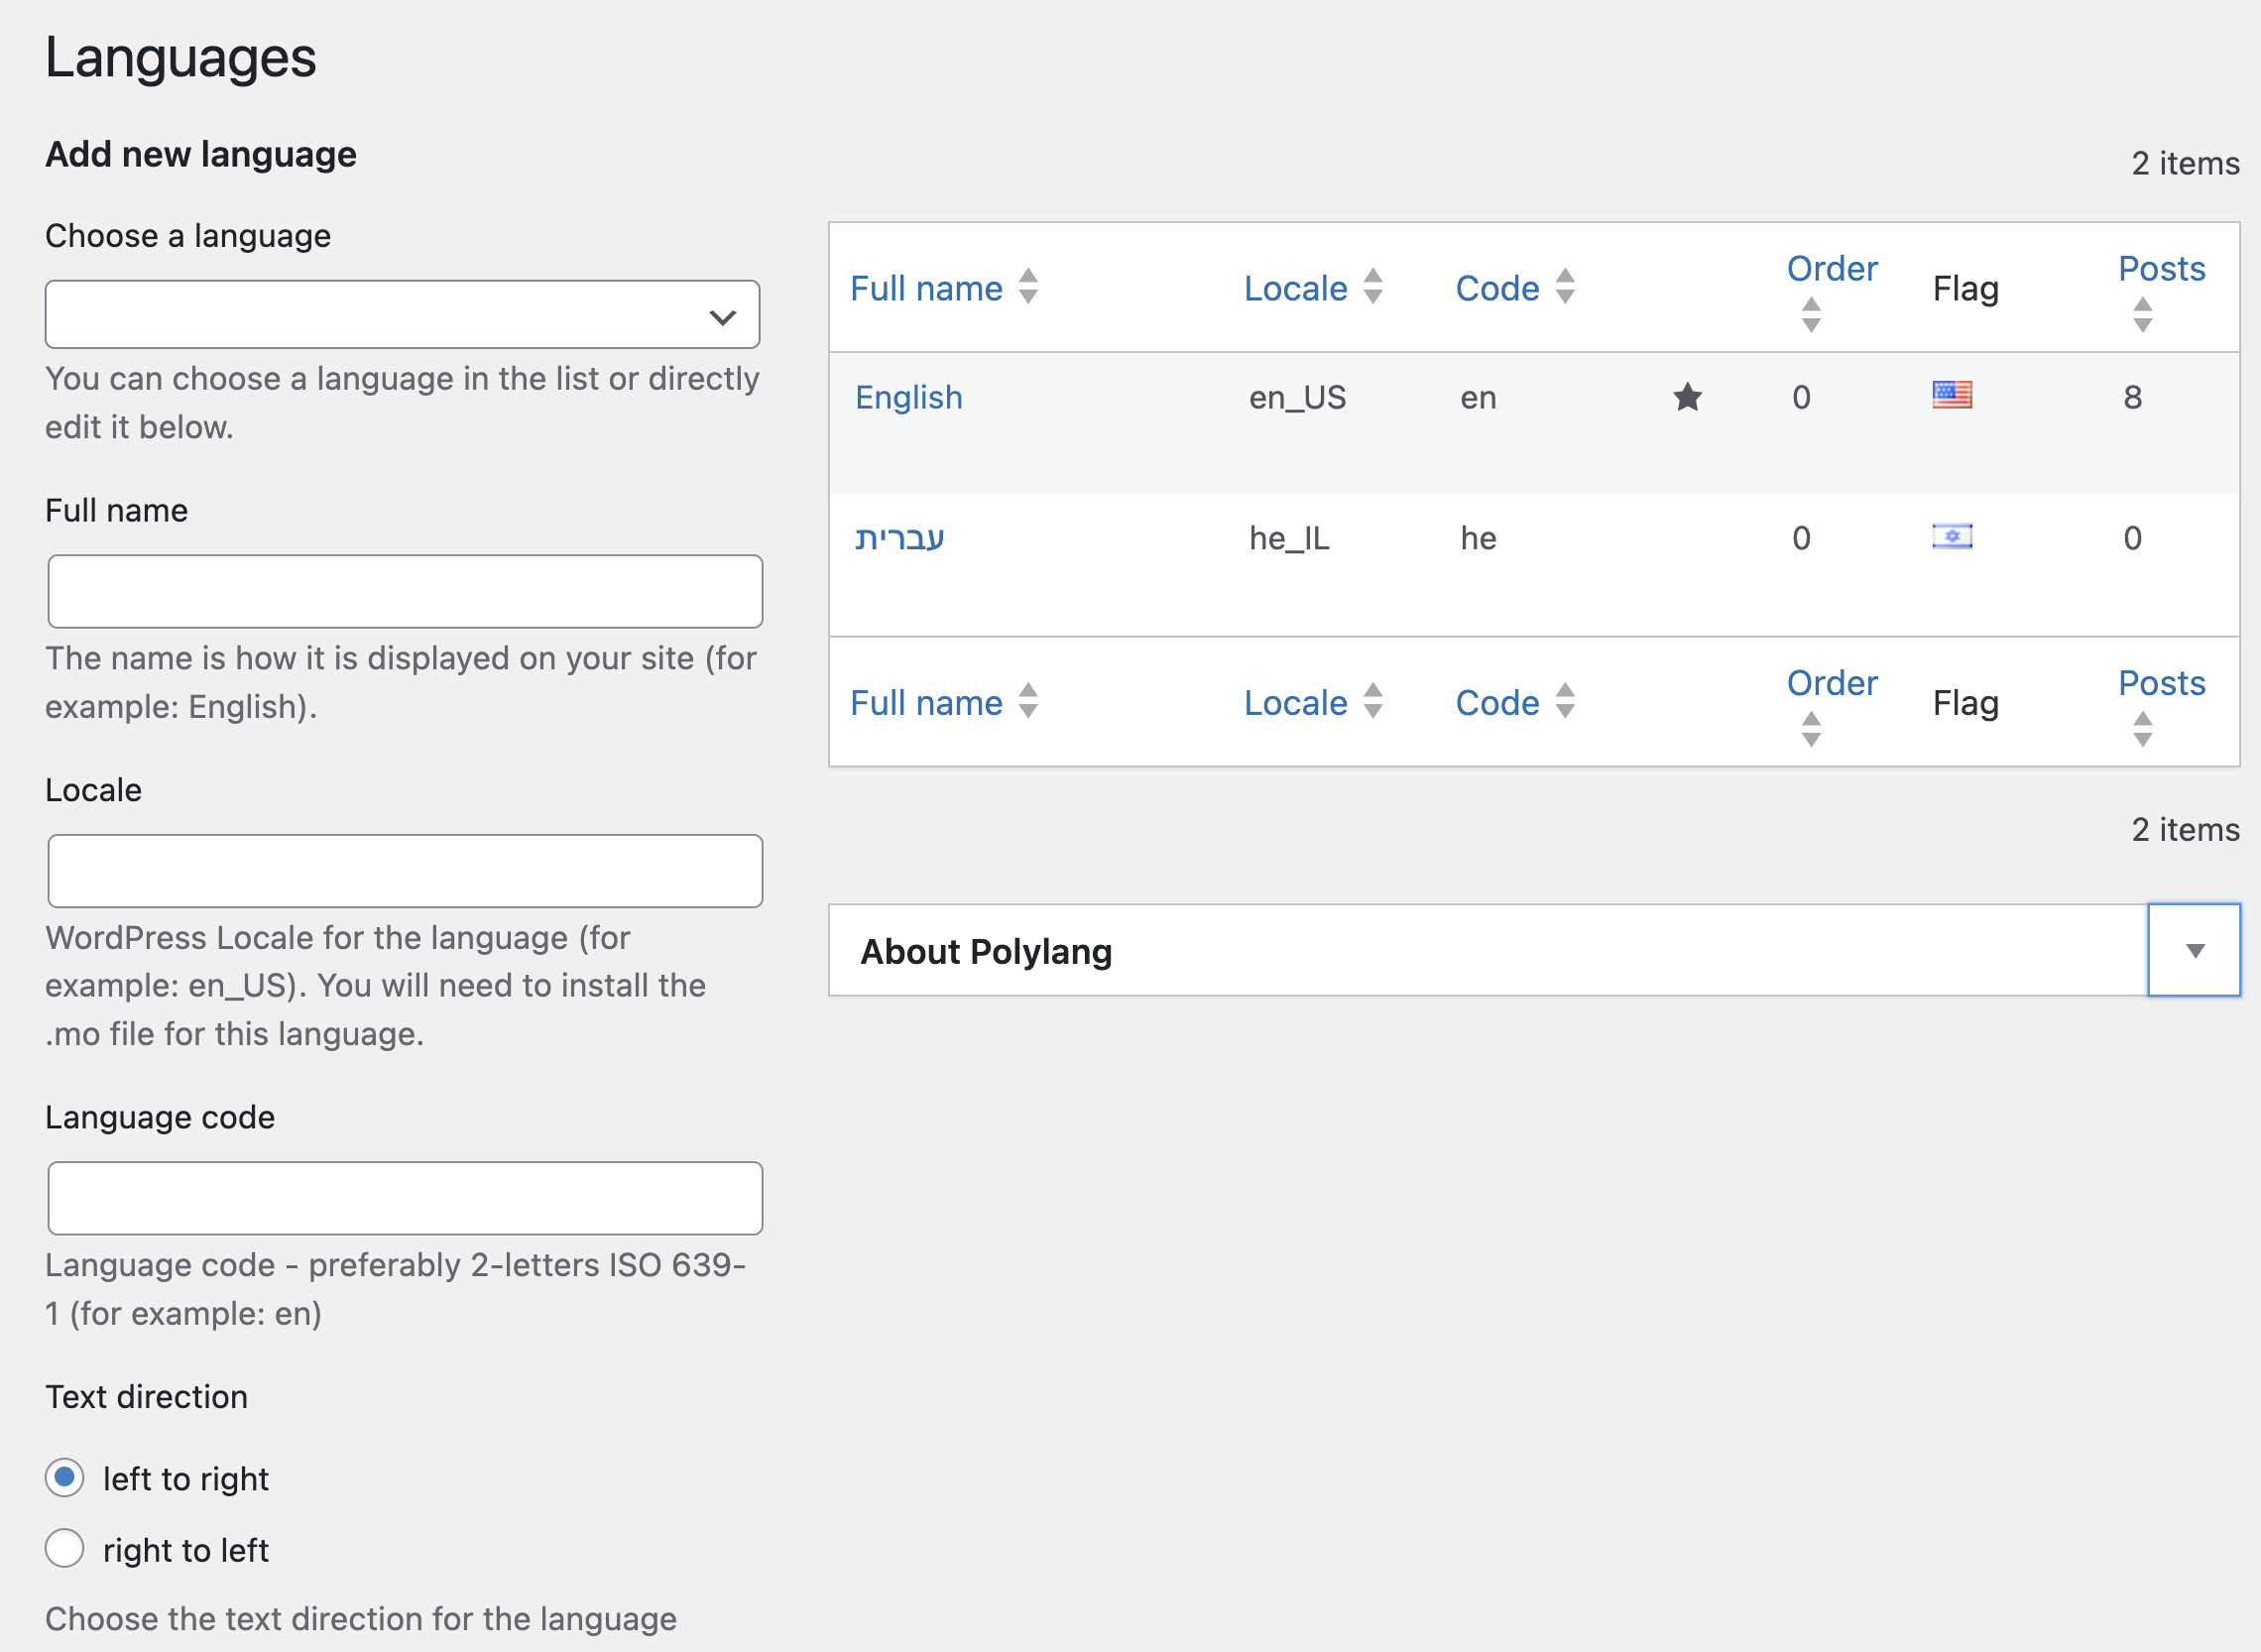
We will see how to perform the settings without using the wizard, so if you close it, you will find a new menu in the WordPress dashboard called Languages.
For the purpose of this guide, we will assume that our WordPress site is in English, and we will add Hebrew as an additional language.
Go to Languages in this menu, choose English, and the language settings will change according to the language you selected. In this case, there is no need to touch these settings, so simply click on Add Language. Then add the additional language (Hebrew), and make sure the text direction matches what you are looking for.
After adding languages, you may receive a message on the screen indicating that there are posts, categories, and tags on the site that do not have a default language set (see image below).

These are the same contents that already exist on your WordPress site. In the message, there is a link that allows you to set the language you just added (Hebrew) as the default language for all these content types. Click on this link.
Now, as strange as it may sound, you have nothing else to do but translate your content and, of course, add the option to switch languages in the main menu or as a widget. Despite this, in this post, we will precisely see the steps to perform and even touch on more advanced plugin settings later.
Language Switching in Polylang
The Polylang plugin provides you with two options for adding a language switcher button, or “Language Switcher.” The first is through the main site menu, and the second is through a widget that will appear in the sidebar (or any widget area in your template).
Adding Language Switcher to the Main Menu
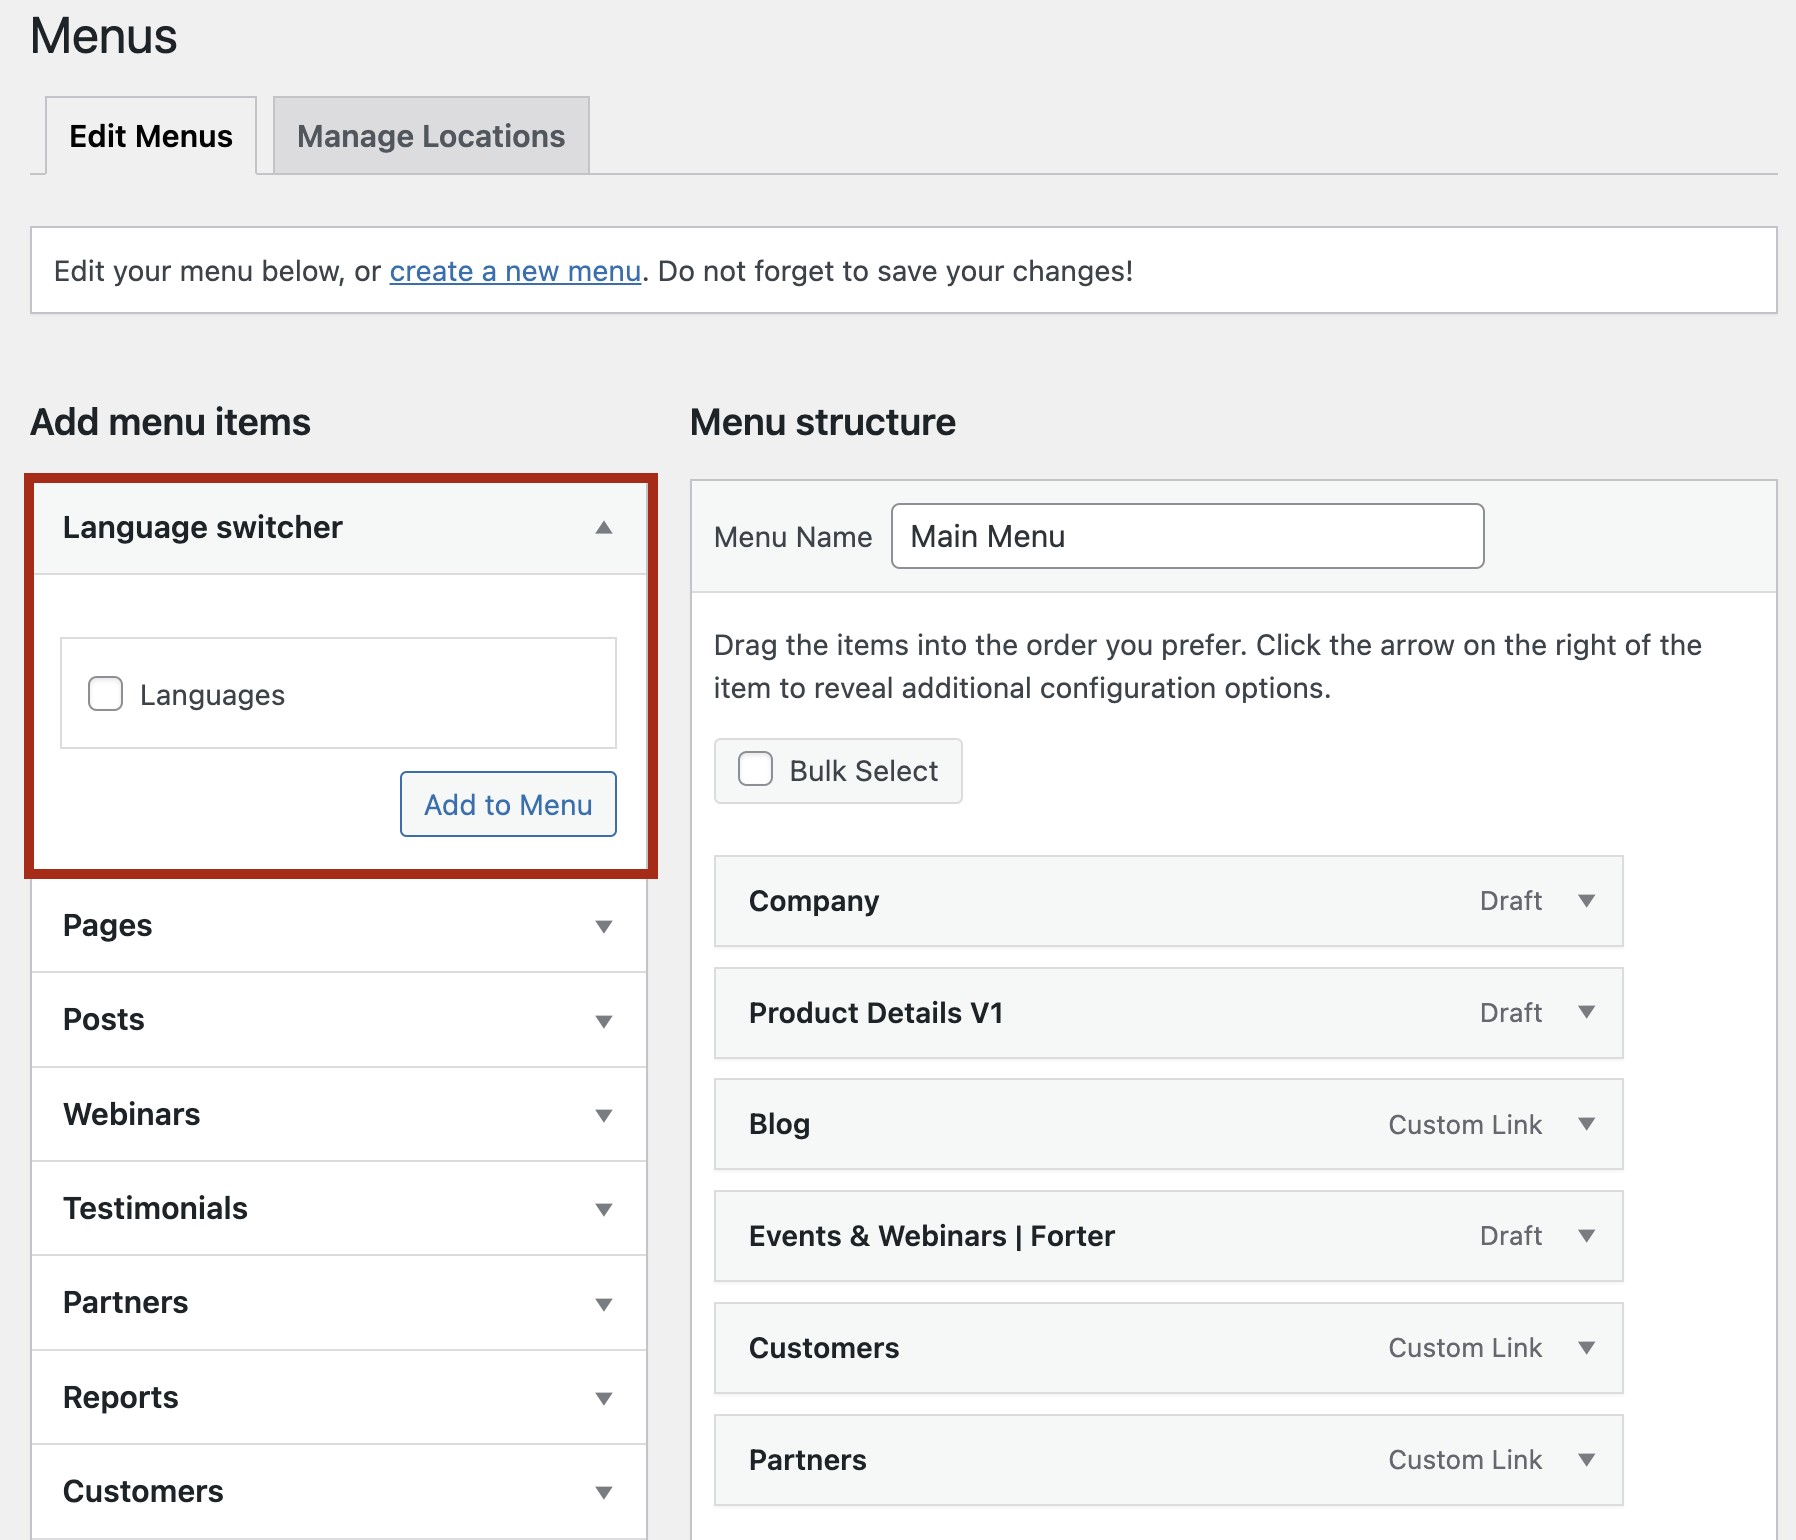
Go to Appearance > Menus in the WordPress dashboard, and you will see the Language Switcher as an option that you can add to the menu.
If you can’t find the Language Switcher, go to the display options at the top of the screen and check the Language Switcher box.
Add the Language Switcher to your menu, select the settings you want accordingly, or simply copy the settings from the following image:
Adding Language Switcher to the Widget Area
Similarly, if you want to add the Language Switcher to the widget area, go to Appearance > Widgets and add the Language Switcher to your widget area.
By the way, note that since installing the plugin and setting the languages, each widget in your template now has the option to choose in which language the widget will be displayed or whether it will be displayed in all languages. Very useful.
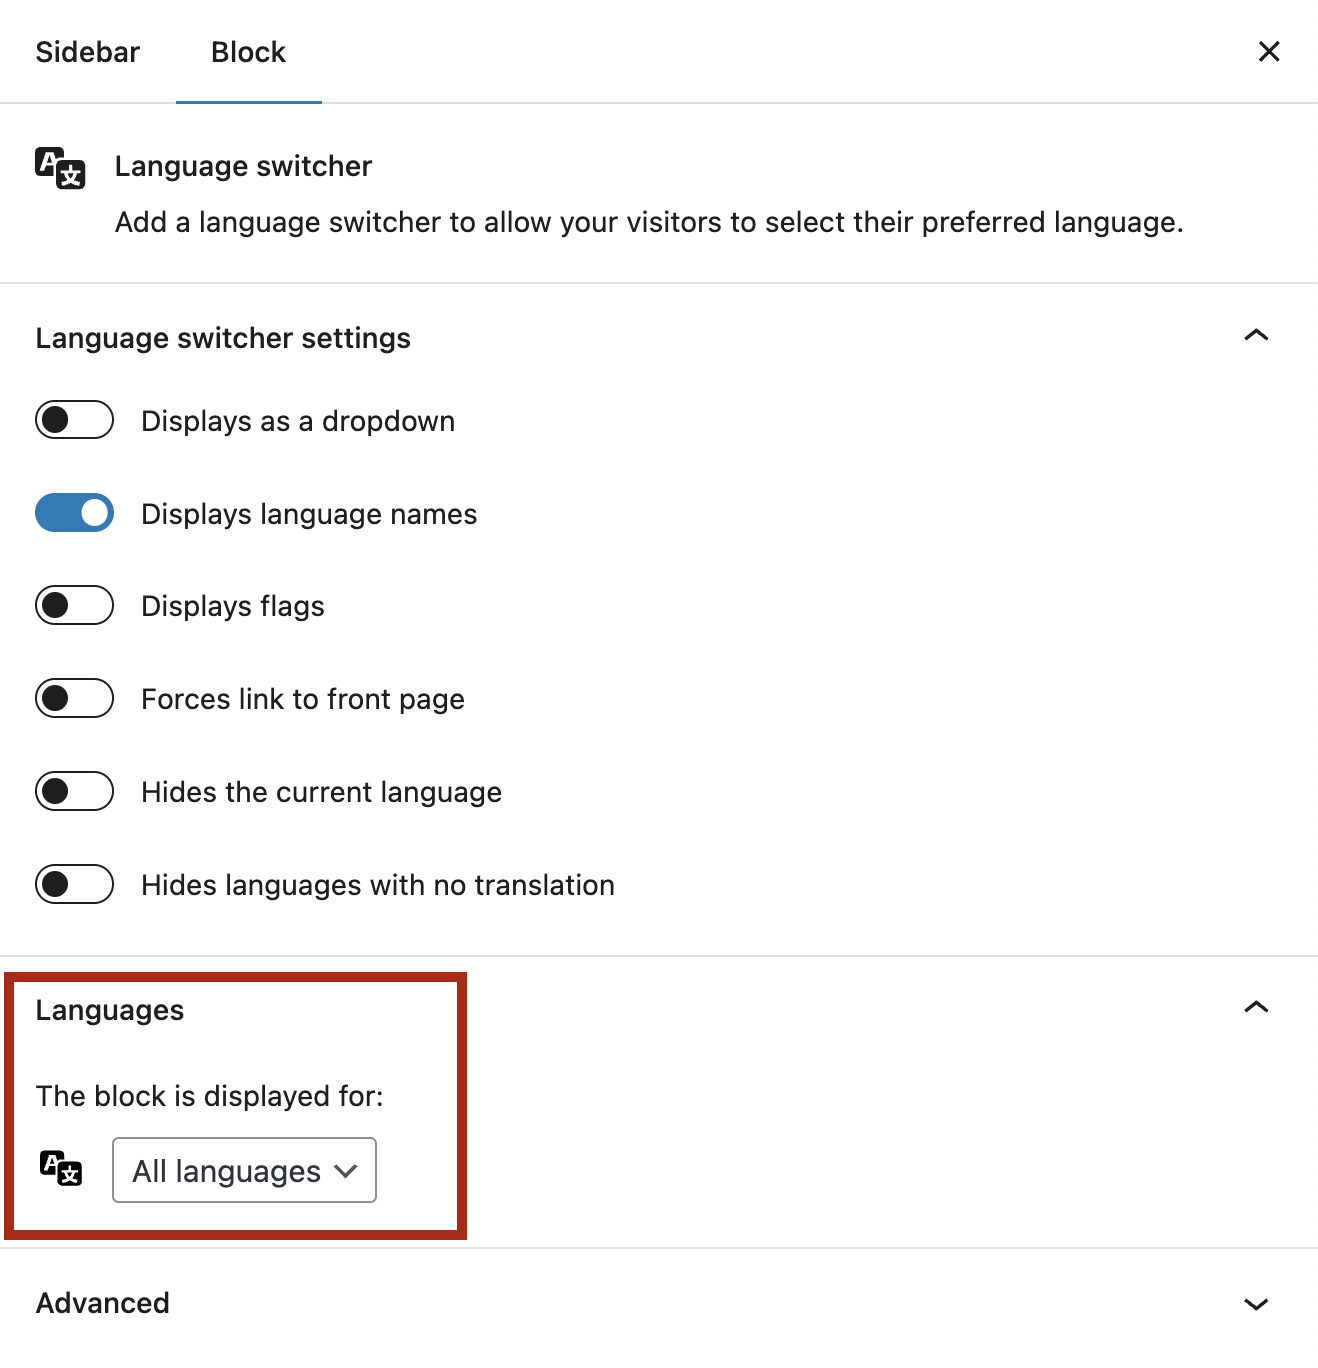
Adding Language Switcher in the Block Editor
If you are using a block-based theme or the Full Site Editor, Polylang (Pro) also provides a Language Switcher block that you can add directly to your navigation or any block area. Simply search for “Language Switcher” in the block inserter and place it wherever you need it.
Content Translation with Polylang
I assume that at this point, you want to see the plugin in action. Create a new page, give it a title, add some content in Hebrew, and publish it.
In the editing screen of that page, you will notice that a new section called “Languages” has been added, and English will be the default language (according to the settings we made at the beginning of the guide).

To add a translation to this page, click on the plus sign in the “Languages” section next to the flag of the desired language. Clicking this button will open a new editing page for the same content in the selected language. Now, publish this page and view it.
If you’ve done everything correctly, the language switcher will appear in your menu, allowing you to choose the language for the page or post.
This behavior will be the same for all pages, posts, categories, and custom post types. Once a translation exists for the content, clicking on the desired language will take you to the translated page in that language.
The process of adding a language is the same for all types of content, whether it’s tags, categories, or posts.
Polylang and SEO
One of the biggest concerns when building a multilingual site is SEO. Polylang handles several key SEO aspects automatically:
- hreflang tags – Polylang automatically generates hreflang tags for all translated content, telling search engines which language version to serve to which audience. It also includes the
x-defaulttag as a fallback for unmatched languages. - Canonical URLs – The plugin properly handles canonical URLs for each language version, preventing duplicate content issues.
- Open Graph tags – Each language version gets its own
og:localeandog:locale:alternatetags for proper social media sharing. - Sitemaps – Polylang is compatible with XML sitemaps generated by plugins like Yoast SEO or Rank Math, creating separate sitemaps per language or including hreflang references.
After setting up Polylang, validate your hreflang implementation using Google Search Console or a tool like Ahrefs. Common issues include missing reciprocal hreflang tags (page A links to page B but not vice versa) and incorrect language codes.
Polylang Plugin Settings
You can view the settings of the Polylang plugin under Languages > Settings in the WordPress dashboard.
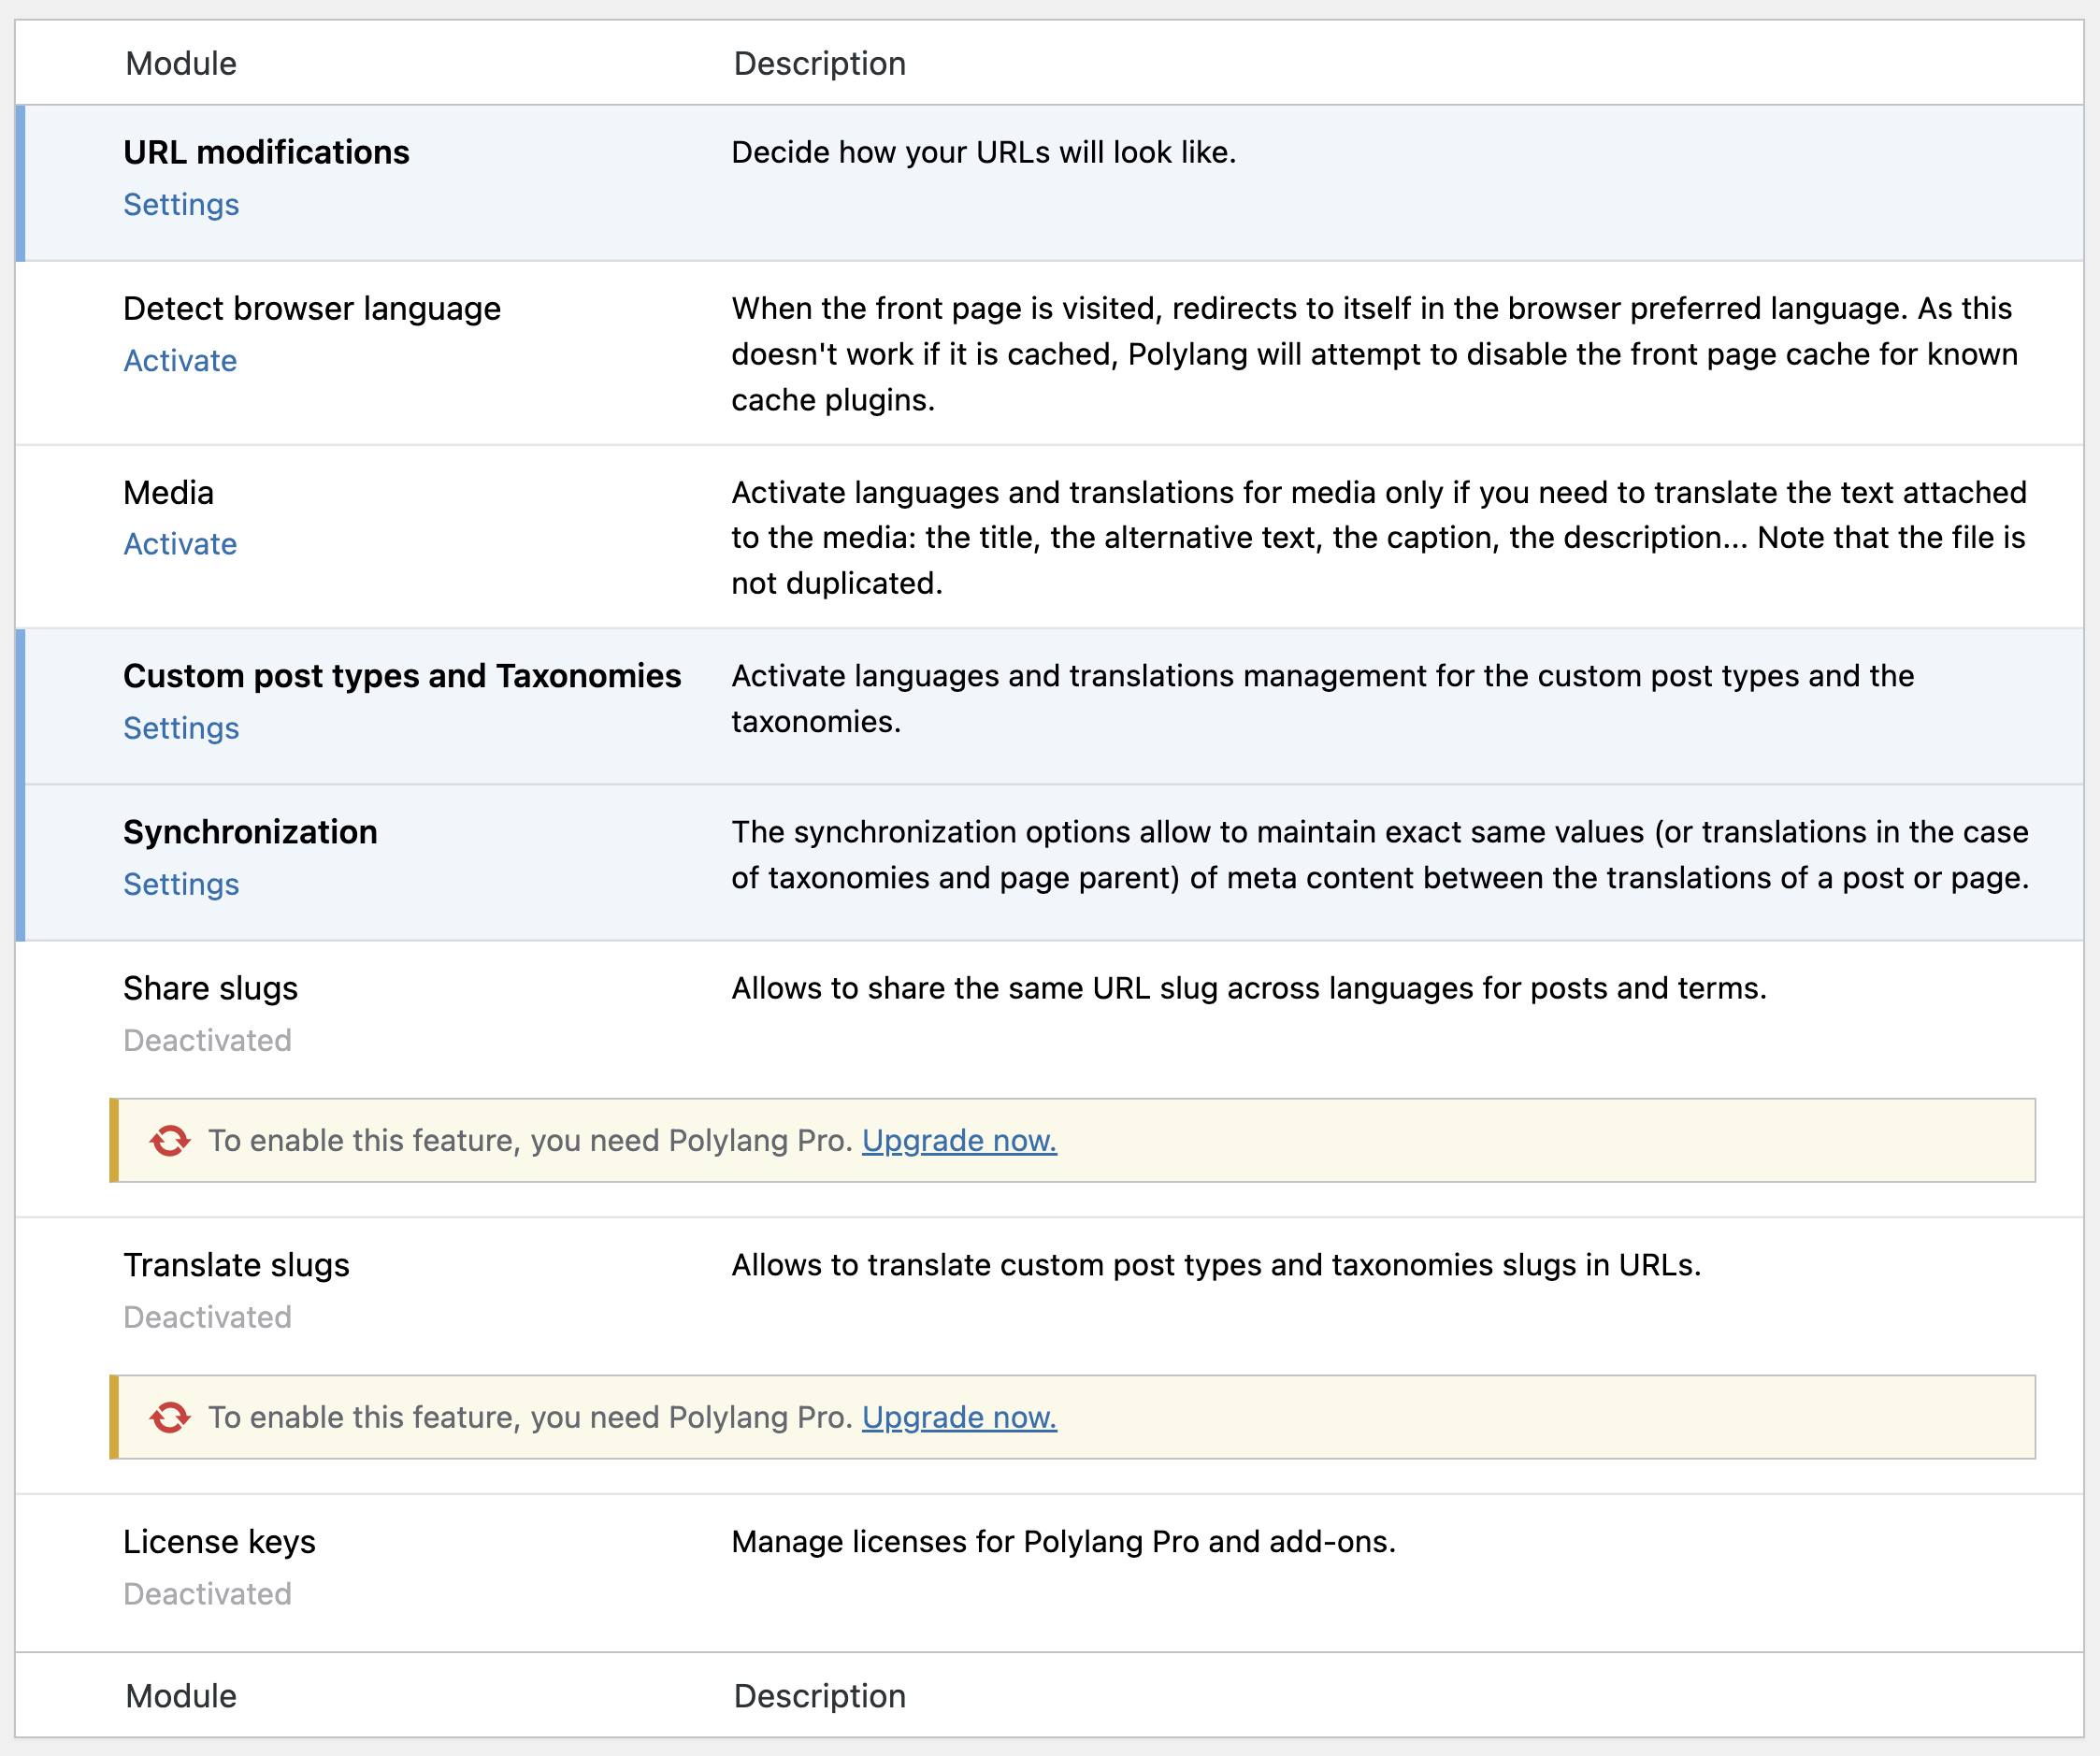
The Polylang plugin doesn’t have overly advanced settings (which is a good thing). Let’s go over the settings and explain each one:
1. URL Modifications – In this section, you can choose the structure of the URLs for different languages. There are several options:
- Language only in content – Set that the URL of posts, pages, and other content won’t change and will be displayed according to the content without any changes to the slug of that content.
- Language appears as a directory in the URL – The language will appear in the URL as a directory. For example –
http://test-wp/en/my-post. - Language appears as a subdomain in the URL – The language will appear in the URL as a subdomain. For example –
http://en.test-wp/my-post. - Languages have different domains – Each language has a completely different domain.
- Keep
/language/before the language name in the URL – Choose whether to keep or remove the word “language” before the language in the URL. For examplehttp://test-wp/en. - Remove
/language/before the language name in the URL – The opposite of the previous option. For example –http://test-wp/language/en. - The homepage URL contains the language code instead of the page name or ID – Choose whether the homepage URL should contain the language instead of the page name or ID. For example – in place of
http://test-wp.com/home, you will seehttp://test-wp.com/en.
If you’re not sure how it will affect your site, my recommendation is to choose the settings as shown in the following image:
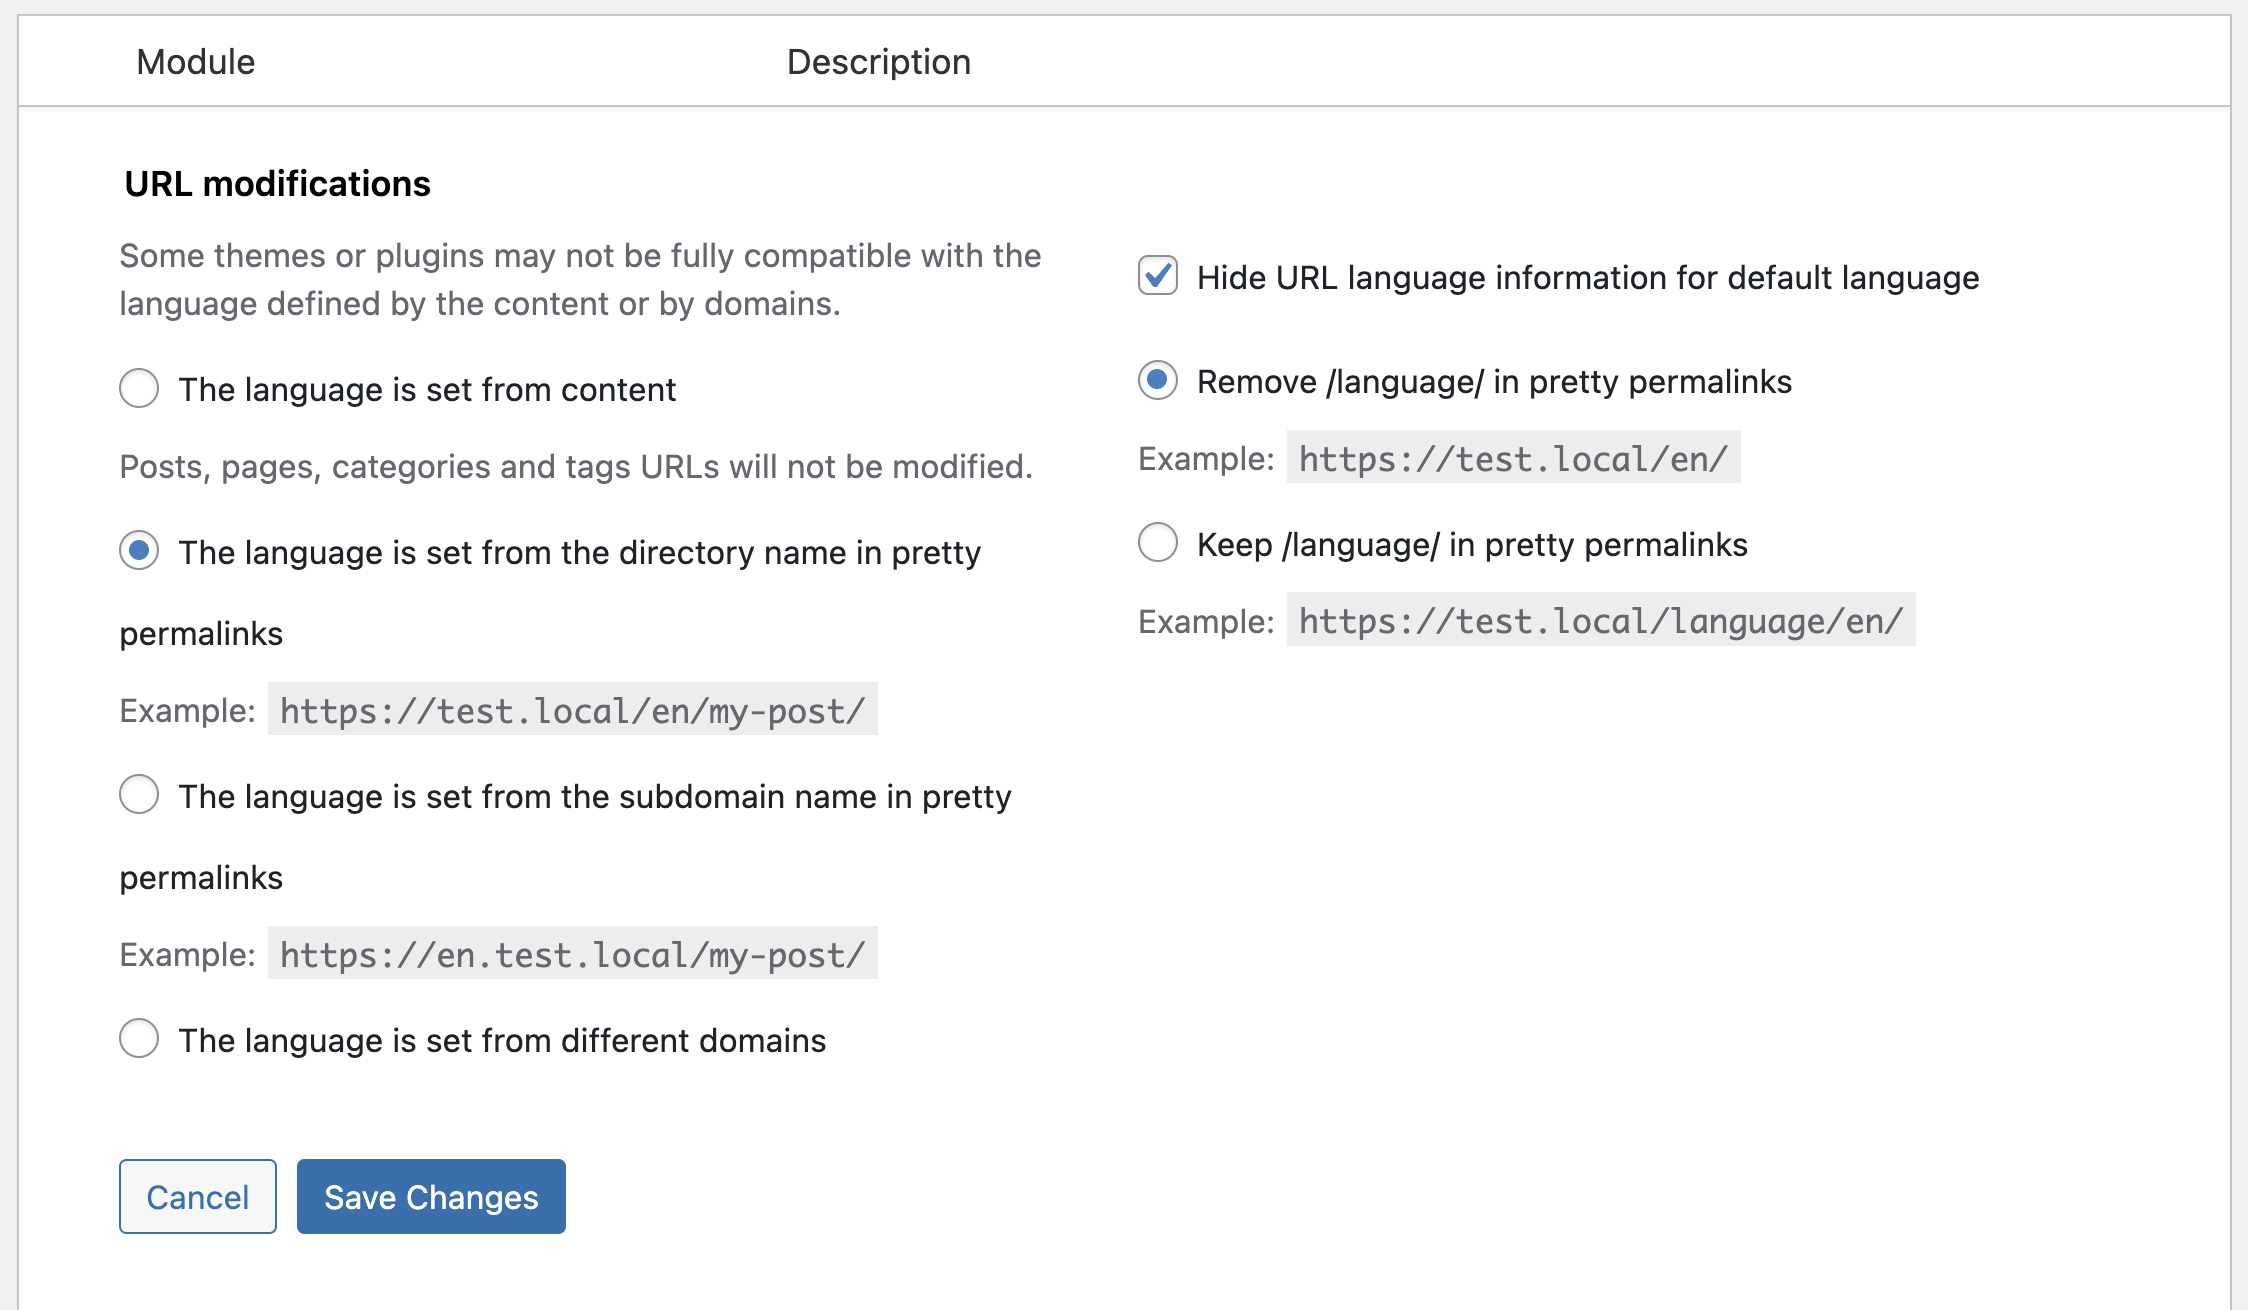
The URL structure you choose has a direct impact on SEO. Using a directory-based structure (e.g.,
/en/my-post) is generally recommended because it keeps all content under a single domain, consolidating link equity, and is the easiest to manage for most sites.
2. Detect Browser Language – You can set whether Polylang will automatically redirect to a page in a specific language based on the language of the browser the user is using.
3. Media – Enable translation of different media for each language in the media library. You can choose different media for each language, just like you do for other content types. The purpose of translating media is only to translate the text, such as the image title, alternative text, and image description.
4. Custom Post Types & Taxonomies – Allows you to choose which custom post types and custom taxonomies the language option will appear for.
5. Synchronization – When creating translations for pages or posts, you might want to avoid repetitive actions such as choosing categories, tags, featured images, etc. In this section, you can set which settings will automatically transfer to the translated post you are creating.
6. Tools – Allows you to decide whether to delete all Polylang information and settings from the database if you uninstall the plugin.
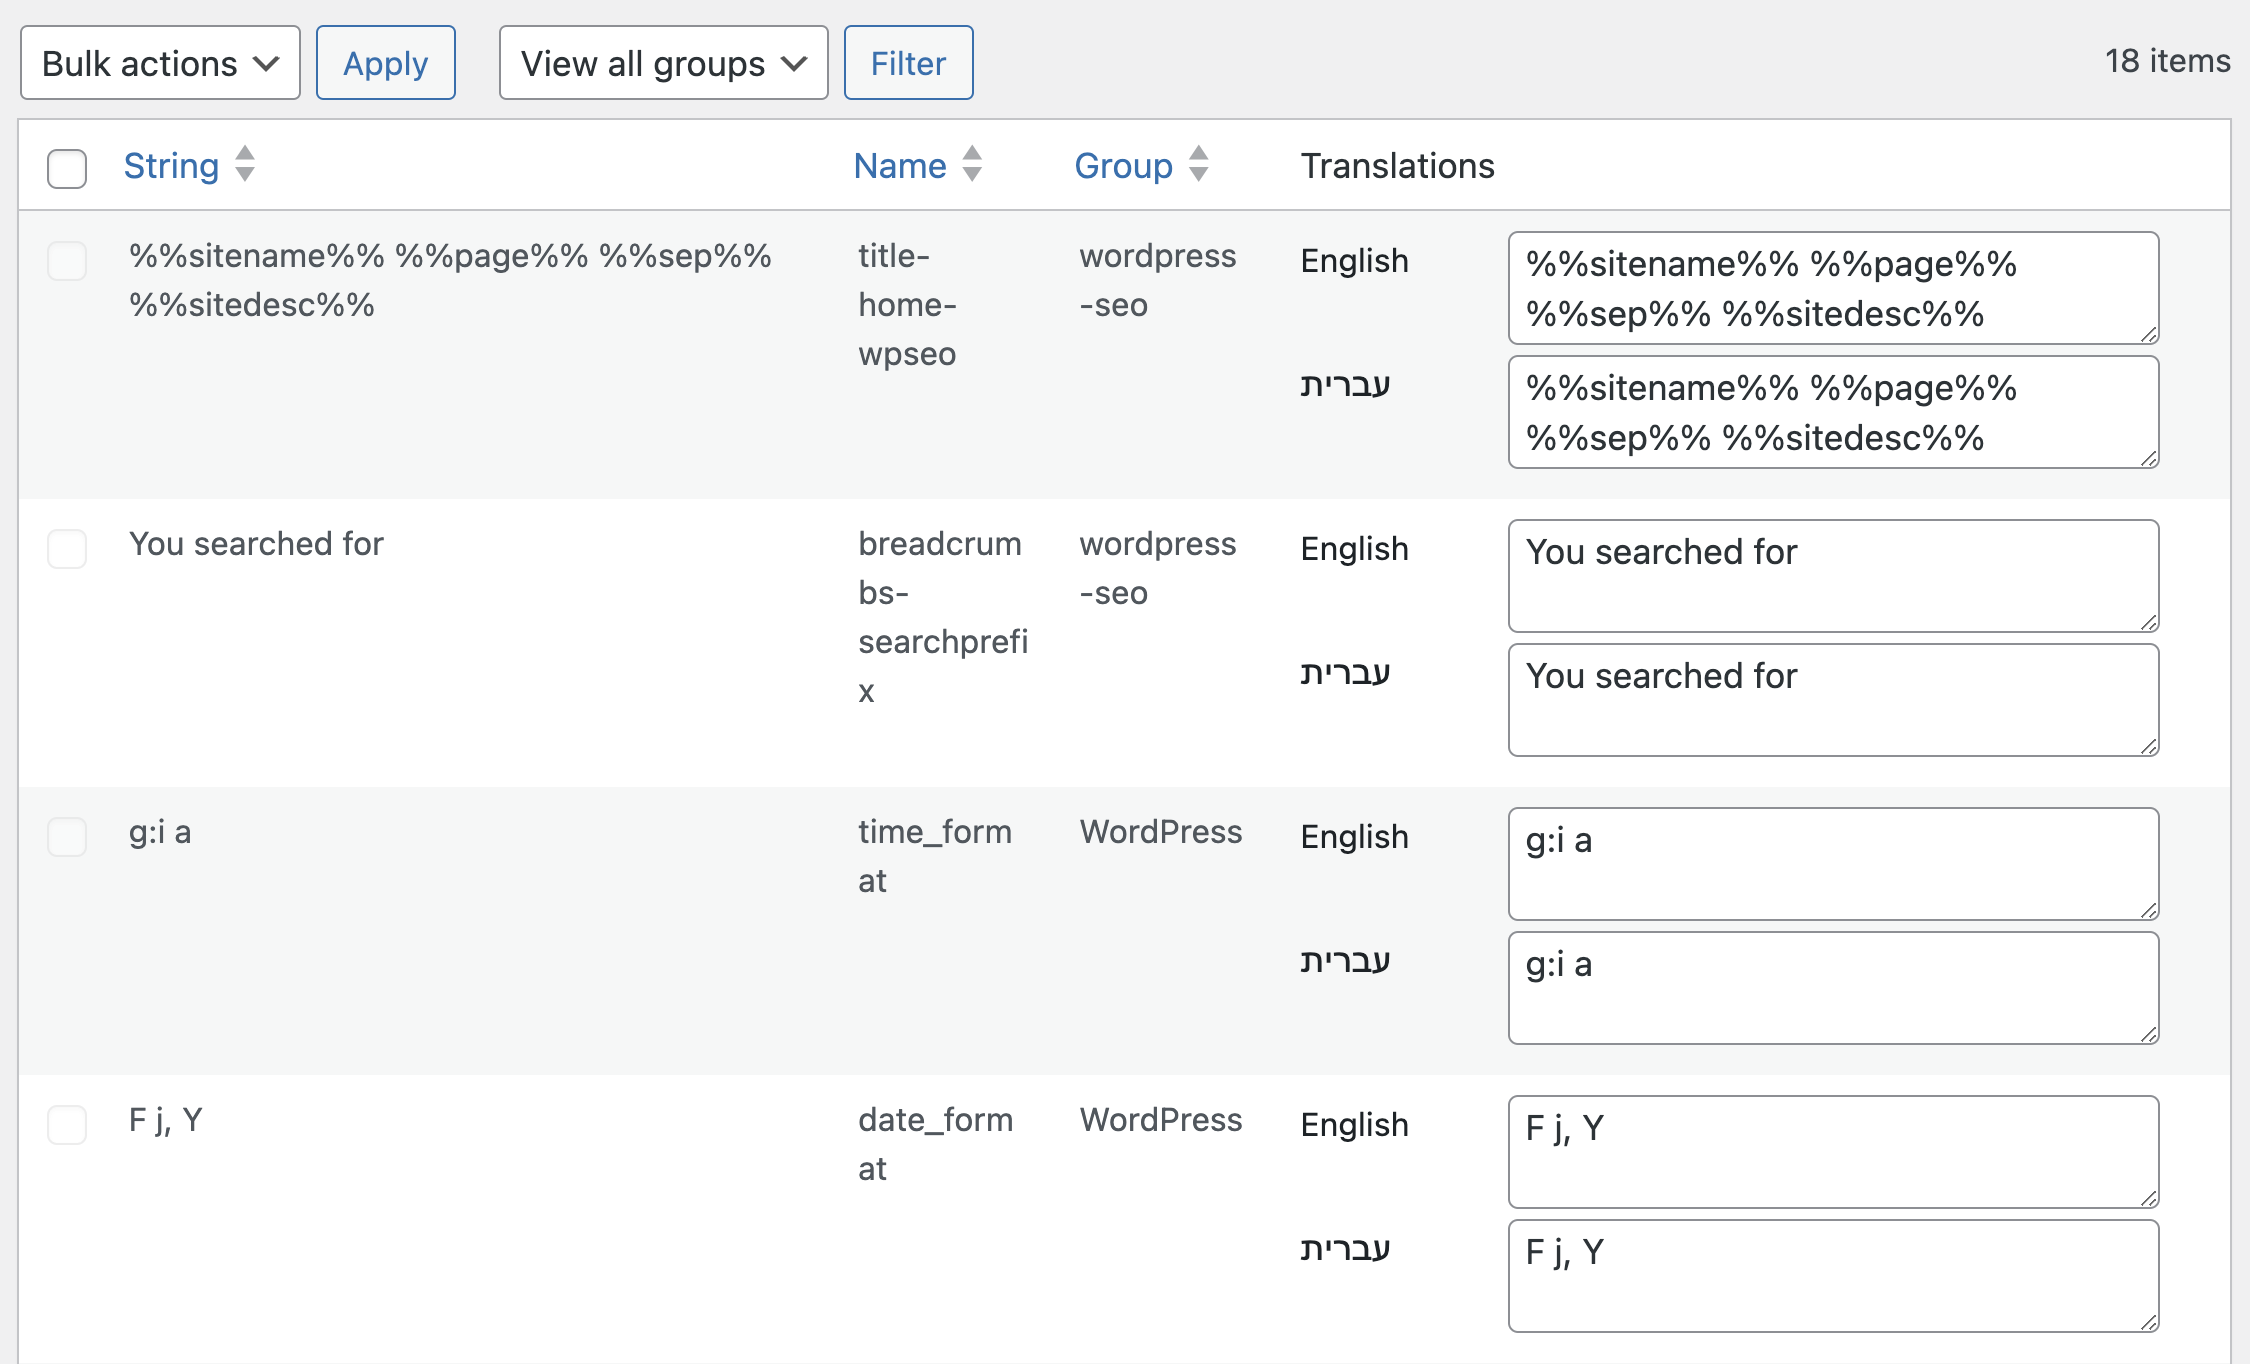
Translation Strings
The Polylang plugin allows you to translate strings such as the site name, site description, and widget titles. In this section, you can also change the date format for each language. Plugins and themes may add strings to this section.
You can also register your own custom strings for translation using the pll_register_string() function. This is particularly useful for hard-coded text in your theme:
pll_register_string( 'mytheme-copyright', 'Copyright 2026 - All Rights Reserved', 'My Theme' );After registering the string, it will appear in the Strings Translations interface, where you can add translations for each language.
Using Polylang in WordPress Themes
The Polylang plugin comes with several functions and filters to customize it for your theme, especially if you’re creating it yourself. The basic function that prints the language switcher in the template is:
pll_the_languages( $args );Where $args is an optional array with the following options:
- ‘dropdown’ – Displays a list if set to 0, a dropdown list if set to 1 (default: 0)
- ‘show_names’ – Displays language names if set to 1 (default: 1)
- ‘display_names_as’ – Either ‘name’ or ‘slug’ (default: ‘name’)
- ‘show_flags’ – Displays flags if set to 1 (default: 0)
- ‘hide_if_empty’ – Hides languages with no posts (or pages) if set to 1 (default: 1)
- ‘force_home’ – Forces a link to the homepage if set to 1 (default: 0)
- ‘echo’ – Echoes if set to 1, returns a string if set to 0 (default: 1)
- ‘hide_if_no_translation’ – Hides the language if no translation exists if set to 1 (default: 0)
- ‘hide_current’ – Hides the current language if set to 1 (default: 0)
- ‘post_id’ – If set, displays links to translations of the post (or page) defined by post_id (default: null)
- ‘raw’ – Use this to create your own custom language switcher (default: 0)
Please note that if you’re not using the dropdown option, you’ll need to print the
ultags yourself.
A. Examples of using pll_the_languages
<!-- outputs a list of languages names -->
<ul>
    <?php pll_the_languages(); ?>
</ul>

<!-- outputs a flags list (without languages names) -->
<ul>
    <?php pll_the_languages( array( 'show_flags' => 1, 'show_names' => 0 ) ); ?>
</ul>

<!-- outputs a dropdown list of languages names -->
<?php pll_the_languages( array( 'dropdown' => 1 ) ); ?>
If the options provided don’t meet your needs, Polylang allows you to build a custom language switcher using the 'raw' argument:
$translations = pll_the_languages( array( 'raw' => 1 ) );The function will return an array of arrays, where each language has its array with the following keys:
- [id] – Language ID
- [slug] – Language code used in URLs
- [name] – Language name
- [url] – URL of the translation
- [flag] – URL of the flag
- [current_lang] – True if this is the current language, false otherwise
- [no_translation] – True if there is no available translation, false otherwise
Another useful function is pll_current_language, which returns the current language of the page. The optional argument $value lets you choose whether to return the language name, its locale, or its slug (default).
You can explore additional functions that Polylang offers in the plugin’s documentation.
B. Checking if Polylang is Active
When using functions from a specific plugin, it’s always advisable to check if the plugin is active. This ensures that if the plugin is inactive, the functions won’t throw PHP errors and crash the site.
The recommended approach is to use function_exists() rather than is_plugin_active(). The reason is that is_plugin_active() only works in the admin area and requires knowing the exact plugin directory path, which may vary. Using function_exists() works everywhere – front-end, back-end, and in hooks:
<?php
if ( function_exists( 'pll_current_language' ) ) {
    // Polylang is active, safe to use its functions
    $current_lang = pll_current_language();
}
?>
This pattern is more reliable and portable. You can wrap any Polylang-dependent code in this check to prevent errors if the plugin is deactivated.
C. Styling and Different CSS for Each Language in Polylang
The recommended approach for handling LTR/RTL layouts in a multilingual site is to use CSS Logical Properties. Instead of writing separate rules for each language direction, logical properties like margin-inline-start, padding-inline-end, and text-align: start automatically adapt based on the document’s direction:
.element {
    margin-inline-start: 1rem;
    padding-inline-end: 0.5rem;
    text-align: start;
}
This single set of rules works correctly in both LTR and RTL contexts, eliminating the need for language-specific overrides.
If you still need to target a specific language with CSS, you can use the :lang() pseudo-class selector:
.element:lang(he) {
    font-size: 1.1rem; /* Hebrew text often benefits from slightly larger sizing */
}
For themes built for right-to-left languages, there is typically a file named rtl.css where you can place RTL-specific CSS. Alternatively, creating files named en_US.css, fr_FR.css, or he_IL.css in the main theme directory will make them load automatically based on the active language.
D. Changing Flag Images in Polylang
You can easily change the default flag images that Polylang offers. You can use PNG, JPG, or SVG files and name them with the language code, for example, en_US.png. Upload these files to the /wp-content/polylang/ directory for them to appear.
Keep in mind that you need to create this directory yourself. After uploading the files, go to Languages > Settings, then to URL modifications, and click Save. If you want to set the height and width of these images, you can use the pll_custom_flag filter.
Note! This should be added as a plugin (preferably mu-plugin) and run before the plugins_loaded action. So, create a file named polylang-flag.php (for example) and add the following code:
<?php
/*
Plugin Name: Polylang Flag Mu
Plugin URI: https://savvy.co.il/
Version: 1.0
Author: Roee Yossef
Author URI: https://savvy.co.il/
License: GPLv2
*/
// To prevent calling the plugin directly
if (!function_exists('add_action')) {
echo 'Please don’t call the plugin directly. Thanks :)';
exit;
}
function pll_custom_flag( $flag, $code ) {
$flag['url'] = "/wp-content/polylang/{$code}.svg";
$flag['width'] = 32;
$flag['height'] = 32;
return $flag;
}
add_filter( 'pll_custom_flag', 'pll_custom_flag', 10, 2 );
Copy this file to the /wp-content/mu-plugins/ directory, and you’re done. I assume you understand where to change the height and width in this code…
E. What About Developing a Theme with Polylang?
Even simpler. Let’s say you want to add a different logo for each language. All you have to do is add a condition to check which language is being used using the get_locale function. Something like this:
<?php if (get_locale() == 'he_IL')  {
    echo '<h1>כותרת בעברית</h1>';
}
elseif (get_locale() == 'en_US') {
    echo '<h1>English Title</h1>';
}
?>
Polylang and Caching
If you’re running a caching plugin on your multilingual site, there are a few things to keep in mind:
- Separate cache per language – Most caching plugins will create separate cached versions for each language URL. If you’re using a directory-based URL structure (e.g.,
/en/,/he/), this happens automatically since each language has a different URL. - Browser detection and caching – If you enabled the “Detect Browser Language” option in Polylang, be aware that this can conflict with page caching. Cached pages are served to all users regardless of browser language, which means the redirect may not work. Consider disabling browser detection if you use aggressive page caching.
- Cookie-based caching – Polylang sets a
pll_languagecookie. Make sure your caching plugin is configured to vary the cache based on this cookie if your URL structure doesn’t differentiate languages.
FAQs
Common questions about using Polylang for multilingual WordPress sites:
Summary
The only thing better than a WordPress site is a bilingual WordPress site. A multilingual site allows you to reach a wider audience than a single-language site. The Polylang plugin allows you to create a bilingual WordPress site easily and quickly.
By the way, there is a WooCommerce extension for the Polylang plugin, enabling you to translate pages of your digital store, translate products, and features directly from the WooCommerce interface.
This is the place to mention that if you are interested in automatically and more easily localizing and enabling other languages for your site, you might want to check alternatives like WegLot, for example. Both tools have pros and cons beyond the scope of this guide.
Share your thoughts on the plugin, advantages and disadvantages compared to other plugins, or anything that comes to mind… 🙂