WordPress is one of the most successful Content Management Systems (CMS) on the web. One of its most significant features is the ability to create Custom Post Types (CPT), which lets you define different content types and expand the system’s capabilities.
In this guide, we will explain what Custom Post Types are, how to create these custom content types, and how to display them on your WordPress site.
A Bit of History
In practice, Custom Post Types in WordPress have been around for quite some time, starting from around 2005 when WordPress version 1.5 introduced the ability to create static pages and added the post_type field to the database.
The wp_insert_post function existed since WordPress version 1.0, so when the post_type field was added to the database, you could simply set its value when adding a post.
Creating and managing custom content types during this period required writing quite a bit of code, but as the system evolved, this became less and less necessary.
In version 2.9, the function register_post_type was introduced and made accessible to everyone. At this point, creating custom content types became much simpler, taking WordPress a few steps forward to become a full-fledged content management system.
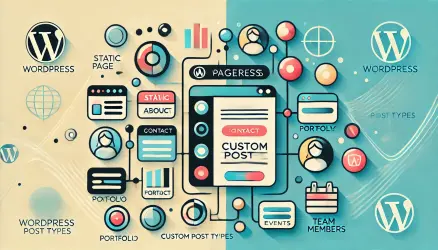
What Is a Custom Post Type (CPT)?
A Custom Post Type is essentially a post with a different value in the post_type field in the database.
If you publish a post on your site, go to the database, and change the content type from “post” to “page,” the post will appear under pages rather than under posts in the admin interface.
WordPress defines several attributes for each custom content type. Can you perform a search within it? Is it displayed in the admin interface? Can you assign categories or tags to it? Does it allow comments?
These are all settings that can be defined for each content type.
By default, WordPress comes with various content types, such as pages, posts, menus, post revisions, and attachments, each with a different value in the post_type field.
WordPress allows you to easily create your own custom content types like books, movies, reviews, recipes, or anything else you have in mind.
When to Use Custom Post Types?
Deciding whether to create a custom content type can be tricky. Sometimes, categorizing posts with categories is sufficient.
There’s no definitive answer, but there are some guiding principles. If any of the following situations apply to you, creating a custom content type would be appropriate:
- If you’re publishing at least two different types of content. For example, personal blog posts and food recipes.
- If structurally and visually, it makes more sense to separate two distinct types of content. For example, a personal blog and a portfolio.
- If the content type doesn’t fit chronologically. For example, a company blog and the services the company offers.
- If the content type can be easily separated into its own site section while still maintaining coherence. For example, a personal blog and products you’re selling.
- If using categories and tags would result in overly complex taxonomies. For example, a personal blog and movie reviews.
So How Do You Create Custom Post Types?
The ideal scenario is to create a custom content type using a dedicated plugin. However, if you don’t know how to create a plugin, you can add the following code to your functions.php file:
// Register Custom Post Type
function snippet_post_type() {

	$args = array();
	register_post_type( 'snippet', $args );

}
add_action( 'init', 'snippet_post_type', 0 );
Naming best practices: Use a prefix matching your plugin or theme name (e.g. savvy_snippet instead of snippet) to avoid conflicts. Keep the name under 20 characters (database limit), use singular form, and avoid the wp_ prefix.
This code will create a new content type called “snippet” without any options. It won’t be public and won’t appear in the WordPress admin dashboard.
To customize the content type according to your needs, add some settings to the empty array in the code above ($args):
// Register Custom Post Type
function snippet_post_type() {

	$labels = array(
		'name'                  => _x( 'Snippets', 'Post Type General Name', 'text_domain' ),
		'singular_name'         => _x( 'Snippet', 'Post Type Singular Name', 'text_domain' ),
		'menu_name'             => __( 'Snippets', 'text_domain' ),
		'name_admin_bar'        => __( 'Snippet', 'text_domain' ),
		'archives'              => __( 'Snippet Archives', 'text_domain' ),
		'attributes'            => __( 'Snippet Attributes', 'text_domain' ),
		'parent_item_colon'     => __( 'Parent Item:', 'text_domain' ),
		'all_items'             => __( 'All Items', 'text_domain' ),
		'add_new_item'          => __( 'Add New Item', 'text_domain' ),
		'add_new'               => __( 'Add New', 'text_domain' ),
		'new_item'              => __( 'New Item', 'text_domain' ),
		'edit_item'             => __( 'Edit Item', 'text_domain' ),
		'update_item'           => __( 'Update Item', 'text_domain' ),
		'view_item'             => __( 'View Item', 'text_domain' ),
		'view_items'            => __( 'View Items', 'text_domain' ),
		'search_items'          => __( 'Search Item', 'text_domain' ),
		'not_found'             => __( 'Not found', 'text_domain' ),
		'not_found_in_trash'    => __( 'Not found in Trash', 'text_domain' ),
		'featured_image'        => __( 'Featured Image', 'text_domain' ),
		'set_featured_image'    => __( 'Set featured image', 'text_domain' ),
		'remove_featured_image' => __( 'Remove featured image', 'text_domain' ),
		'use_featured_image'    => __( 'Use as featured image', 'text_domain' ),
		'insert_into_item'      => __( 'Insert into item', 'text_domain' ),
		'uploaded_to_this_item' => __( 'Uploaded to this item', 'text_domain' ),
		'items_list'            => __( 'Items list', 'text_domain' ),
		'items_list_navigation' => __( 'Items list navigation', 'text_domain' ),
		'filter_items_list'     => __( 'Filter items list', 'text_domain' ),
	);
	$args = array(
		'label'                 => __( 'Snippet', 'text_domain' ),
		'description'           => __( 'Snippet CPT Description', 'text_domain' ),
		'labels'                => $labels,
		'supports'              => array( 'title', 'editor' ),
		'taxonomies'            => array( 'category', 'post_tag' ),
		'hierarchical'          => false,
		'public'                => true,
		'show_ui'               => true,
		'show_in_menu'          => true,
		'menu_position'         => 5,
		'show_in_admin_bar'     => true,
		'show_in_nav_menus'     => true,
		'can_export'            => true,
		'has_archive'           => true,
		'exclude_from_search'   => false,
		'publicly_queryable'    => true,
		'capability_type'       => 'post',
		'show_in_rest'          => true,
	);
	register_post_type( 'snippet', $args );

}
add_action( 'init', 'snippet_post_type', 0 );
The above code presents many of the arguments that can be set when creating a custom content type. It’s not mandatory to use all of them.
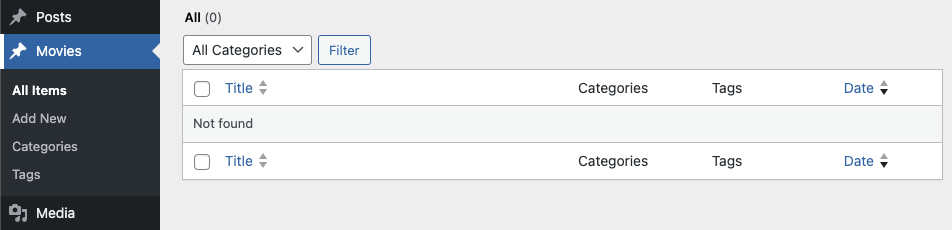
This code will create a new content type called snippet and it will appear as a standard menu item in the WordPress admin dashboard.
You’ll be able to add posts, view and edit the posts of this content type in the admin dashboard, and of course, see the published posts on your website.
There are quite a few parameters that can be defined when creating a new content type. For the complete list, refer to the WordPress Developer Resources.
Note the reserved names when working with WordPress, and you cannot use these for taxonomies or post types you create; otherwise, you’ll run into issues.
Some of the parameters include:
- labels – This parameter should be an array defining the labels for the content type in the WordPress admin.
- description – A brief description of the content type, what it does, and why it’s used.
- exclude_from_search – Defines whether the content type will appear in search results when searching on the site.
- menu_position – The position of the menu in the WordPress admin (default is below the Comments menu).
- supports – Defines what the created content type will support, such as title, excerpt, comments, revisions, etc.
- has_archive – Allows displaying an archive for this content type.
- show_in_rest – Exposes the content type to the REST API and enables the block editor (Gutenberg). Set this to
truefor any content type that should use the modern editor. - menu_icon – Sets a Dashicon for the admin menu (e.g.
'dashicons-media-code'). - rewrite – Controls the permalink structure. Use
array( 'slug' => 'snippets', 'with_front' => false )to decouple the URL slug from the post type identifier.
Displaying the Custom Content Type
There are many nuances to the explanation so far, but this should give you the foundation for creating a custom content type in WordPress.
What remains is to explain how to display the created content type to users on your site – as a list of posts on the archive page and as a single page displaying the post itself.
Displaying the Archive Page of the Created Content Type
If you’ve created a custom content type with the parameter has_archive set to true, WordPress (by default) will display this content type using the archive.php template.
If the content type we’ve created is named snippets, you can access http:/mysite.com/snippet to see the list of posts you’ve created.
The WordPress template hierarchy works as follows: if a file named archive-[post_type].php exists (in our case archive-snippet.php), WordPress will use it. If it doesn’t exist, WordPress falls back to archive.php, and then to index.php.
Therefore, if you want to change the structure of the archive page for the snippet content type we created, it would be wise to create a new file in your template named archive-snippet.php and copy the code from archive.php into it.
Now you can modify the new file according to your design requirements.
Displaying the Single Post Page of the Created Content Type
The same hierarchy applies to the single post page – the page that appears when you click on a post from the archive.
WordPress defaults to using single.php. To customize it, create a file named single-snippet.php in your theme, copy the code from single.php, and make your changes.
Displaying Posts Using the WordPress Loop
In many cases, you’ll want to display posts of a specific content type in a custom page template. The most convenient way is by using WP_Query and the WordPress loop.
To display posts of a specific content type in any page template, use the following code:
<?php
if ( get_query_var( 'paged' ) ) {
    $paged = get_query_var( 'paged' );
}
if ( get_query_var( 'page' ) ) {
    $paged = get_query_var( 'page' );
}

$query = new WP_Query( array( 'post_type' => 'snippet', 'paged' => $paged ) );

if ( $query->have_posts() ) : ?>
    <?php while ( $query->have_posts() ) : $query->the_post(); ?>
        <div class="entry">
            <h2 class="title"><?php the_title(); ?></h2>
            <?php the_content(); ?>
        </div>
    <?php endwhile;
    wp_reset_postdata(); ?>
    <!-- you can display pagination here -->
<?php else : ?>
    <!-- you can display error here -->
<?php endif; ?>
You can change the content type displayed in line number 9. Additionally, the
$pagedvariable is necessary for proper pagination.
Custom Content Types and Page Builders
Page builders like Elementor allow you to create custom archive and single post templates for your custom content types without writing code. This can be a convenient alternative if you prefer a visual approach to template design.
FAQs
Summary
Creating custom post types is a powerful way to extend WordPress beyond basic posts and pages. By using register_post_type(), you can define content types tailored to your specific needs – whether that’s recipes, portfolios, products, or anything else.
Key points to remember: register post types in a plugin for portability, set show_in_rest to true for block editor support, use a prefix to avoid naming conflicts, and create dedicated template files (archive-{post_type}.php and single-{post_type}.php) for custom layouts. For more on organizing content, see our guide on taxonomies in WordPress.