With over seven million active installations, a rating of 4.6 on WordPress.org, and a whole army of digital store owners backing it up, WooCommerce is undoubtedly the most popular plugin providing a solution for digital stores on the WordPress system.
If you’re thinking about setting up a virtual store on WordPress, choosing WooCommerce is likely the right decision for you.
In a few words, WooCommerce is a free eCommerce plugin that allows the sale of physical products, digital products, and basically anything you desire.
The WooCommerce plugin is built for seamless integration with WordPress. It is currently the favored eCommerce solution in the market, offering store owners and WordPress developers full control over their stores.
So, here’s a comprehensive and updated guide on how to install and configure WooCommerce to build a virtual store on WordPress. I hope you’ll find it helpful…
Installing WooCommerce
Go to Dashboard > Plugins > Add New, search for the keyword WooCommerce, install and activate the plugin that appears first on the right.

After installing the plugin, you have two options:
1. Option A
Proceed with the basic settings of WooCommerce in the wizard that will pop up after installation. The wizard will help you set basic store settings in six steps. Most of them are self-explanatory:

Whether you use the wizard or not, activating WooCommerce will also add the basic pages of WooCommerce automatically – Checkout, My Account, Cart, and more.
2. Option B
Alternatively, exit the wizard, go to the WordPress dashboard, and configure the settings yourself. For the purposes of this guide, we’ll exit the wizard, go to the WordPress dashboard, and start adding the relevant pages to the store and configuring the plugin ourselves.
Important: Before launching your store, make sure your site has an SSL certificate installed and is accessible via HTTPS. An SSL certificate encrypts the connection between your customers and your site, and it is a requirement for accepting online payments. Most hosting providers offer free SSL certificates through Let’s Encrypt.
Adding and Managing Products
The first change you’ll notice when you go to the WordPress dashboard is that 4 new tabs have been added:
- WooCommerce – General settings for the plugin.
- Products – Where you manage your products.
- Analytics – Reports & analytics regarding your store.
- Marketing – Mainly the ability to add Coupons.
To start building the digital store, go to Products > Add New to add your first product. Give your product a name, scroll down, and you’ll find two new tabs – Product Data and Short Description.
Let’s explain these before discussing store settings.
Product Data
WooCommerce supports several product types out of the box. The default is a Simple product – a single item with one price.
Other types include Grouped (a collection of related products), External/Affiliate (a product listed on your site but sold elsewhere), and Variable (a product with variations like size or color, each with its own price and stock).
You can select the product type from the dropdown at the top of the Product Data section.
General
In the General tab, you can enter the regular price and sale price of the product (which can be scheduled).

Inventory
In the tab called Inventory, you can define a SKU for the product. You can also define whether the product is in stock (In Stock / Out of Stock / On Backorder), set the quantity of that product in stock (inventory management), and determine whether to limit the purchase to one item only (sold individually).

Here’s a comprehensive guide on how to manage stock & inventory in WooCommerce. Later on, you might want to know how to deal with products that are out of stock from an SEO perspective and in general.
Shipping
In the Shipping tab, you can define the product’s dimensions, weight, and also the type of shipping you provide for that product. If you haven’t defined shipping types yet, you won’t be able to choose the shipping type (more on that later).

Linked Products
In the Linked Products tab, you can define products that you want to promote (up-sell products). These are essentially products that can serve as alternatives to the current product, such as more profitable products, higher-quality products, or more expensive products.
Complementary products are products that you want to promote in the shopping cart based on the current product.

Attributes
The Attributes tab allows you to add specific attributes to the same product, for example: unbreakable, reliable, etc. These attributes will be displayed under the Additional Information tab on the product page on the site itself, and you can think of them as tags.
In this window, you can choose that the product will not be a regular product but a product with variations and different attributes for each item, such as color/size, and so on.

Advanced
The last tab is called Advanced, and here you can add purchase notes, give the product a position in the menu, and enable/disable the option to add “reviews” to that product.

Notice that at the top of the Product Data section, you can choose whether the product is a virtual or downloadable product. If you’re selling digital products, you’ll need to upload the file you’re selling, define whether to limit the downloads for the same file, and set when the download expires.
Note that choosing a virtual product will hide the Shipping tab in this section.
Product Short Description
This section, which usually appears below the Product Short Description section at the bottom of the product page, allows you to choose a short sentence describing the image of the product, and it will appear under the product name.
After you’ve played with these settings, don’t forget to add tags to the product, choose a category for it, and add an image or gallery to the product.
These options will appear for every content type in WordPress (by default) on the left side of the screen.

Digital Store Settings – WooCommerce
In the tab called WooCommerce, you can see various settings for your digital store, view orders, coupons, and reports. In this section, you can also change WooCommerce settings and add extensions to your store.
Orders
This page displays the current list of orders and purchases in your store. If you sell digital products, there isn’t much to do in this section other than to see which items customers have purchased.
If you sell physical products, you can manage which products need to be shipped, which orders are in progress, and which orders are pending.

Coupons
The WooCommerce system comes with several options to allow you to add coupons to your digital store. The Coupons page will display a list of existing coupons in your store.
Clicking on Add Coupon will take you to a page where you can add new coupons. In the coupon details section, you can define the coupon and its discounts and limitations.

The General tab allows you to edit the basic settings of that coupon: the type of discount (cart discount, cart percentage discount, product discount, and product percentage discount), set the coupon value, shipping settings, and, of course, the expiration date of that coupon.
Please note that hovering over the question mark icon to the left of the fields will provide you with additional information about the field in question.
In the Usage Restrictions tab, you can set the minimum purchase amount that the customer needs to pay in order to use the coupon. To restrict coupon usage so that it cannot be used with other coupons, mark the box for personal use only.
You can also choose whether the coupon can be used on products that are on sale or not. In this section, you also define the products or product category to which the coupon can be applied and set usage restrictions based on email addresses.
In the Usage Limits tab, you can set the number of times the coupon can be applied, per coupon or per user. The coupon management page in the image below.
I wrote a more extensive post on the topic of coupons in WooCommerce. Take a look if you’re interested in the subject in the guide Coupon Management in WooCommerce Stores.

Reports
WooCommerce provides tracking tools where you can view charts and graphs of your sales, orders, and shipping costs in five different time periods. Each graph can be limited to a specific product, product category, coupons, or by the number of downloads (for digital products).
By default, orders marked as processing, on hold, or completed are considered sales and appear in the reports.
The Orders tab describes the store’s performance in terms of sales, and there are various ways to view this information – by dates, by products, and by categories.
In the Customers tab, you can see customer purchases based on the time periods you choose. In the Stock tab, you can get information on items close to being out of stock, items that are out of stock, and more.
The Taxes tab allows you to see the taxes paid by country code (state) and taxes by date. All the information in this tab can be exported to a CSV file.
Settings
This is the central part of WooCommerce settings, where you can define every detail of your digital store.
General
In this section, you can set the basic store settings, the currency in use, the base location or the country from which you sell products. You can also define sales areas, currency display options, and the option to apply taxes to products in the store.
In this section, you will also be asked to enter the store’s address if you did not use the WooCommerce setup wizard mentioned at the beginning of the post.
Note that this is where you define sales locations, whether you sell products to specific countries and to which countries, as well as shipping zones. There are additional settings in this section that explain themselves.
Check “Enable tax rates and calculations” in order to see the Tax Tab. Check the “Enable the use of coupon codes” in order to enable the store coupons

Products
Note that there are several settings screens under this tab – General / Stock / Downloadable Products.
Under General, you can set the page that will serve as the store in WordPress. If you used the setup wizard, this page will be configured automatically. You can also decide on the shopping cart behavior (whether in Ajax or in the regular way through redirection).
Leave the default settings if you are not sure what you are looking for. Additionally, you can define weight units, dimensions, and product rating and review options.

You can set a default image for products that do not have an attached image in this screen.
Under Stock, you can decide whether to enable inventory management, stock notifications, and various other built-in settings. Under Downloadable Products, you will find several options relevant to selling digital products in your store.
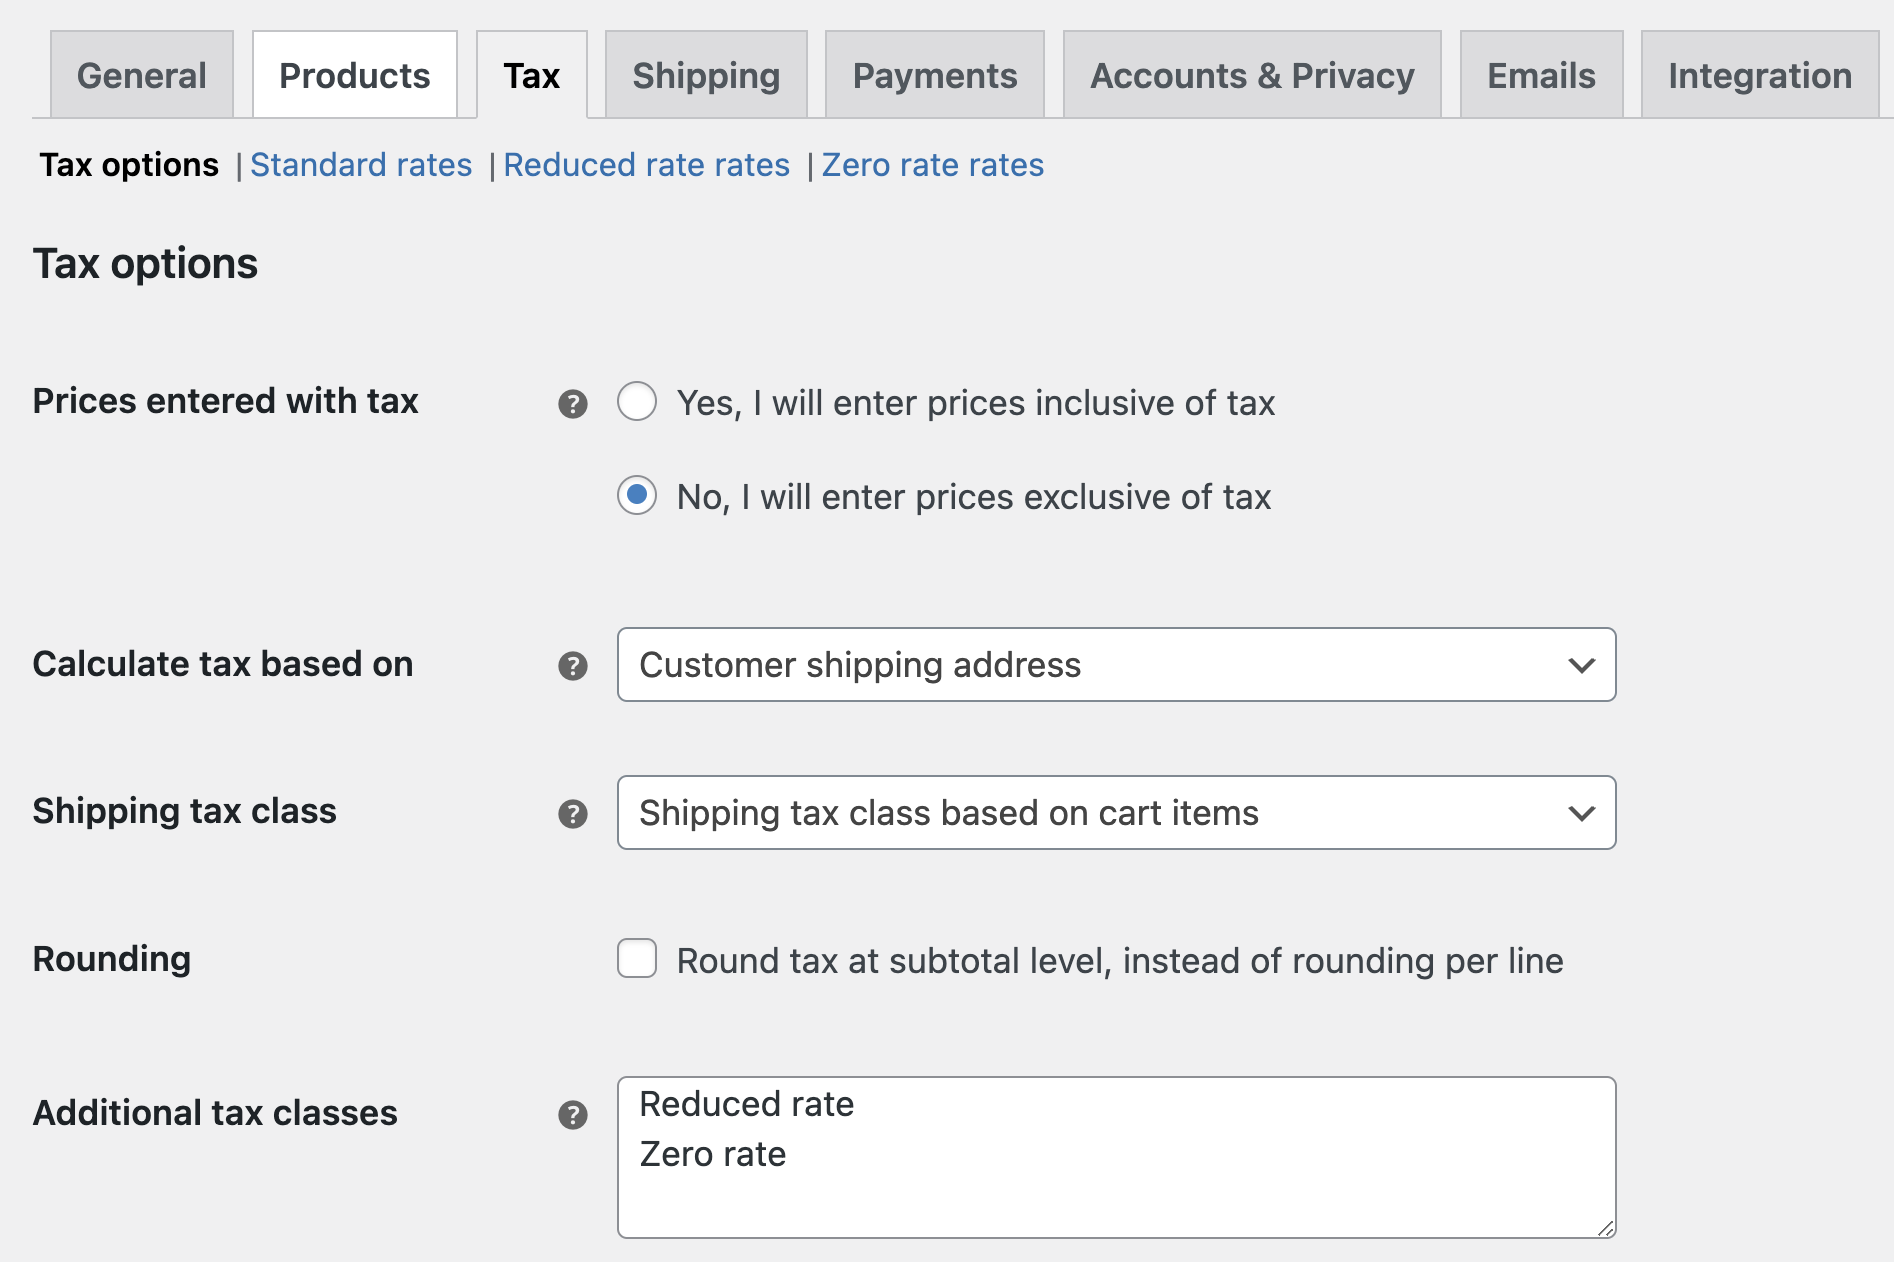
Tax
In this section, you can choose and set tax options and standard rates, zero rates, discounted rates, and the like. Here’s a comprehensive post about setting up WooCommerce taxes.
Shipping
Note that this tab also has several setting screens – Shipping Zones / Shipping Options / Shipping Methods.
Under Shipping Zones, you can add and set shipping zones, each with a different rate. In Shipping Options, you can define the shipping destination, i.e., whether to the customer’s shipping address or the customer’s billing address. You can also decide whether to display a shipping calculator and the like.
In Shipping Methods, you can group similar products for shipping and choose from several shipping method options.

Payments
In this screen, you will see the payment options in the store. WooCommerce now promotes WooPayments (built in partnership with Stripe) as its primary payment solution, alongside options like Direct Bank Transfer / Check Payment / Cash on Delivery / PayPal, and many third-party gateways. In general, in this screen, you can define which types of payments are possible.
Clicking on setting / managing next to each one will lead to the specific settings page for that payment type.
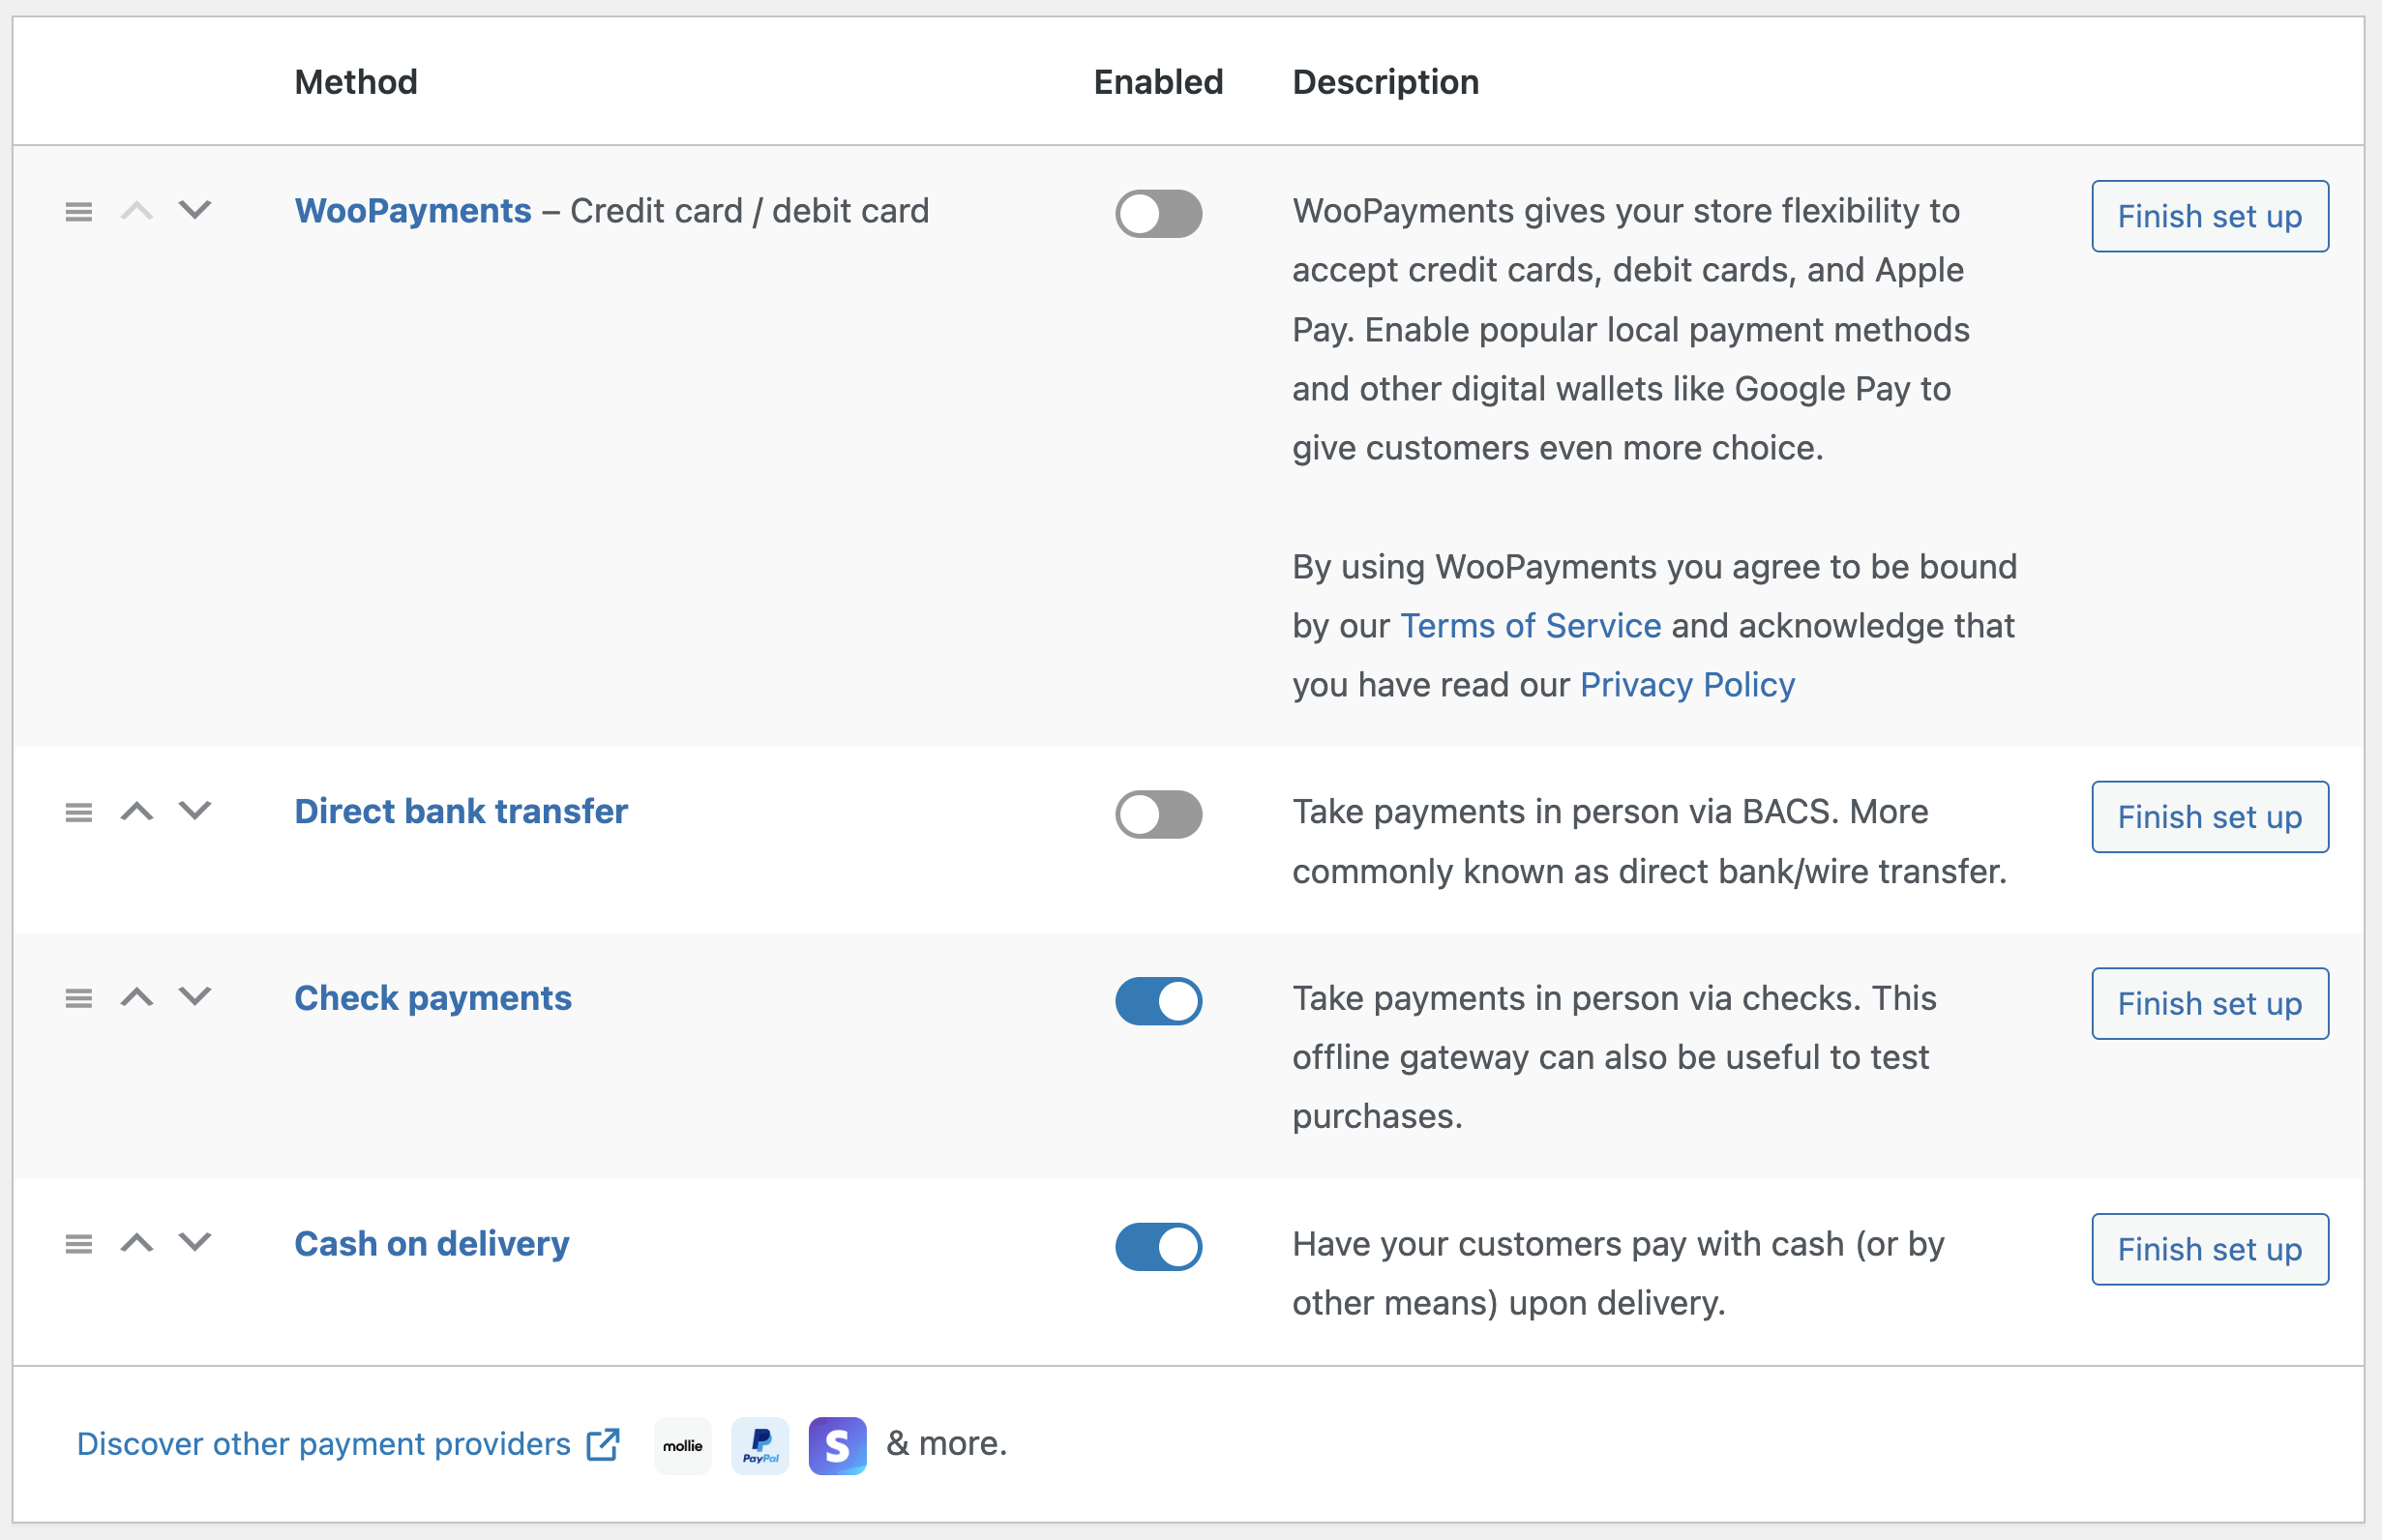
Tip: WooPayments, built in partnership with Stripe, is WooCommerce’s recommended payment solution. It supports credit cards, Apple Pay, Google Pay, and buy-now-pay-later options like Klarna and Afterpay – all managed directly from your WordPress dashboard.
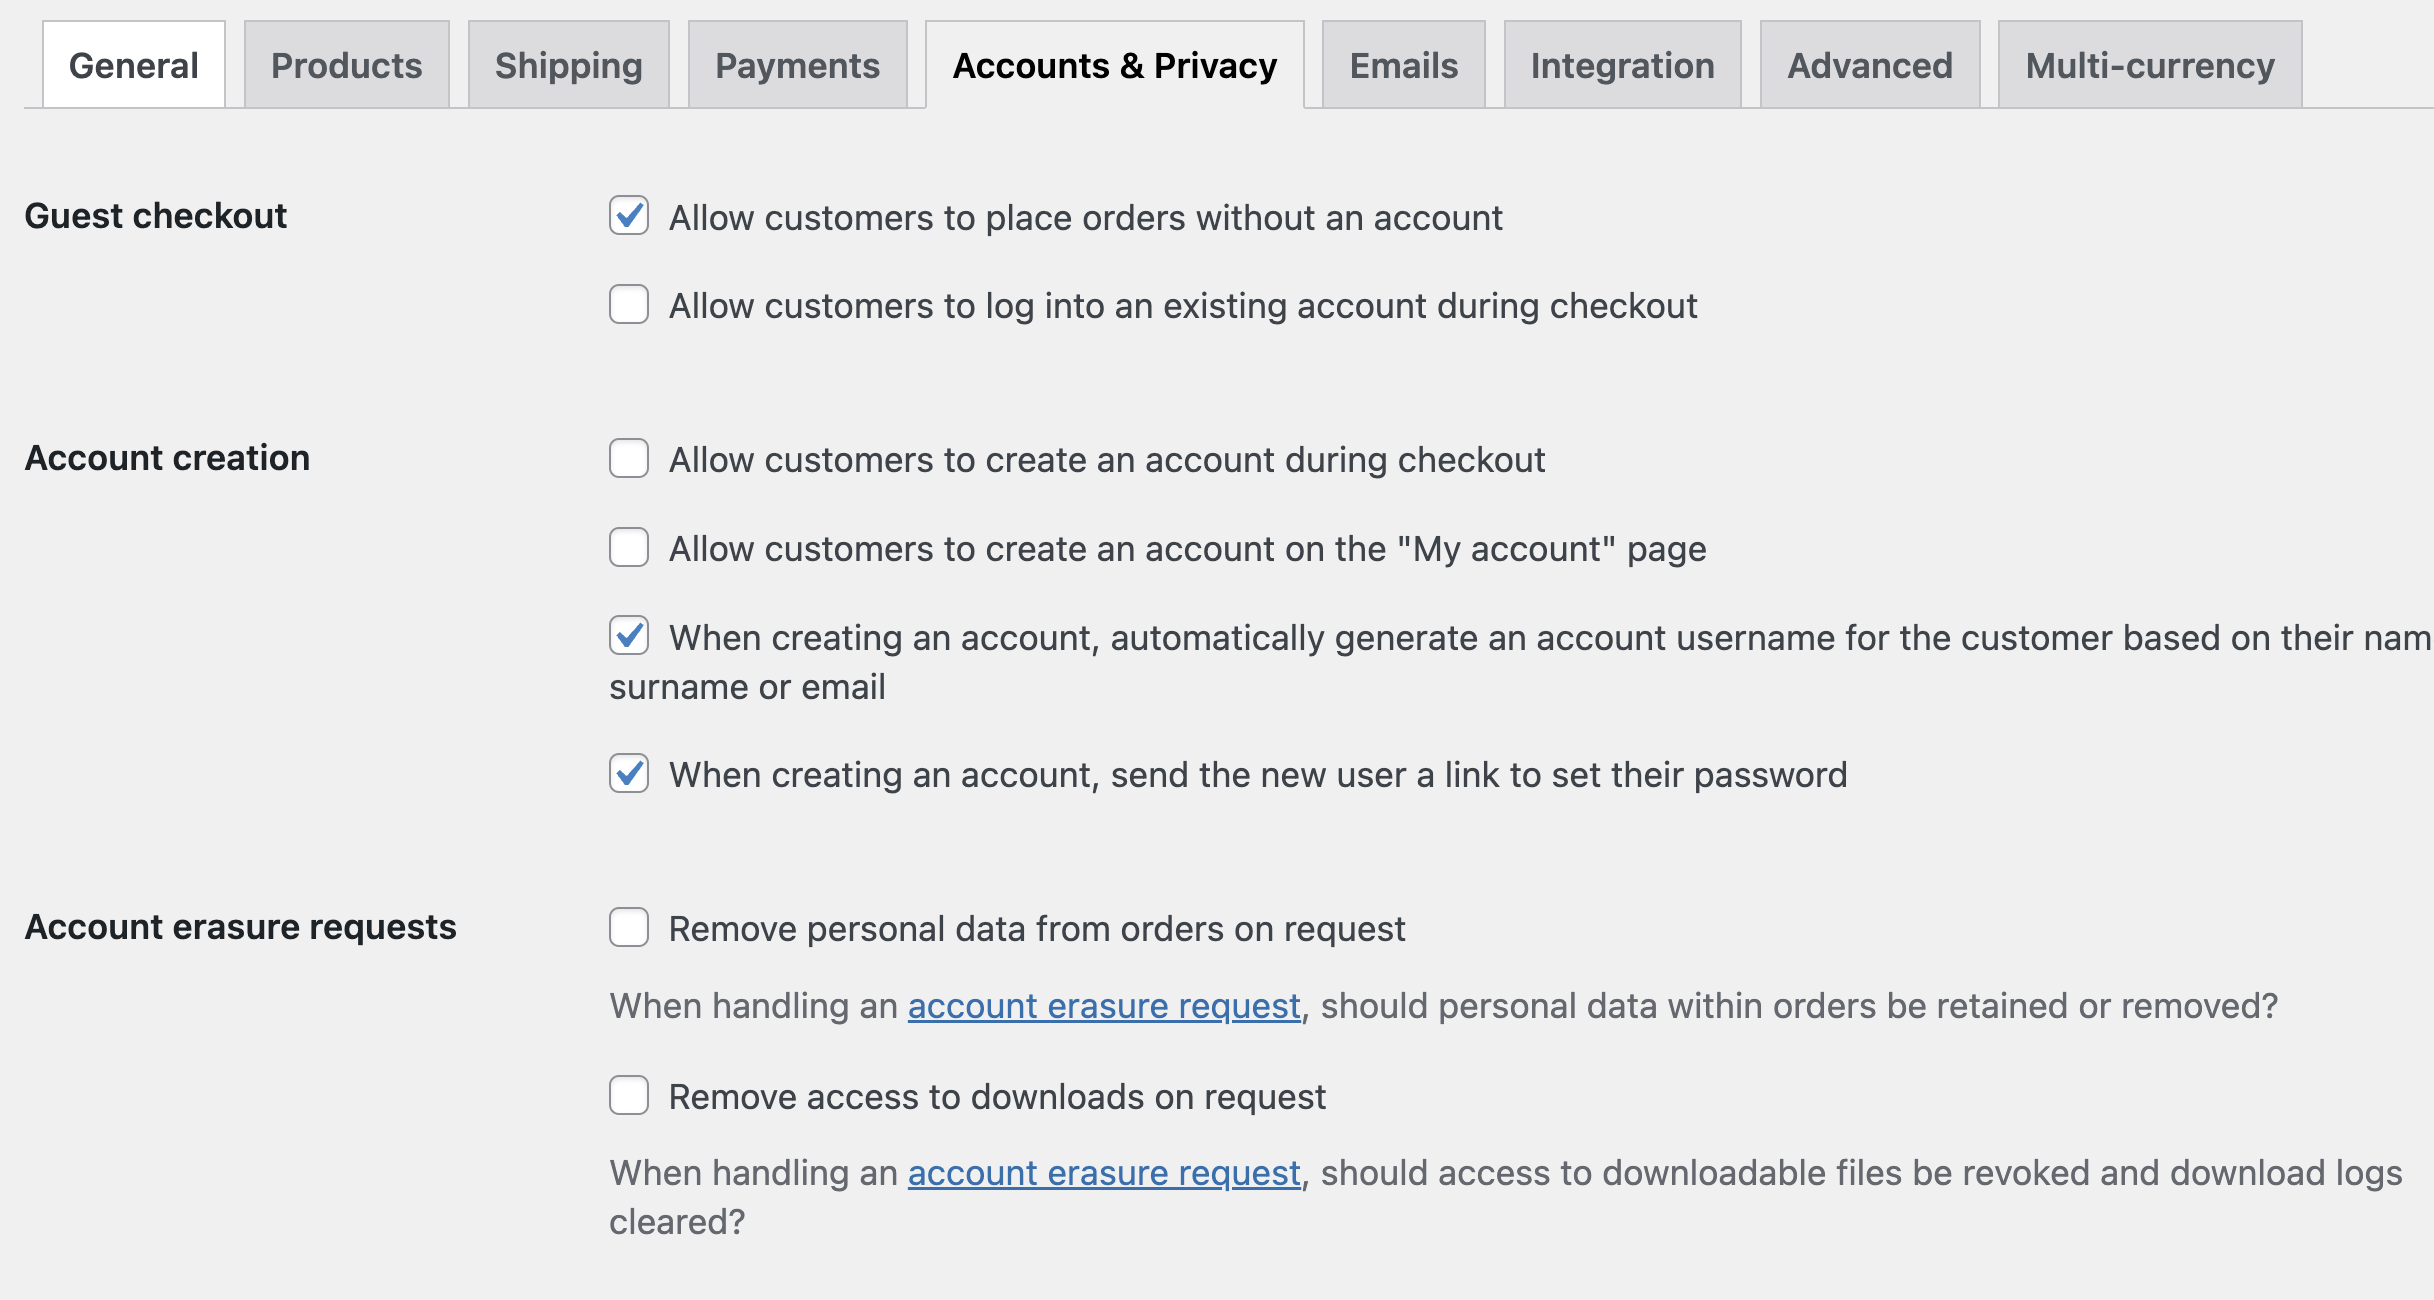
Accounts & Privacy
In this screen, you can configure the display of the “My Account” screen for the customer on the site (at the customer level) and the registration options. In this screen, you can also set the privacy statement page for your digital store.
Emails
In this section, you can configure the options for sending email upon purchase and even the display of the email that will be sent automatically as part of the registration and ordering process for customers on your site.
Additionally, you can customize the appearance of the email template that will be sent.

In this section, you can also manage how each type of email sent in the context of your store will look by clicking on the “Manage” button next to each type of email.
For example, if you want to change the title in the email sent to a customer who canceled an order, this is the place to do it.
Integration
WooCommerce allows you to automatically identify the geographic location of customers and display tax rates and shipping options accordingly. In this tab, you can enable MaxMind to perform the same identification based on geographic location.
An active MaxMind account is required to integrate this.
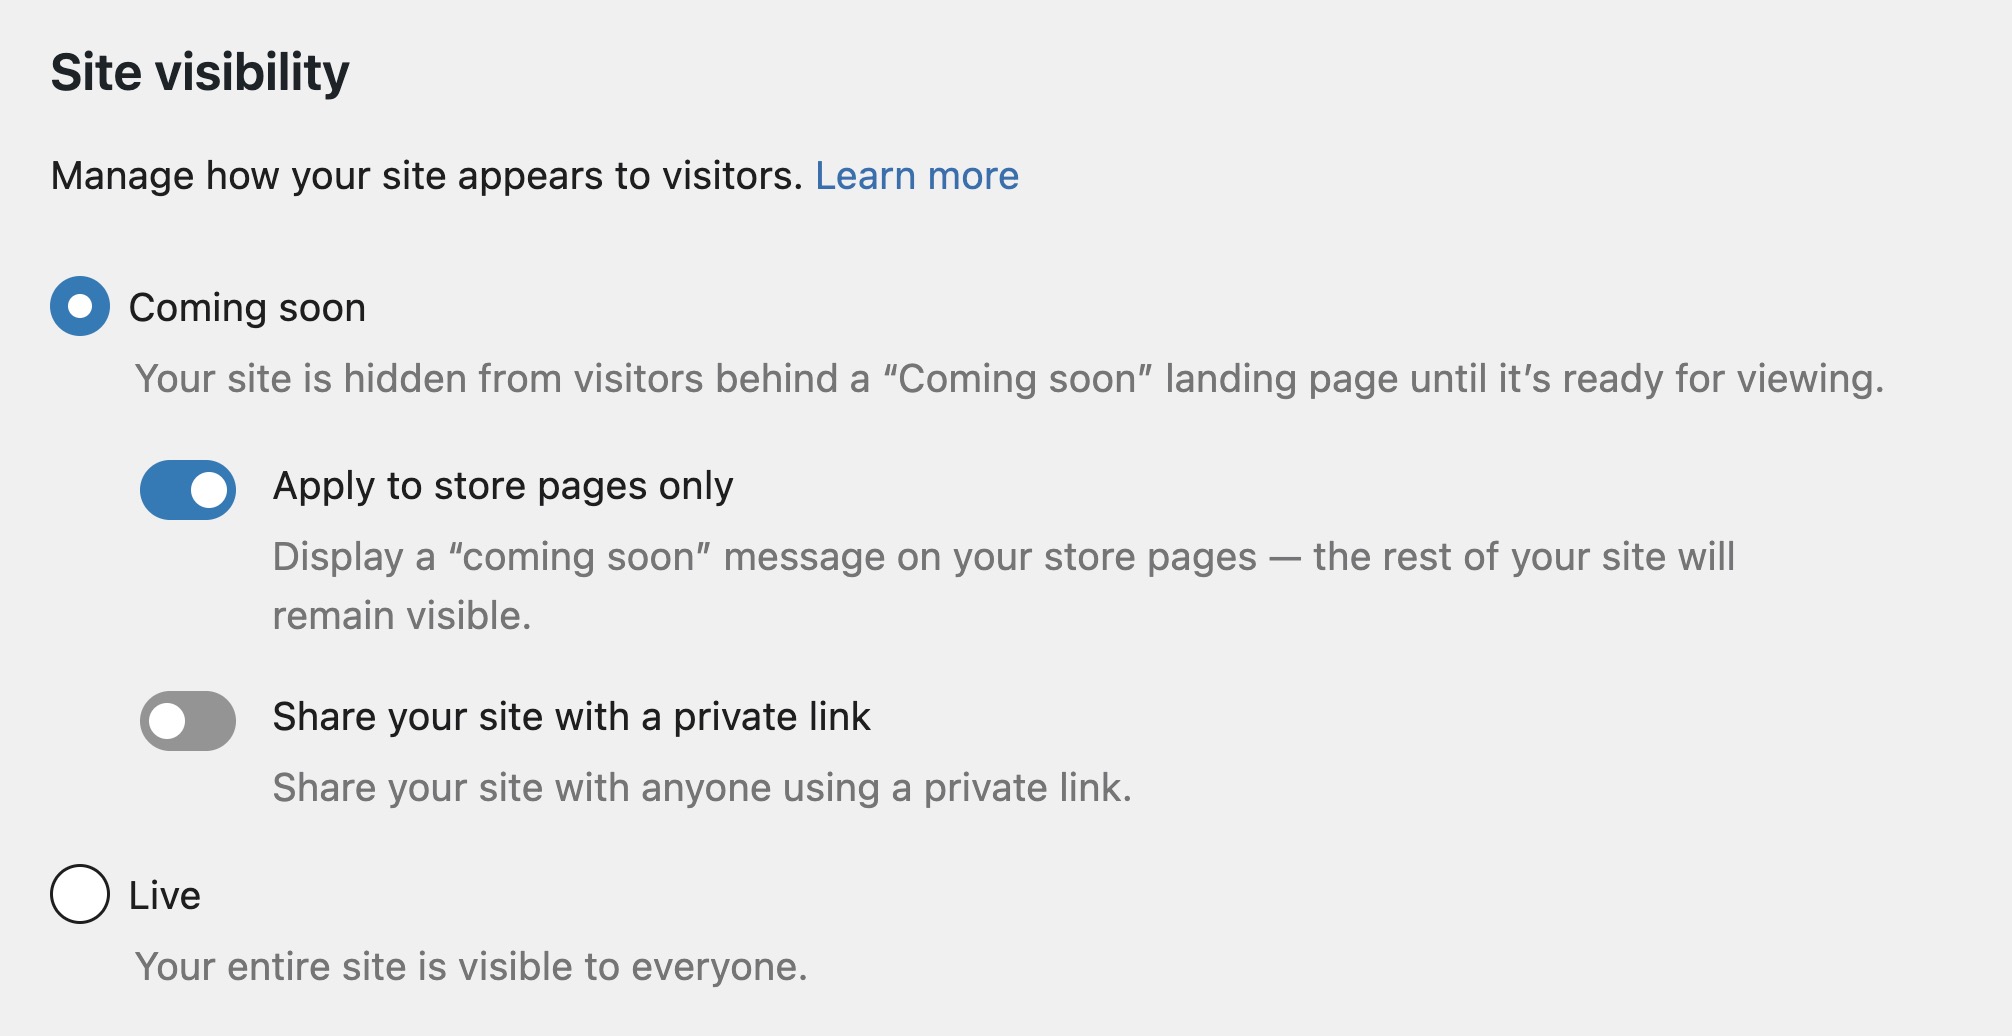
Site Visibility
In this tab, you can determine whether users will be able to view your site or if the site/store is in development mode. Selecting the option “Coming Soon” will display a message to users indicating that the site will soon be open and accessible. Additionally, you will see two options:
The first option is to hide only the store pages, and the second option allows you to share the site via a private link, so only those you send the link to can view the site. The default option is “Live“, which means that the site and store are accessible to all users.
Advanced
The last tab is called Advanced, which is also divided into several sub-tabs. In the Page Settings tab, you can define store pages if you haven’t defined them using the setup wizard.
This is also the place to define endpoints (beyond the scope of this guide, and if you don’t know what it is, it’s likely you don’t need it). In the REST API & WEBHOOKS tab, we won’t touch and it’s also beyond the scope of this guide.
System Status
All the “backend” settings of the system – WooCommerce/PHP/MySQL versions, PHP limits, and system logs, can be found in this section. Under the Tools tab on this page, you can clear the system cache, install pages, and restore WooCommerce settings to default.

Extensions
One of the reasons WordPress is the most popular content management system is the community behind it.
Thousands of themes and hundreds of thousands of plugins, with close to 100% of them developed by users. The same story with WooCommerce, just on a slightly smaller scale.
In this section, you’ll find many useful plugins for WooCommerce, which can be used to expand the capabilities and functionality of this system and your digital store.
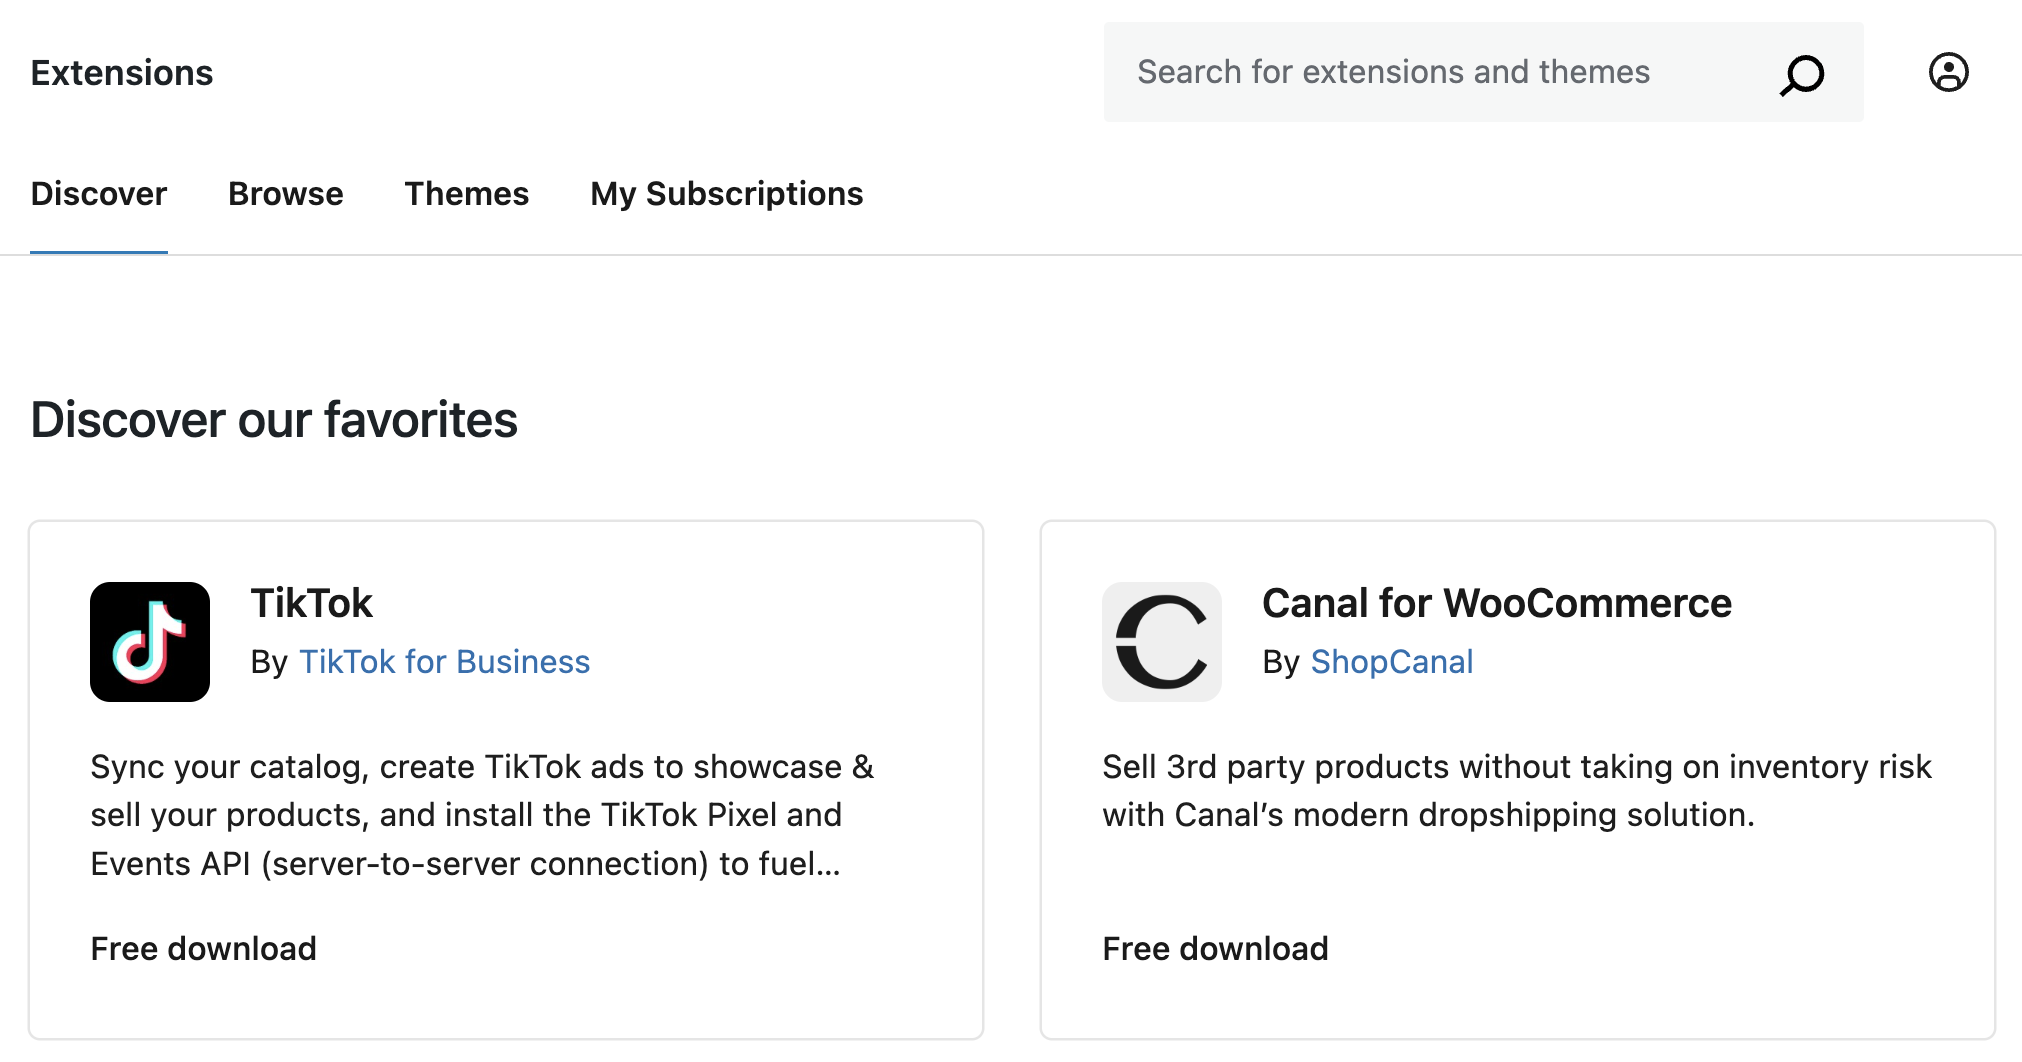
You can also browse and purchase extensions in the official WooCommerce Marketplace. In this store, you will find hundreds of plugins, themes, and specific design kits for WooCommerce.
FAQs
Common questions about WooCommerce:
In Conclusion
WooCommerce is undoubtedly the best solution for creating a digital store in WordPress. On the surface, it looks like a solid statistics plugin, but it’s only when you delve deeper into WooCommerce’s options that you can understand the amazing capabilities it holds.
I really hope that this guide provides you with a basic understanding of installing WooCommerce and its initial settings.
There’s a lot more to talk about in the context of this system; feel free to explore the category of WooCommerce and online stores to read more articles and guides on the topic.
Best of luck, and may the process be quick until your first product is sold 🙂 Thoughts and comments are welcome…