You can use the following filter for this:
add_filter( 'get_the_archive_title', function ($title) {
    if ( is_category() ) {
        $title = single_cat_title( '', false );
    } elseif ( is_tag() ) {
        $title = single_tag_title( '', false );
    } elseif ( is_author() ) {
        $title = '<span class="vcard">' . get_the_author() . '</span>' ;
    } elseif ( is_tax() ) { //for custom post types
        $title = sprintf( __( '%1$s' ), single_term_title( '', false ) );
    } elseif (is_post_type_archive()) {
        $title = post_type_archive_title( '', false );
    }
    return $title;
});
This uses the get_the_archive_title filter. Learn more in WordPress Hooks Explained.
The following snippet lets you check whether a specific post has embedded content. It works inside the loop using the post ID. Alternatively, you can pass any ID to check if that post contains embedded content.
<?php

function has_embed( $post_id = false ) {
	if( !$post_id ) $post_id = get_the_ID();
	else $post_id = absint( $post_id );
	if( !$post_id ) return false;

	$post_meta = get_post_custom_keys( $post_id );
	$post_meta = array_map( 'trim' , $post_meta );

	foreach( $post_meta as $meta ) {
		if( '_oembed' != substr( $meta , 0 , 7 ) )
			continue;
		return true;
	}
	return false;
}
Usage:
if( has_embed() ) {
   // do whatever
}
For more on embedded content, see Improving Loading Time of Embedded Videos.
The following snippet lets you add default content automatically to every new post of a given post type. Add to functions.php:
<?php
////////////////////////////////////////////////////////////////////////////////////
// This auto populates post types and posts.
///////////////////////////////////////////////////////////////////////////////////


function my_editor_content( $content ) {

	global $post_type;

	switch( $post_type ) {
		case 'your_post_type_here': //auto populate
			$content = 'The content you want to pre-populate the post type with.';
			break;
	}

	return $content;
}
add_filter( 'default_content', 'my_editor_content' );
For more on custom post types, see How to Create Custom Post Types.
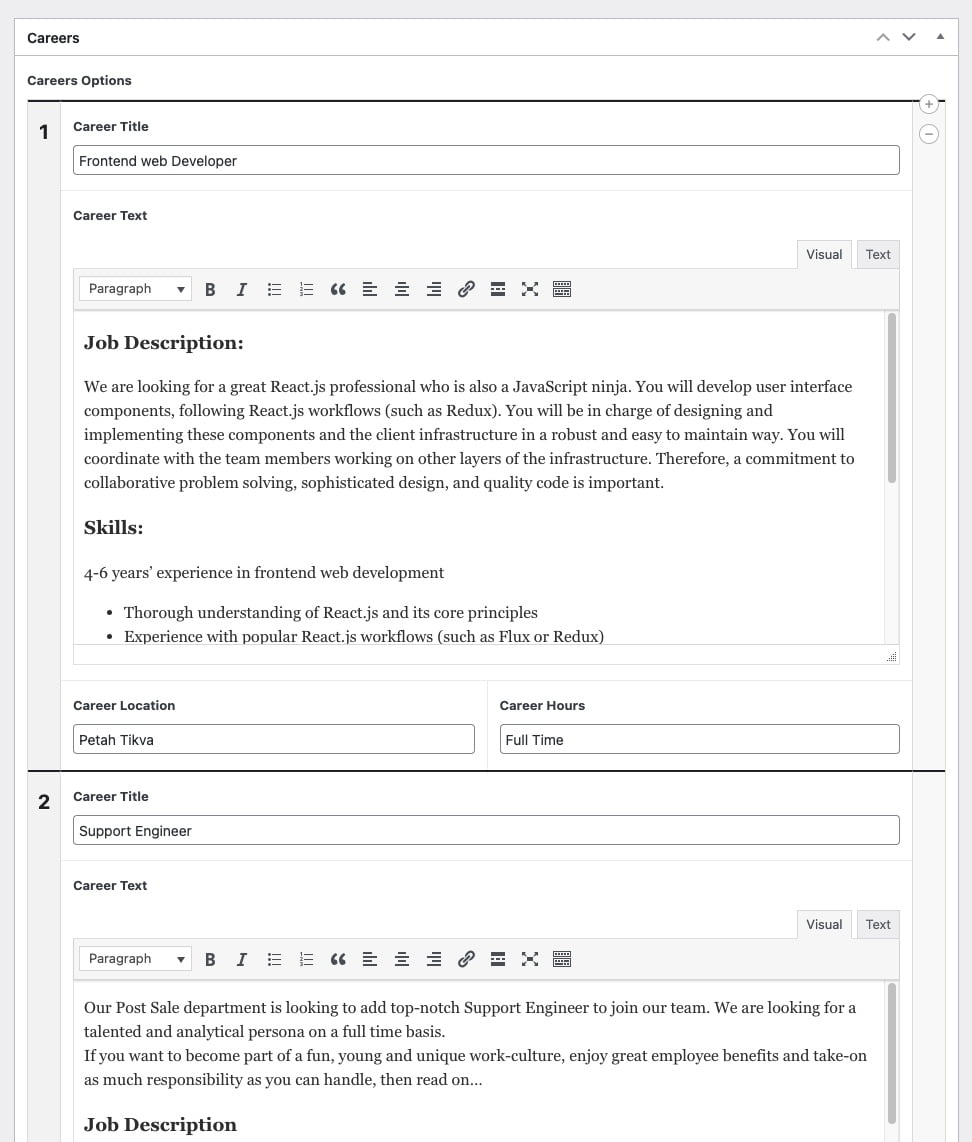
Here is how to add CSS to the ACF admin interface. In this case, we made Repeater Fields have clearer separation. Several other changes were made to improve the interface readability:
Note: Remove the opening PHP tag from the code…
<?php
function my_acf_admin_head() {t?>
    <style type="text/css">

        .acf-flexible-content .layout .acf-fc-layout-handle {
            background-color: #202428;
            color: #eee;
        }

        .acf-repeater.-row > table > tbody > tr > td,
        .acf-repeater.-block > table > tbody > tr > td {
            border-top: 2px solid #202428;
        }

        .acf-repeater .acf-row-handle {
            vertical-align: top !important;
            padding-top: 16px;
        }

        .acf-repeater .acf-row-handle span {
            font-size: 20px;
            font-weight: bold;
            color: #202428;
        }

        .imageUpload img {
            width: 75px;
        }

        .acf-repeater .acf-row-handle .acf-icon.-minus {
            top: 30px;
        }

    </style>
t<?php
}

add_action( 'acf/input/admin_head', 'my_acf_admin_head' );
And here is the result for the Repeater. Notice the separator line?
%22%20transform%3D%22translate(2.2%202.2)%20scale(4.46094)%22%20fill-opacity%3D%22.5%22%3E%3Cpath%20fill%3D%22%23cbcbcb%22%20d%3D%22M5%2068l128%2022-97%2049z%22%2F%3E%3Cellipse%20fill%3D%22%23c8c8c8%22%20cx%3D%2245%22%20cy%3D%22248%22%20rx%3D%2238%22%20ry%3D%2234%22%2F%3E%3Cellipse%20fill%3D%22%23fff%22%20cx%3D%22140%22%20cy%3D%22172%22%20rx%3D%22184%22%20ry%3D%2251%22%2F%3E%3Cellipse%20fill%3D%22%23fff%22%20rx%3D%221%22%20ry%3D%221%22%20transform%3D%22matrix(126.71922%201.99066%20-.7592%2048.32783%20143.7%2042.1)%22%2F%3E%3C%2Fg%3E%3C%2Fsvg%3E)
To change the styling of emails that WooCommerce sends, you can add inline CSS using the woocommerce_email_header hook. Add the following code to your functions.php file:
<?php
/**
 * WooCommerce
 * Add inline CSS to emails sent out
 */
function sv_add_css_to_woo_email() {
    echo '<style type="text/css">
             h1 {
                 text-align: center !important;
                 color: #DDD;
             }
         </style></pre>';
}
add_action( 'woocommerce_email_header', 'sv_add_css_to_woo_email' );
For more WooCommerce email customization, see Mastering WooCommerce Hooks.
To change the breadcrumb delimiter in WooCommerce, use the following filter:
function in_woocommerce_breadcrumb_defaults($args){
    $args['delimiter']   = ' | ';
    return $args;
}
add_filter('woocommerce_breadcrumb_defaults','in_woocommerce_breadcrumb_defaults');
In this case we replaced the slash with a vertical bar. Here are all the values you can change with this filter:
array(
   'delimiter'   => ' / ',
   'wrap_before' => '<nav class="woocommerce-breadcrumb">',
   'wrap_after'  => '</nav>',
   'before'      => '',
   'after'       => '',
   'home'        => _x( 'Home', 'breadcrumb', 'woocommerce' ),
)
WordPress lets you create an excerpt for posts by entering text in the excerpt box on the post edit screen. But excerpts are not available for pages, and there is no way to enable this through the WordPress admin.
If you want to add the excerpt box for pages too, add the following code to your theme’s functions.php file:
<?php

// START COPY FROM HERE
function add_excerpt_pages() {
    add_post_type_support('page', 'excerpt');
}
add_action('init', 'add_excerpt_pages');
After adding the code, edit a page and click “Screen options” in the top-left corner of the screen.
%27%20fill-opacity%3D%27.5%27%3E%3Cpath%20fill%3D%22%23fff%22%20fill-opacity%3D%22.5%22%20d%3D%22M523.8%20245.5l72.4-100.4%20247.5%2067.4-266-31.5zm-10-181.1L294%2079.7l-9.5-136.5L504.3-72zm-472%20213.1h98.8v136.8H41.8zM1562.1%20650l-296.4%2091.2%20228-205.3z%22%2F%3E%3C%2Fg%3E%3C%2Fsvg%3E "How to enable excerpt for pages in WordPress")
How to enable excerpt for pages in WordPress
Check the Excerpt box and you are done. You will now see an excerpt box for all pages on your site…
For safe theme customizations, see What Are Child Themes and How to Use Them.
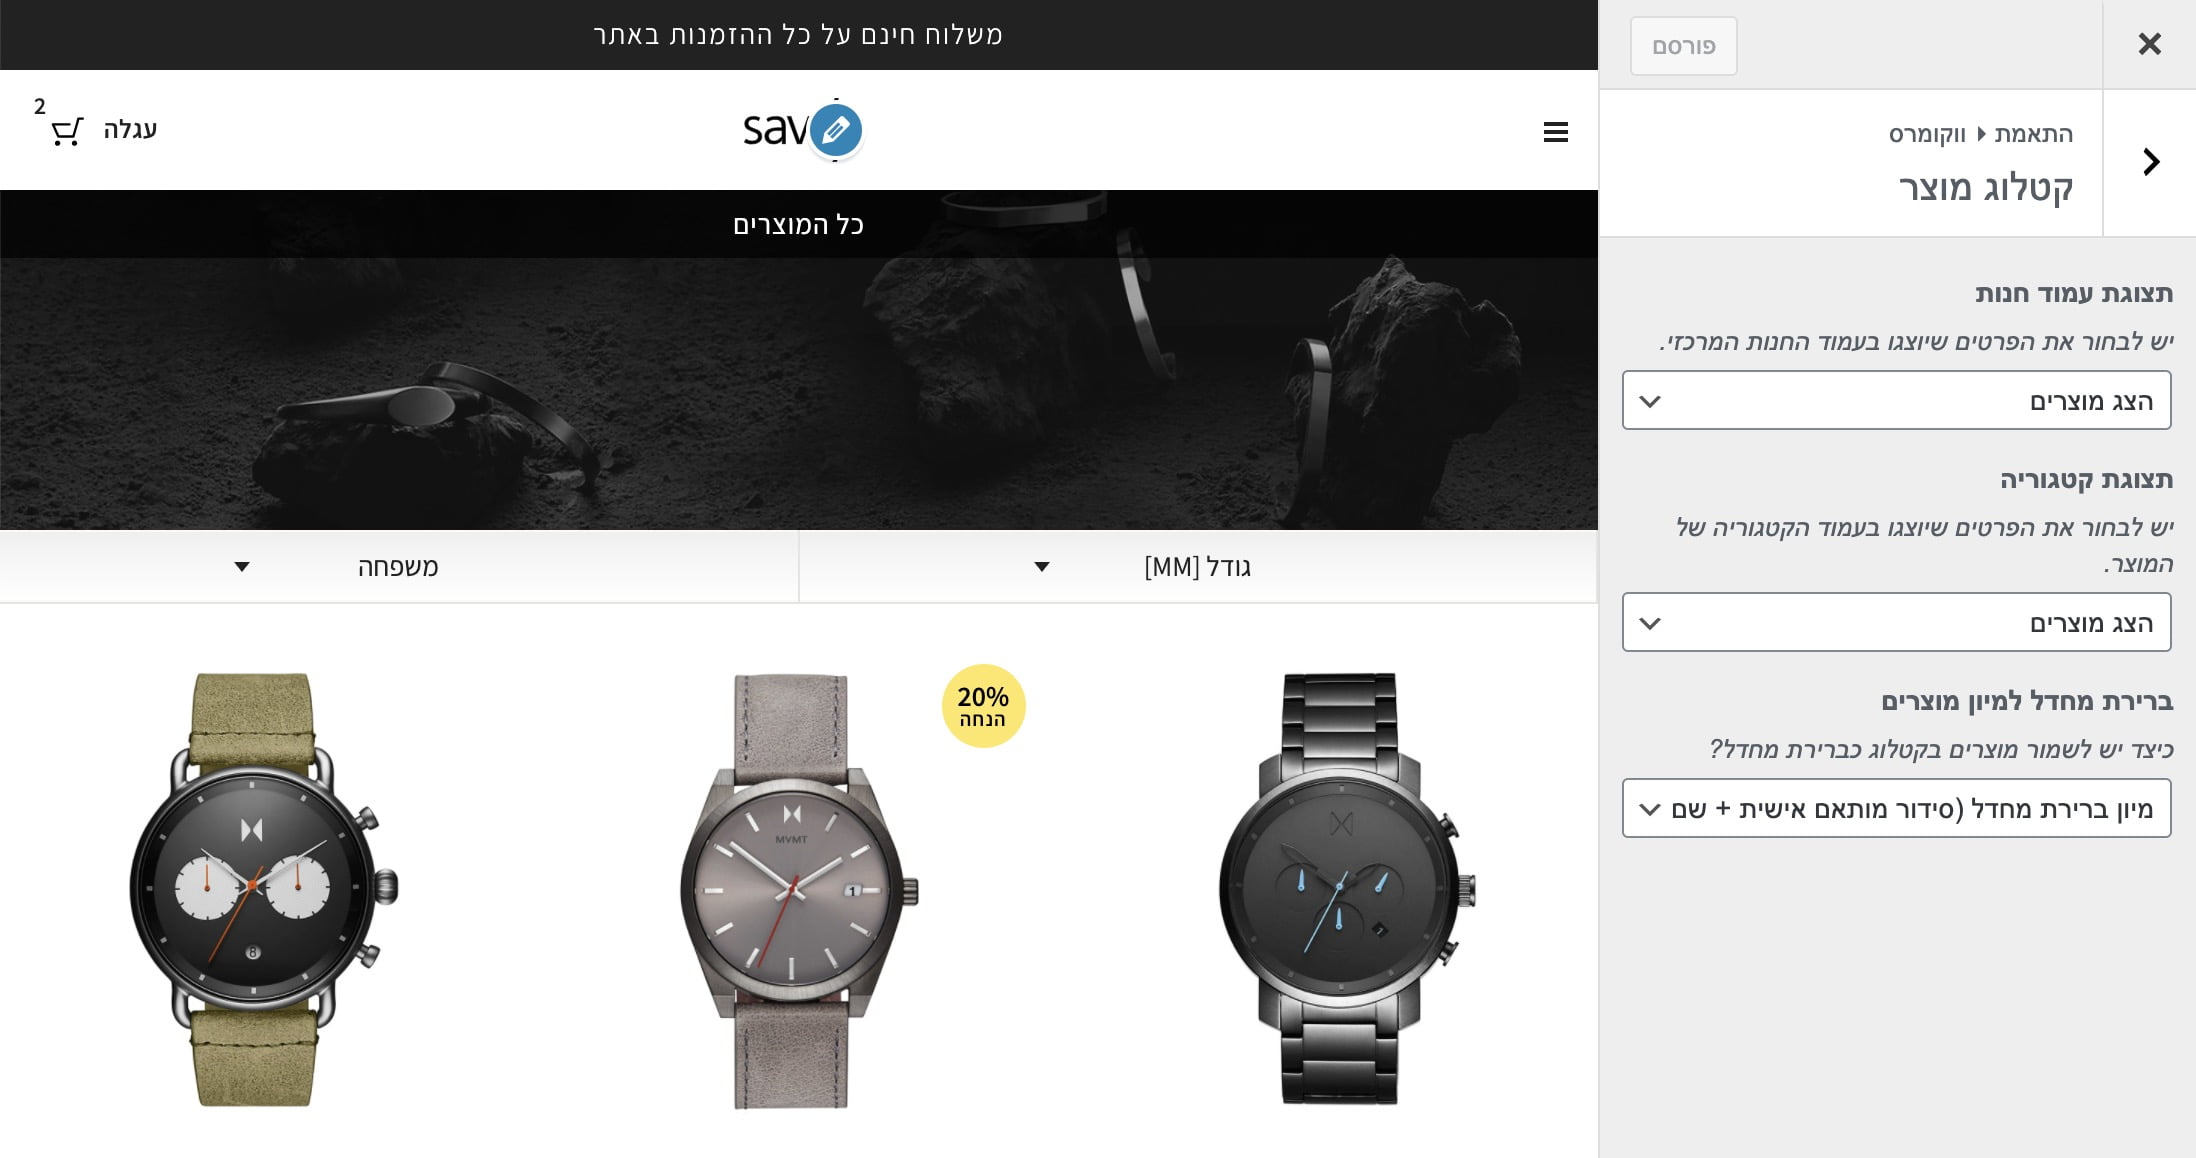
Use the following code to change the number of products WooCommerce displays per page. For this to work, make sure the “Products per page” option is selected in Customizer.
%27%20fill-opacity%3D%27.5%27%3E%3Cellipse%20fill%3D%22%23303030%22%20fill-opacity%3D%22.5%22%20rx%3D%221%22%20ry%3D%221%22%20transform%3D%22rotate(8.2%20-307.2%203247.5)%20scale(1047.96431%20457.09397)%22%2F%3E%3Cellipse%20fill%3D%22%23fdfdfd%22%20fill-opacity%3D%22.5%22%20rx%3D%221%22%20ry%3D%221%22%20transform%3D%22matrix(156.2035%20439.56778%20-2061.15016%20732.4442%201155%201090)%22%2F%3E%3Cellipse%20fill%3D%22%23fff%22%20fill-opacity%3D%22.5%22%20rx%3D%221%22%20ry%3D%221%22%20transform%3D%22matrix(-182.2831%20337.23423%20-284.35429%20-153.70024%202009.6%20124.8)%22%2F%3E%3Cellipse%20fill%3D%22%23919191%22%20fill-opacity%3D%22.5%22%20rx%3D%221%22%20ry%3D%221%22%20transform%3D%22matrix(-448.21247%2033.66252%20-17.4875%20-232.84402%201201.1%20569.7)%22%2F%3E%3C%2Fg%3E%3C%2Fsvg%3E)
Add this code to your theme’s functions.php file:
/**
 * Change number of products that are displayed per page (shop page)
 */
add_filter( 'loop_shop_per_page', 'new_loop_shop_per_page', 20 );

function new_loop_shop_per_page( $cols ) {
  // $cols contains the current number of products per page based on the value stored on Options –> Reading
  // Return the number of products you wanna show per page.
  $cols = 9;
  return $cols;
}
For more WooCommerce customization, see Mastering WooCommerce Hooks.
To completely disable WordPress search, add the following code to your theme’s functions.php file:
<?php function sv_filter_query($query, $error = true) {
    if (is_search()) {
        $query->is_search = false;
        $query->query_vars[s] = false;
        $query->query[s] = false;
        if ($error == true)
            $query->is_404 = true;
    }
}

add_action('parse_query', 'sv_filter_query');
add_filter('get_search_form', create_function('$a', "return null;"));

function remove_search_widget() {
    unregister_widget('WP_Widget_Search');
}

add_action('widgets_init', 'remove_search_widget');
Ever wondered how to limit search results to a specific Custom Post Type? It is simple. We have already seen how to completely disable WordPress search by modifying functions.php. Now we will do something similar to filter our search results.
Add the following code to your functions.php file:
function sv_search_filter($query) {

    if ($query->is_search && !is_admin() ) {
        $query->set('post_type',array('post','page'));
    }

return $query;
}

add_filter('pre_get_posts','sv_search_filter');
Note this line:
$query->set('post_type',array('post','page'));
You can filter search results by changing the values in that array. Search results will now show only pages and posts, but you can change this array to include any post type you want.