These functions, if you are not familiar, create links to the previous and next post. They have many options but not one that lets you add a class to the link. If you want to do that, add the following code to your functions.php file:
add_filter('next_posts_link_attributes', 'posts_link_attributes');
add_filter('previous_posts_link_attributes', 'posts_link_attributes');

function posts_link_attributes() {
  return 'class="styled-button"';
}
For more on pagination, see Add Pagination to WordPress Templates.
The simplest way to change the post order on the page that uses the archive.php file is to use the pre_get_posts hook. In this case you should make sure the query is the one you want to apply the change to.
Using the is_archive or is_post_type_archive condition should work in this case. Here is an example:
function sv_change_sort_order($query){
    if(is_archive()):
        //If you wanted it for the archive of a custom post type use: is_post_type_archive( $post_type )
        //Set the order ASC or DESC
        $query->set( 'order', 'ASC' );
        //Set the orderby
        $query->set( 'orderby', 'title' );
    endif;
}
add_action( 'pre_get_posts', 'sv_change_sort_order');
You may want to learn more about the WordPress template hierarchy if you are not sure what this means.
Alternatively, if you prefer a graphical way to manage the order, you can use the dedicated plugin – reordering custom post types in WordPress which offers a drag-and-drop interface directly in the dashboard.
By default WordPress uses the "s" parameter as the query string to perform a site search. In some cases you may want to change this parameter to a different string. You can do this easily with the following function:
function change_search_url_rewrite() {
    if ( is_search() && ! empty( $_GET['s'] ) ) {
        wp_redirect( home_url( "/search/" ) . urlencode( get_query_var( 's' ) ) );
        exit();
    }
}
add_action( 'template_redirect', 'change_search_url_rewrite' );
After adding this function, the search URL will be search/test instead of ?s=test
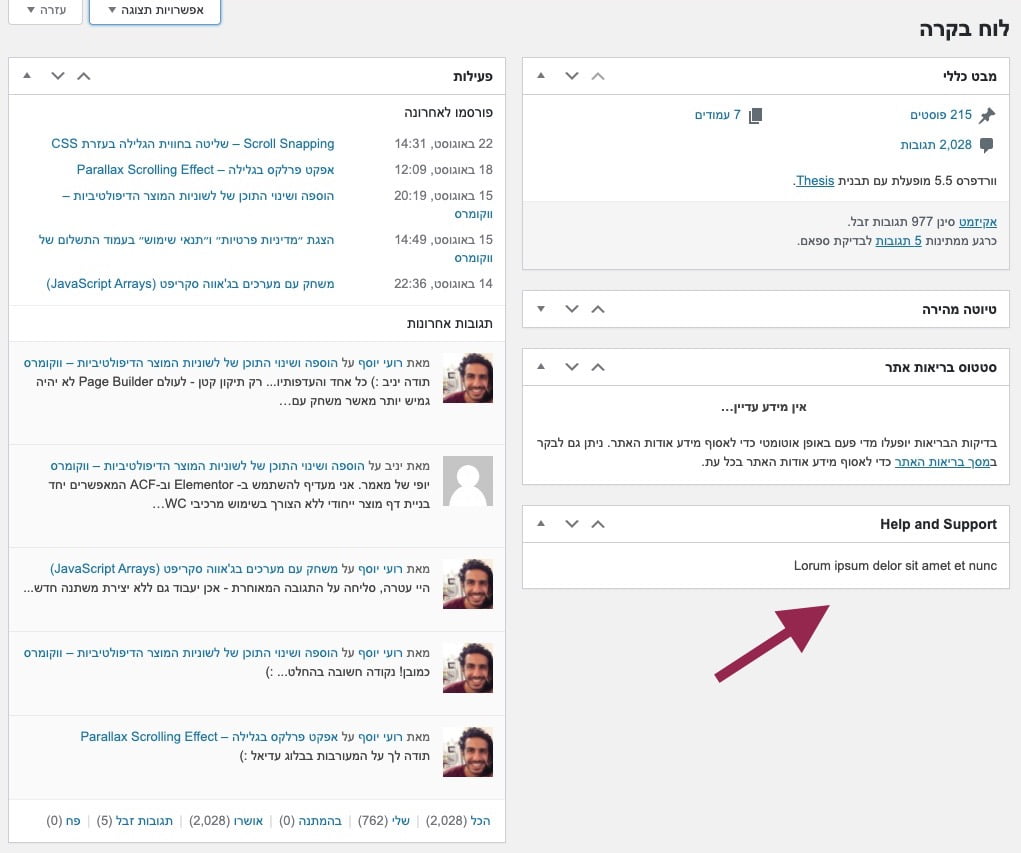
The following code adds a new widget to the WordPress Dashboard. You can of course set what content appears in this widget. Add this code to your theme’s functions.php file:
add_action('wp_dashboard_setup', 'my_custom_dashboard_widgets');

function my_custom_dashboard_widgets() {
    wp_add_dashboard_widget('custom_help_widget', 'Help and Support', 'custom_dashboard_help');
}

function custom_dashboard_help() {
    echo '<p>Lorum ipsum delor sit amet et nunc</p>';
}
It looks like this:
%22%20transform%3D%22translate(2%202)%20scale(3.98828)%22%20fill-opacity%3D%22.5%22%3E%3Cellipse%20fill%3D%22%23d0d0d0%22%20rx%3D%221%22%20ry%3D%221%22%20transform%3D%22matrix(40.34734%20-12.14879%2027.26829%2090.56075%20111.6%20167.7)%22%2F%3E%3Cellipse%20fill%3D%22%23d1d1d1%22%20rx%3D%221%22%20ry%3D%221%22%20transform%3D%22rotate(-42.4%20296.6%20-197.4)%20scale(66.62459%2027.53765)%22%2F%3E%3Cellipse%20fill%3D%22%23fff%22%20cx%3D%2294%22%20rx%3D%22137%22%20ry%3D%22137%22%2F%3E%3Cellipse%20fill%3D%22%23d1d1d1%22%20rx%3D%221%22%20ry%3D%221%22%20transform%3D%22rotate(-137.3%2069.8%2037.5)%20scale(32.19295%2038.92402)%22%2F%3E%3C%2Fg%3E%3C%2Fsvg%3E)
For safe theme customizations, see What Are Child Themes and How to Use Them.
I want to delay publishing to the RSS feed by 10-15 minutes because I always find a few errors after publishing. Another scenario is when you want your site content to be exclusive for a while and not appear in the RSS feed.
// Delay feed update
function publish_later_on_feed($where) {
    global $wpdb;

    if (is_feed()) {
        // Timestamp in WordPress format
        $now = gmdate('Y-m-d H:i:s');

        // Value for wait; + device
        $wait = '10'; // integer

        // http://dev.mysql.com/doc/refman/5.0/en/date-and-time-functions.html#function_timestampdiff
        $device = 'MINUTE'; // MINUTE, HOUR, DAY, WEEK, MONTH, YEAR

        // Add SQL syntax to default $where
        $where .= " AND TIMESTAMPDIFF($device, $wpdb->posts.post_date_gmt, '$now') > $wait ";
    }
    return $where;
}
add_filter('posts_where', 'publish_later_on_feed');
For more RSS management, see Disable RSS Feeds in WordPress.
To add Custom Post Types to the site’s main RSS feed by default, add the following code to your theme’s functions.php file:
// ADD CUSTOM POST TYPES TO THE DEFAULT RSS FEED
function custom_feed_request( $vars ) {
 if (isset($vars['feed']) && !isset($vars['post_type']))
  $vars['post_type'] = array( 'post', 'site', 'plugin', 'theme', 'person' );
 return $vars;
}
add_filter( 'request', 'custom_feed_request' );
When you upload an image using WordPress media and then insert it into the content editor, the image is attached with width and height attributes. These attributes are generally desirable because they help the browser reserve the right space for the image during layout.
But if you want to prevent WordPress from adding these width and height attributes, add the following code to your theme’s functions.php file:
add_filter( 'post_thumbnail_html', 'remove_width_attribute', 10 );
add_filter( 'image_send_to_editor', 'remove_width_attribute', 10 );

function remove_width_attribute( $html ) {
   $html = preg_replace( '/(width|height)="d*"s/', "", $html );
   return $html;
}
Here is a simple way to redirect a user to a specific page when they remove a WooCommerce coupon from the cart page. Useful for example if you want to show content to users who remove a coupon that was automatically added to the cart. Here is how:
/*
 * Redirects user to a specific page upon coupon removal.
 */
function action_woocommerce_removed_coupon( $coupon_code ) {
    // Redirection...
    wp_redirect( $url ); // Replace $url by your page URL.
    exit;
};

// add the action
add_action( 'woocommerce_removed_coupon', 'action_woocommerce_removed_coupon', 10, 1 );
Here is a quick way to disable the Lightbox in WooCommerce 3.0 and above. Add the following code to your functions.php file:
add_action( 'after_setup_theme', 'remove_wc_gallery_lightbox', 100 );

function remove_wc_gallery_lightbox() {
  remove_theme_support( 'wc-product-gallery-lightbox' );
}
For more WooCommerce customization, see Mastering WooCommerce Hooks.
In some cases you may want to hide the scrollbars that appear on an element while still allowing the user to scroll. You can do this with the following CSS when the class .element is the element you want to hide scrollbars for:
.element::-webkit-scrollbar {
    width: 0;
    height: 0
}

.element {
   scrollbar-width: none;
}
Say you want to hide the scrollbars that appear for the <html> tag. You can do this with the following CSS:
::-webkit-scrollbar {
    width: 0;
    height: 0
}

html {
   scrollbar-width: none;
}
Note: This will not work in Safari and likely not in Internet Explorer.
For more scrollbar customization, see Style Scrollbars Using CSS.