It’s difficult to describe the excitement I felt when I discovered the wonders of the plugin Advanced Custom Fields, or by its short name, ACF.
Here’s a brief introduction – when I first started with WordPress, I had to make do with the default content types like posts and pages. To divide these content types, I relied on categories & tags provided by WordPress.
It didn’t take long for me to understand how to create Custom Post Types and to generate my own taxonomies. These made my life much easier. However, even with these, I still felt quite limited in many aspects.
I really wanted the ability to enhance posts and pages beyond the standard title + content + excerpt + image usage. I wanted to add new fields to these posts and display their content on the website for users.
For example, to display events I needed fields to accommodate date and time, and to display employees I needed fields like name, email, position, and so on.
And at this point, enters the beloved ACF plugin…
Say Hello to ACF
ACF, which stands for “Advanced Custom Fields,” allows us to add new content fields in the WordPress editing screens. These fields are called Custom Fields in WordPress terminology, and they allow you to build WordPress sites more quickly, enabling clients to add and edit content more conveniently.
ACF lets you add new fields through an intuitive and user-friendly interface, and clients can manage these fields easily without needing special explanations. So, creating new fields takes WordPress one step forward and expands the system’s capabilities.
ACF has a free version with over 30 field types and a Pro version that adds premium fields like Repeater, Flexible Content, Gallery, and ACF Blocks for creating custom Gutenberg blocks. The free version is powerful enough for most use cases covered in this guide.
Appendix – Why not use dedicated plugins?
One solution to create new content types with their own fields is using plugins like Events Calendar for events, Meet the Team for team members, and similar plugins.
This solution works well for many, it’s fairly straightforward, and you can see results quickly during site development. However, I’ve never been a fan of excessive plugin use (for Frontend) for a number of reasons.
Firstly, nearly every plugin you add to the system will have a negative impact on site speed. In most cases, every plugin you install will load its own CSS and JavaScript files that will be added to your site’s pages.
Another reason is that it’s reasonable to assume that the HTML and styling the plugin generates (and the visitor sees) may not visually match your template’s style or the design requirement you’ve received (especially in the case of certain Premium themes tailored to display specific plugins).
Therefore, either your site will look visually disjointed, or you’ll need to invest quite a bit of effort to write CSS and adapt the display of those plugins to match your template.
The Foundation of ACF
Those Custom Fields functionality already exists in WordPress by default and is present in pages, posts, and custom content types. However, those fields in their default form are not very user-friendly.
Once the ACF plugin is installed, you have the ability to “craft” and decide for yourself which fields will be displayed and how they will look.
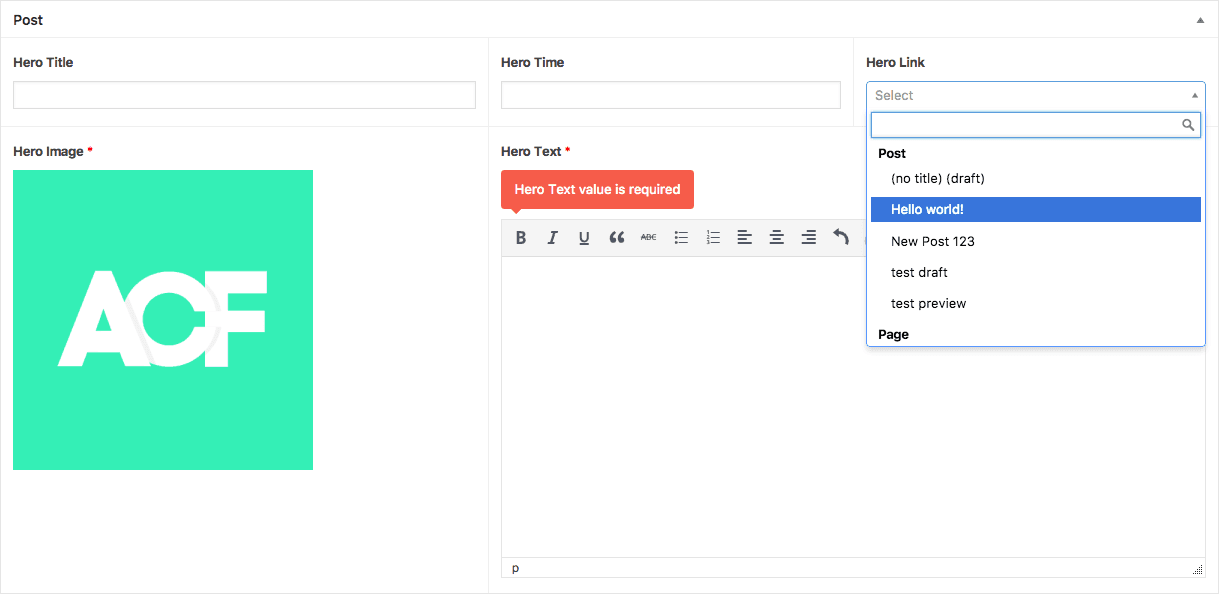
For instance, you might want the option to choose a background image for the top part of your homepage. Using ACF, you can easily create an Image Field and display it when editing the homepage.
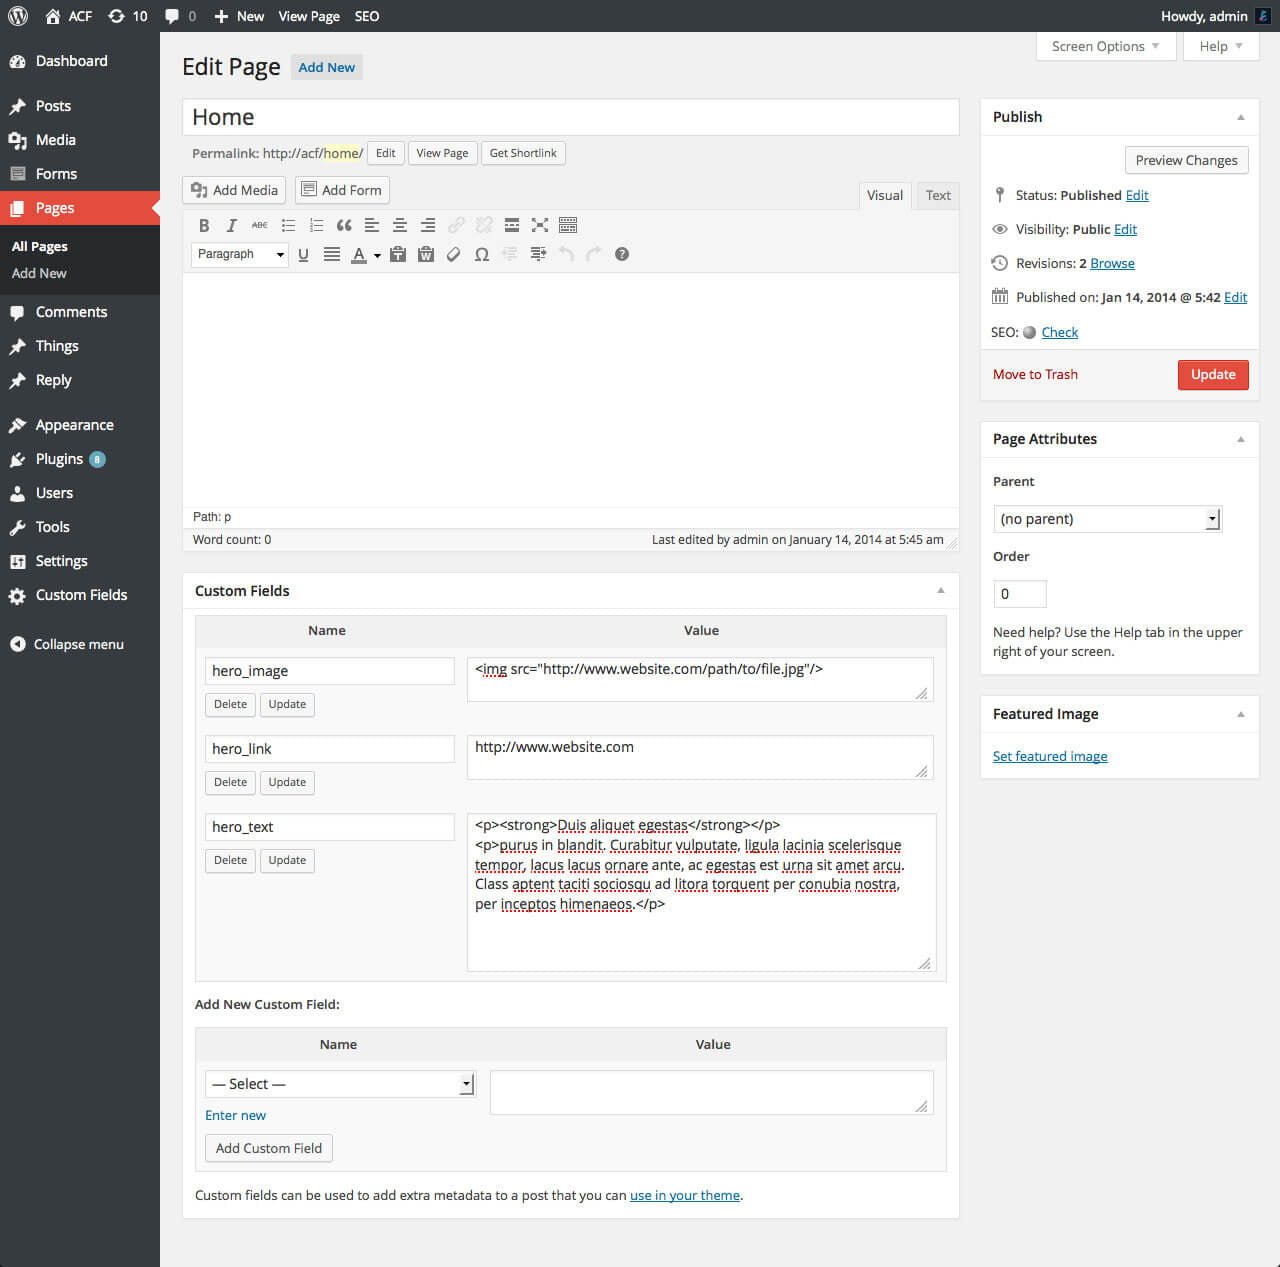
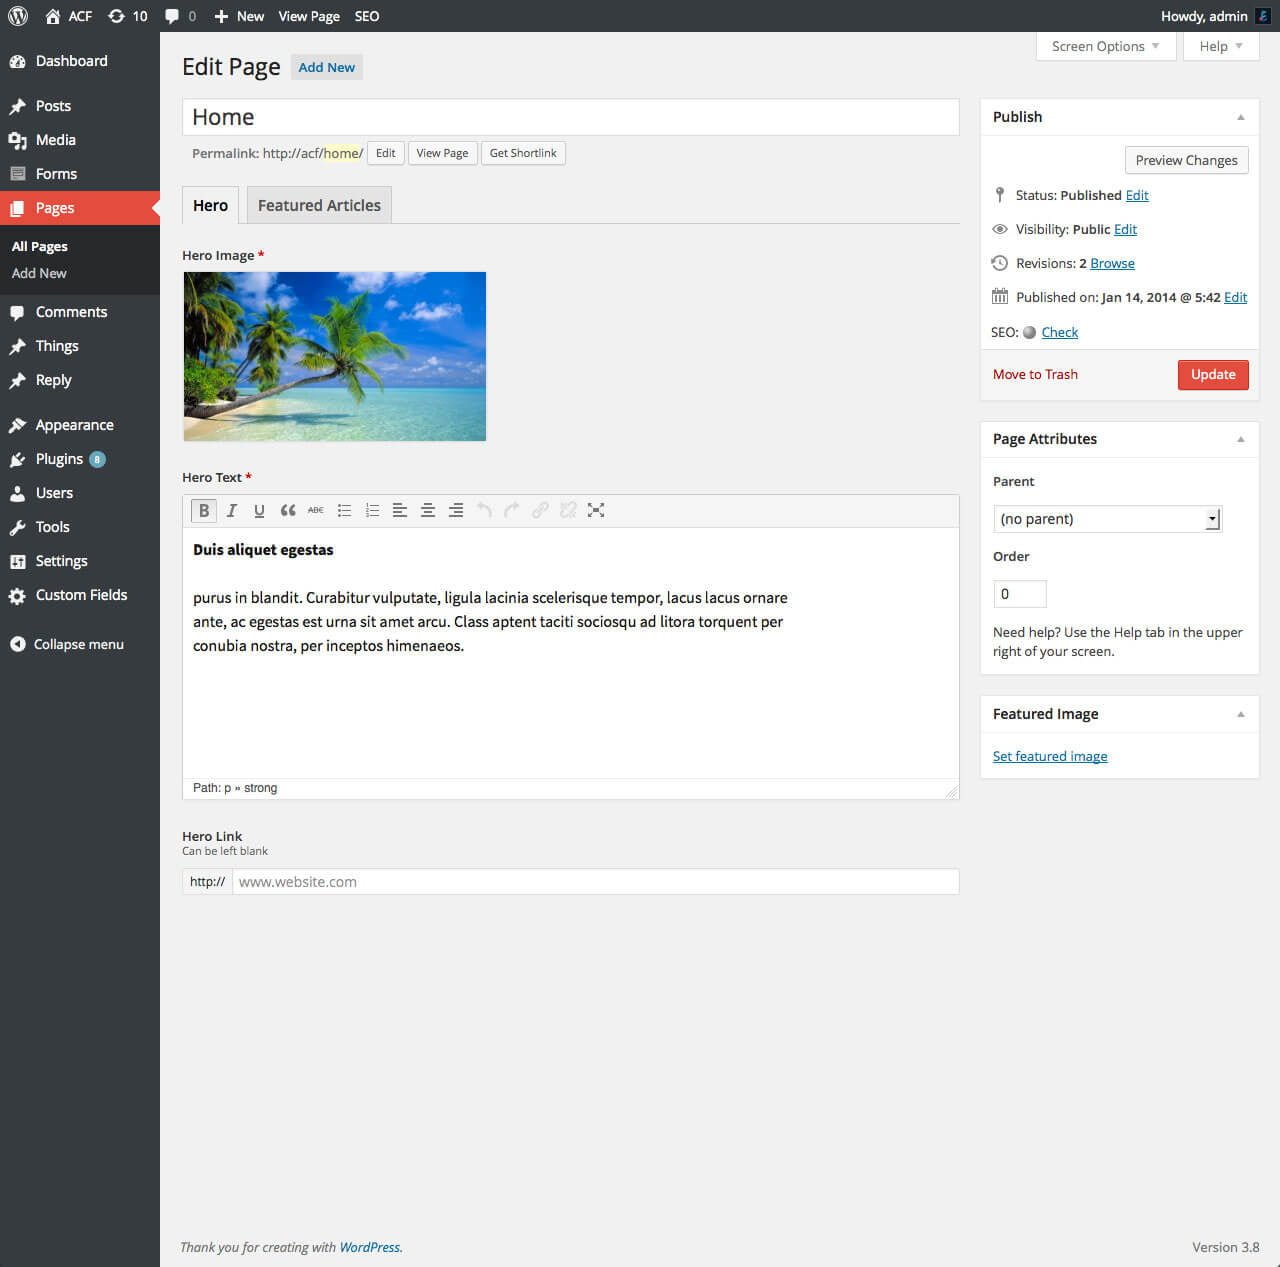
Here are images representing the differences between the default customized fields that come with WordPress (right) and the fields from the Advanced Custom Fields plugin (left):
Let’s see how to install and work with the Advanced Custom Fields plugin…
ACF is one of the best plugins for custom fields in the market, but feel free to explore some alternatives in the attached link.
Installing the ACF Plugin
Installing the plugin is done like any other WordPress plugin. Go to Plugins > Add New and search for Advanced Custom Fields:
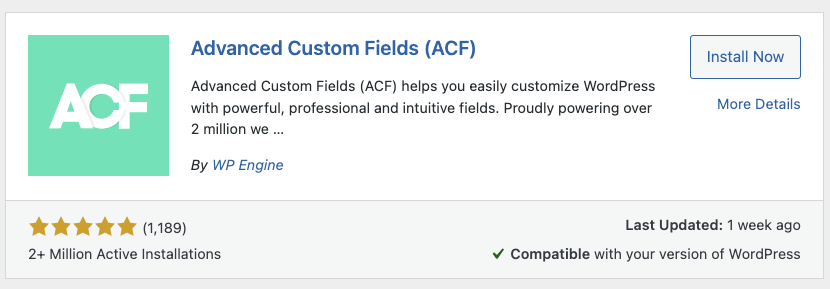
The plugin has over two million active installations and a 5-star rating, and rightfully so. It’s an excellent plugin with many add-ons that extend its capabilities. Let’s see how to use it.
Adding a Fields Group in ACF
After installing the plugin, you’ll notice a new tab in the WordPress dashboard called ACF. Go to this screen and click Add New to create a new fields group.
Choose a title for the fields group, then add two different fields by clicking “Add Field“. For the purpose of this guide, let’s say you want to add a Call to Action (CTA) element to each post on the site.
Create a new Text Field for the CTA’s text. This field will be of type “text” and have an identifier cta_text. The field label can be whatever you choose. Here’s how it might look:

We won’t cover all the existing options for each field in this guide, so leave them as they are.
Then create an Image Field for the CTA’s image. It will be of type “image” and have an identifier cta_image. Note that in this field, you can set the Return Value. Let’s set it as an Image Array for this guide:
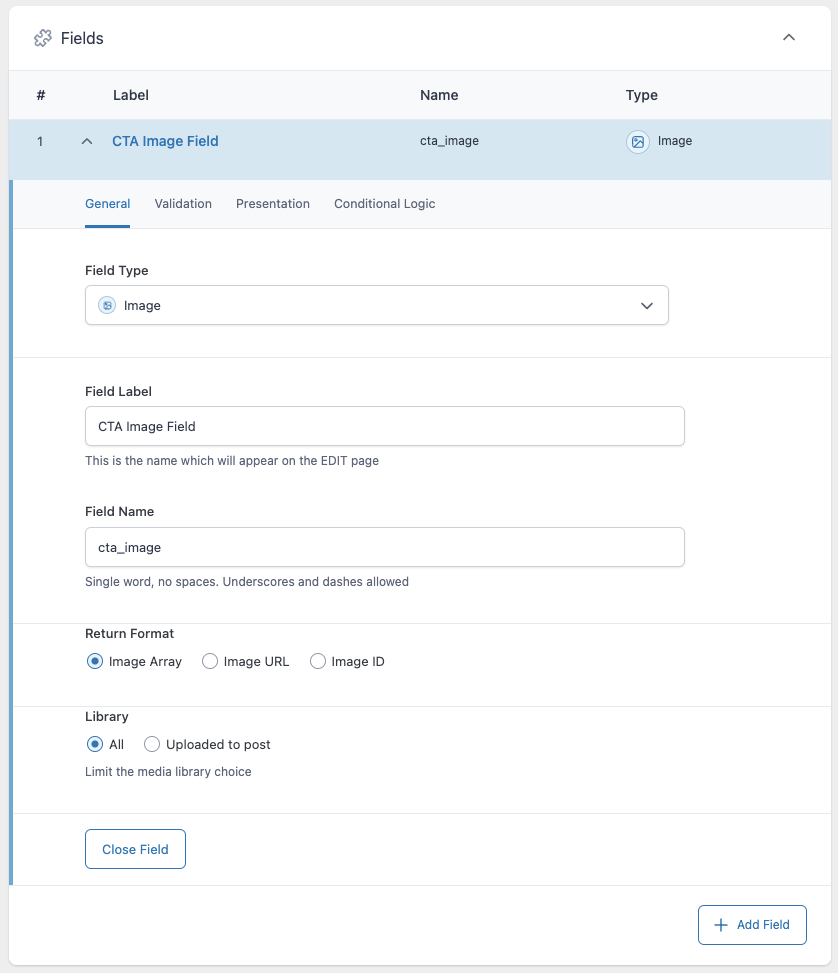
Now, after adding the fields and clicking Update, you’ll see something like this:

Adding a condition to determine where the fields will be displayed in the WordPress admin interface
Now, let’s add a condition that states these fields will be displayed only in the edit screen of standard post types. Under the fields we created, you’ll see a section named “Rules”.
Set a rule that specifies these fields will appear only when editing a standard post type. Of course, you can set any conditions you like, whether they’re for pages, taxonomies, categories, or many other options:

Click on Update to complete the field group settings. If you navigate to edit any post screen at the moment, you will find that both fields appear on the screen as shown in the following image:
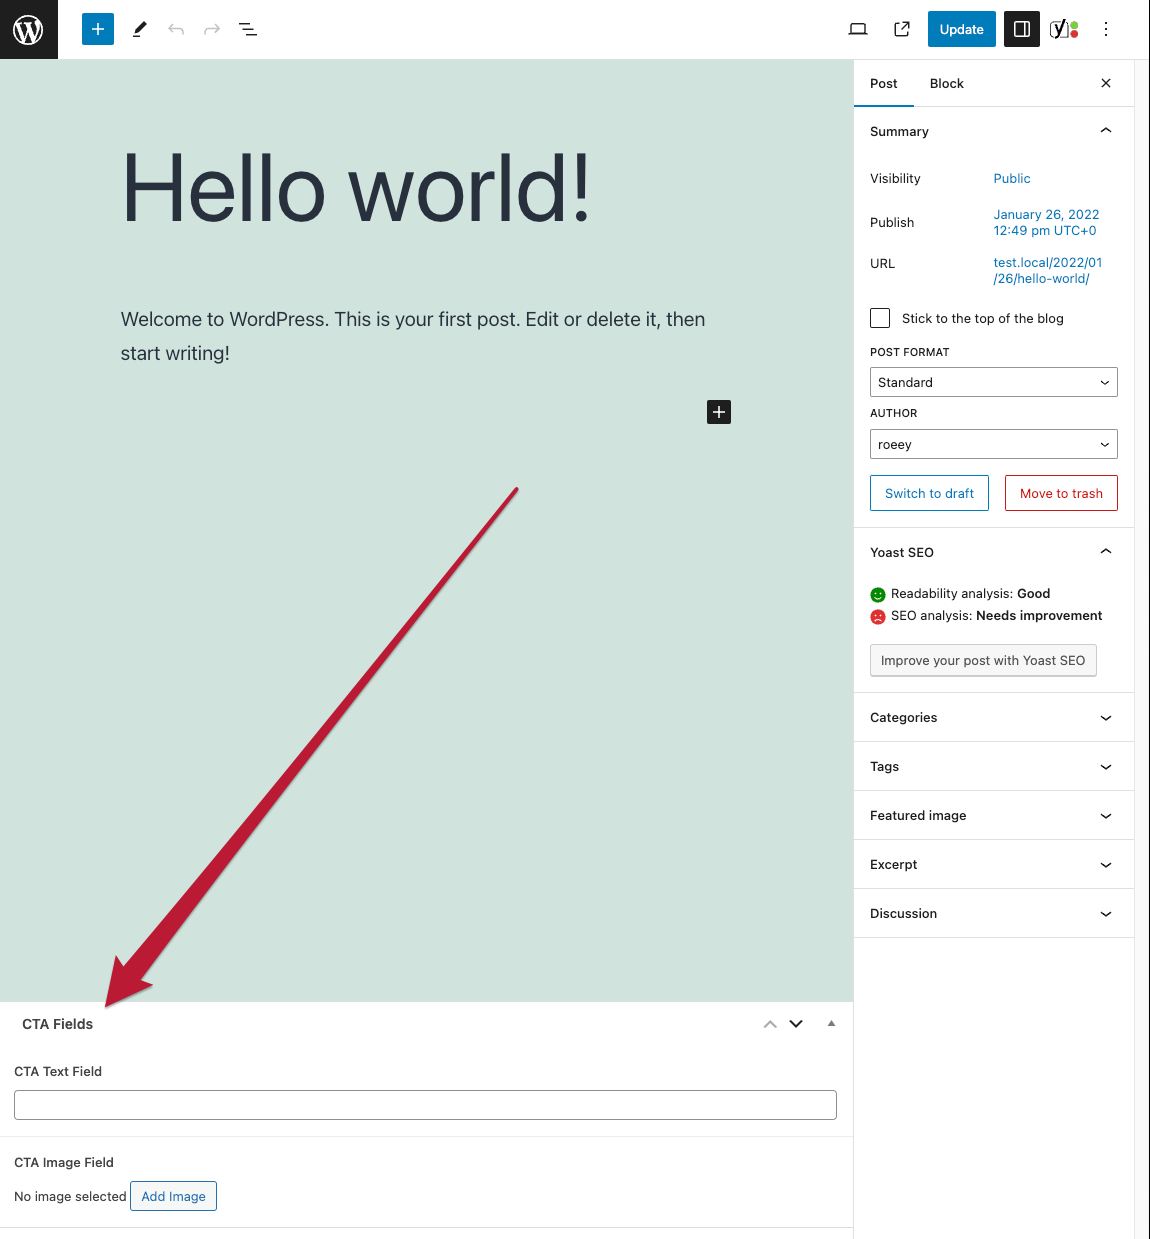
All you have to do is add content to these fields and display them in the template. But how do we display the values of these fields in the template? Let’s take a look at how to do that…
The ACF the_field Function
The function the_field() is quite versatile and can be used to print a specific value of an ACF field on the screen and perform some interaction with that value.
The retrieved value from the function will depend on the type of field we are requesting. Using the function is done as follows:
the_field($selector, [$post_id], [$format_value]);It’s simpler than it sounds. To display the value of a text field existing in the current post, you should use the function like this, where you need to replace text_field with the ID you chose when creating the field in ACF:
<?php the_field('text_field'); ?>For example, the following example will display the value of the field text_field from the post with the ID 123:
<?php the_field('text_field', 123); ?>If you want to check if a specific value exists before displaying it, you can do it as follows:
<?php if( get_field('text_field') ): ?>
    <?php the_field('text_field'); ?>
<?php endif; ?>
So, to display the text field we created earlier in our template, we need to find the file responsible for displaying individual posts (usually single.php) and add the following code:
<?php if( get_field('cta_text') ): ?>
    <?php the_field('cta_text'); ?>
<?php endif; ?>
Displaying an ACF Image Field in the Template
Displaying an image field in the template is quite similar. Note that you need to refer to the returned value that you defined when creating the image field.
For a returned value of type unique identifier (ID), the code you need to use is as follows:
<?php

$image = get_field('image');
$size = 'full'; // (thumbnail, medium, large, full or custom size)

if( $image ) {

    echo wp_get_attachment_image( $image, $size );

}

?>
Note that in this case, you should choose the desired image size in the variable
$size, more on this topic in the post Image Sizes in WordPress.
For a returned value of type internet address (URL):
<?php if( get_field('image') ): ?>

    <img src="<?php the_field('image'); ?>" />

<?php endif; ?>
For a returned value of type image array:
<?php

$image = get_field('image');

if( !empty($image) ): ?>

    <img src="<?php echo $image['url']; ?>" alt="<?php echo $image['alt']; ?>" />

<?php endif; ?>
Appendix – Adding Custom Post Types & Taxonomies Using ACF
The ACF plugin allows you to add custom post types (CPTs) and taxonomies using the WordPress admin interface without touching any code.
You can find these options in the admin interface under ACF > Post Types and similarly under ACF > Taxonomies.
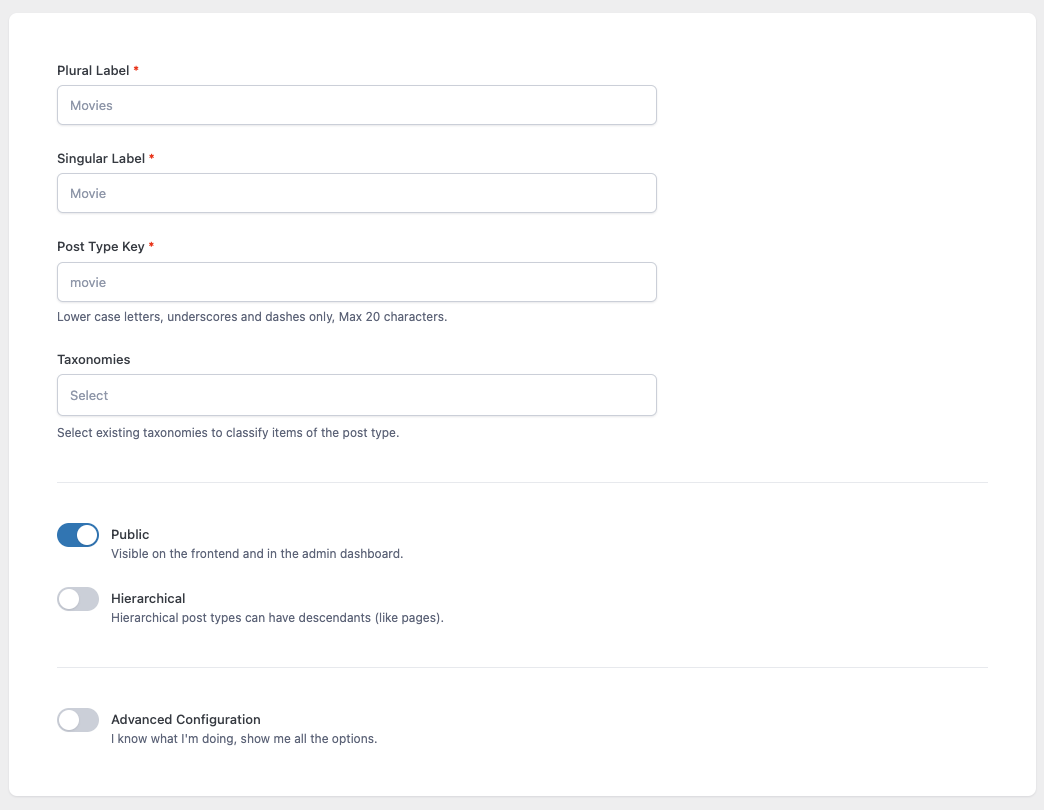
To register a new post type, go to ACF > Post Type and click on Add New, and you’ll see a screen with basic settings for the custom content type. The same goes for taxonomies.
We won’t go beyond that, but you’re welcome to take a look at the post I wrote about Creating Custom Post Types in WordPress and Understanding Taxonomies in WordPress.
ACF and the Block Editor
ACF integrates with the WordPress Block Editor (Gutenberg) through ACF Blocks. This feature, available in ACF PRO, lets you create custom blocks using PHP – the same language and functions you already use in your theme templates.
Instead of learning React and JavaScript, you can build blocks that leverage ACF fields. This makes it straightforward for developers already familiar with WordPress theme development to create powerful, custom blocks for the editor.
The basic concept is defining a block in your theme’s functions.php (or a dedicated file) using the acf_register_block_type() function and providing a PHP template for the block’s output. The block then appears in the editor’s block inserter, and editors can fill in ACF fields to control the block’s content.
If you’re interested in WordPress hooks and filters, keep in mind that ACF provides its own set of hooks that let you modify field values, customize the admin interface, and integrate with other plugins.
FAQs
Common questions about Advanced Custom Fields:
In Conclusion
As you can see, there are plenty of options with the ACF plugin. Many other types of fields were not covered, diverse location options for those fields, and additional parameters that can be set, like the fields’ location on the page and their visibility.
ACF is a very versatile plugin that allows you to expand WordPress’s capabilities in a simple and convenient way. In this basic guide, we only scratched the surface of what can be done with this plugin, and its capabilities are much broader.
It’s worth mentioning that despite the obvious advantages of the plugin, if your site needs only one or two fields, meaning there is no need for any complex system of fields, then I recommend simply using the built-in Custom Fields functionality in WordPress.
I say this because the ACF plugin is relatively heavy and it affects the performance of the site, particularly the TTFB, both on the Frontend and in the admin interface. For best performance, consider registering your fields via PHP instead of the database.
If you’re interested, you can take a look at other articles related to ACF:
- A Comprehensive Guide to Using the ACF Clone Field
- Registering Fields with Advanced Custom Fields Using PHP
- How to Use the ACF Repeater Field in WordPress
- How to Use the Group Field in Advanced Custom Fields
- Customizing the WordPress Admin with ACF
I hope this guide has provided you with a basic understanding of how to work with ACF in WordPress templates. If you have any questions, feel free to ask in the comments below.