Similar to the feeling of moving to a different city, migrating a WordPress website to a new server or domain can be a bit worrisome. There are always small details that need attention, and missing one of them can lead to unnecessary headaches.
And even though migrating a WordPress site is not an overly complex process, there are a few things to consider. In this guide, we will show you how to manually migrate a WordPress site to a new server or domain without using a plugin.
But before we begin with the explanations, make sure you have the following items:
- Access to the WordPress Dashboard (WP-ADMIN).
- Access to the hosting server’s management interface (e.g., cPanel).
- FTP access to the servers (not strictly necessary; you can use the management interface).
If you prefer to use a plugin to save time, you can take a look at the post How to Copy, Duplicate, and Backup WordPress Site Using the Duplicator Plugin.
Manual Migration of a WordPress Site to a New Server
If we break down the process into three stages, all you need to do is transfer the files from the current server to the new server, create a database on the new server and import your WordPress site’s database into it, and adjust the wp-config.php file according to the settings of the new database you created.
Stage 1 – Downloading Site Files to Your Computer
The first thing you need to do is download your site files to your computer. Connect to the server using FTP and download the folder containing WordPress. In most cases, the folder will be public_html or www.
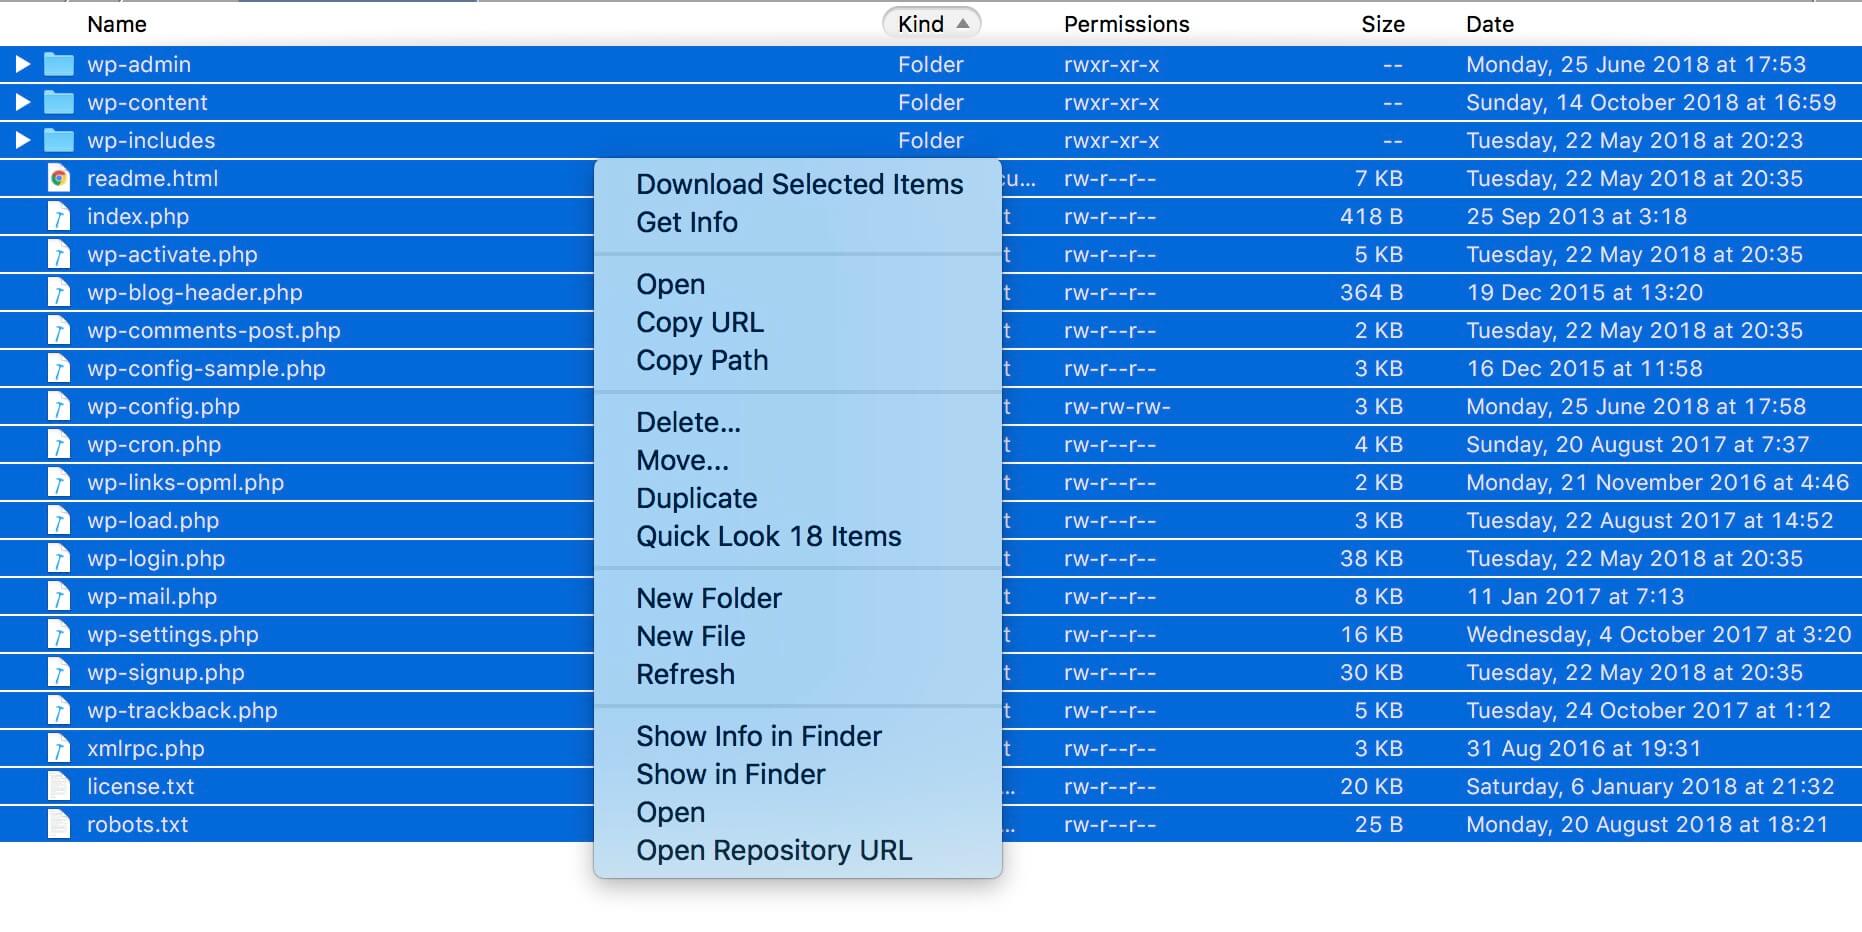
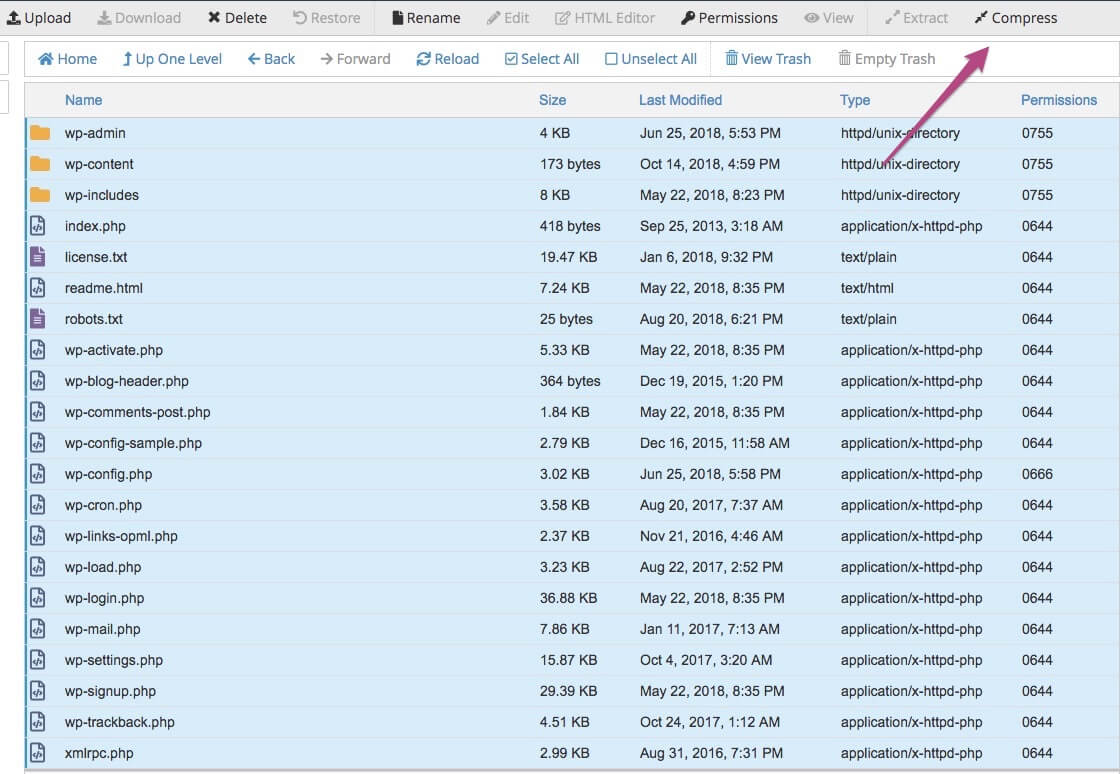
Alternatively, you can use the hosting management interface (cPanel/Plesk etc..). Go to the File Manager, compress the files into a Zip file before downloading, and save a lot of time.
You can even download the compressed file from the same interface without the need for FTP. Your choice.
Stage 2 – Downloading the Database from the Current Server
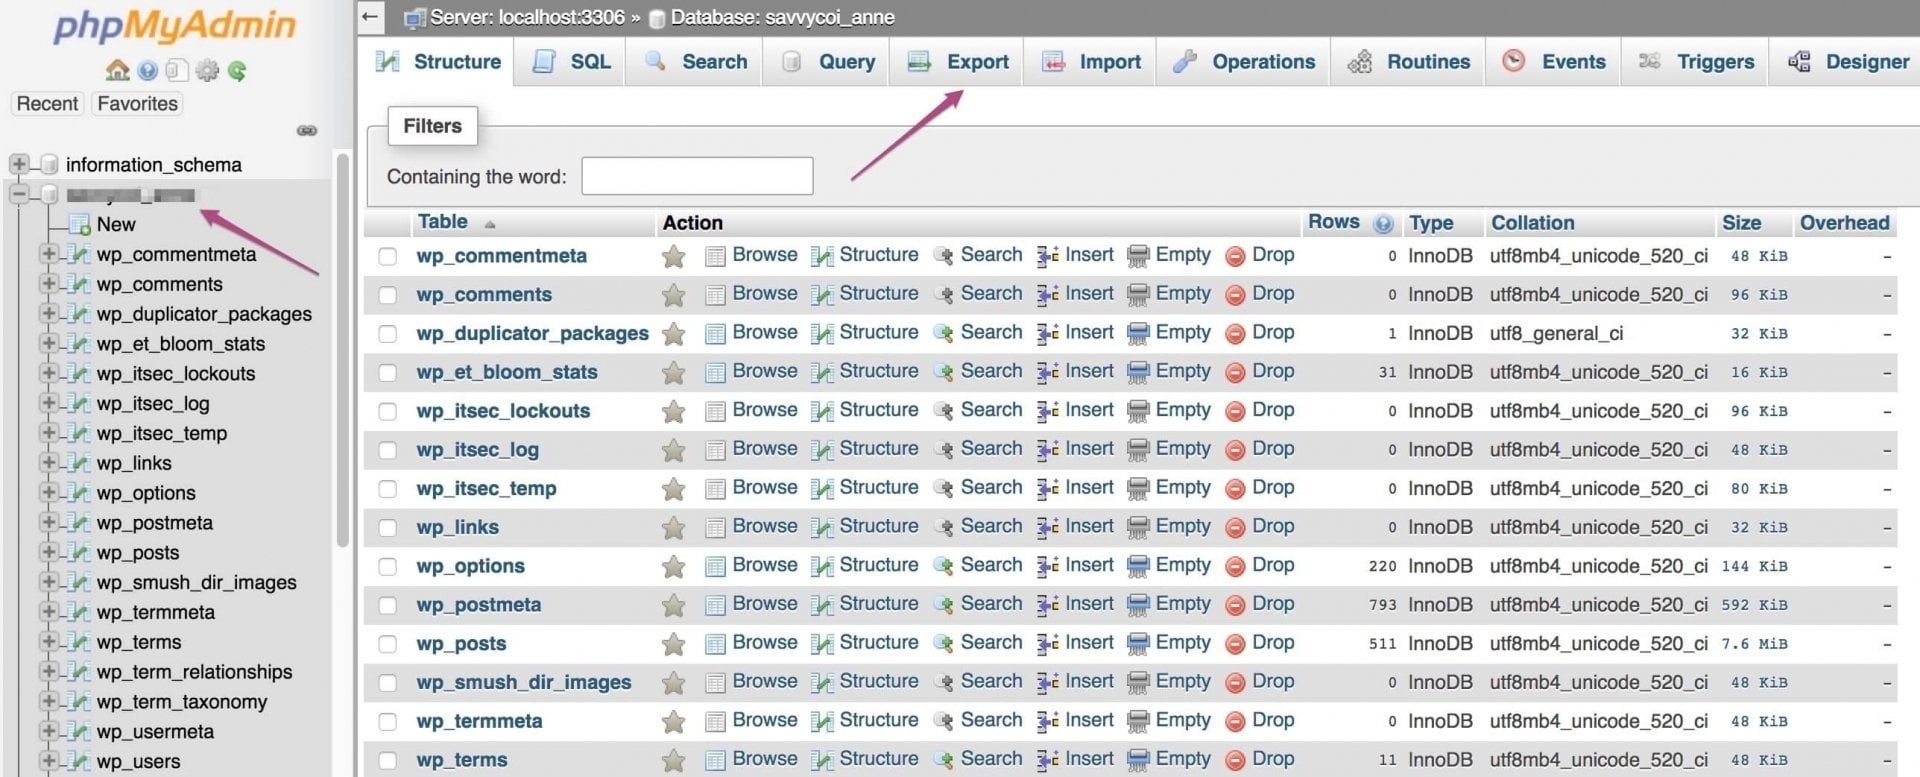
Once the download is complete, you need to download the database to your computer. To do this, access the phpMyAdmin in the admin interface of the current server.

Click on your site’s database and then click on Export in the top toolbar. Choose the quick option under Export method and click Go to download the database.
Stage 3 – Uploading Files to the New Hosting Server
At this point, you have all the necessary information from your old server. Now you need to connect to the new server using FTP and upload your site files. You can also use the File Manager in the management interface if you’re not using FTP.
Either way, if you uploaded a Zip file, you need to extract it, and you can do this only through the File Manager in the server’s management interface.
Stage 4 – Creating a Database on the New Hosting Server
Once the files are uploaded, you need to create a new database on the new server and import the database file you downloaded earlier.
To create a new database, go to MySQL Databases in the server’s management interface, click on Create New Database, and choose a name for the database.

Then, go to Add New User on the same screen. Choose a username and password, create a new user by clicking Create User.

Then, scroll down to the Add User to Database section, choose the username and the database you created, and click Add.

In the next screen, click on All Privileges to grant all the necessary permissions to the user and make the changes by clicking the Make Changes button.

Important note: In the upper part of this screen, you’ll see the database name and the username. Remember or note them down, as we will use them in the next section.
Stage 5 – Updating the wp-config.php File According to the New Database
You need to edit the existing wp-config.php file in the main WordPress directory to provide the permissions for the site to connect to the new database. You need to change a few details in this file:
- DB_NAME – The name of the database.
- DB_USER – The username of the database.
- DB_PASSWORD – The password for the database.
- DB_HOST – The host of the database. (In most cases, it will be
localhost, but this depends on your hosting platform. If localhost doesn’t work, consult your hosting support).
// ** MySQL settings - You can get this info from your web host ** //
/** The name of the database for WordPress */
define('DB_NAME', 'xxxxxxxxx');
/** MySQL database username */
define('DB_USER', 'xxxxxxxxx');

/** MySQL database password */
define('DB_PASSWORD', 'xxxxxxxxx');

/** MySQL hostname */
define('DB_HOST', 'localhost');
Replace the xxxxxxx values with the information you noted in the previous section, according to your new database settings.
Step 6 – Importing the Database to the New Server
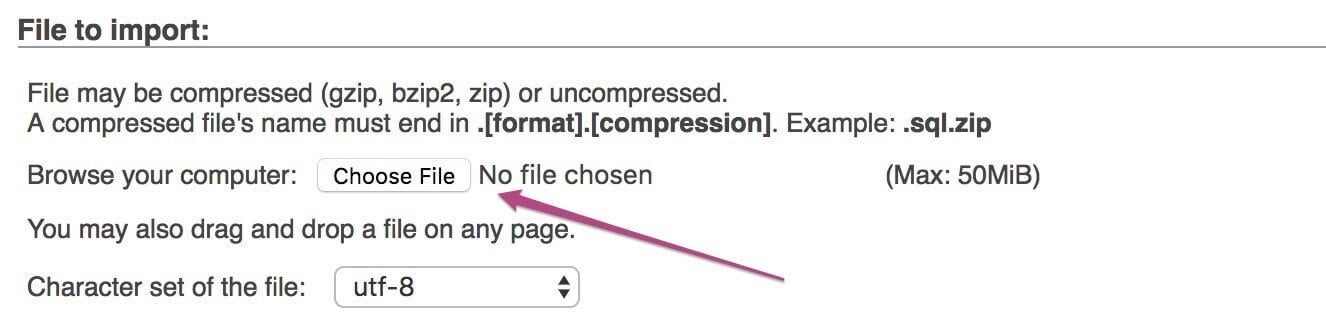
After creating a new database and updating the wp-config.php, go to phpMyAdmin in the management interface of the new server and select the database you’ve just created. Click on it and then click on Import in the top toolbar.
Click on Choose File and select the database file you downloaded earlier and have on your computer. Click Go and wait for the operation to finish.
If you haven’t changed the domain, these are all the actions to perform. Of course, if you haven’t done this yet, you need to point the DNS servers of the domain to the new server.
This action is performed through the domain management with the company from which you purchased the domain (your domain registrar). An explanation of this action goes beyond the scope of this guide.
In any case, if you’ve performed the steps correctly, at this stage, you should succeed in connecting to the WordPress admin interface on the new hosting server.
At this point, go to the WordPress Dashboard > Settings > Permalinks and click Save Permalinks.
You might want to check the website on a temporary URL before switching the DNS. Alternatively you can test your website with your temporary address if you are using cPanel.
Step 7 – Update Site URLs in the Database for the New Domain (Optional)
If you’ve changed the domain, you need to perform several additional actions, including updating the addresses in the database to the new domain:
A. Change the home and siteurl fields in the database
In phpMyAdmin, find the wp_options table and click on it to see the fields it contains.
It might have a different prefix other than
wp_but it will always end withoptions.
Find the siteurl and home fields and notice that their values are the old domain addresses. Edit the fields and replace the addresses with your new domain.

Alternatively, if you’re not comfortable working with phpMyAdmin, you can override these settings by editing the wp-config.php file and adding the following lines, replacing example.co.il with your new domain:
define( 'WP_HOME', 'https://example.co.il' );
define( 'WP_SITEURL', 'https://example.co.il' );
Use
https://if your site uses an SSL certificate. If you are migrating to HTTPS at the same time, see the complete HTTPS migration guide.
B. Perform a Search & Replace for all URLs in the database
The final action to take is to replace all the URLs in the database where the old domain is mentioned. To do this, go to the WordPress admin interface and install a search-and-replace plugin. Better Search Replace is a well-maintained, free plugin with over one million active installations.
After activating Better Search Replace, go to Tools > Better Search Replace. Enter your old domain in the Search field and your new domain in the Replace field. Select all database tables, and run a dry run first to preview the changes before applying them.
FAQs
Common questions about migrating WordPress sites between servers and domains:
wp-config.php with the new database credentials.wp-config.php, point your domain's DNS to the new server and save the Permalinks in the WordPress dashboard. No URL replacement is needed.Summary
Manual WordPress migration involves downloading your files and database from the current server, uploading them to the new one, creating a fresh database, updating wp-config.php, and importing the data. If the domain changed, you also need to update the home and site URLs and run a search-and-replace across the database.
Before switching DNS, always test the site on the new server using a temporary URL. If you prefer an automated approach, the Duplicator plugin can handle the entire process with minimal manual steps.