Have you ever updated WordPress to a new version and then discovered that there are issues with the installed version? If you find yourself in this situation, there’s no need to panic.
In the majority of cases, the root cause of the problem lies in a plugin or a theme that is not compatible with the new update. Rarely is the update itself the cause of the problem.
Regardless of the reason, one of the quickest solutions to restore your site to its previous state is to downgrade WordPress to the previous version it had.
By the way, compatibility issues (as well as security issues) are the main reasons why you should avoid using themes or plugins that are not regularly updated. But regardless of the reason, I assume you wouldn’t want to refrain from updating WordPress to a new version just because one of your plugins or themes is not compatible with the new version.
So, if you decide to downgrade a version of WordPress, consider deactivating that troublesome plugin until it receives an update that’s compatible with the current WordPress version. On the other hand, if the compatibility issue is with the theme you’re using, that’s a whole different story, and in this case, consider downgrading the WordPress version.
Before you downgrade a version, it’s highly recommended to have a full backup of your site, in case things don’t go as planned and the site or the process breaks.
There are plenty of plugins that allow you to create structured backups of your site, such as UpDraft or Duplicator, which I’ve also written about. Your hosting company can also provide you with the latest backup, or even restore your site to the latest backup.
In this post, we’ll look at two ways to downgrade a WordPress site, one manually without using a plugin and the other using the WP Downgrade plugin. Let’s get started…
Potential Risks of Downgrading WordPress
Before proceeding, it’s important to understand that downgrading WordPress can expose your site to potential risks:
- Security vulnerabilities: Older versions may lack critical security patches.
- Plugin and theme compatibility: Some plugins or themes may not support the older version.
- Data loss or corruption: Downgrading may occasionally lead to database conflicts.
These risks highlight why it’s crucial to create a full backup before attempting a downgrade.
Alternative Solutions to Consider
Before downgrading, consider these alternatives:
- Test in a staging environment: Set up a staging site to troubleshoot issues without affecting your live site.
- Rollback specific plugins or themes: Some plugins offer rollback features to revert to earlier versions.
- Contact plugin or theme support: Reach out to the developer for assistance with compatibility issues.
These alternatives may save time and reduce risks associated with downgrading.
Manual WordPress Downgrade Without a Plugin
In order to manually downgrade a WordPress site to a previous version, you need to download the version you want to downgrade to on your personal computer. You can download any version you want, so download the WordPress version you had before the update from this link and let’s begin.
There are a few steps you need to take to manually downgrade a WordPress version:
1. Deactivate All Plugins on the Site
After you’ve backed up and downloaded the WordPress version you want to downgrade to, log in to your site’s admin interface and deactivate all plugins.

2. Log Out of WordPress
After deactivating the plugins, log out and exit the system.
3. Use FTP Software to Locate the Current WordPress Installation
This step requires you to have a way to connect to your site’s hosting server using an FTP client. FTP access will allow you essential access to all of the site’s files. Filezilla software is a popular option used by many, install it and connect to the server using the credentials you received when purchasing your hosting package.
The images in this post are from the Transmit FTP software. The software is paid and suitable for OSx systems only.
Once connected to the server, find the core files of WordPress (such as wp-admin, wp-content, etc.). These are typically located in the public_html or www directory.
By the way, steps 3, 4, and 5 can also be done using the File Manager available in their hosting control panel (cPanel or similar) if you prefer not to do this through FTP.
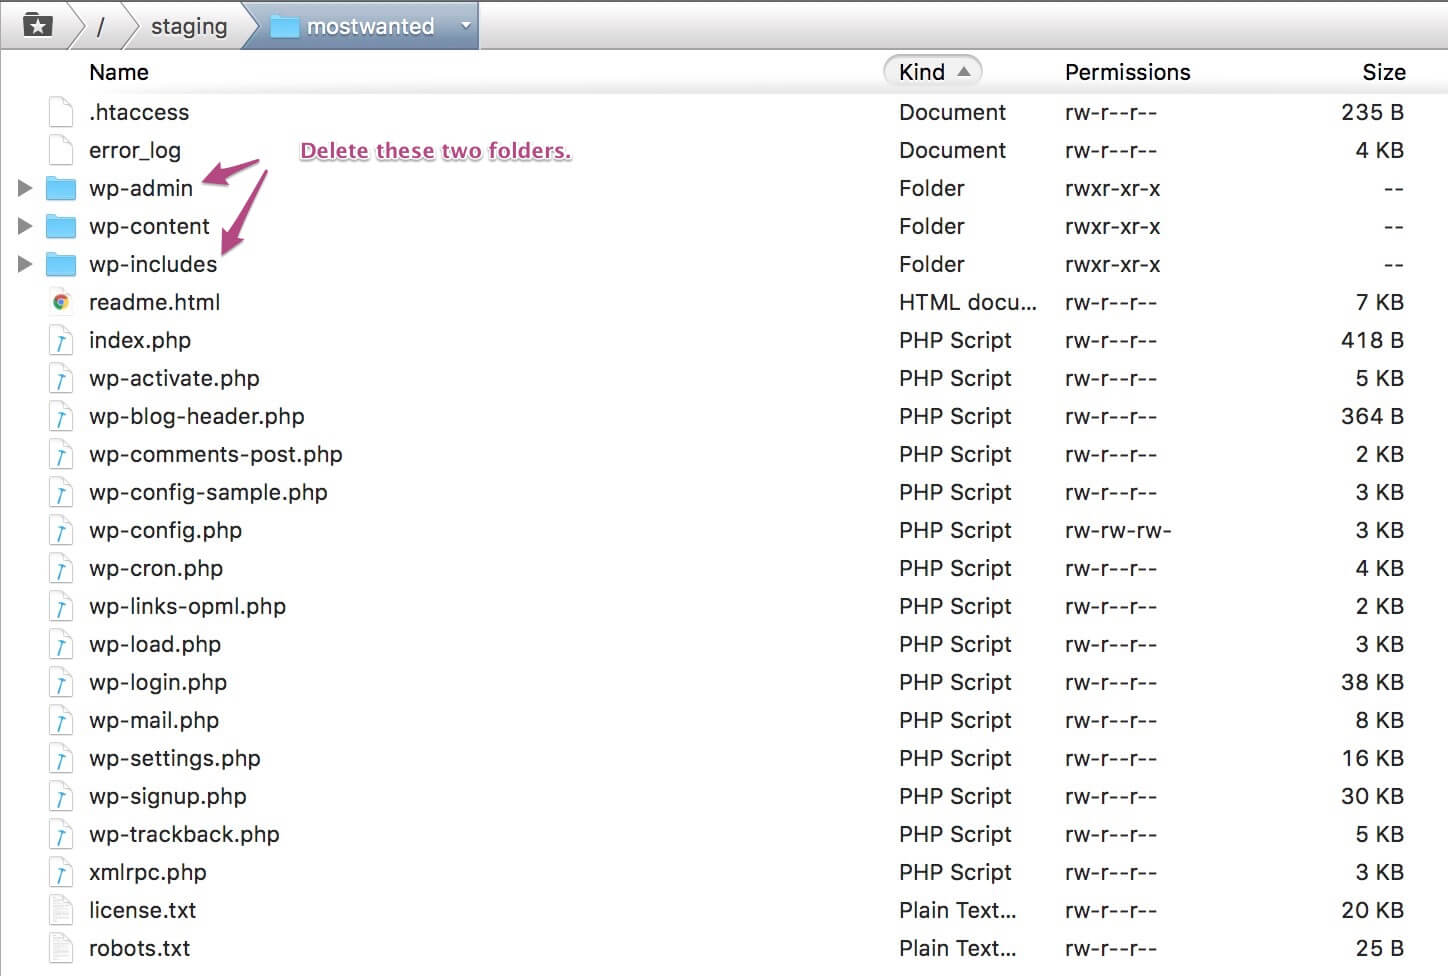
4. Delete the wp-admin and wp-includes Directories
Delete the wp-admin directory and the wp-includes directory, but do not touch the wp-content directory in any way! You can leave all other files and directories as they are; we will overwrite them in the next step.
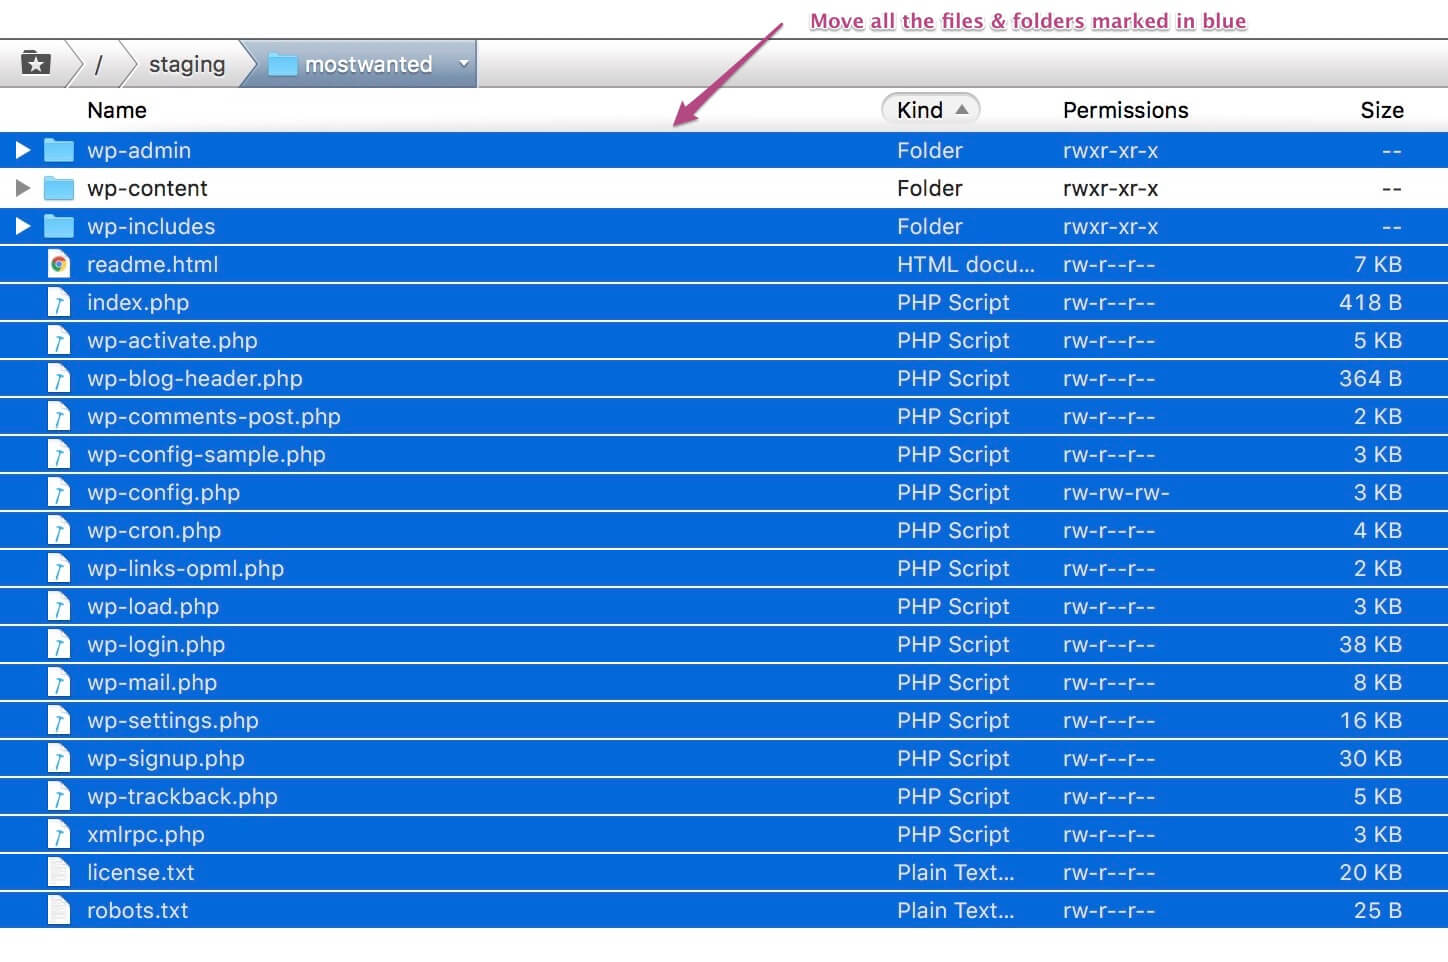
5. Transfer Files from the Previous WordPress Version to the Server Using FTP
Open the Zip file of the version you want to downgrade to, and use FTP to copy all files in the directory (excluding the wp-content directory) to the same location where you deleted the wp-admin and wp-includes directories on the server. Confirm overwriting existing files if prompted.
Once all files have been transferred to the server, the downgrade process is complete.
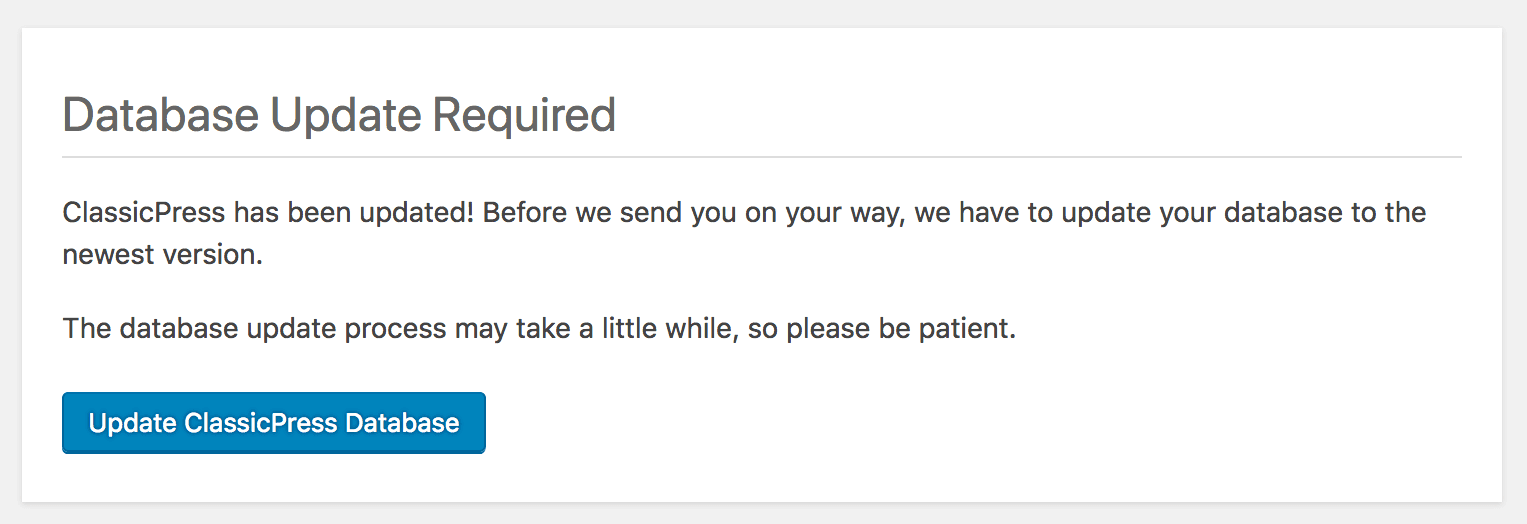
6. Update the WordPress Database
Log in to the WordPress admin interface and you’ll receive a message to update the database. Confirm the update and log back into the site. Once logged in, you’ll see that the WordPress version has been downgraded to the one you selected.
Downgrade WordPress Using the WP Downgrade Plugin
Another option, and perhaps even simpler, to downgrade a version is by using the WP Downgrade plugin. The plugin works well and allows you to downgrade WordPress to a previous version of your choice.
If you encounter any issues or errors during the plugin usage, try temporarily deactivating all plugins before starting the process.
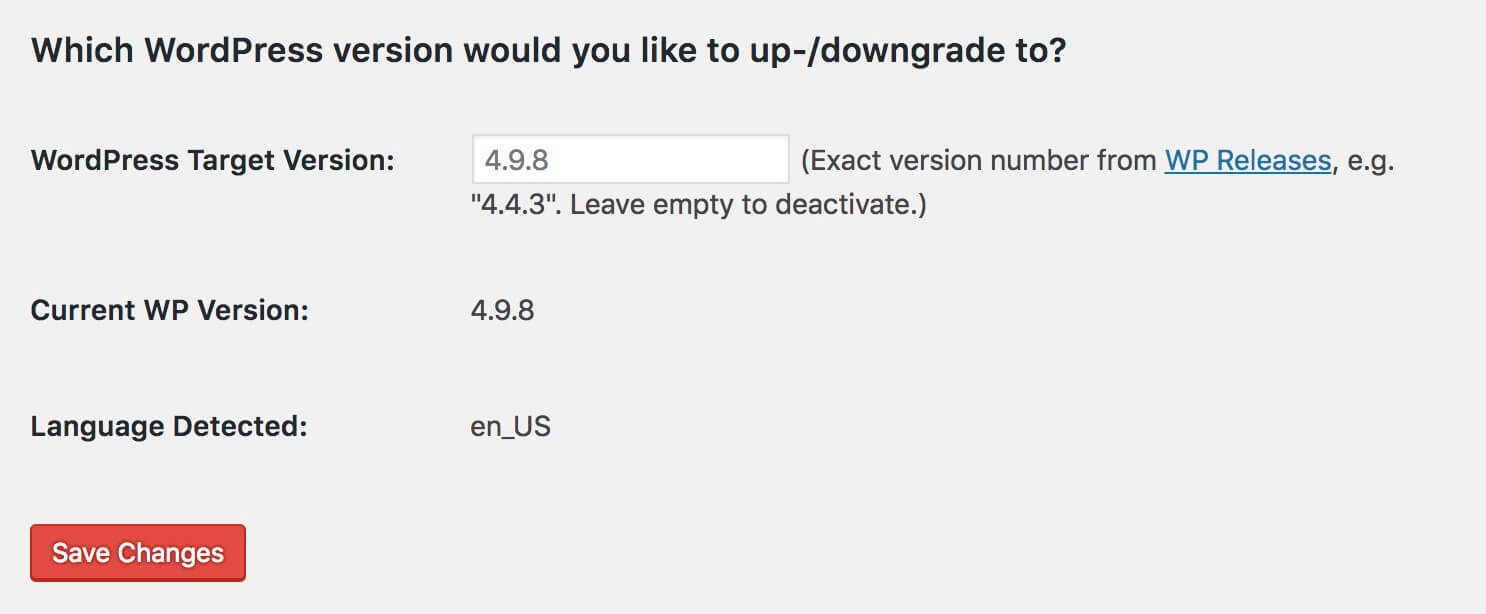
Install the plugin, go to your WordPress admin panel Settings > WP Downgrade, select the desired version, click Save Changes, and you’ll find a new button called Up-/Downgrade Core appearing before you. Clicking this button will initiate the downgrade process.
Remember that whether you perform the downgrade manually or using the plugin, it’s important to create a backup before doing so, in case things go wrong.
In Conclusion
Situations where you need to downgrade a WordPress version are rare. If you find yourself in such a situation due to certain critical plugins not supporting your current WordPress version, or if your theme does not support those new versions and does not receive regular updates, consider changing the theme.
In any case, I hope this post helps you if you ever need to downgrade a version, and as always, if you have any questions or comments, feel free to let us know in the comments below… 🙂