There are quite a few ways to improve the loading time of WordPress sites which I have written about in previous articles.
However, there is one action I do not see being performed often by WordPress developers, which is selectively loading plugins as needed.
This is a sensible action because it is likely that the plugins you are using are loading a lot of CSS and JS files even on pages where those plugins are not used.
In one of my recent projects, I used several plugins that provided the functionality required for that site. I discovered (of course) that they are loaded on every single page of the site, whether I used their functionality on that page or not.
Moreover, these are relatively “heavy” plugins and load many Javascript and CSS files during their loading time, which slows down the loading of each page on the site.
In searching for a way to prevent this and improve the site’s loading speed, I came across a plugin called Plugin Organizer and I must say it is one of the most useful plugins I have encountered.
Before we explain the settings of the plugin, let’s say a few words about the impact of plugins on your WordPress site’s speed.
How do WordPress plugins affect your site’s speed?
Properly written WordPress plugins ensure that they are only loaded on your site if they are used. WordPress itself does not load inactive plugins, so these do not affect your site’s performance.
However, it always loads all active plugins, whether they are needed or not.
Sometimes, plugin authors cannot predict when and where you are using their plugin on your site. In these cases, they will load the plugin’s code on every page, even if it is not being used.
Understanding how WordPress enqueues scripts and styles helps you see why this is problematic.
If all the plugins are loading assets (JavaScript and CSS files), it is likely that these plugins will negatively impact your WordPress site’s performance and Core Web Vitals, especially Interaction to Next Paint (INP) and Largest Contentful Paint (LCP).

How does Plugin Organizer help improve your site’s performance?
Depending on the plugins you are using, it is likely that some of them are only needed on specific pages, in specific posts, or only in certain types of content. Some plugins are only required in the WordPress dashboard, so they do not need to be loaded for visitors at all.
The Plugin Organizer allows you the following actions (among others):
- Selectively choose which plugins are loaded and which are not according to the URL.
- Enable or disable certain plugins according to the user role.
- Allow loading/removal of plugins according to custom post types.
- Determine and change the order in which plugins are loaded.
- Disable plugins and load them only as needed.
In addition, it allows you to create a group of several plugins, which can be disabled with the click of a button on a specific page or content type as needed.
Another functionality of the plugin is the ability to choose which plugins are loaded on mobile. A common use case is preventing WooCommerce’s JS and CSS files from loading on non-shop pages.
You can also change the order of plugin loading on the site. This can help in some cases to show the user the important content in the critical “above the fold” part of the page faster.
Using the Plugin Organizer Plugin
Install and activate the plugin, go to the plugin’s settings under Plugin Organizer > Settings and check the option Selective Plugin Loading.
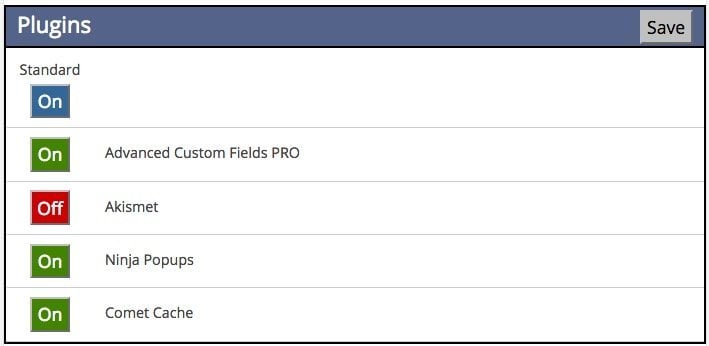
Go to one of the pages on your WordPress site and you will find at the bottom of the page a table showing all your plugins (both active and inactive). In the simplest way, you can choose which plugins are loaded on that specific page and which are not.
Note – When installing the plugin, an attempt is made to create a directory named mu-plugins under the wp-content folder.
Depending on the server permissions, the plugin may not be able to create this directory. The plugin itself will be installed but the selective loading will not work.
If this is the case, create this directory yourself and copy the PluginOrganizerMU.class.php file into it.
Global Plugin Settings
In the same measure, you have the option to go to Plugin Organizer > Global Plugins and disable the loading of certain plugins across the entire site.
If you want to load a specific plugin only on a specific page, it would be correct to disable it through the Global Plugins, go to the page where you want the plugin to be loaded and activate it only on that page.
As a rule, any plugin settings made at the page/post level will override the global settings of the plugin.
Selective Plugin Loading by Custom Post Type
One of the options of the plugin is to load plugins selectively according to the custom post types existing on your WordPress site. Go to Plugin Organizer > Settings, under Custom Post Type Support choose for which content types you want to enable this functionality.
Go to Plugin Organizer > Post Type Plugins, select the content type you want to apply the changes to and set which plugins will be active and which will not.

How to Identify Plugins That Need Selective Loading
Before disabling plugins on specific pages, you need to know which plugins are loading unnecessary assets. Here are several ways to identify them:
- Use Query Monitor to see which scripts and styles are loaded on each page and which plugin enqueued them.
- Open Chrome DevTools, go to the Coverage tab, and check which CSS/JS files have a high percentage of unused code.
- Run a Google PageSpeed Insights test and look at the “Reduce unused JavaScript” and “Reduce unused CSS” opportunities.
Always test your site thoroughly after disabling plugins on specific pages. Some plugins have dependencies that may not be obvious, and disabling them could break functionality.
Alternatives to Plugin Organizer
While Plugin Organizer is a solid free option, several modern alternatives offer similar or enhanced functionality:
- Asset CleanUp – A free plugin that lets you unload specific CSS and JS files per page. It works at the asset level rather than the plugin level, giving you more granular control.
- Perfmatters – A premium plugin with a powerful Script Manager that lets you disable scripts per page, post type, or regex pattern. It also includes device-based unloading and many other performance features.
- WP Rocket File Optimization – If you already use WP Rocket, its Delay JavaScript Execution and file optimization features can handle many of the same tasks.
For a code-based approach, you can also lazy load JavaScript on demand for scripts tied to specific user interactions.
FAQs
Common questions about selective plugin loading:
Summary
Selective plugin loading is one of the most effective ways to improve WordPress site performance. By preventing unnecessary plugins from loading on pages where they are not needed, you reduce the amount of CSS and JavaScript processed by the browser.
Plugin Organizer provides a straightforward free solution, while alternatives like Asset CleanUp and Perfmatters offer more granular control at the asset level. Whichever tool you choose, combine it with other speed optimization techniques for the best results.