Conversion tracking in Google Analytics (also known as Goals) can be crucial for any significant activity on your important business website. For example, form submissions, newsletter sign-ups, or even product purchases.
In the old version of Google Analytics (Universal Analytics), these tracked conversions, called Conversions in English, were marked when a specific Goal was reached, and you could define up to 20 Goals per Analytics property.
However, the concept of Goals no longer exists in Google Analytics 4 (GA4). In this version, you can define conversions directly in the Analytics interface based on events happening on the site.
In GA4 (short for Google Analytics 4), you can create and define as many conversions as you want, and you can set each event happening on the site as a conversion. You can modify each event or create a new event based on the occurrence of other events and parameters, marking them as conversions.
If you are not aware, Events in Google Analytics are user interactions with content that can be measured independently, meaning after the page load stage. Anyway, if you have installed Google Analytics 4 on your site, you can access the conversion report by clicking on the Conversions tab under the Reports page.
In this post, we will describe how to set up conversions in Google Analytics 4 and how to send events to Analytics using Google Tag Manager (GTM).
How to set up conversions in GA4 for existing events tracked?
Google Analytics 4 automatically tracks certain events from the moment the tracking code is installed. You can easily mark each of these events as a conversion. To set up conversions for events already tracked by GA4, follow these steps:
1. Go to the relevant property in GA4
Open the property in Analytics 4 and click on Configure on the left side of the screen.
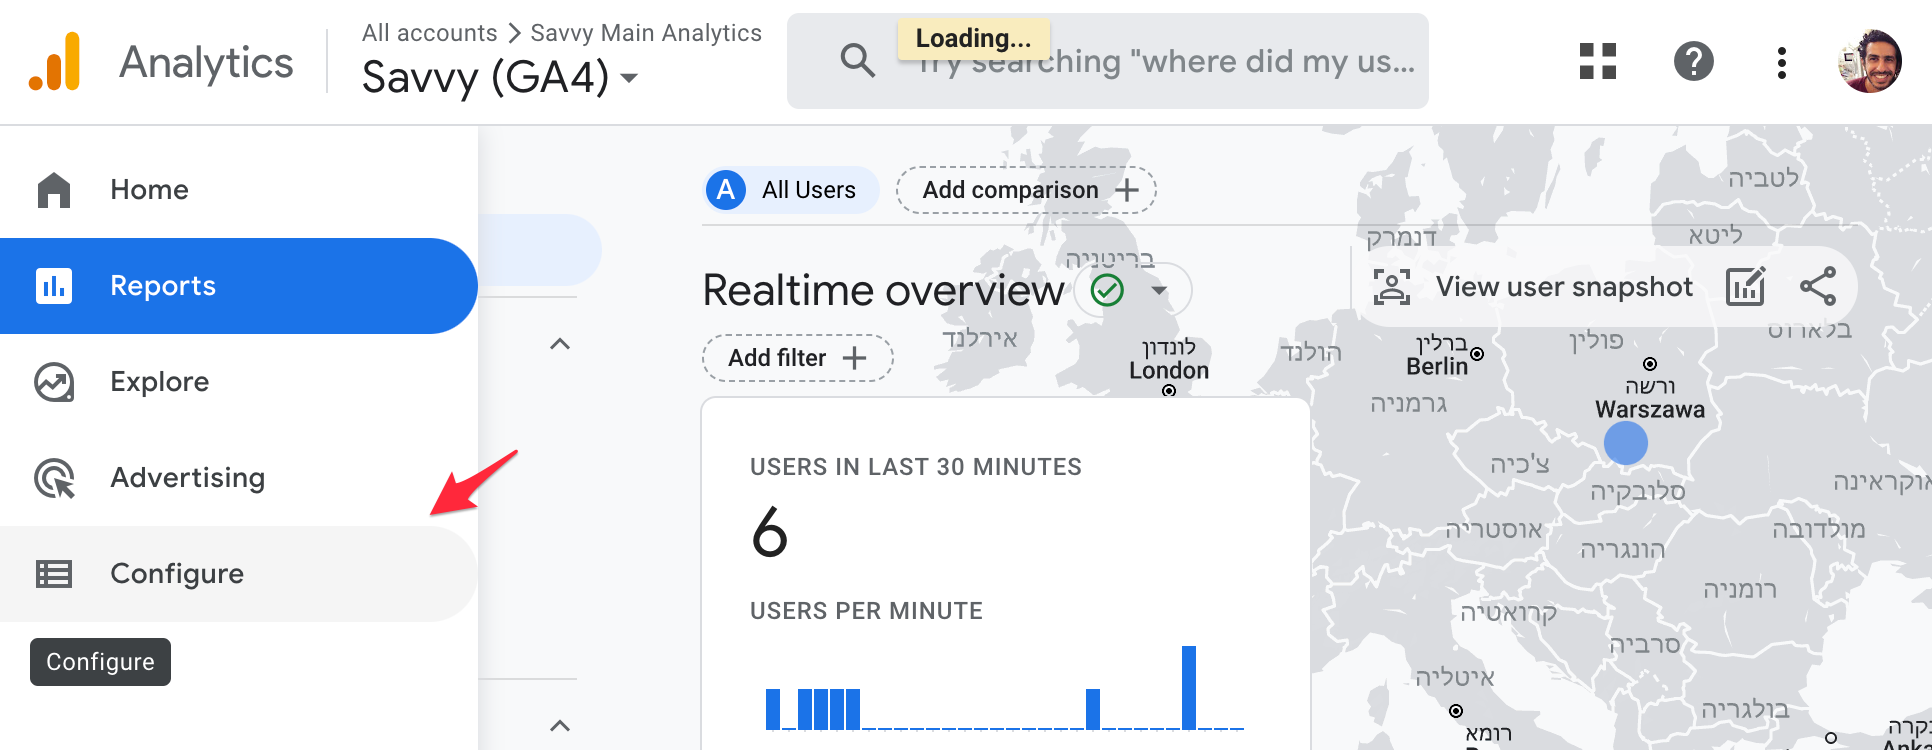
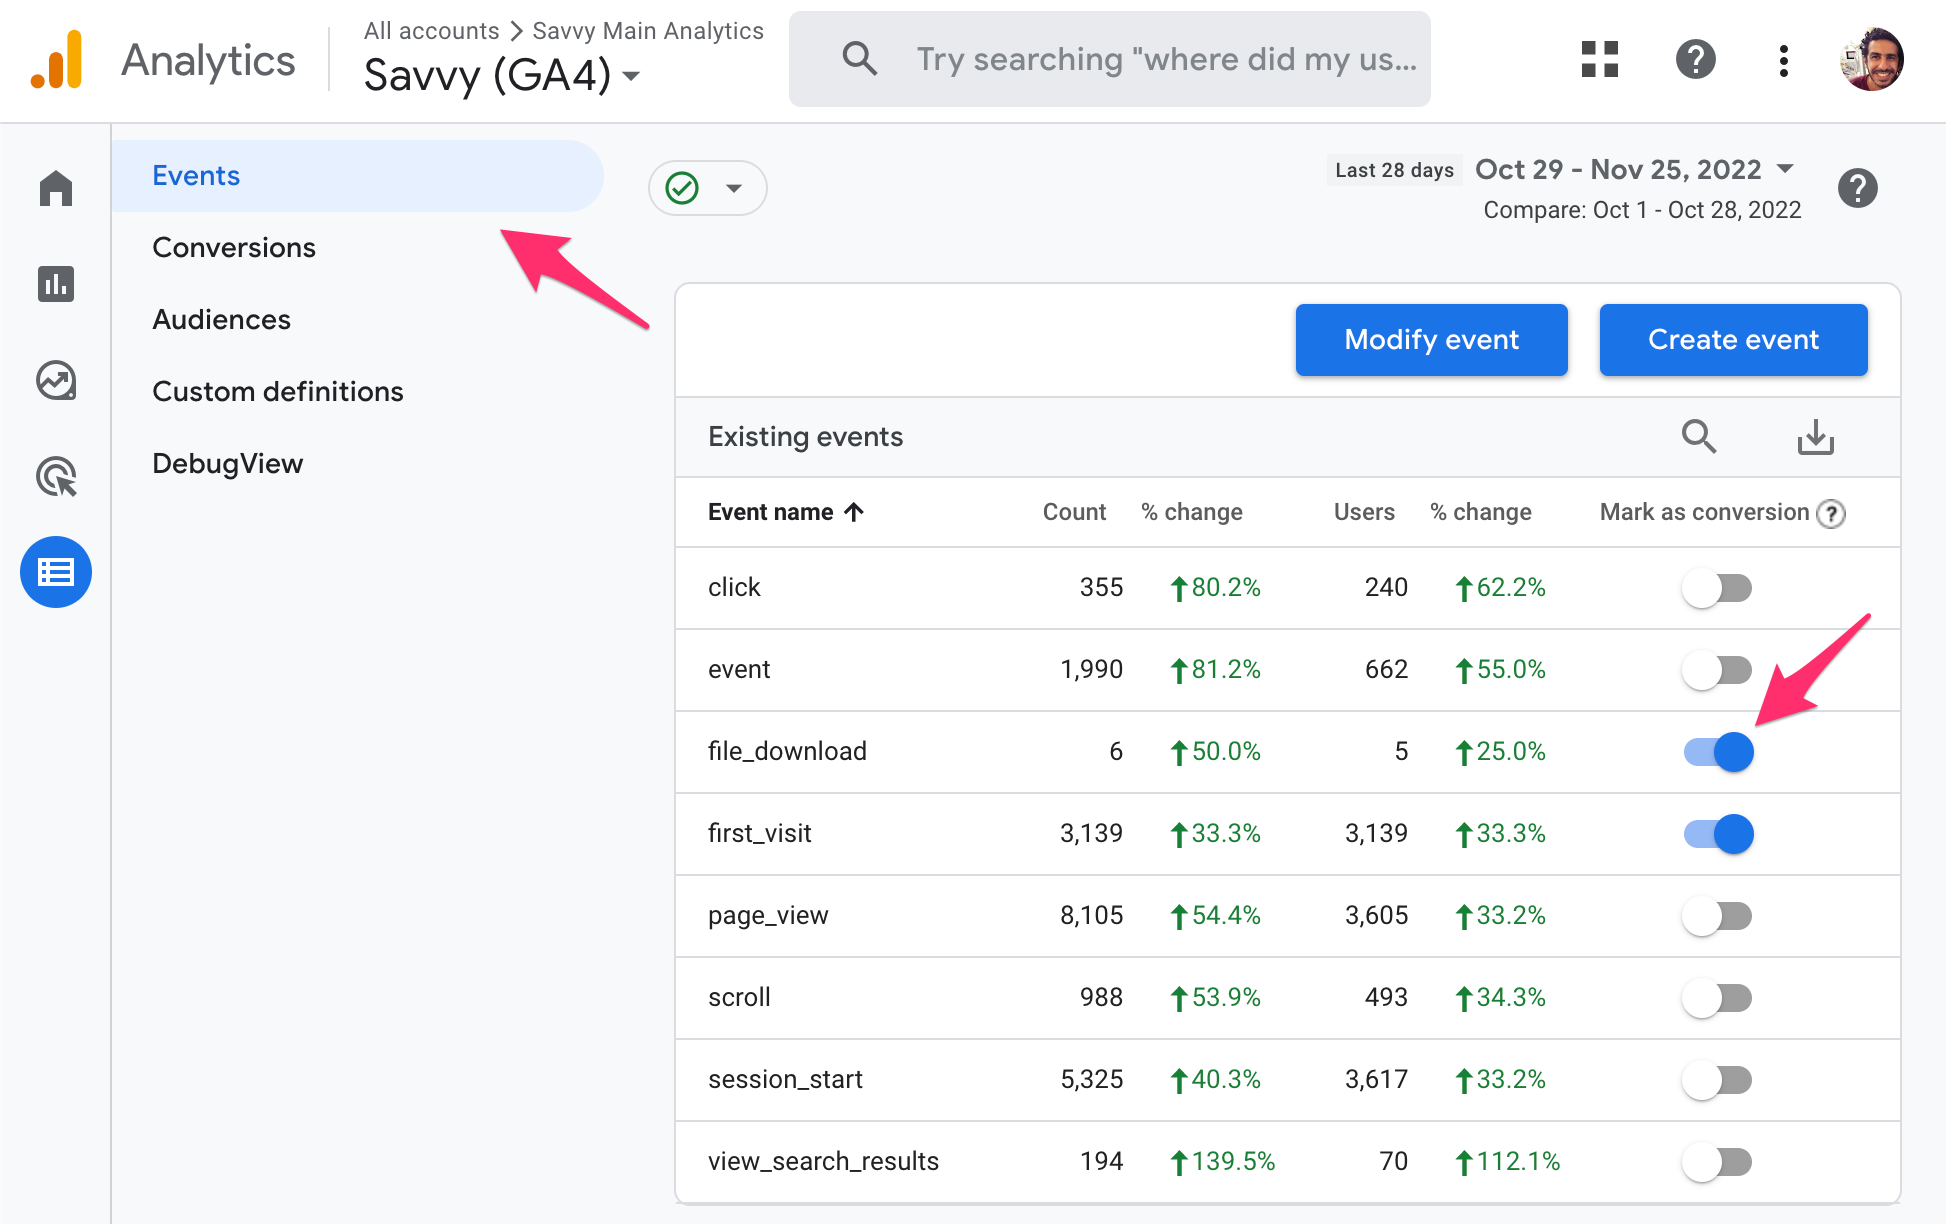
2. Click on Events and mark events as conversions
If you want to mark a specific event as a conversion, you need to enable the “Mark as conversion” toggle next to that event. In our case (for example purposes only), we marked the events first_visit and file_download as conversions. It looks like this:
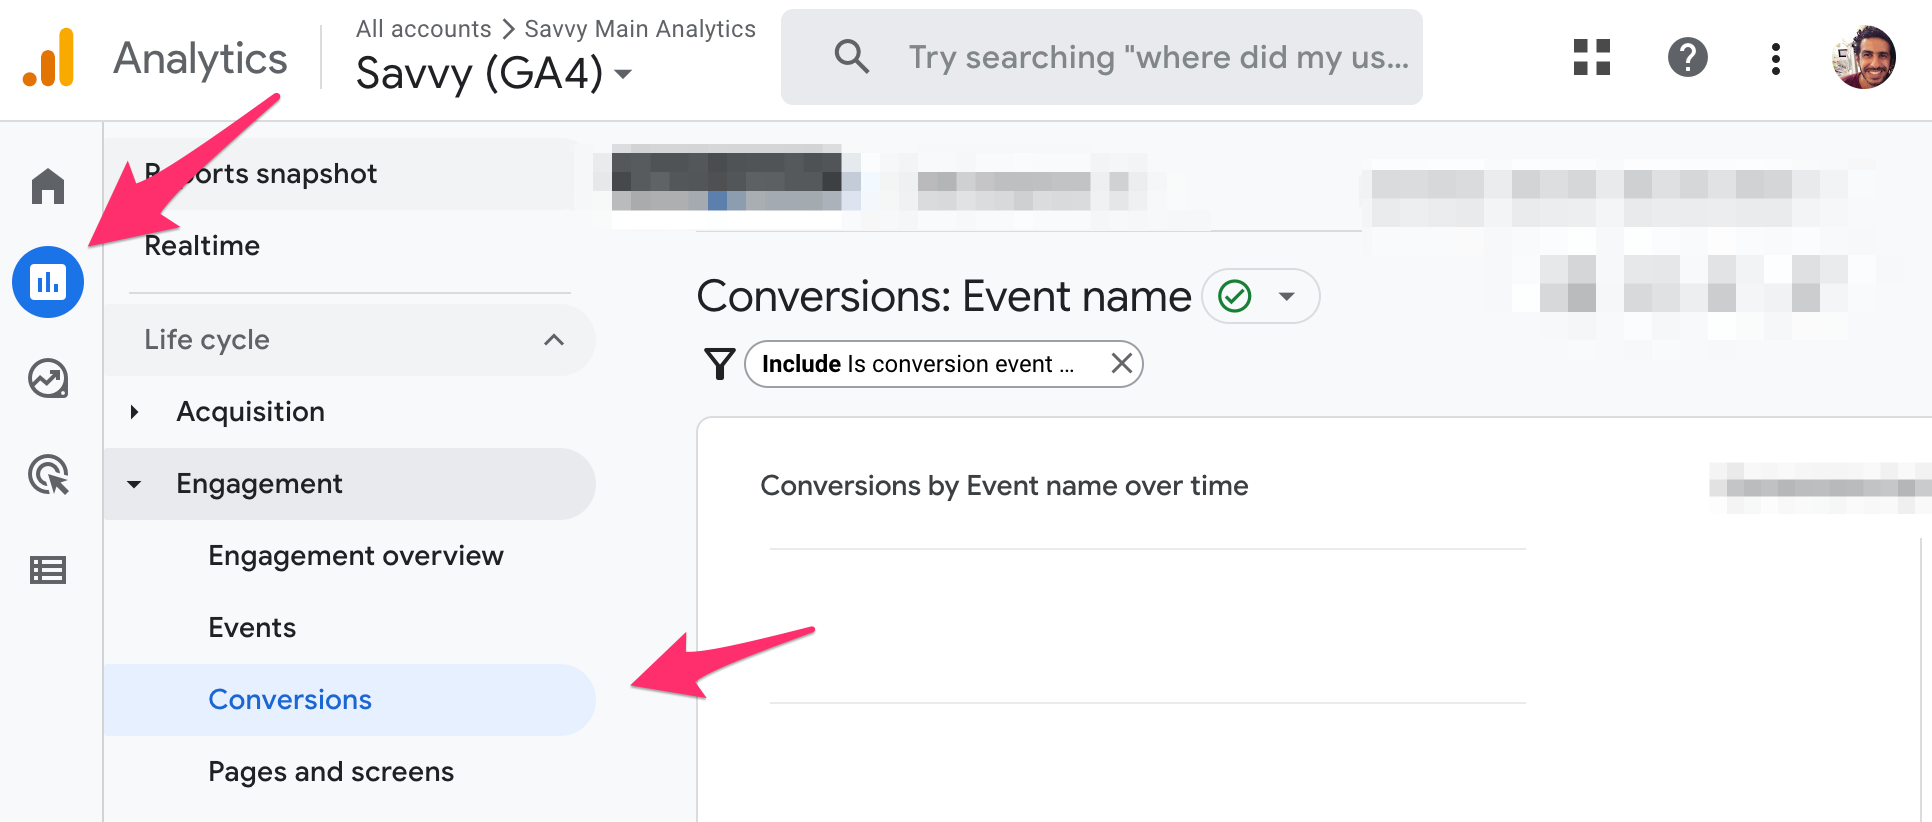
4. View the report for those marked events as conversions
Now, only after actual conversions have occurred, go to the Conversions tab under the Reports page, and you will see those important events accessible as conversions.
That’s it! You have successfully set up conversion tracking for events on your site.
How to define conversion tracking on a new event in Google Analytics 4?
You can also define a new event as a conversion under the Conversions tab. Follow the instructions below to create a new event and define it as a conversion in GA4.
1. Go to your GA4 property and click on Configure
Open the property in Analytics 4 and click on Configure on the left side of the screen.

2. Click on Conversions and then on New conversion event
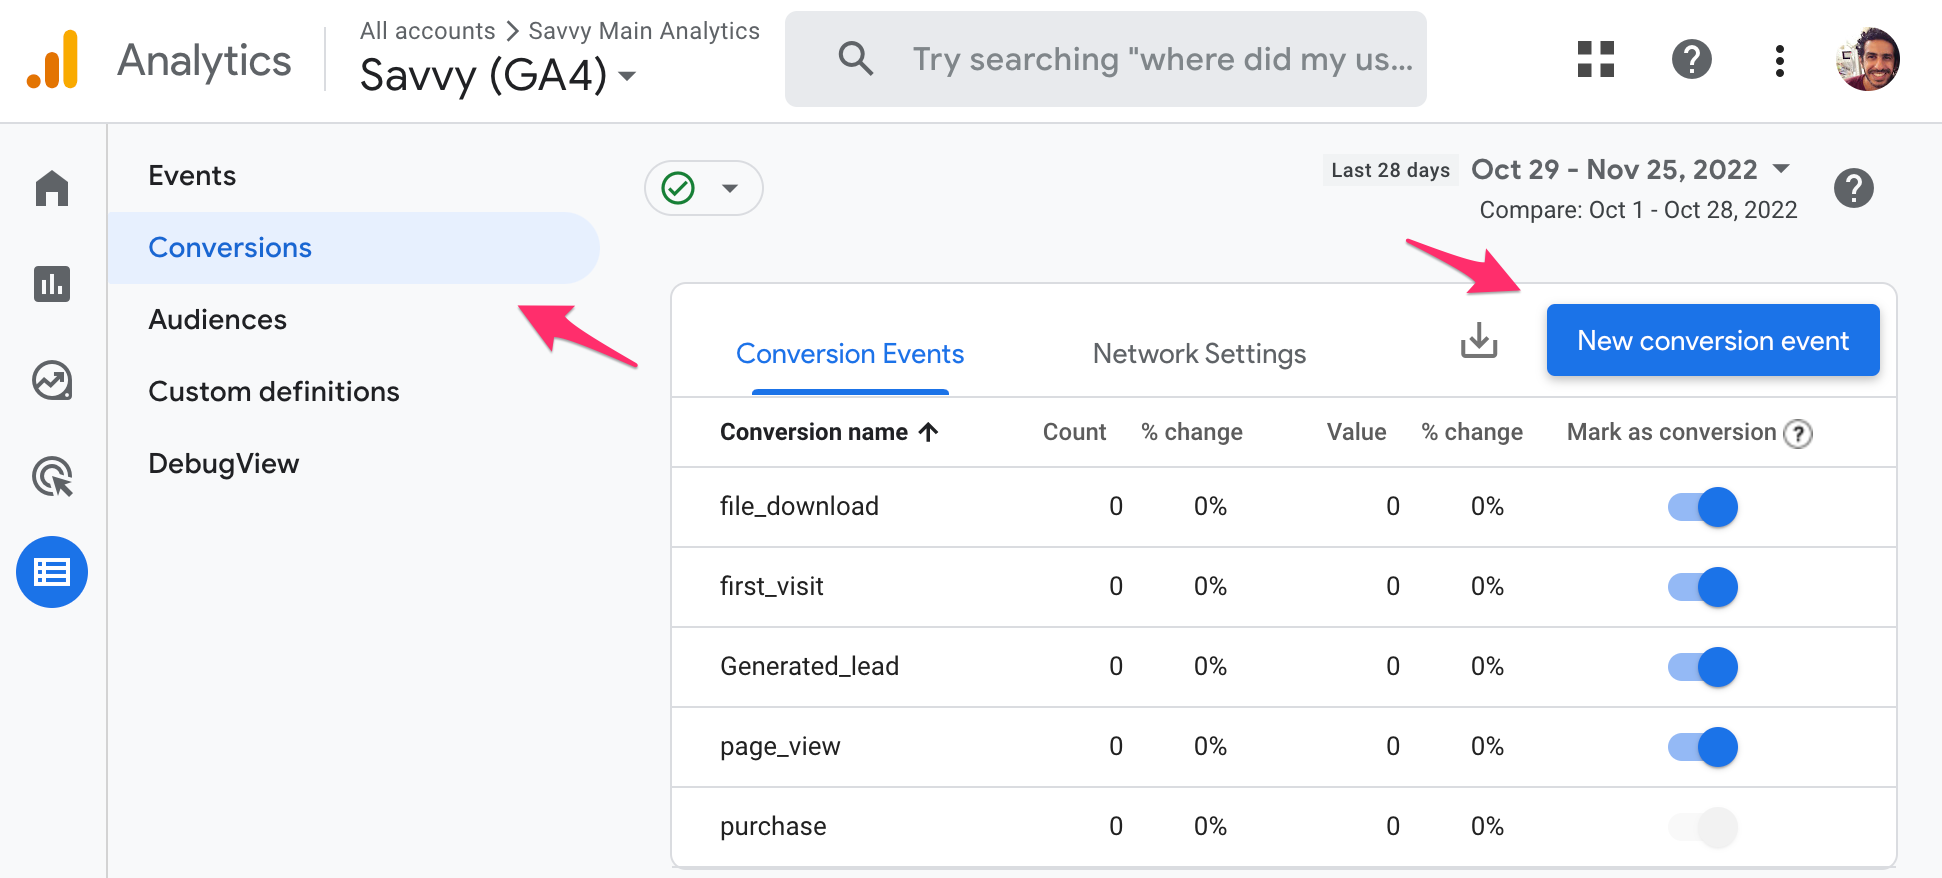
3. Choose a name for the Conversion Event
In the window that appears, give the new conversion event a name that describes it. For example, we will track views on the Thank You page that users reach after successfully submitting a form on the site.
We chose the name Generated_lead for this conversion event. Now, click on Save.
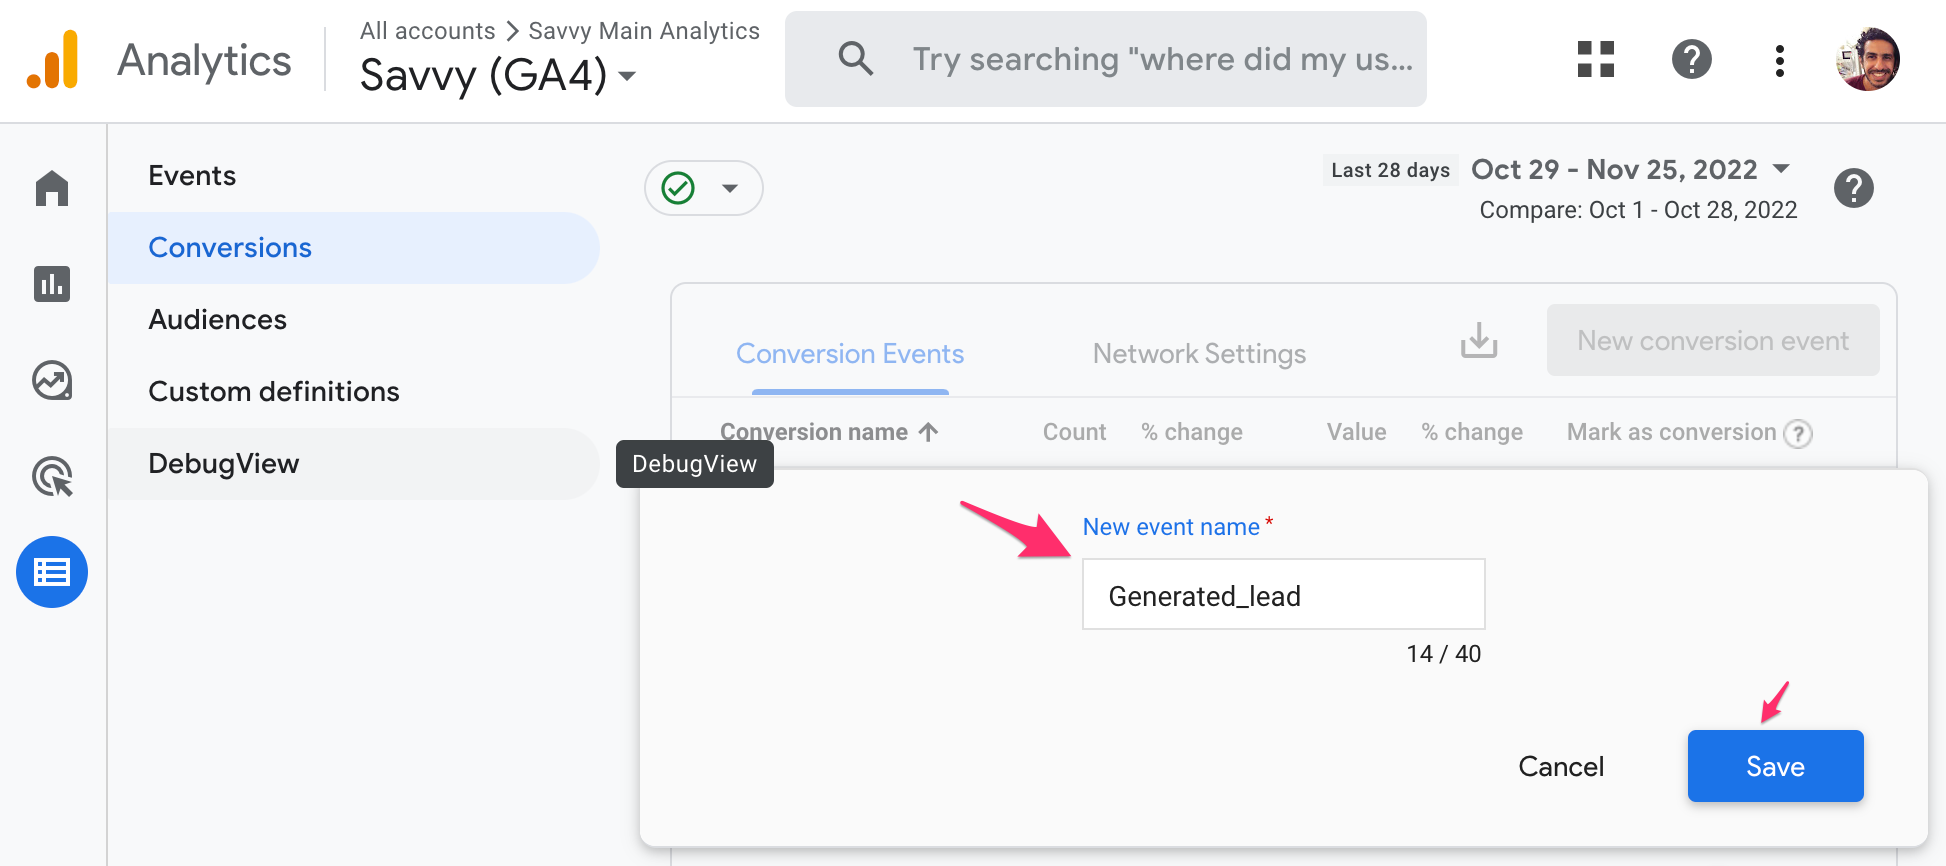
Note that you can now see the newly created event in the Conversions tab. Under the Count column, you can see it’s currently zero, as we just created the event through the GA4 interface. Now, we need to send this event to Google Analytics every time a user reaches the Thank You page on the site.
You can do this in two ways (maybe even more). One is to send the event using Google Tag Manager (GTM), and the other is to define in GA4 that this event should be sent when another event occurs, an event that GA4 automatically tracks…
In this post, we’ll describe how to send an event to GA4 using Google Tag Manager.
How to send an event to GA4 using Google Tag Manager?
Here are the steps you need to follow to send an event to GA4 using Google Tag Manager.
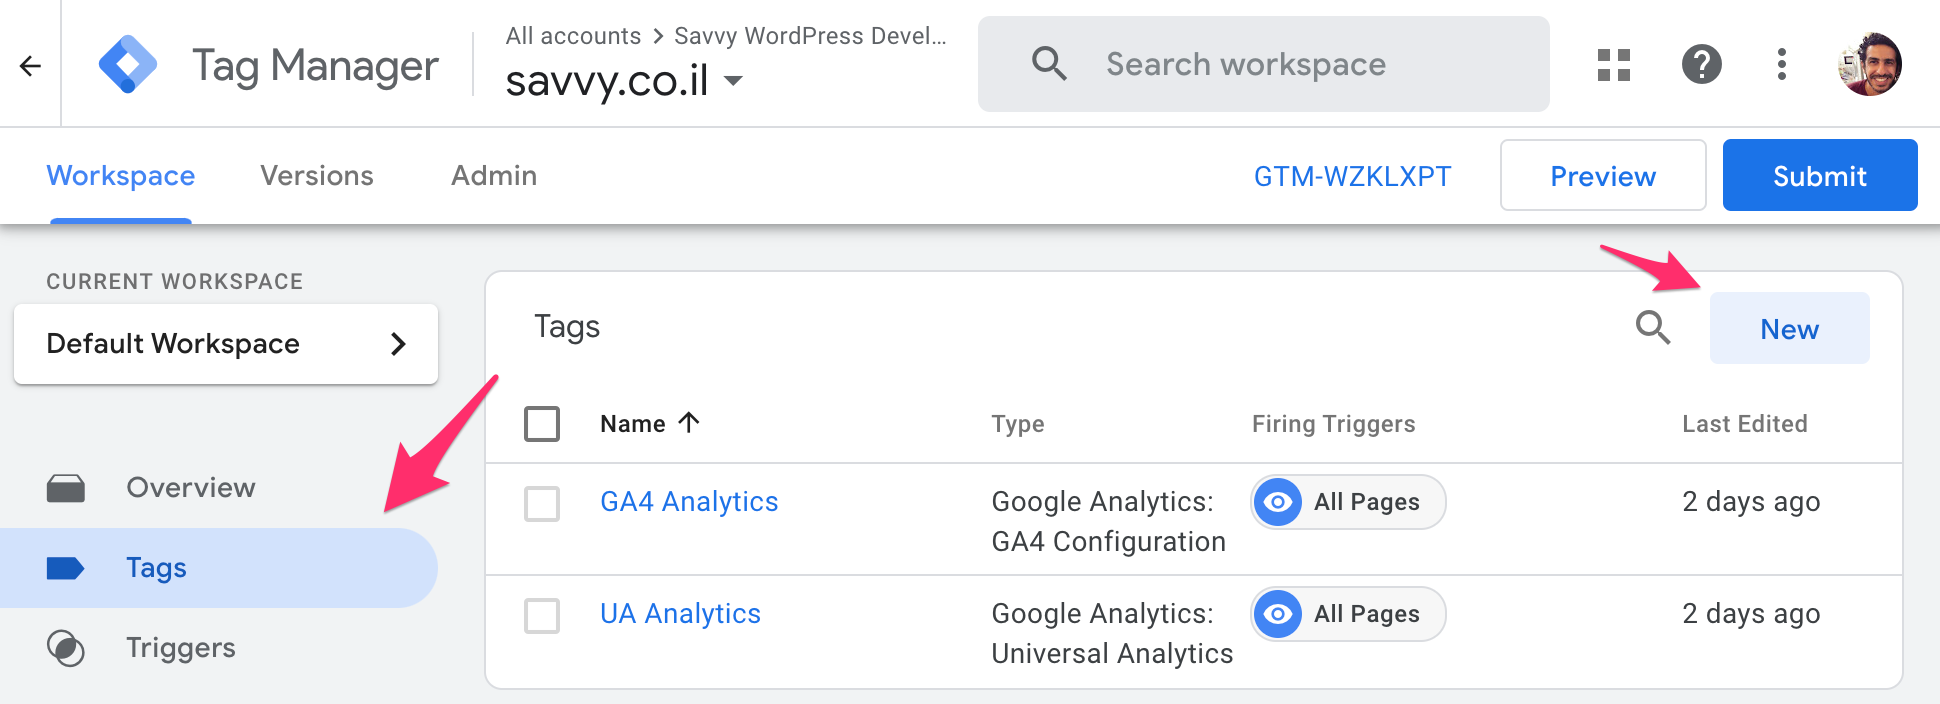
1. Log in to Google Tag Manager and click on Tags
Then click on New to create a new tag.
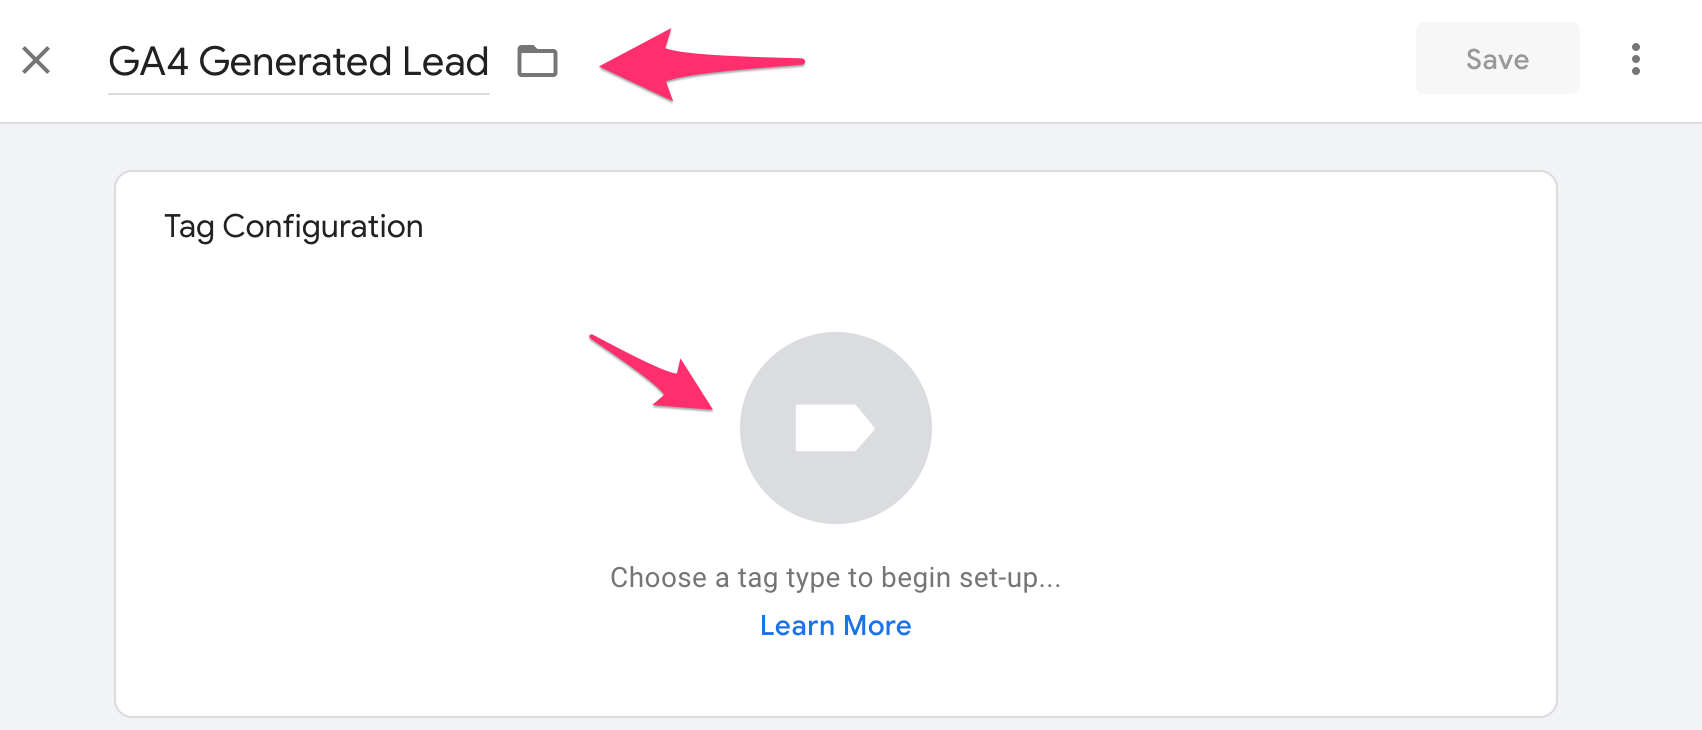
2. Give a proper name to the new tag and click on Tag Configuration
The name we chose in this case is GA4 Generated Lead.
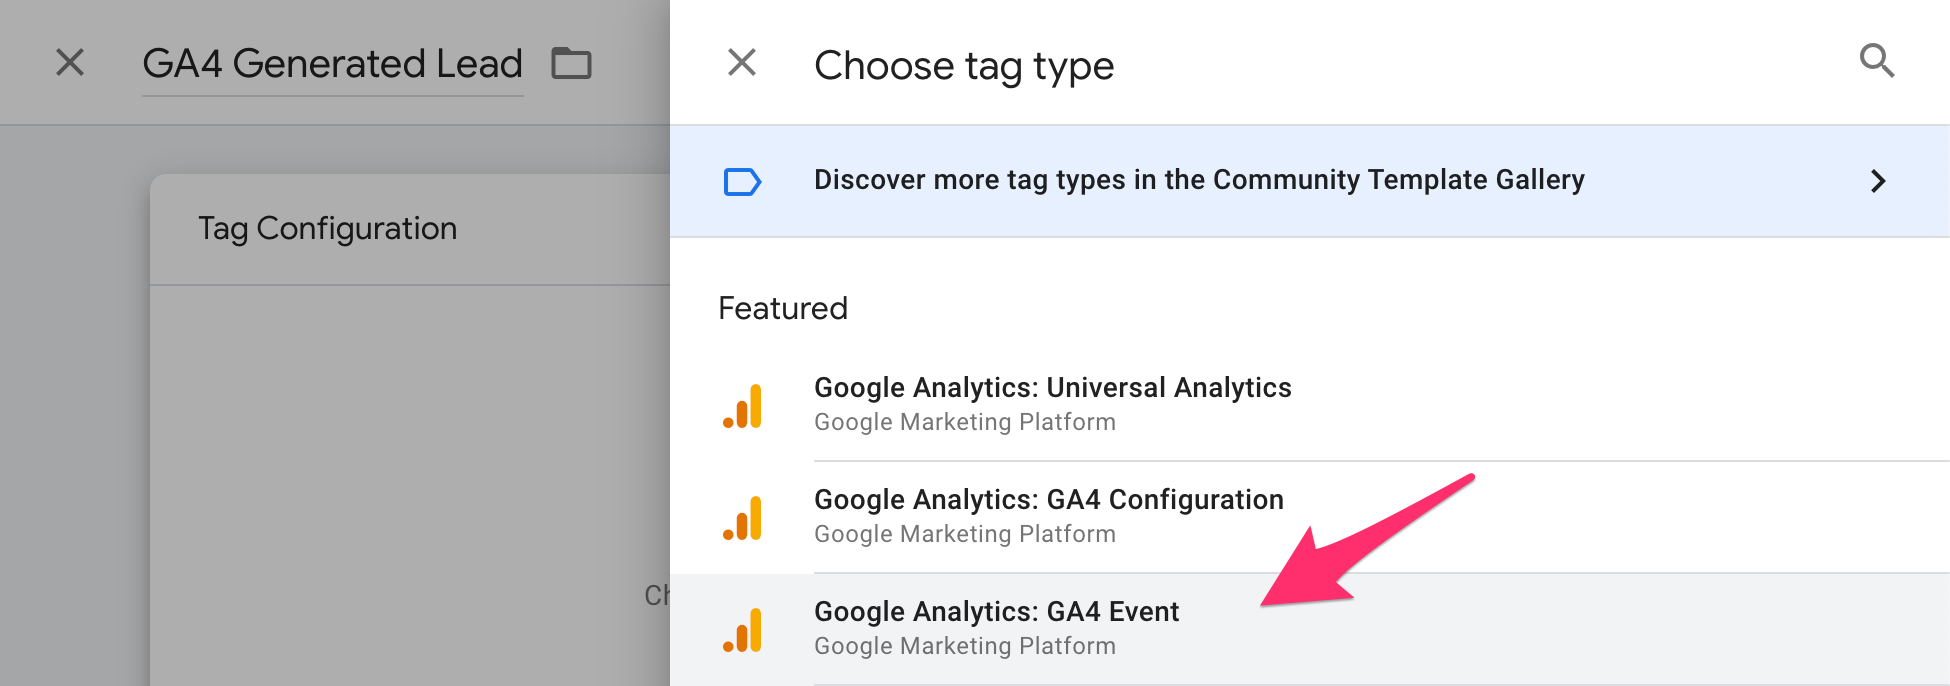
3. Choose the GA4 Event tag
Clicking will open a window showing a list of tags. Choose the tag Google Analytics: GA4 Event.
4. Configure the tag
The Tag Configuration window will open; click on Select Configuration Tag. In the Drop Down menu that appears, choose None – Manually Set ID.
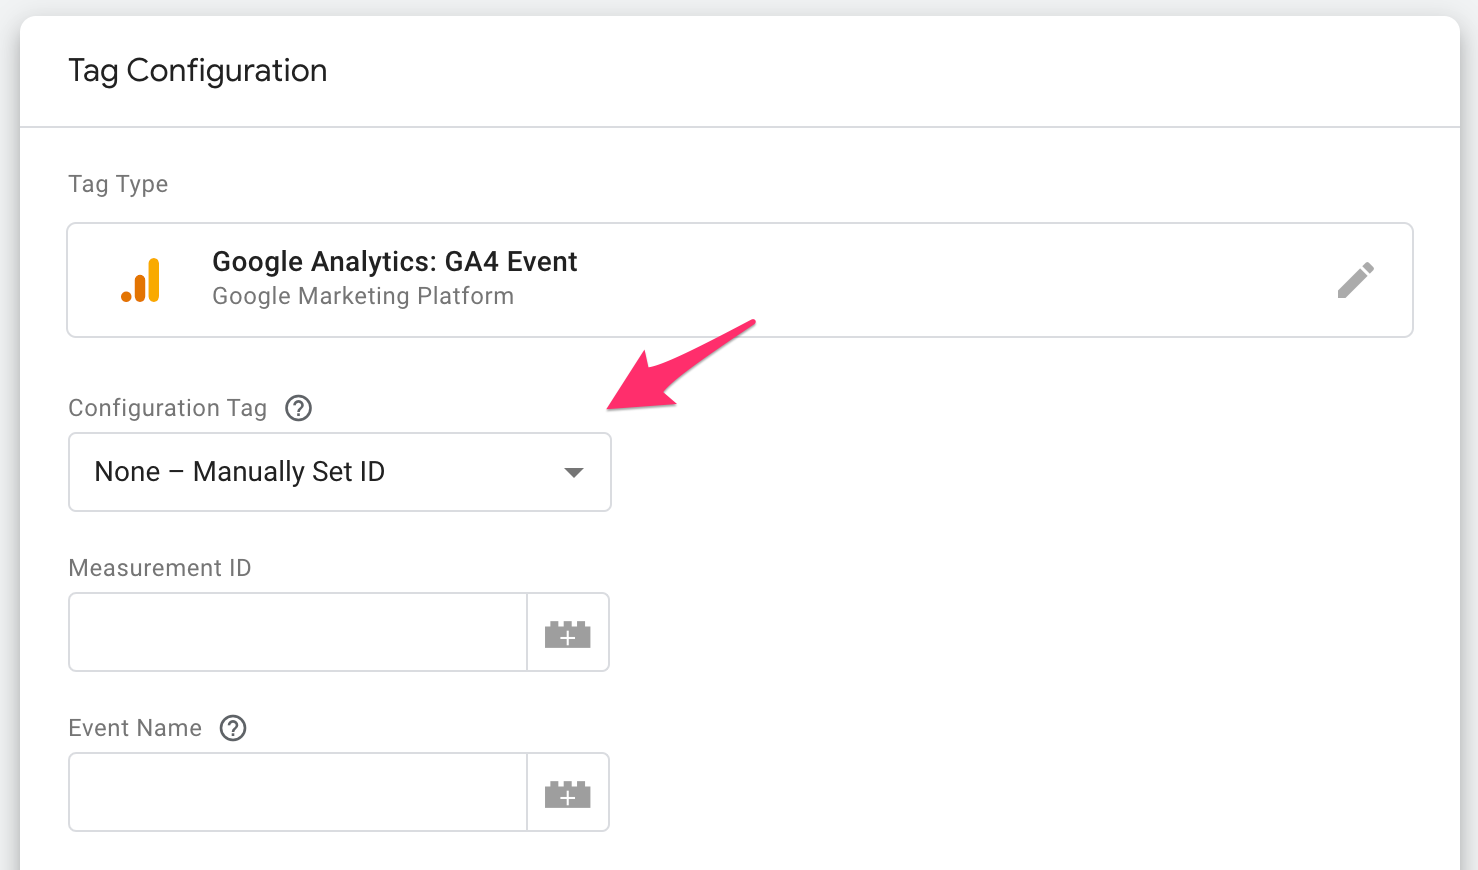
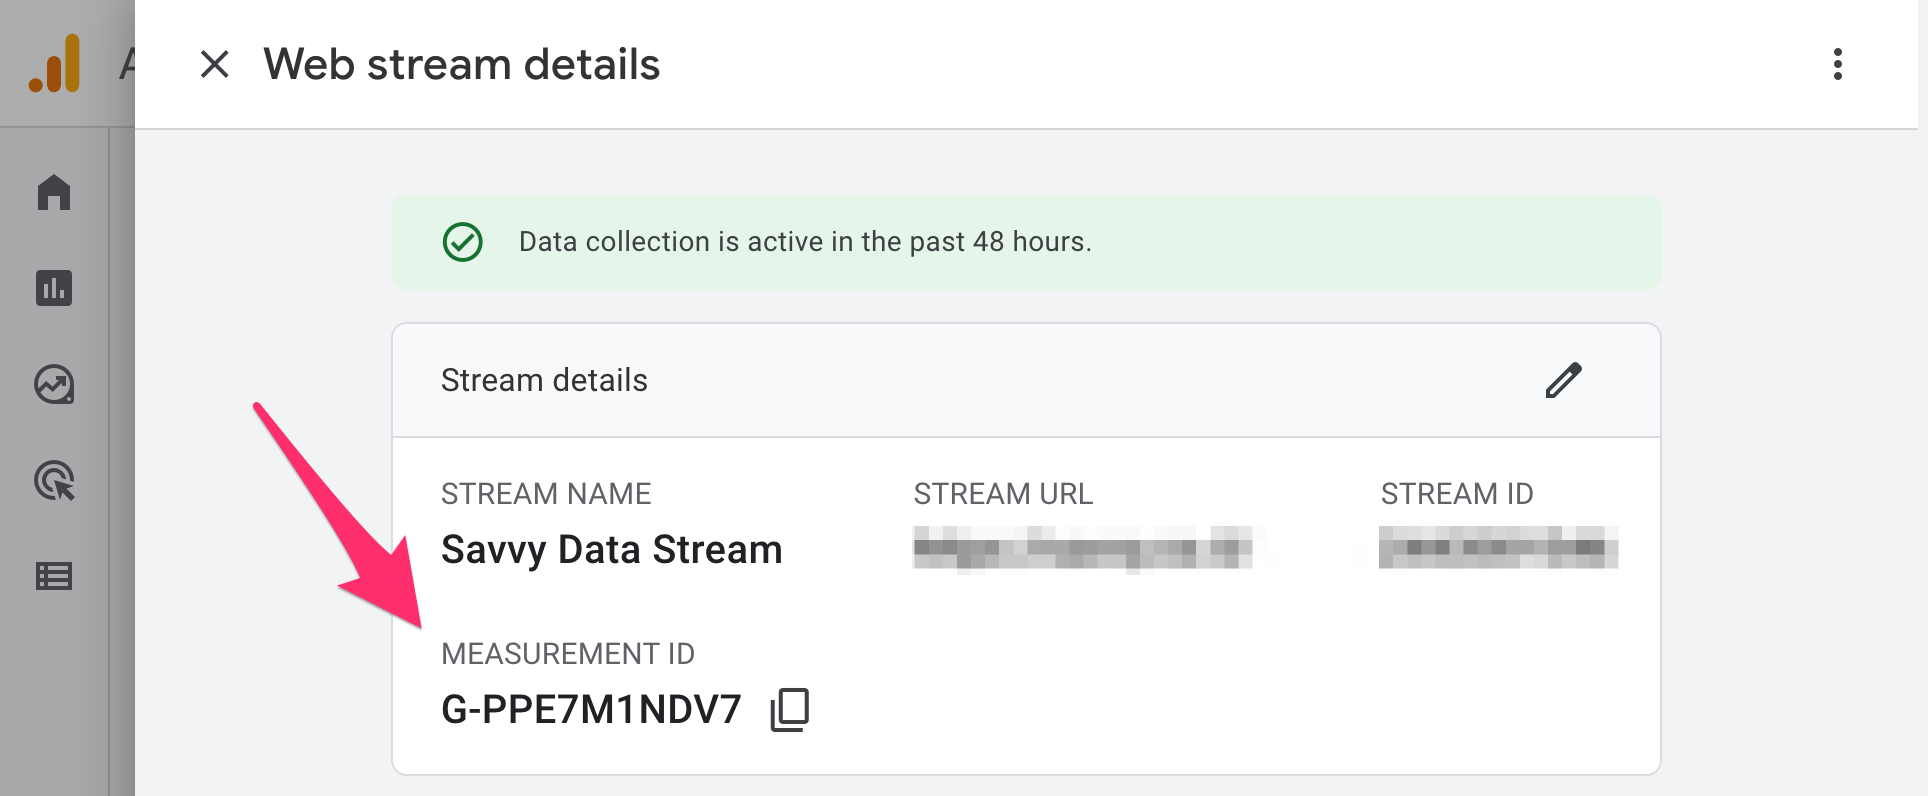
6. Enter the relevant GA4 Measurement ID in the field
You can find the Measurement ID under Admin > Data Streams in the GA4 admin interface.
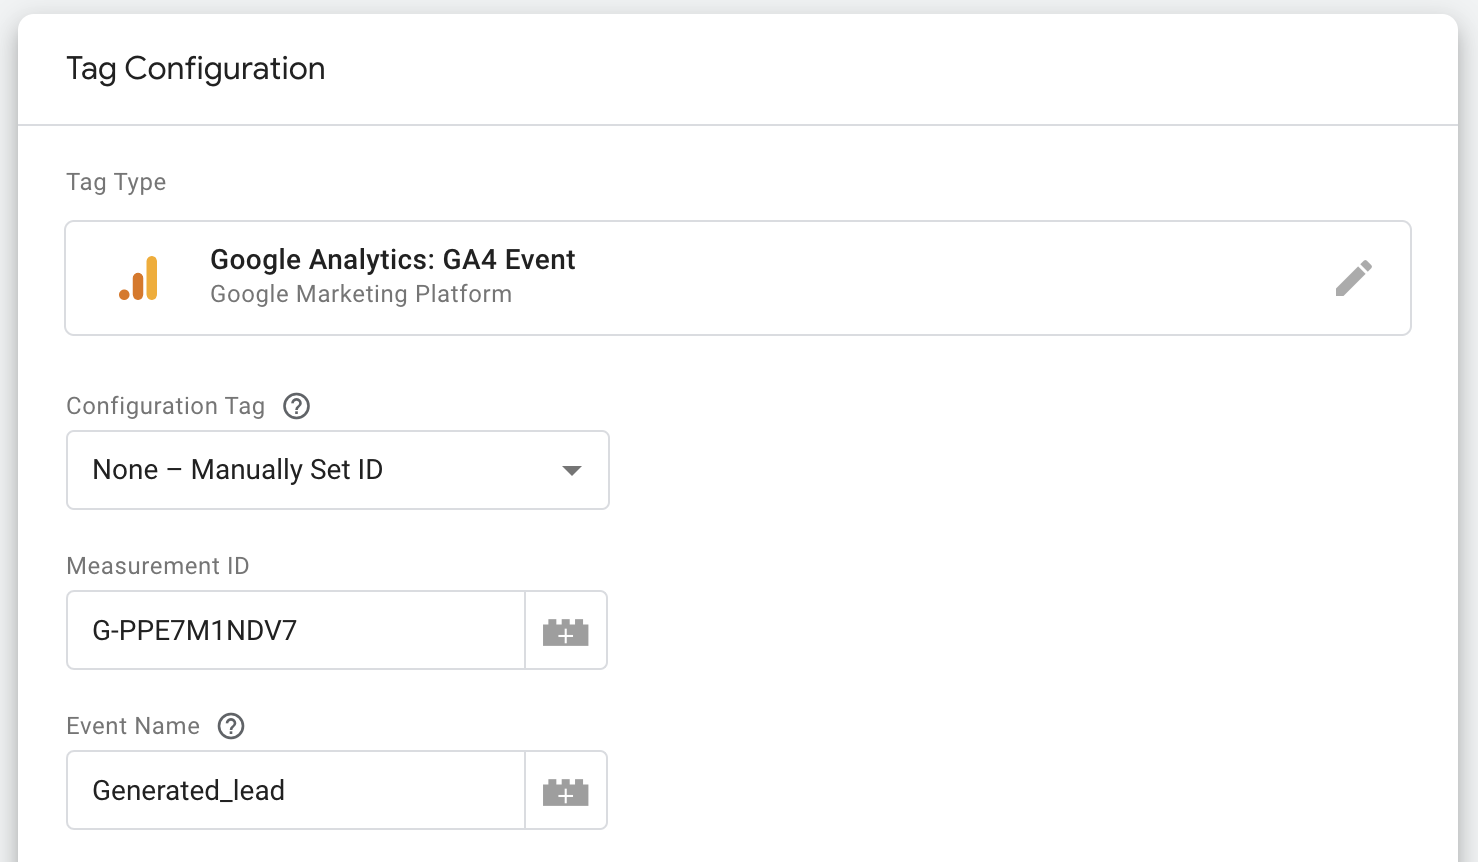
After entering the Measurement ID, you need to choose a name for the event. The event name you choose is what will appear in Google Analytics reports. In our case, we chose the name Generated_lead for this conversion event. It should look more or less like this:
Clicking the blue Save button will prompt a window asking if you want to add a trigger to the tag you created. Click Add trigger.
7. Create a Trigger that will send the event to GA4
The Trigger determines when the event will be sent. Click the ‘+‘ on the upper right side of the screen to add a new Trigger.

Now, give a name to the Trigger and click on Trigger Configuration.
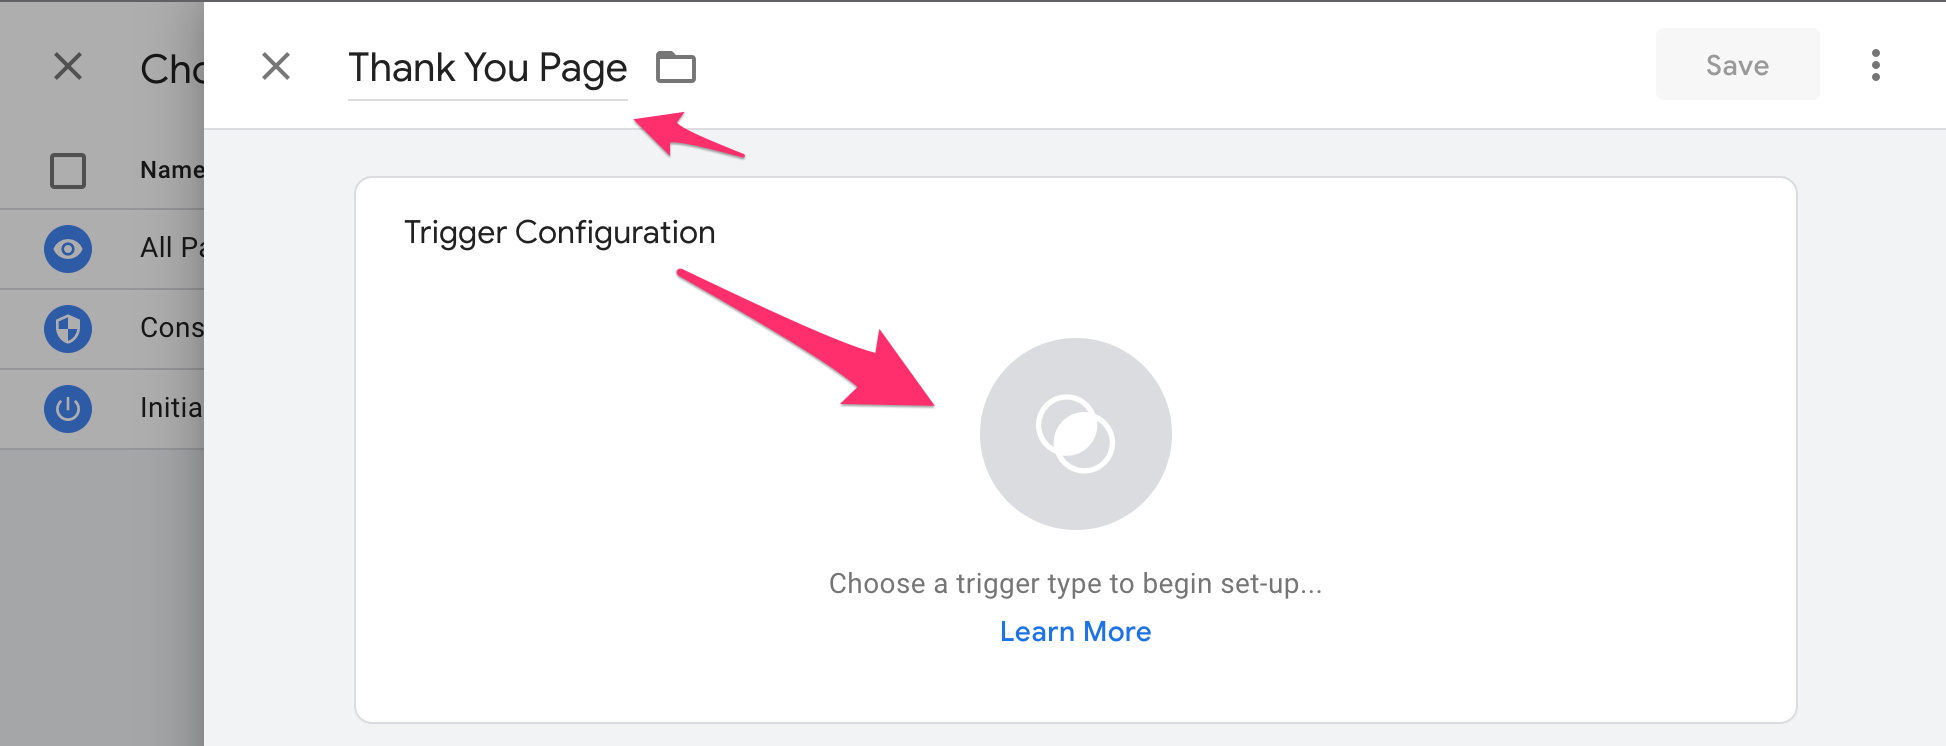
8. Set the conditions for the Trigger
In this case, we’ll set the Trigger conditions as follows:
- Trigger Type: Page View
- Trigger will fire on: Some Page Views
- Condition: Page URL contains thank-you
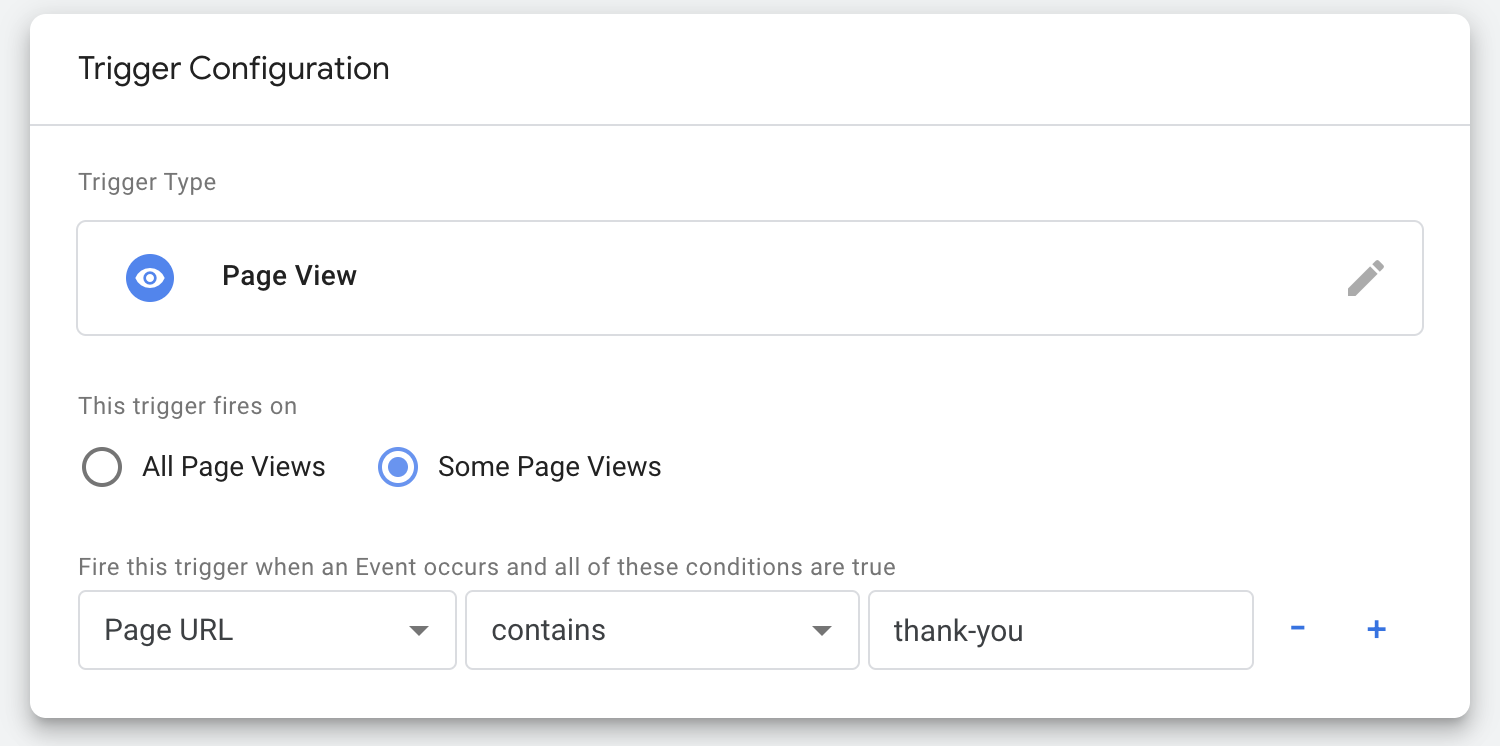
The Trigger will send the event to GA4 when the URL contains the text “thank-you”. Assuming, of course, that this text is present in the URL of your site’s Thank You page.
Once you’ve set the conditions, click the blue Save button twice, once for the Trigger and once for the Tag.
9. Check that the event is indeed sent to GA4
Go to the relevant property in the GA4 admin interface and click on Realtime. If you now visit the Thank You page of your site, you should see the Conversions happening in real-time.
That’s it. Questions are welcome in the comments section of the post…


