Security Headers in WordPress add an extra layer of protection against common attacks without requiring changes to your application’s code.
Securing a website has a lot of moving parts, but adding Security Headers is one of the quickest ways to start strengthening a WordPress site.
In my experience, missing security headers are one of the most common findings in WordPress pentest reports, and one of the easiest to fix.
What Are Security Headers in WordPress?
Security Headers are HTTP response headers that instruct the browser how to behave when handling your site’s content. They restrict what the browser is allowed to do, which shuts down attacks like clickjacking, cross-site scripting (XSS), and protocol downgrades.
The settings below may not suit every site, so add one header at a time and watch the browser console after each change. I give examples for both Apache and NGINX.
Incorrect Security Header configuration can cause a 500 error or break parts of your site. Always back up your .htaccess or nginx.conf file before making changes, and make sure you have FTP or file manager access so you can revert if the site goes down.
For a deeper reference on each header and its parameters, see the MDN Web Docs on HTTP Security Headers.
Recommended Security Headers to Add
The headers below fall into two groups. The safe baseline (X-Content-Type-Options, X-Frame-Options, Referrer-Policy, X-XSS-Protection, and a conservative HSTS) works on virtually any WordPress site and rarely breaks anything.
The advanced headers (Content-Security-Policy, Permissions-Policy, and the cross-origin headers) are more powerful, but they can break real features (embeds, express checkout, social logins, CDN assets), so test each one before you rely on it.
A. HTTP Strict Transport Security (HSTS)
HTTP Strict Transport Security (HSTS) tells browsers to only connect to your site over HTTPS, never over plain HTTP. This prevents protocol downgrade attacks and cookie hijacking.
Your site must already have a valid SSL certificate and be fully working on HTTPS before enabling HSTS.
Header always set Strict-Transport-Security "max-age=31536000; includeSubDomains"add_header Strict-Transport-Security "max-age=31536000; includeSubDomains" always;The max-age=31536000 value means the browser will remember this policy for one year. The includeSubDomains directive applies the policy to all subdomains as well – only use this if all your subdomains support HTTPS.
If you are setting up HSTS for the first time, start with a short max-age (e.g., 300 for 5 minutes) and gradually increase it once you confirm everything works.
B. X-Frame-Options
X-Frame-Options protects users from clickjacking attacks. Without it, an attacker could load your site inside an iframe on their own page and trick users into clicking on hidden elements.
This is particularly dangerous when the user is logged into an area on your site that requires authentication.
<IfModule mod_headers.c>
Header always set X-Frame-Options "SAMEORIGIN"
</IfModule>
add_header X-Frame-Options "SAMEORIGIN" always;The SAMEORIGIN value lets your own site embed itself in iframes (handy for previews in the WordPress admin) but blocks other domains from doing so.
Use set here rather than append: set replaces any X-Frame-Options a plugin, proxy, or CDN might already be sending, while append can produce a duplicate, conflicting header that browsers ignore.
Modern browsers are moving to the frame-ancestors directive in Content-Security-Policy (section D), which takes priority over X-Frame-Options. Keep both for older browsers; the CSP below already sets frame-ancestors 'self'.
C. X-Content-Type-Options
Setting the X-Content-Type-Options header prevents the browser from guessing (or “sniffing”) the MIME type of a file. Without it, a browser might interpret a malicious file as JavaScript or HTML.
Header always set X-Content-Type-Options nosniffadd_header X-Content-Type-Options "nosniff" always;This is one of the simplest headers to add and has virtually no risk of breaking your site.
D. Content-Security-Policy
The Content Security Policy (CSP) header is the most powerful of the bunch, and the most complex. It tells the browser exactly which sources may load scripts, styles, images, fonts, and other resources.
A strict CSP can effectively prevent XSS attacks. However, WordPress themes and plugins rely heavily on inline scripts and styles, which makes a strict policy difficult to implement without breaking functionality.
A realistic starting point for most WordPress sites:
Header always set Content-Security-Policy "default-src 'self'; script-src 'self' 'unsafe-inline' 'unsafe-eval' https:; style-src 'self' 'unsafe-inline' https:; img-src 'self' https: data:; font-src 'self' https: data:; connect-src 'self' https:; frame-src 'self' https:; media-src 'self' https:; object-src 'none'; base-uri 'self'; frame-ancestors 'self';"add_header Content-Security-Policy "default-src 'self'; script-src 'self' 'unsafe-inline' 'unsafe-eval' https:; style-src 'self' 'unsafe-inline' https:; img-src 'self' https: data:; font-src 'self' https: data:; connect-src 'self' https:; frame-src 'self' https:; media-src 'self' https:; object-src 'none'; base-uri 'self'; frame-ancestors 'self';" always;The unsafe-inline and unsafe-eval directives weaken CSP protection, but most WordPress sites need them: core, Gutenberg, and many plugins depend on inline scripts, so removing them will likely break the site.
Treat them as a practical compromise and tighten the policy over time as WordPress improves its CSP support.
Two directives here are easy to miss but matter a lot. frame-src and media-src are set to 'self' https: so embeds keep working. Drop them and both fall back to default-src 'self', which silently blocks every third-party embed: YouTube, Vimeo, Google Maps, audio and video players.
object-src 'none' and base-uri 'self' are two cheap wins. They block legacy object and plugin injection and <base>-tag hijacking, with essentially no downside on a normal site.
Before enforcing a CSP, test it with Content-Security-Policy-Report-Only. It logs violations to the browser console without blocking anything, so you see exactly what would break first.
E. Referrer-Policy
The Referrer-Policy header controls how much referrer information the browser sends when navigating from your site to another.
Header always set Referrer-Policy "strict-origin-when-cross-origin"add_header Referrer-Policy "strict-origin-when-cross-origin" always;The strict-origin-when-cross-origin value sends the full URL for same-origin requests but only the origin (domain) for cross-origin requests. This is a good balance between privacy and functionality – it preserves analytics data while not leaking full page paths to external sites.
F. Permissions-Policy
The Permissions-Policy header (formerly Feature-Policy) controls which browser features and APIs your site can use, such as the camera, microphone, geolocation, and payment APIs.
Most WordPress sites do not need access to these features, so disabling them reduces your attack surface:
Header always set Permissions-Policy "camera=(), microphone=(), geolocation=(), payment=(), browsing-topics=()"add_header Permissions-Policy "camera=(), microphone=(), geolocation=(), payment=(), browsing-topics=()" always;The empty parentheses () disable each feature entirely, and browsing-topics=() opts your site out of Google’s Topics API. If you actually use one of these (a store locator needs geolocation, say), allow just that one with geolocation=(self).
One WooCommerce catch worth flagging: Apple Pay and Google Pay run on the Payment Request API. If you offer them, drop payment=() (or use payment=(self)), or the express checkout buttons quietly disappear.
G. X-XSS-Protection (Deprecated)
The X-XSS-Protection header was designed to activate the browser’s built-in XSS filter. However, this header is now deprecated and has been removed from all modern browsers (Chrome removed it in version 78, Firefox never supported it, and Edge removed it in version 17).
The XSS filter was found to have security flaws of its own – it could be exploited to create cross-site information leaks. The recommended approach is to either omit this header entirely or explicitly disable it:
Header always set X-XSS-Protection "0"add_header X-XSS-Protection "0" always;Use Content-Security-Policy instead for XSS protection. If you previously had X-XSS-Protection: 1; mode=block in your configuration, it is safe to remove it.
Complete Configuration Example
I recommend rolling these out in two passes: paste the safe baseline first and confirm the site is healthy, then layer on the advanced headers one at a time.
One placement note before you paste: in .htaccess (Apache or LiteSpeed), put these outside the # BEGIN WordPress / # END WordPress block. WordPress rewrites that block whenever you save permalinks, so anything inside it gets wiped.
On NGINX, add the directives to your server block and reload with sudo nginx -s reload. Apache and LiteSpeed apply .htaccess changes immediately.
Safe baseline (start here)
This block is safe on virtually any WordPress site. It uses a conservative HSTS (no includeSubDomains yet) and only the headers that almost never affect functionality:
<IfModule mod_headers.c>
Header always set Strict-Transport-Security "max-age=31536000" env=HTTPS
Header always set X-Content-Type-Options nosniff
Header always set X-Frame-Options "SAMEORIGIN"
Header always set Referrer-Policy "strict-origin-when-cross-origin"
Header always set X-XSS-Protection "0"
</IfModule>
Full configuration (add after testing)
Once the baseline is live and the site is healthy, layer on the advanced headers. Add Content-Security-Policy and Permissions-Policy one at a time and watch the console; these are the ones most likely to break embeds, checkout, or logins.
Upgrade HSTS to includeSubDomains only after you have confirmed every subdomain is on HTTPS:
<IfModule mod_headers.c>
Header always set Strict-Transport-Security "max-age=31536000; includeSubDomains" env=HTTPS
Header always set X-Content-Type-Options nosniff
Header always set X-Frame-Options "SAMEORIGIN"
Header always set Referrer-Policy "strict-origin-when-cross-origin"
Header always set X-XSS-Protection "0"
Header always set Permissions-Policy "camera=(), microphone=(), geolocation=(), payment=(), browsing-topics=()"
Header always set Content-Security-Policy "default-src 'self'; script-src 'self' 'unsafe-inline' 'unsafe-eval' https:; style-src 'self' 'unsafe-inline' https:; img-src 'self' https: data:; font-src 'self' https: data:; connect-src 'self' https:; frame-src 'self' https:; media-src 'self' https:; object-src 'none'; base-uri 'self'; frame-ancestors 'self';"
</IfModule>
One gotcha with env=HTTPS: it only sends HSTS over HTTPS, but behind Cloudflare or a load balancer that terminates SSL, Apache often does not set the HTTPS variable, so the header never appears. If that happens, gate on "expr=%{HTTP:X-Forwarded-Proto} == 'https'" instead.
Hit a 500 error after adding a header? Remove it and add the rest back one at a time. The culprit is almost always a single unsupported directive or a missing mod_headers.
H. Cross-Origin Headers (Advanced)
Three newer headers help isolate your site from cross-origin attacks like Spectre:
Cross-Origin-Opener-Policy (COOP) stops other sites from getting a reference to your window through popups. Cross-Origin-Resource-Policy (CORP) controls which origins are allowed to load your resources. (The third, COEP, is stricter still, but most WordPress sites should leave it off.)
Header always set Cross-Origin-Opener-Policy "same-origin"
Header always set Cross-Origin-Resource-Policy "same-origin"
add_header Cross-Origin-Opener-Policy "same-origin" always;
add_header Cross-Origin-Resource-Policy "same-origin" always;These break more than people expect. Cross-Origin-Opener-Policy: same-origin severs window.opener, which kills social-login popups ("Log in with Google") and some payment popups. Cross-Origin-Resource-Policy: same-origin blocks your own images, fonts, and scripts when they load from a CDN subdomain (and cdn.example.com is cross-origin to www.example.com, so most CDN setups are affected).
Skip COEP, and only add COOP and CORP if you do not use social logins, cross-origin popups, or a CDN subdomain.
Checking Your Security Headers
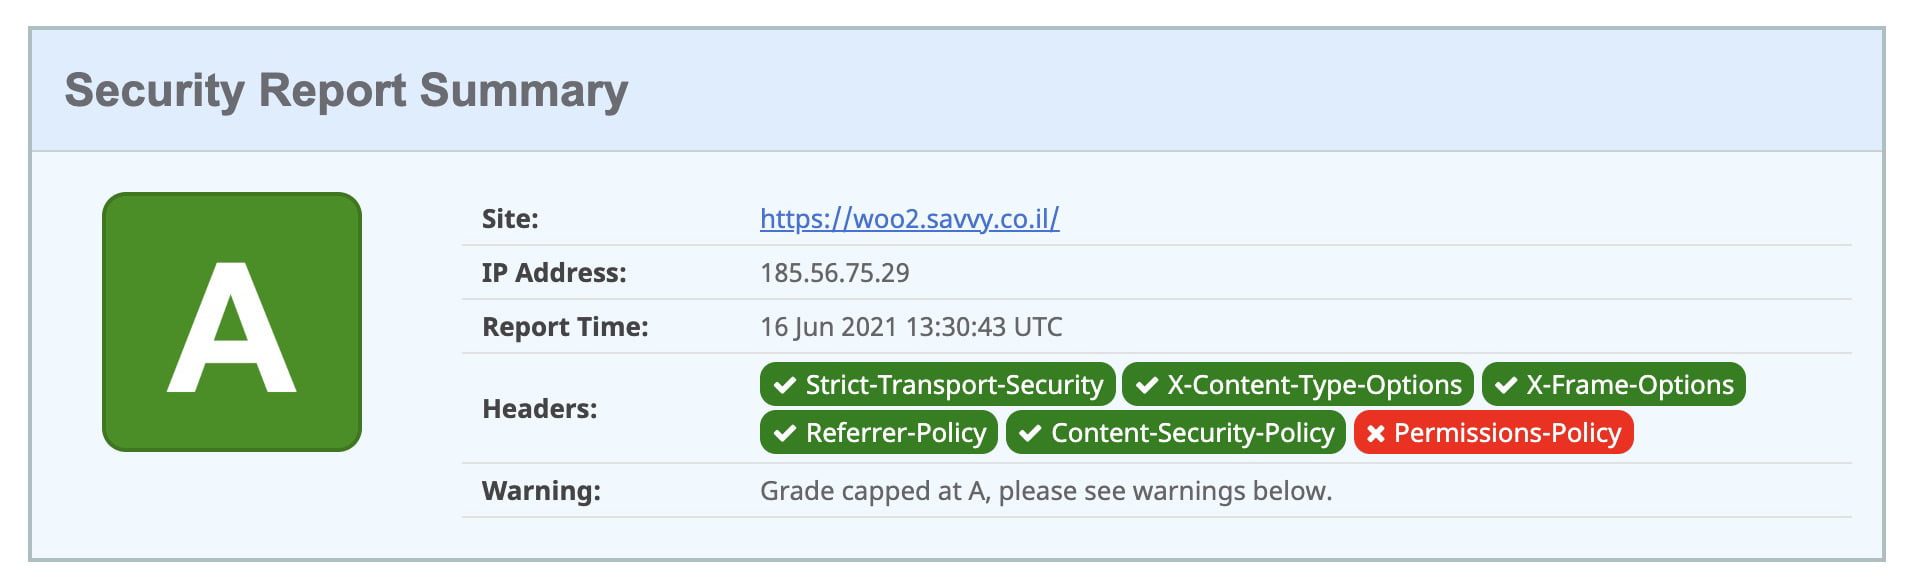
After adding the headers, verify they are working correctly. You can test your site on securityheaders.com to get a grade and see which headers are present.
You can also check headers in your browser’s Developer Tools. Open the Network tab, click on the main document request, and look at the Response Headers section to confirm your headers are being sent.
FAQs
Common questions about WordPress security headers:
Summary
Security headers are one of the cheapest wins in WordPress security: a few lines in .htaccess and you have shut down a whole class of attacks. Start with the safe baseline, confirm nothing breaks, then layer on CSP and Permissions-Policy while watching the console.
The key rule: add one header at a time, test, and keep a backup. If something breaks, you can always revert.
Security headers are just one layer of a solid WordPress security setup. From here, look at two-factor authentication, securing the REST API, and disabling XML-RPC.
One header to watch on the SEO side: a misconfigured X-Robots-Tag can block AI crawlers, which the AI Visibility Audit checks for.
If you have questions or want to suggest improvements, feel free to leave a comment below.


Thanks! Very helpful