Security Headers in WordPress were created to protect applications from frequent and widespread attacks without the need to add or modify anything in your application’s code.
When it comes to securing websites or web applications, there are several aspects to consider, and a good place to start strengthening the security of WordPress sites is by adding Security Headers.
What are Security Headers in WordPress?
These Security Headers in WordPress help add an additional layer of security to prevent various attacks and protect your site from different vulnerabilities and threats. In this post, we will go through the different Security Headers and see how to add them to your site for the purpose of enhancing stronger site security.
I won’t go into detail about the parameters of each of the Security Headers, but let’s briefly look at the code snippets you need to add to the relevant file, whether it’s in an Apache server or NGINX server.
It’s important to note that the settings I’m presenting in this post may not necessarily be suitable for every site. You should do some trial and error and make sure to check the site and see if there are any console errors after each change.
In many cases, only a specific Security Header among those we’re presenting might be problematic. In any case, back up the file before starting work and ensure you have access to the files you’re changing, even if the site goes down (using FTP for example).
I’m not an expert in this specific subject, so if there’s an issue, I suggest seeking a professional’s help. In any case, since I’m not specifying the parameters of each Security Header I’m presenting, keep in mind that you can find additional information at this link.
Recommended Security Headers to Add
Here are some recommended Security Headers for WordPress sites. Note that an incorrect configuration of these could cause your site not to work, so make sure you have a proper backup.
A. HTTP Strict Transport Security (HSTS)
HTTP Strict Transport Security (HSTS) allows web servers to declare that web browsers (or any compatible User Agent) should interact with them only over a secure HTTPS connection, never over unsecure HTTP.
You can add the HSTS Security Header by adding a few lines to the .htaccess file on Apache servers or the nginx.conf file on NGINX servers. Below are both snippets for each:
Header always set Strict-Transport-Security "max-age=31536000; includeSubDomains"
add_header Strict-Transport-Security "max-age=31536000";
B. X-Frame-Options
X-Frame-Options protects users from clickjacking attacks. By using iframes, the content of your site can be loaded on other sites. This can be exploited to make a user unknowingly click on a seemingly innocent external link that navigates within your site.
This can be particularly dangerous when the user is logged into an area on your site that requires some form of authentication.
Header always append X-Frame-Options SAMEORIGIN
add_header X-Frame-Options "SAMEORIGIN" always;C. X-XSS-Protection
X-XSS-Protection is a Security Header that allows you to configure XSS-Protection using the existing mechanism in browsers. For example, preventing the theft of session cookies when the user is logged into your site.
Header set X-XSS-Protection "1; mode=block"add_header X-Xss-Protection "1; mode=block" always;D. X-Content-Type-Options
Setting the X-Content-Type-Options header prevents the browser from interpreting files as something else than what’s specified by the content type in the HTTP Header.
There are many possible parameters for this Security Header, but the most common one is nosniff:
Header set X-Content-Type-Options nosniffadd_header X-Content-Type-Options "nosniff" always;E. Content-Security-Policy
The Content Security Policy header helps mitigate XSS risks in modern browsers by declaring which dynamic resources can be loaded and from where.
Header set Content-Security-Policy "default-src 'none'; script-src 'self'; connect-src 'self'; img-src 'self'; style-src 'self';"add_header Content-Security-Policy "default-src 'none'; script-src 'self'; connect-src 'self'; img-src 'self'; style-src 'self';";F. Referrer-Policy
The Referrer-Policy header indicates to modern browsers how to handle or filter the Referer header, which contains information indicating where the request came from.
Header set Referrer-Policy "same-origin"Checking Security Headers
Here’s a WooCommerce store on an Apache server where I added the following code to the .htaccess file:
<IfModule mod_headers.c>
Header set Strict-Transport-Security "max-age=31536000" env=HTTPS

Header set X-XSS-Protection "1; mode=block"

Header set X-Content-Type-Options nosniff

Header always append X-Frame-Options SAMEORIGIN

Header Referrer-Policy: no-referrer-when-downgrade

Header set Content-Security-Policy "default-src 'self' 'unsafe-inline' 'unsafe-eval' https: data:";

</ifModule>
If you encounter a 500 error or any other issue, try the following Security Headers instead:
<ifModule mod_headers.c>
Header set Strict-Transport-Security "max-age=31536000" env=HTTPS
Header set X-XSS-Protection "1; mode=block"
Header set X-Content-Type-Options nosniff
Header set X-Frame-Options DENY
Header set Referrer-Policy: no-referrer-when-downgrade
</ifModule>
If we check the result of this store on securityheaders.com, we get the following result:
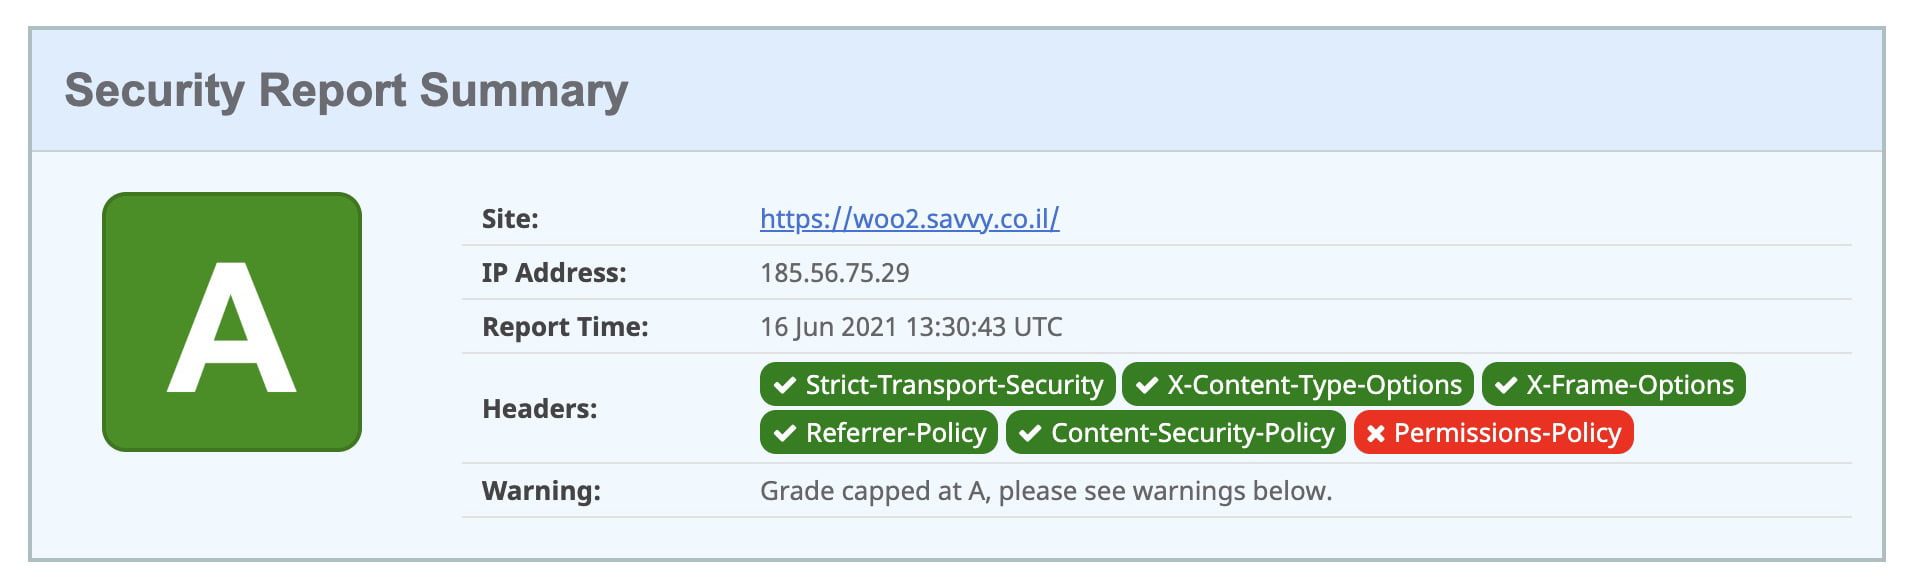
Regarding the Permissions-Policy, which we didn’t mention in this post, if you know the recommended configuration for WordPress sites or if you have anything to share, feel free to do so in the comments…
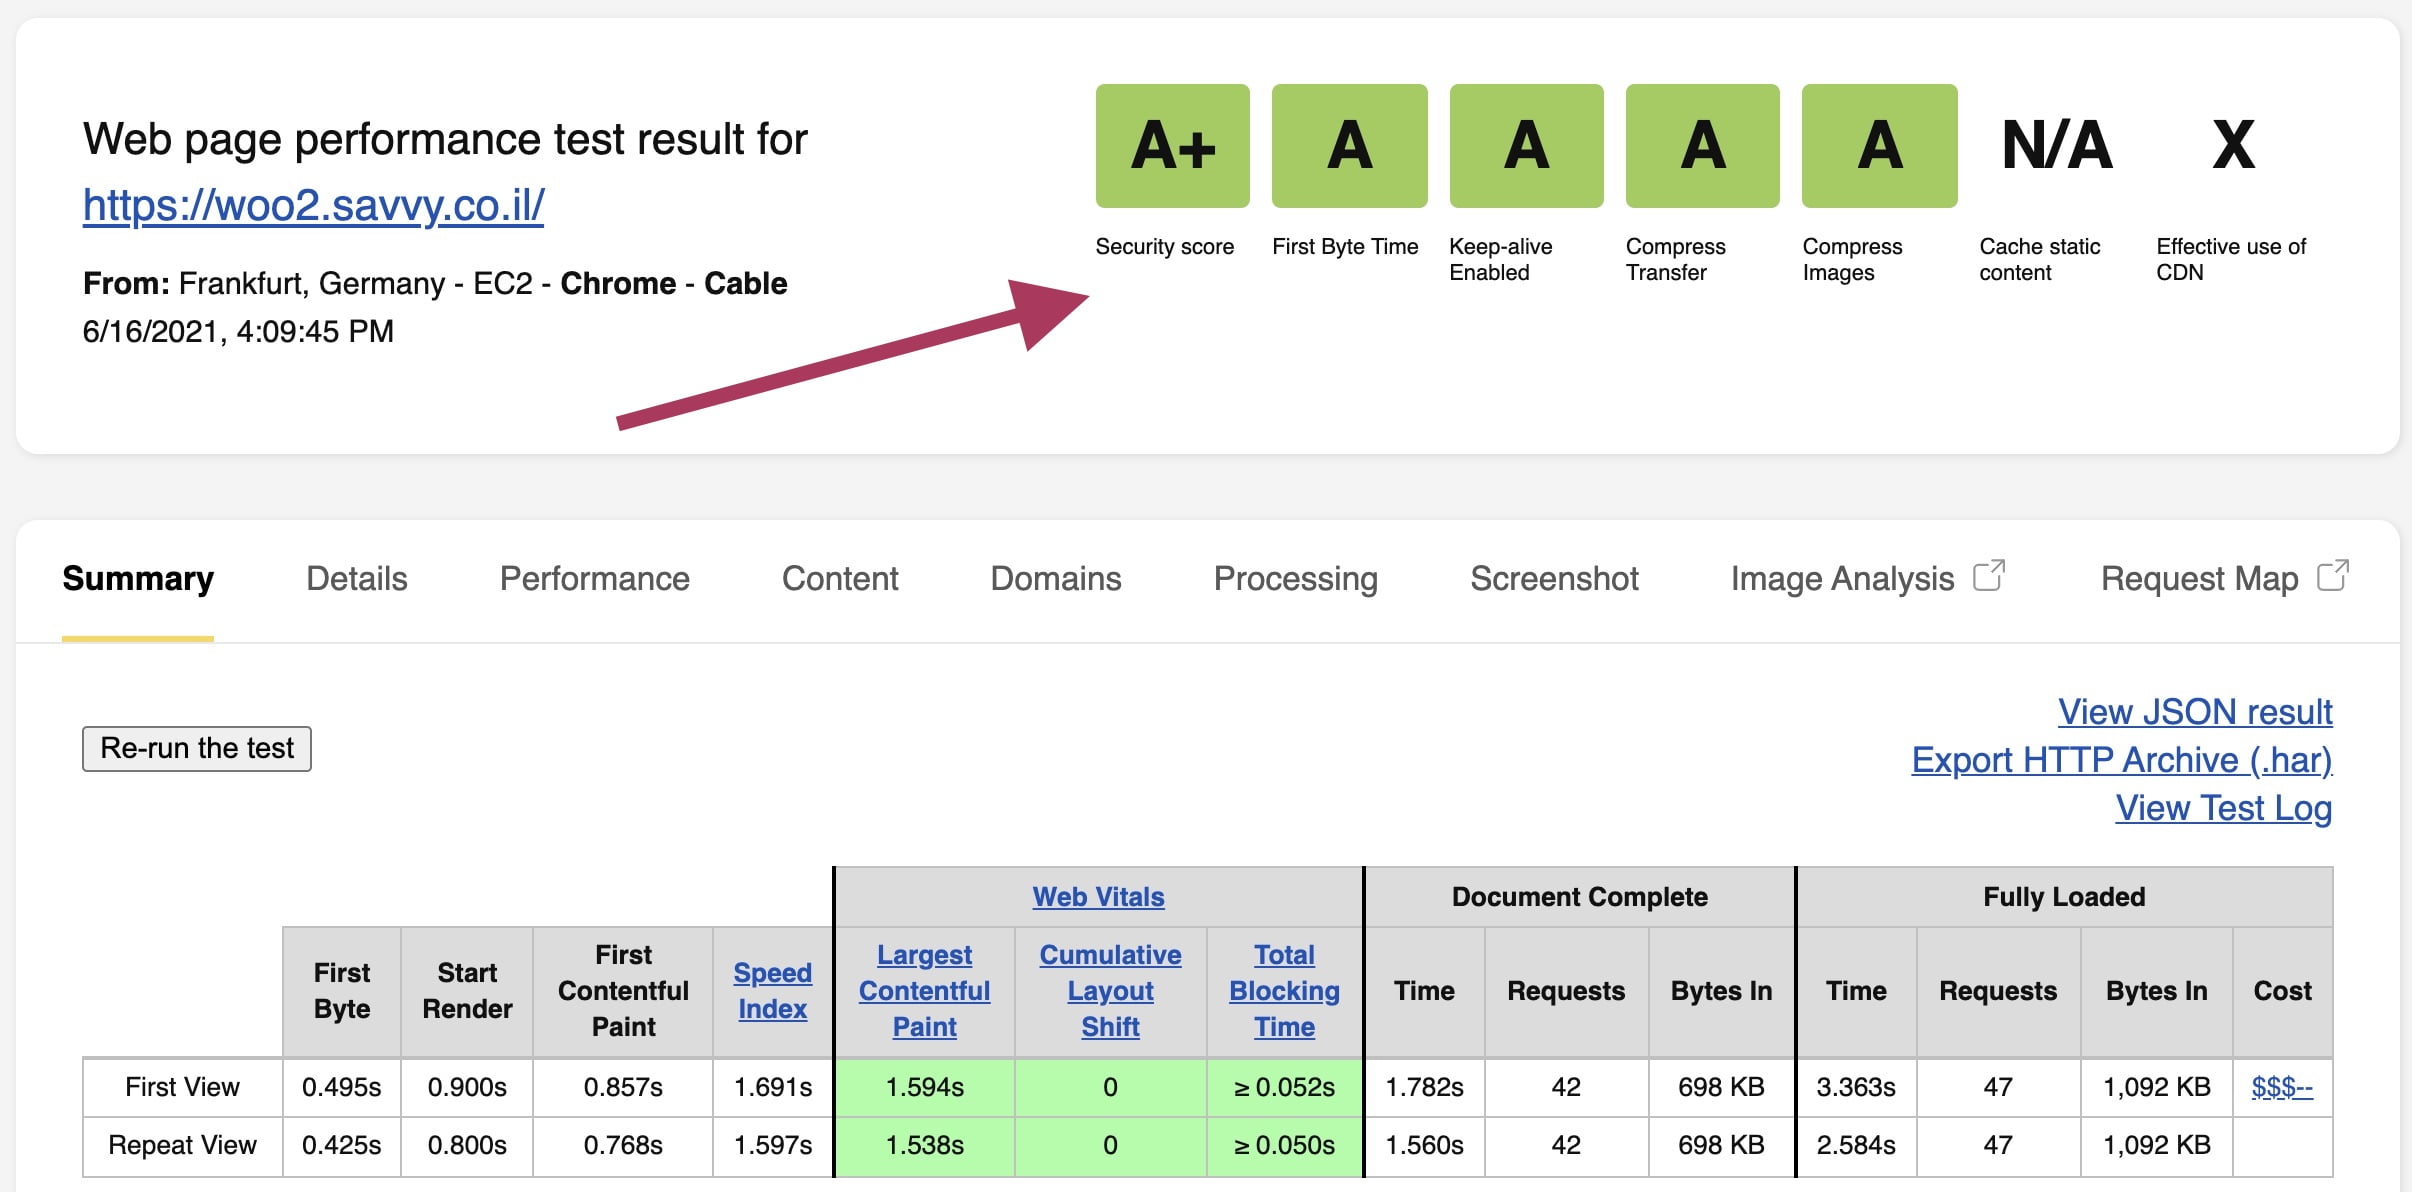
Another way to test the security level of your site is through webpagetest by testing your site’s URL. Here’s the result for the same store:
Thats it, Corrections, comments, and improvements are welcome…


Thanks! Very helpful