Dark Mode has become standard on websites and applications. With iOS, macOS, Windows, and Android all offering system-level dark themes, users expect websites to support them too.
A dark mode toggle makes your site more accessible to users who prefer darker colors, and providing a way to switch between light and dark themes improves the overall user experience.
In this post, I will show you two approaches for adding Dark Mode to your website: a simple CSS file swap, and the modern approach using CSS Variables with a data-theme attribute.
Approach 1: CSS File Swap with localStorage
This approach works by swapping between two CSS files and persisting the user’s choice in localStorage.
Create the CSS Files
Create two CSS files: light-theme.css (empty) and dark-theme.css containing all the CSS overrides for your dark mode.
The light-theme.css file stays empty because the light theme is your site’s default stylesheet. Add a link to the CSS file in the site’s <head>:
<link id="themeCssLink" rel="stylesheet" type="text/css" href="/path-to/light-theme.css"/>Adjust the path to match the file’s location in your site directory.
Create the Toggle Button
Add a button to your site’s footer that switches between modes:
<button id="toggleButton">Change Contrast</button>Here is some CSS to position it as a fixed button in the bottom-right corner:
#toggleButton {
    right: 10px;
    left: auto;
    position: fixed;
    bottom: 14px;
    z-index: 999999;
    display: inline-block;
    text-indent: -999999px;
    width: 40px;
    height: 40px;
    background: linear-gradient(-45deg, #ffd600, #ffd600 49%, #fefefe 49%, #fefefe 51%, #2d2d2d 51%);
    border-radius: 50%;
    border: 0;
    cursor: pointer;
}
JavaScript Toggle with localStorage
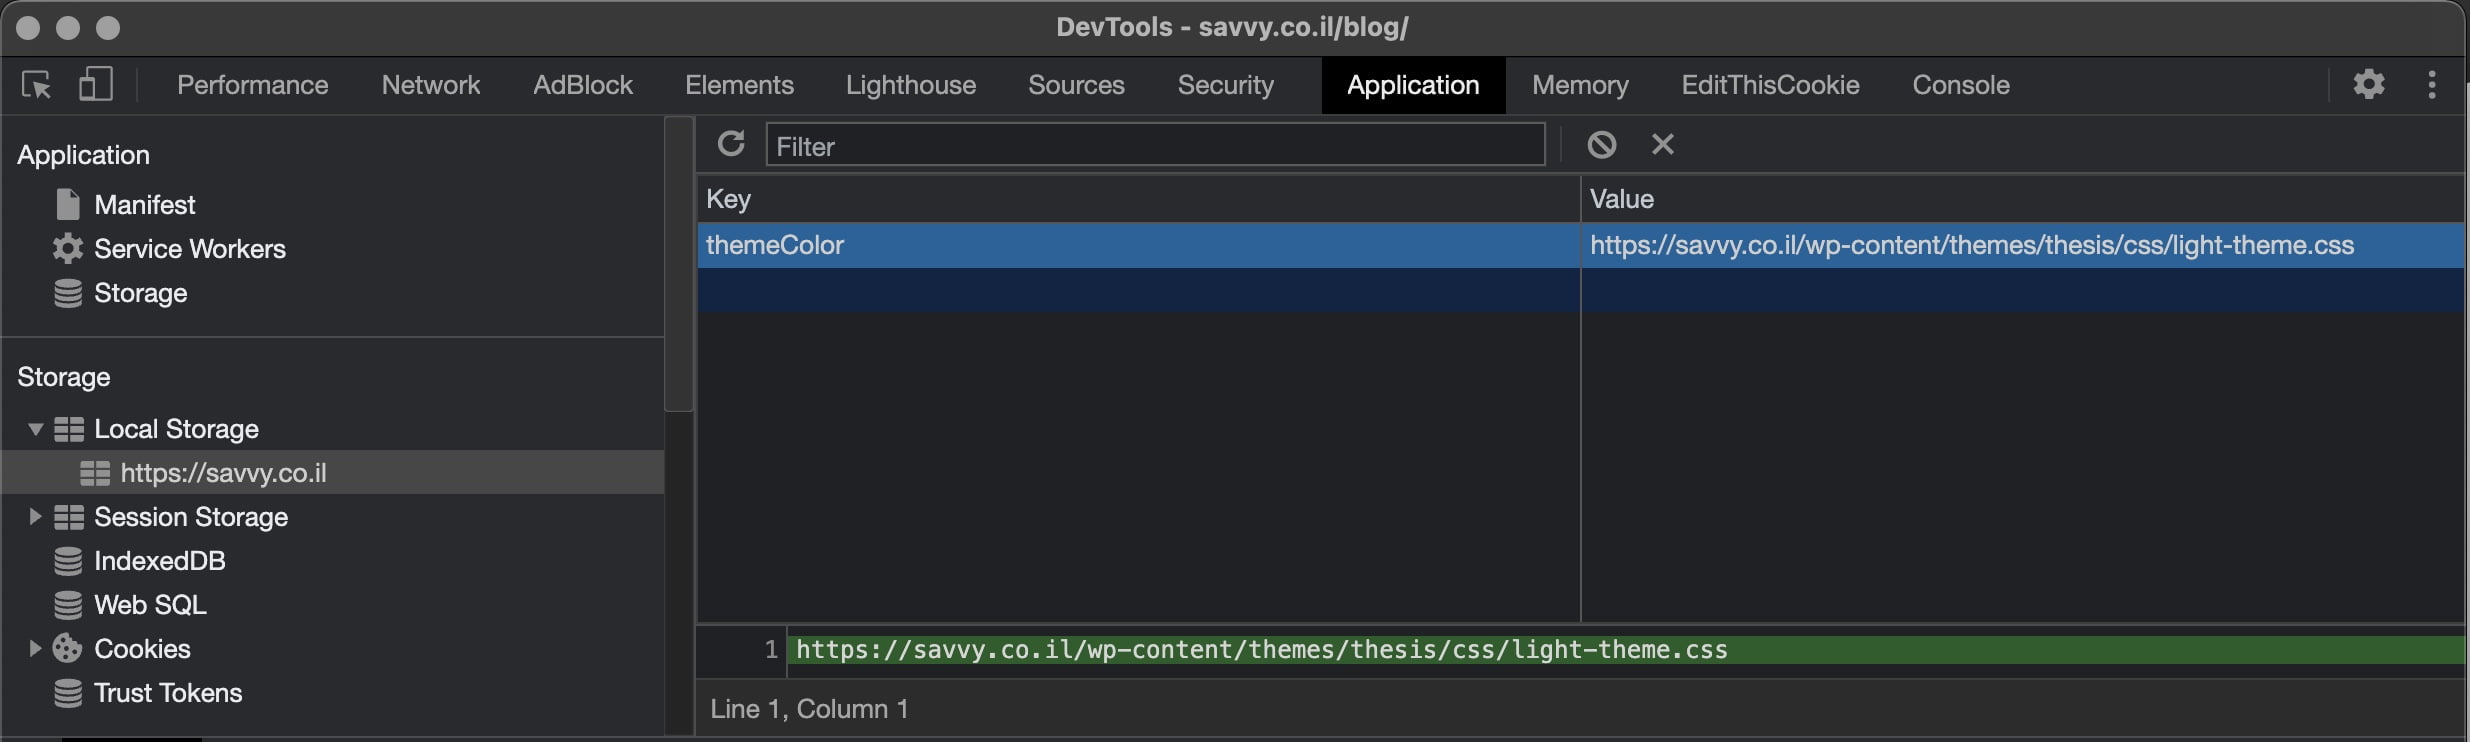
To persist the user’s preference across page loads and browser sessions, we use localStorage – a browser API that stores key/value pairs locally without expiration.
Data stored in
localStoragesurvives page refreshes and browser restarts. Unlike cookies, it does not require a consent notice.
You can inspect localStorage values in Chrome DevTools under the Application tab:
Here is the JavaScript that handles the toggle:
document.addEventListener('DOMContentLoaded', () => {
    const themeStylesheet = document.getElementById('themeCssLink');
    const themeToggle = document.getElementById('toggleButton');
    const storedTheme = localStorage.getItem('themeColor');

    if (storedTheme) {
        themeStylesheet.href = storedTheme;
    }
    themeToggle.addEventListener('click', () => {
        if (themeStylesheet.href.includes('dark')) {
            themeStylesheet.href = '/path-to/light-theme.css';
        } else {
            themeStylesheet.href = '/path-to/dark-theme.css';
        }
        localStorage.setItem('themeColor', themeStylesheet.href);
    });
});
Remember to update the paths in lines 10 and 12 to match the actual location of your CSS files.
The code runs after DOMContentLoaded to ensure the DOM is fully parsed. It checks localStorage for a saved preference, applies it if found, and listens for button clicks to toggle between themes.
Approach 2: CSS Variables with data-theme (Recommended)
The modern and recommended approach uses CSS Variables (custom properties) instead of swapping entire CSS files. This avoids the extra HTTP request, eliminates the empty file, and makes the transition instant.
Define your color tokens as CSS variables and override them for the dark theme:
:root {
    --bg-color: #ffffff;
    --text-color: #1a1a1a;
    --link-color: #0066cc;
    --surface-color: #f5f5f5;
    --border-color: #e0e0e0;
}

[data-theme="dark"] {
    --bg-color: #121212;
    --text-color: #e0e0e0;
    --link-color: #66b3ff;
    --surface-color: #1e1e1e;
    --border-color: #333333;
}

body {
    background-color: var(--bg-color);
    color: var(--text-color);
}

a {
    color: var(--link-color);
}
The JavaScript is simpler because you only toggle a data-theme attribute on the <html> element:
document.addEventListener('DOMContentLoaded', () => {
    const toggle = document.getElementById('toggleButton');
    const savedTheme = localStorage.getItem('theme');

    if (savedTheme) {
        document.documentElement.setAttribute('data-theme', savedTheme);
    }

    toggle.addEventListener('click', () => {
        const current = document.documentElement.getAttribute('data-theme');
        const next = current === 'dark' ? 'light' : 'dark';
        document.documentElement.setAttribute('data-theme', next);
        localStorage.setItem('theme', next);
    });
});
Respecting System Preferences with prefers-color-scheme
Modern browsers support the prefers-color-scheme media query, which detects whether the user’s operating system is set to light or dark mode. You can use it to automatically match the system preference as the default, while still allowing manual override via the toggle:
document.addEventListener('DOMContentLoaded', () => {
    const toggle = document.getElementById('toggleButton');
    const savedTheme = localStorage.getItem('theme');

    if (savedTheme) {
        document.documentElement.setAttribute('data-theme', savedTheme);
    } else if (window.matchMedia('(prefers-color-scheme: dark)').matches) {
        document.documentElement.setAttribute('data-theme', 'dark');
    }

    toggle.addEventListener('click', () => {
        const current = document.documentElement.getAttribute('data-theme');
        const next = current === 'dark' ? 'light' : 'dark';
        document.documentElement.setAttribute('data-theme', next);
        localStorage.setItem('theme', next);
    });
});
This follows the correct priority: saved user preference first, then system preference, then default (light).
FAQs
Common questions about adding dark mode to a website:
data-theme attribute on the <html> element. Define your colors as variables in :root and override them under [data-theme="dark"]. Toggle the attribute with JavaScript and persist the choice in localStorage.prefers-color-scheme is a CSS media query that detects whether the user's operating system or browser is set to light or dark mode. It has been supported in all major browsers since 2020. Use it to automatically match the system preference as the default theme, while still allowing users to override it with a toggle.localStorage.setItem('theme', 'dark') to save the preference and localStorage.getItem('theme') to retrieve it on page load. localStorage persists across page refreshes and browser restarts, and unlike cookies, it does not require a consent notice.<head> of your HTML (before any CSS loads) that reads the saved theme from localStorage and sets the data-theme attribute immediately. This runs before the page renders, preventing the flash. For example:<script>
const t = localStorage.getItem('theme');
if (t) document.documentElement.setAttribute('data-theme', t);
</script>Summary
The simplest way to add dark mode is swapping CSS files with localStorage, but the modern approach using CSS Variables with a data-theme attribute is more efficient – no extra HTTP requests, instant transitions, and easier maintenance. Combine it with the prefers-color-scheme media query to respect the user’s system preference while still allowing manual override.