Conversion tracking in Google Analytics 4 lets you measure the actions that matter most to your business – form submissions, newsletter sign-ups, product purchases, and more. Knowing which events drive results helps you optimize your site and your ad campaigns.
In the old Universal Analytics, these tracked actions were called “Goals,” and you could define up to 20 per property. GA4 replaced Goals with a more flexible, event-based system.
In March 2024, Google renamed “Conversions” to “Key Events” in GA4. What used to be called a conversion in the GA4 interface is now called a key event. The term “Conversion” is now reserved for events imported into Google Ads for campaign optimization. This post uses the current terminology.
In GA4, every user interaction is tracked as an event. You can mark any event as a key event, and you can create new events based on conditions you define. You can have up to 30 key events per property (50 for GA4 360).
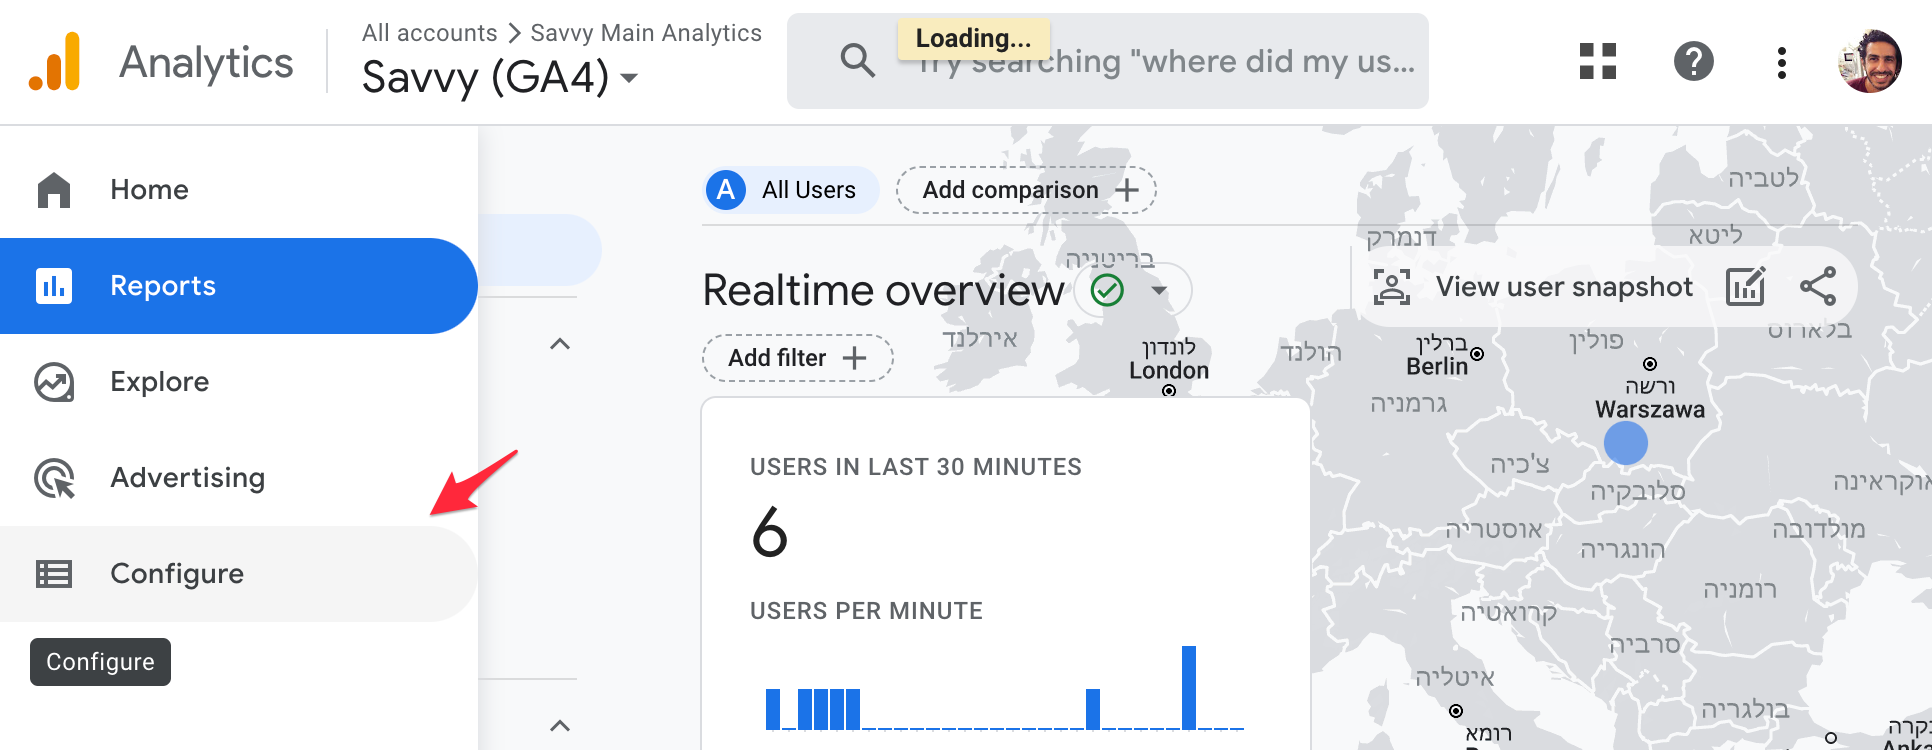
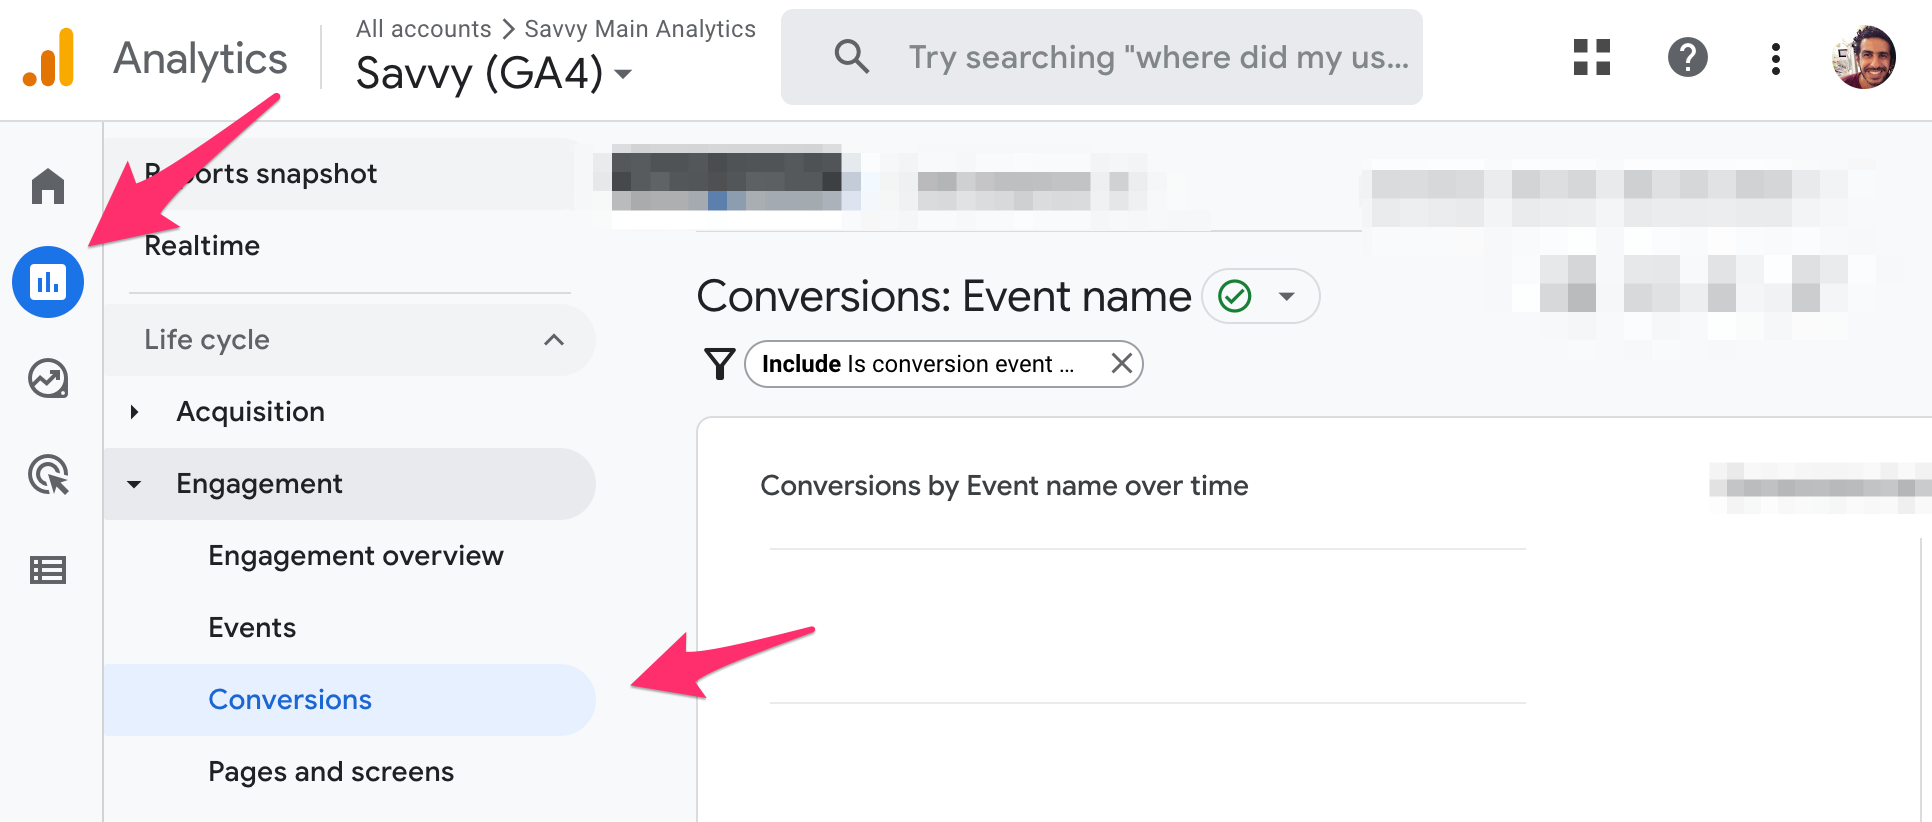
If you have installed Google Analytics 4 on your site, you can view your key events report by navigating to Reports > Engagement > Key events.
In this post, we will cover how to mark existing events as key events, how to create a new key event, and how to send custom events to GA4 using Google Tag Manager (GTM).
How to Mark Existing Events as Key Events in GA4
GA4 automatically tracks certain events from the moment the tracking code is installed (e.g., page_view, first_visit, scroll). You can mark any of these as a key event with a single toggle.
1. Open the Events Section in GA4
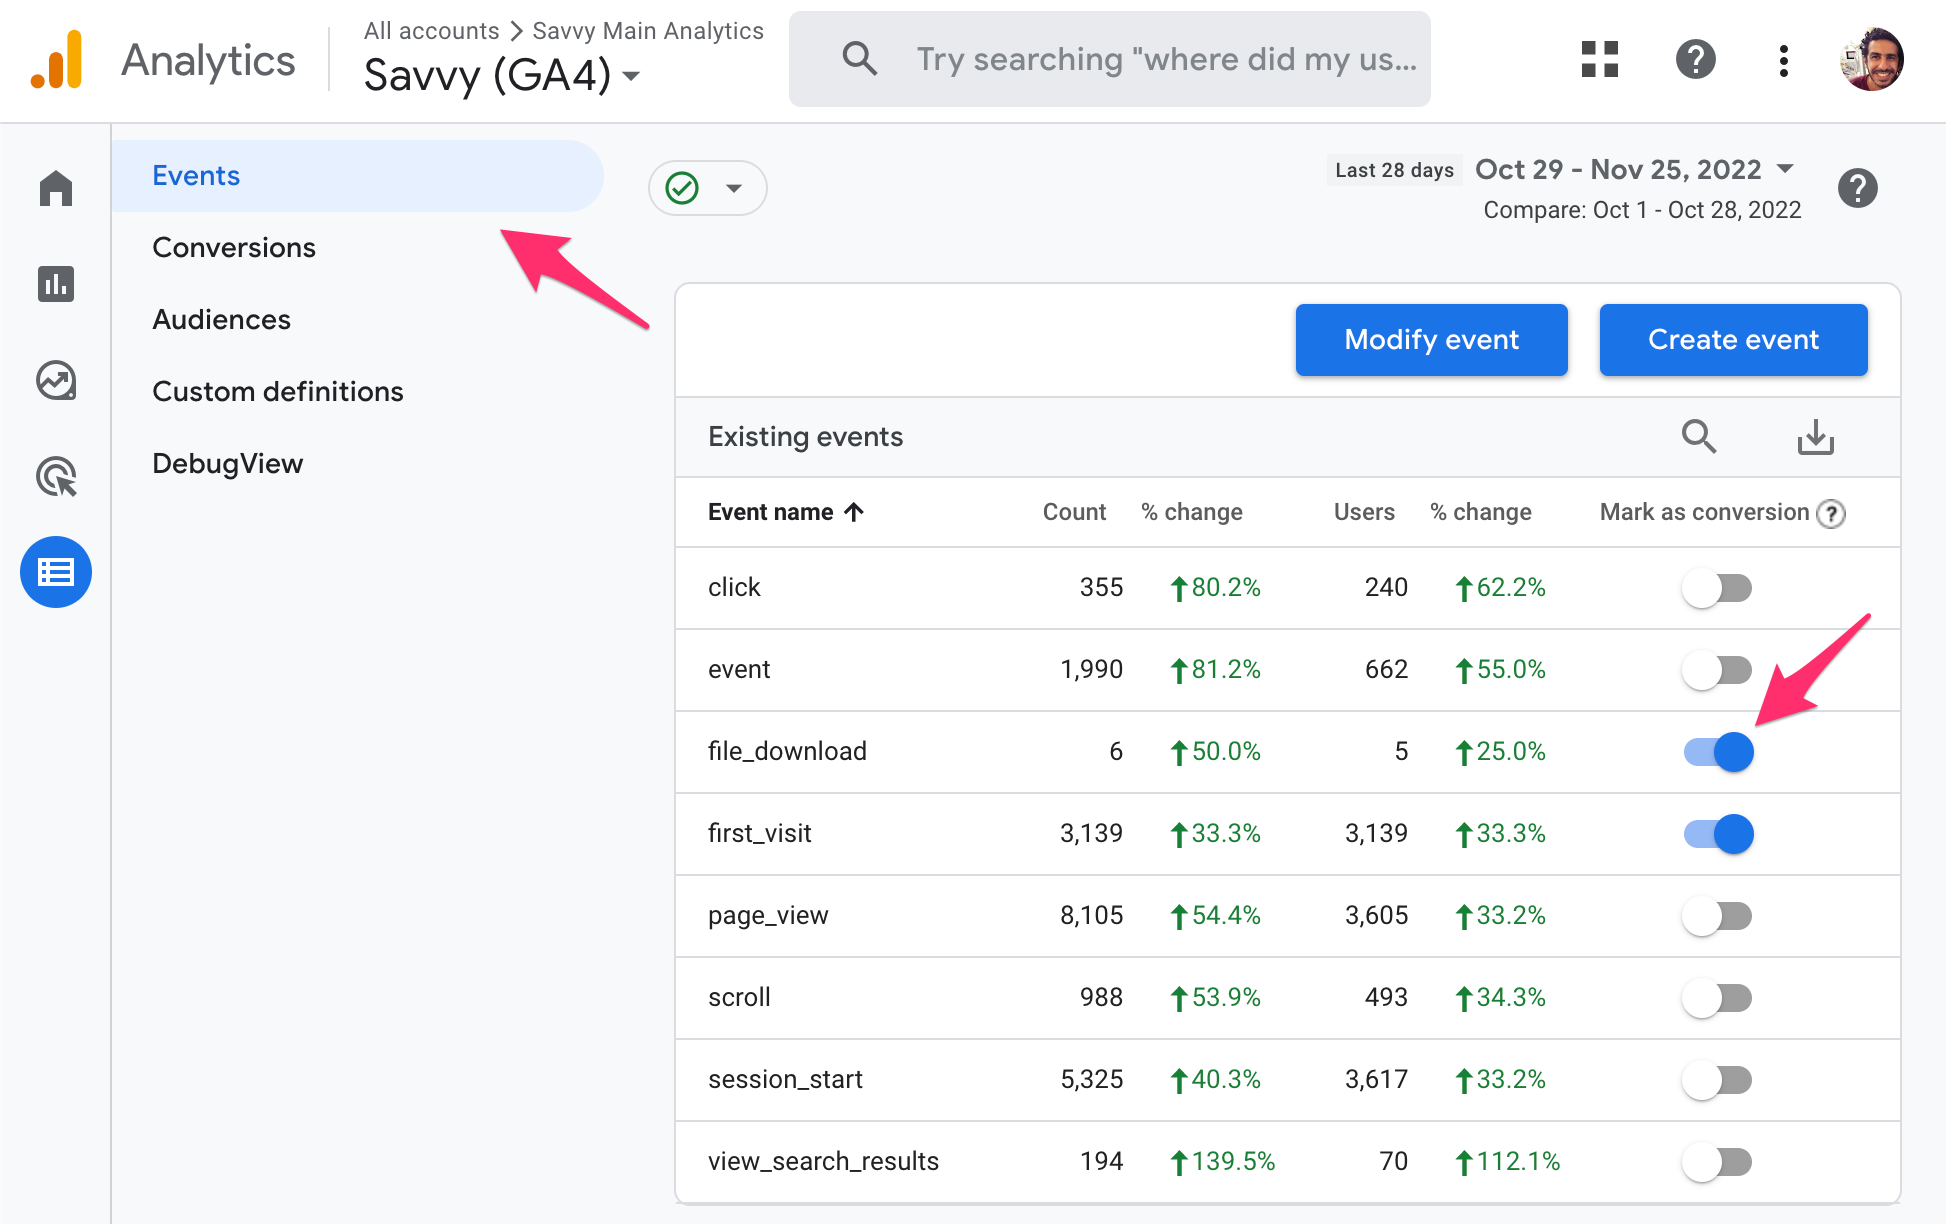
Open your GA4 property and navigate to Admin > Data display > Events.
2. Toggle “Mark as Key Event”
Find the event you want to track as a key event and enable the “Mark as key event” toggle next to it. In this example, we marked first_visit and file_download as key events.
3. View the Key Events Report
After actual key events have occurred on your site, go to Reports > Engagement > Key events to see the data.
That is it. You have successfully set up key event tracking for existing events on your site.
How to Create a New Key Event in GA4
You can also create a brand-new event and mark it as a key event. This is useful when you want to track something GA4 does not automatically capture – like a Thank You page view after a form submission.
1. Open Admin > Data Display > Events
Open your GA4 property and navigate to Admin > Data display > Events.
2. Click “Create Event” and Define It
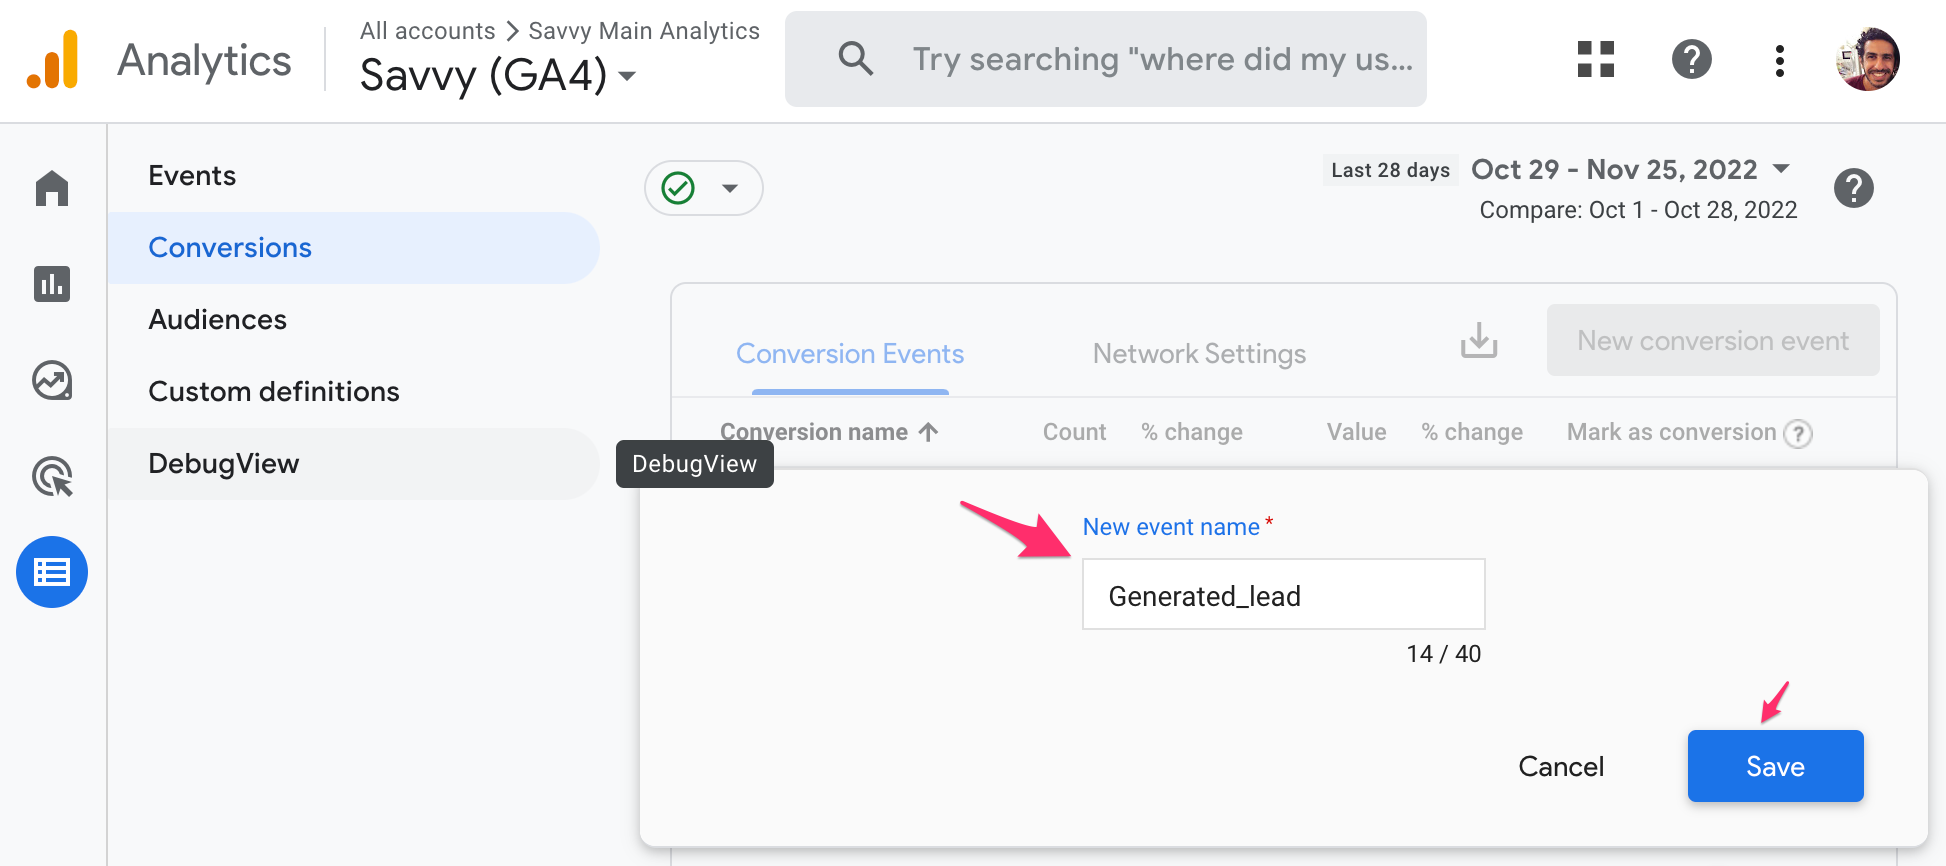
Click the Create event button and give the new event a descriptive name. For this example, we will track views on the Thank You page that users reach after submitting a form.
We chose the name Generated_lead for this event. Click Save.
3. Mark It as a Key Event
Once the event is created, go to the Key events tab and mark it. The Count column will show zero until actual events are recorded.
Now you need to send this event to GA4 every time a user reaches the Thank You page. You can do this in two ways: using Google Tag Manager (GTM) to fire the event, or creating a GA4 event rule that triggers when another automatically tracked event occurs.
In this post, we will use the GTM approach.
How to Send an Event to GA4 Using Google Tag Manager
Follow these steps to send a custom event to GA4 using GTM.
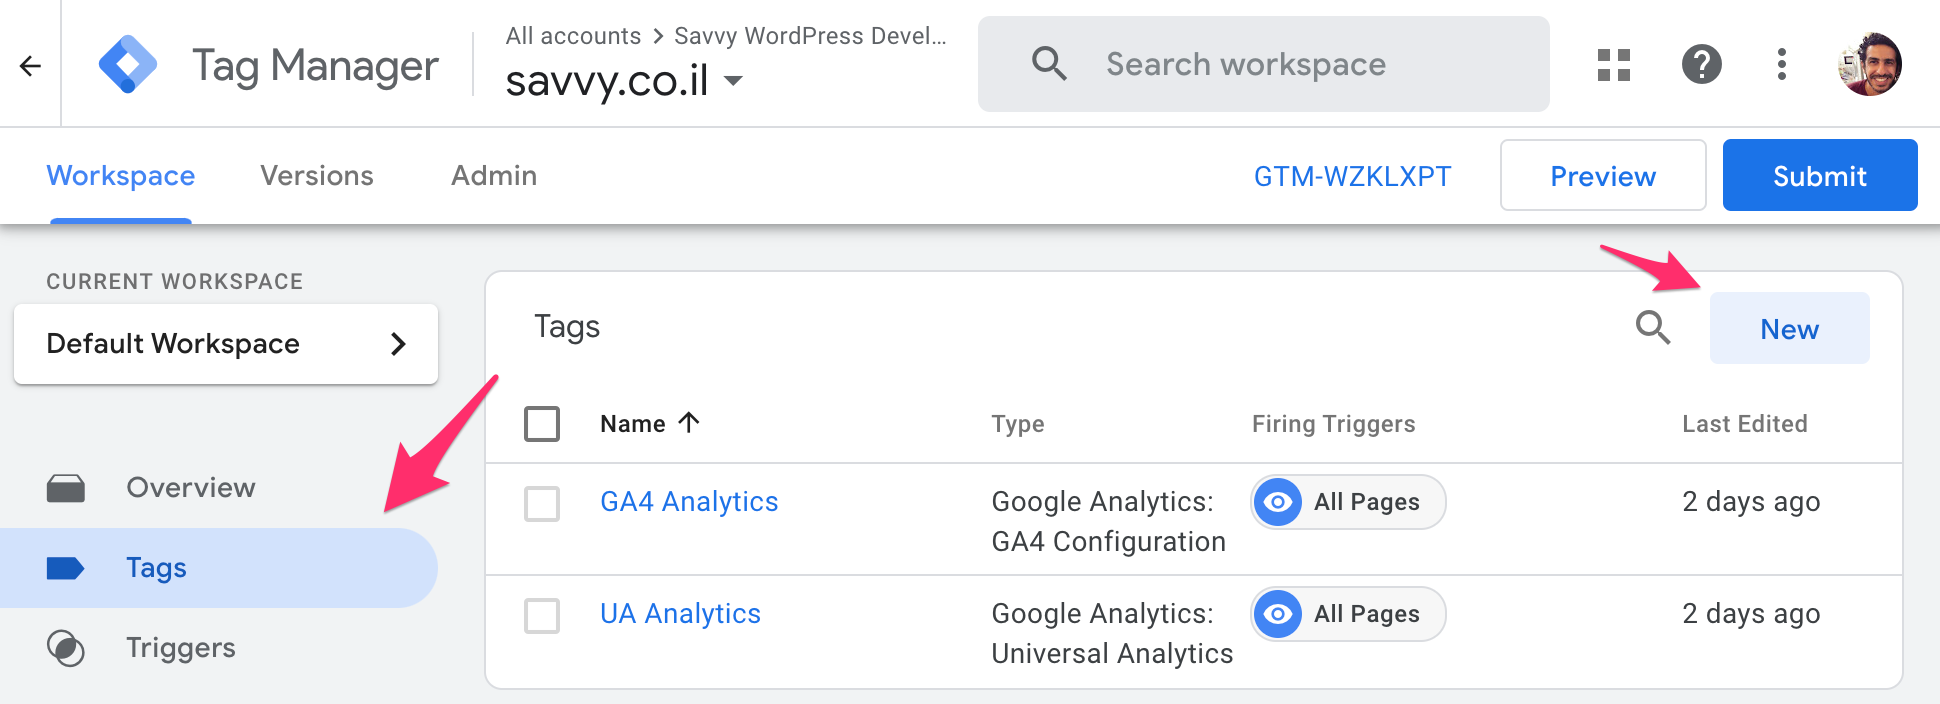
1. Log in to GTM and Create a New Tag
In your GTM workspace, click Tags in the left menu, then click New to create a new tag.
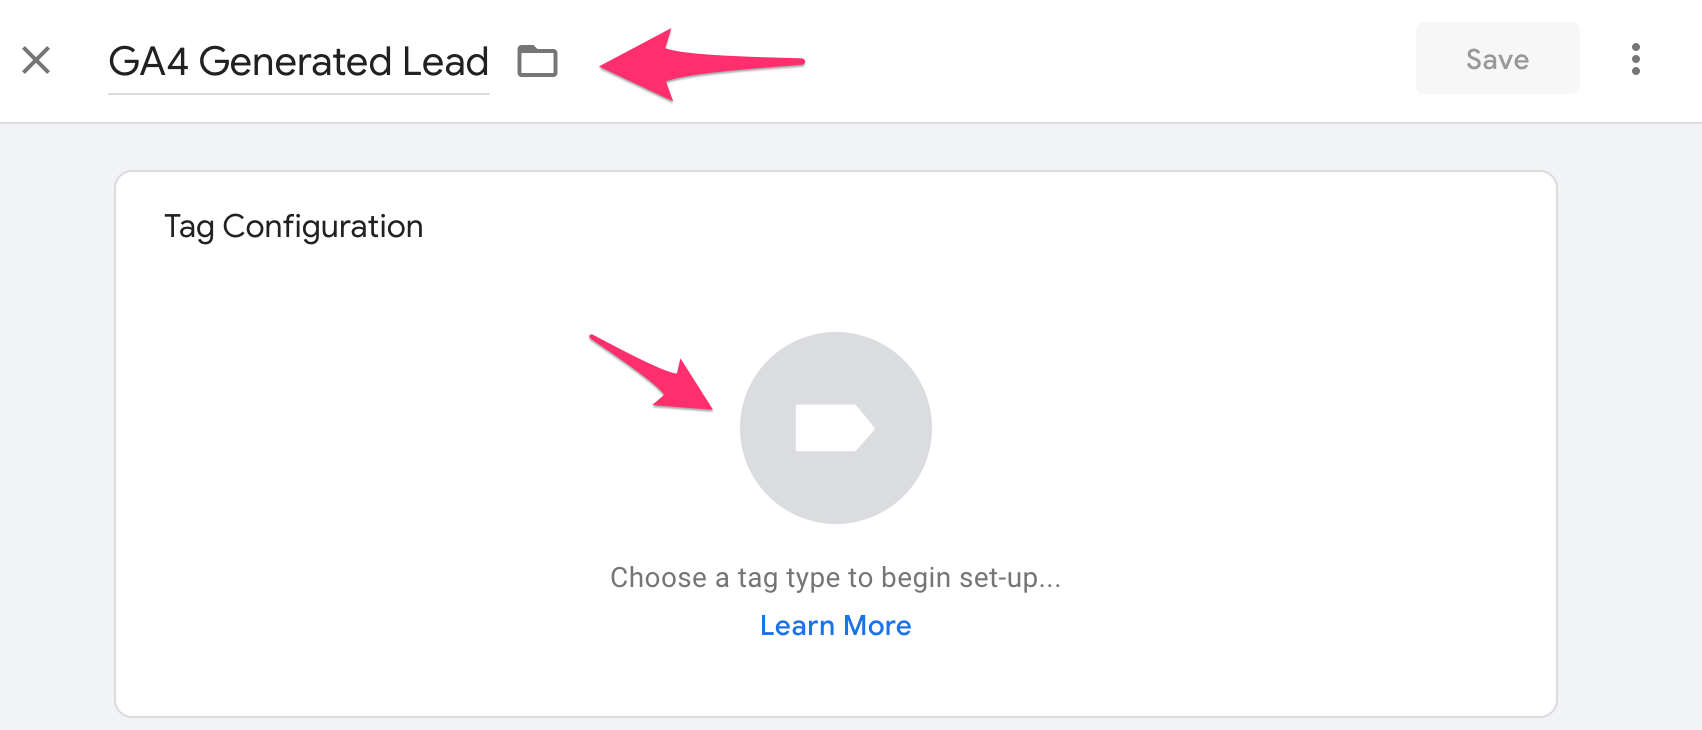
2. Name the Tag and Open Tag Configuration
Give the tag a descriptive name. In this case, we chose GA4 Generated Lead. Click on Tag Configuration.
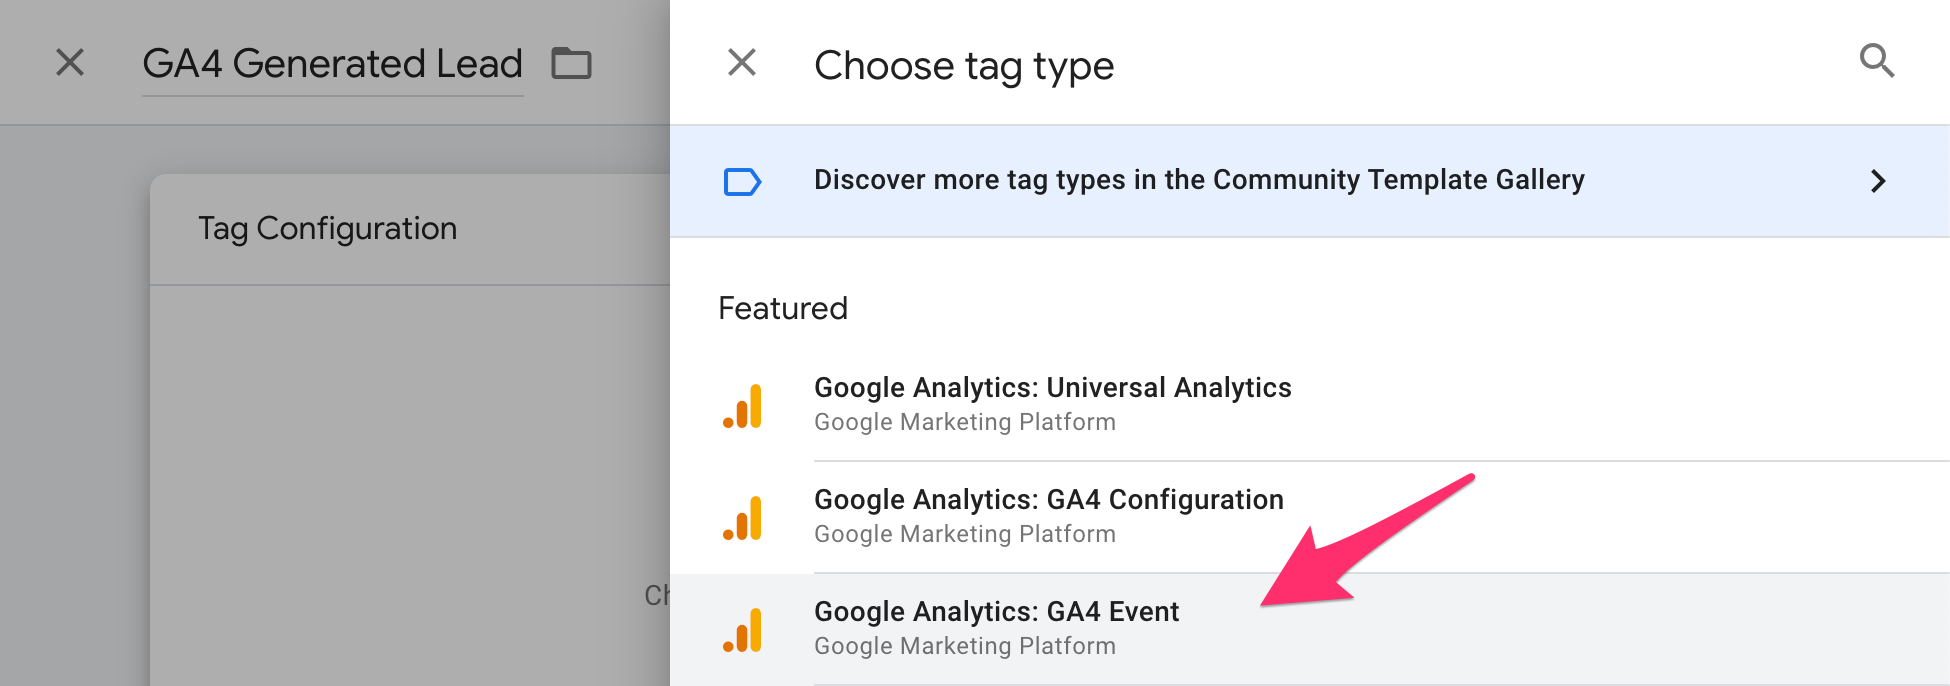
3. Select the GA4 Event Tag Type
A list of tag types will appear. Choose Google Analytics: GA4 Event.
4. Configure the Tag
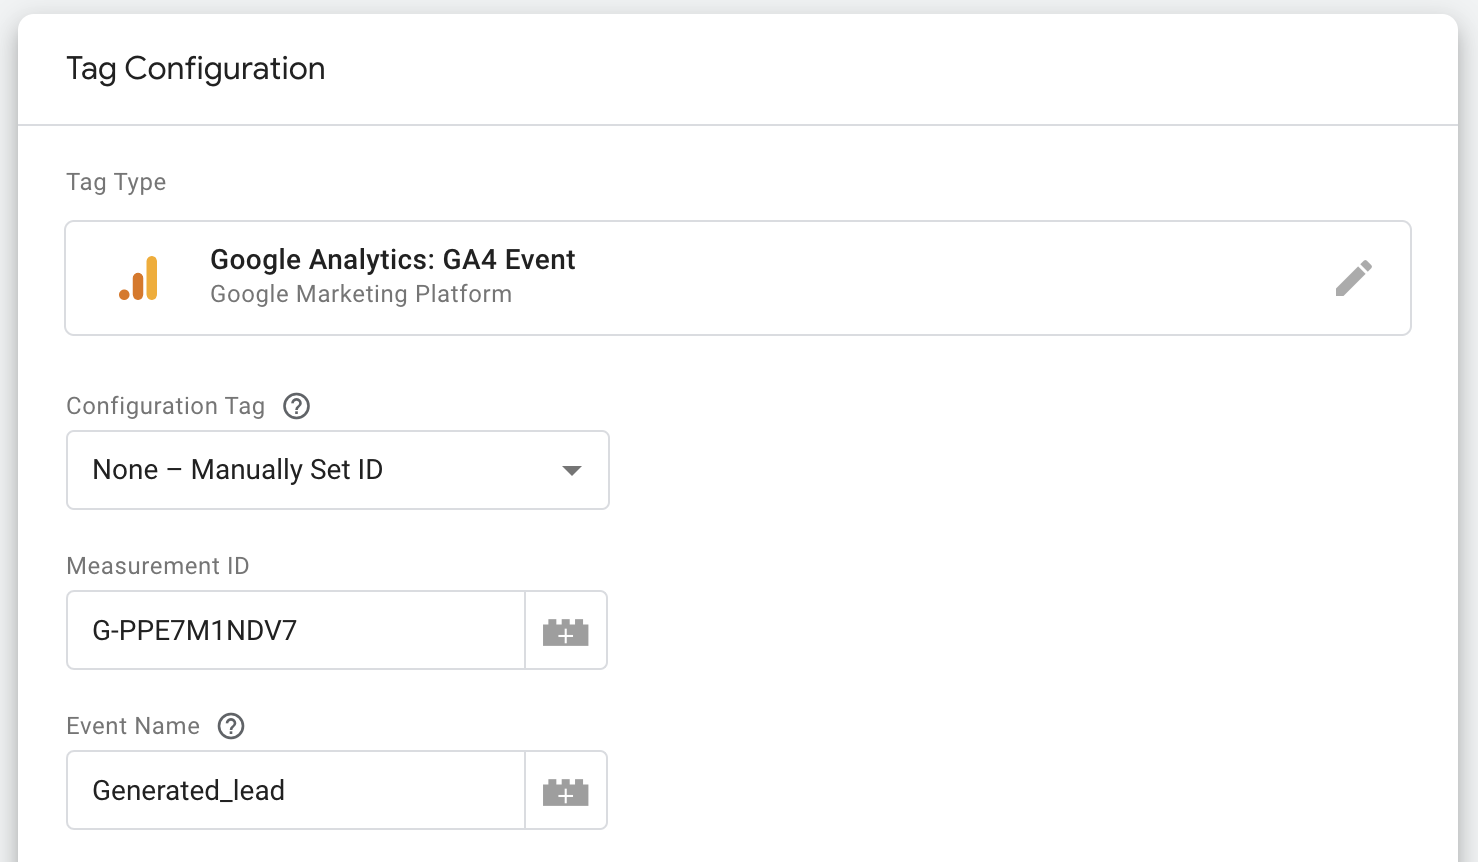
In the Tag Configuration panel, click Select Configuration Tag. From the dropdown, choose None – Manually Set ID.
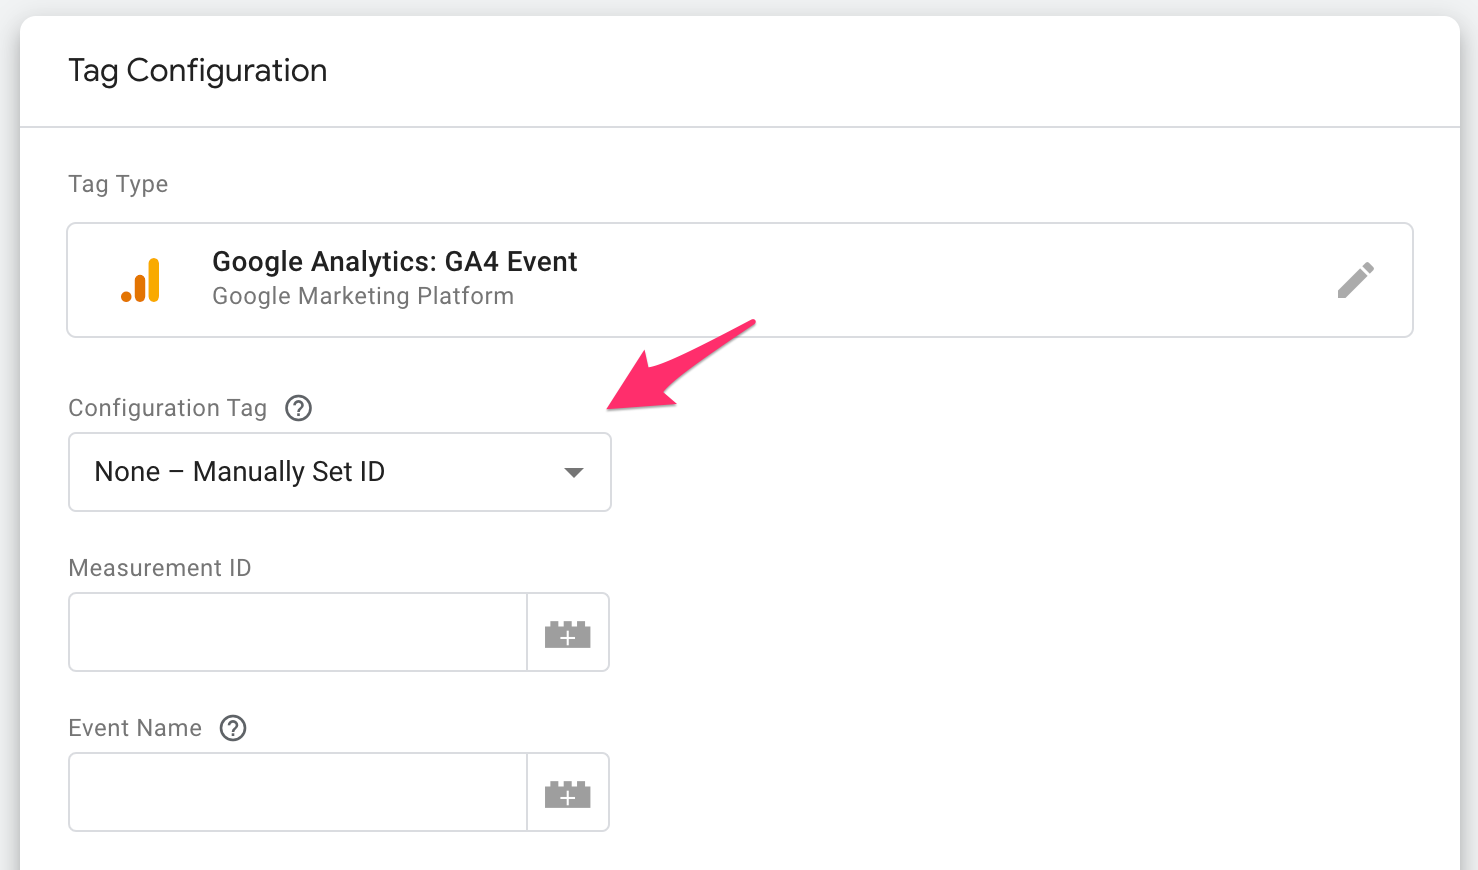
5. Enter Your GA4 Measurement ID
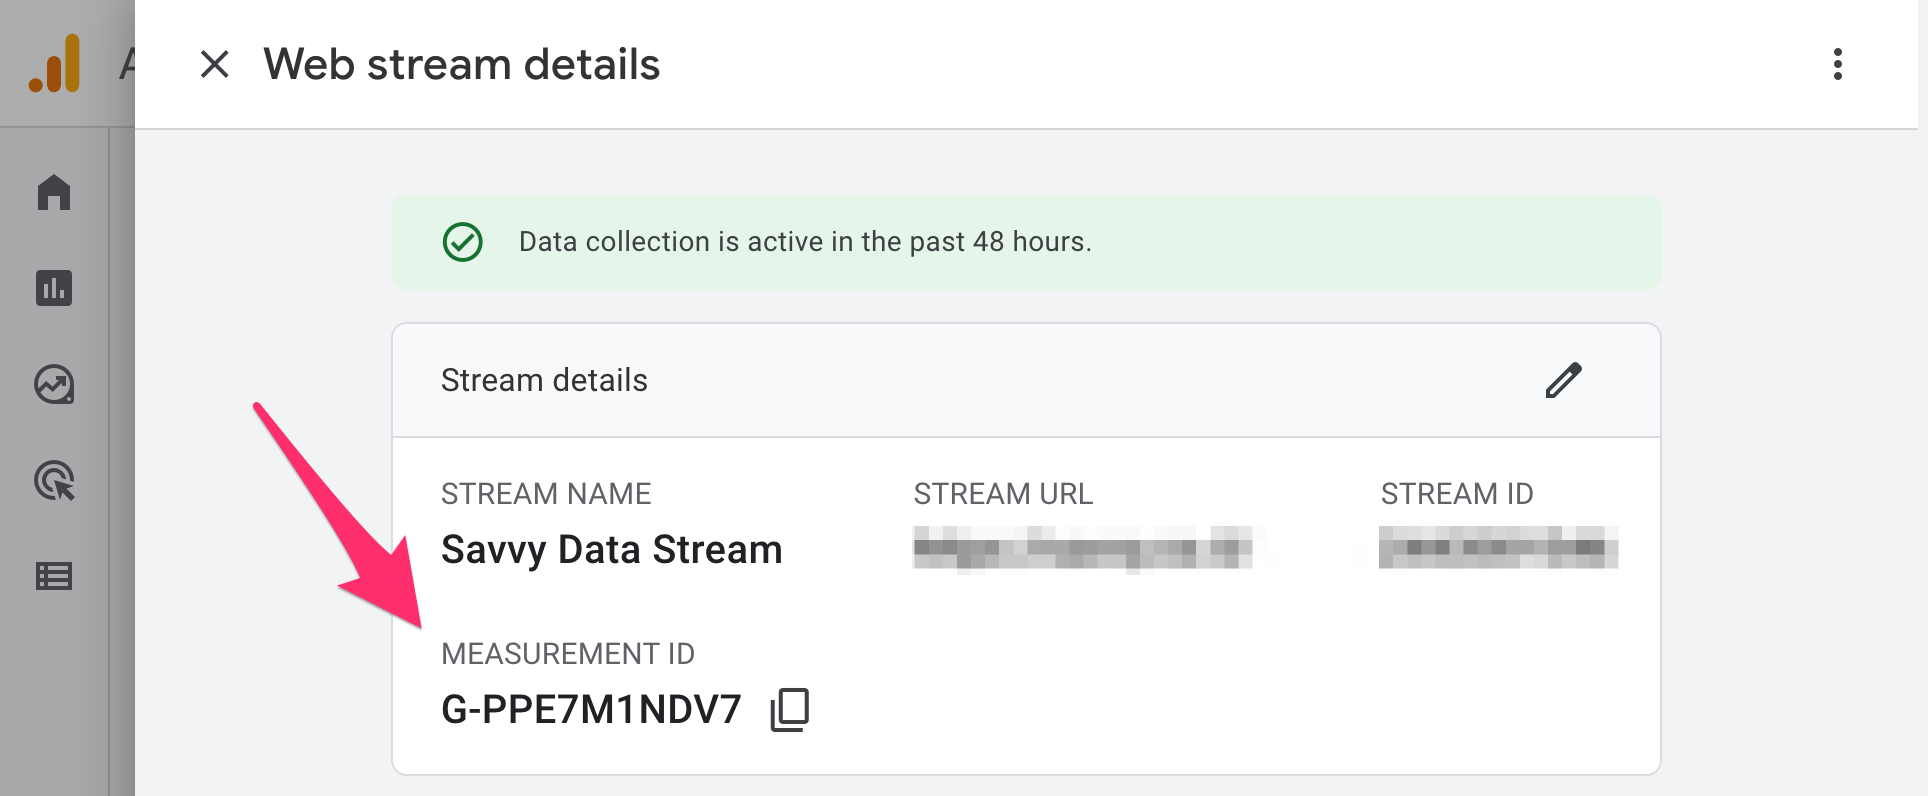
You can find the Measurement ID under Admin > Data Streams in the GA4 interface.
After entering the Measurement ID, set the Event Name. This is the name that will appear in GA4 reports. We used Generated_lead – the same name we defined earlier in the Key events tab. The configuration should look like this:
Click the blue Save button. A prompt will ask if you want to add a trigger. Click Add trigger.
6. Create a Trigger
The trigger determines when the event fires. Click the “+” icon in the upper right to add a new trigger.

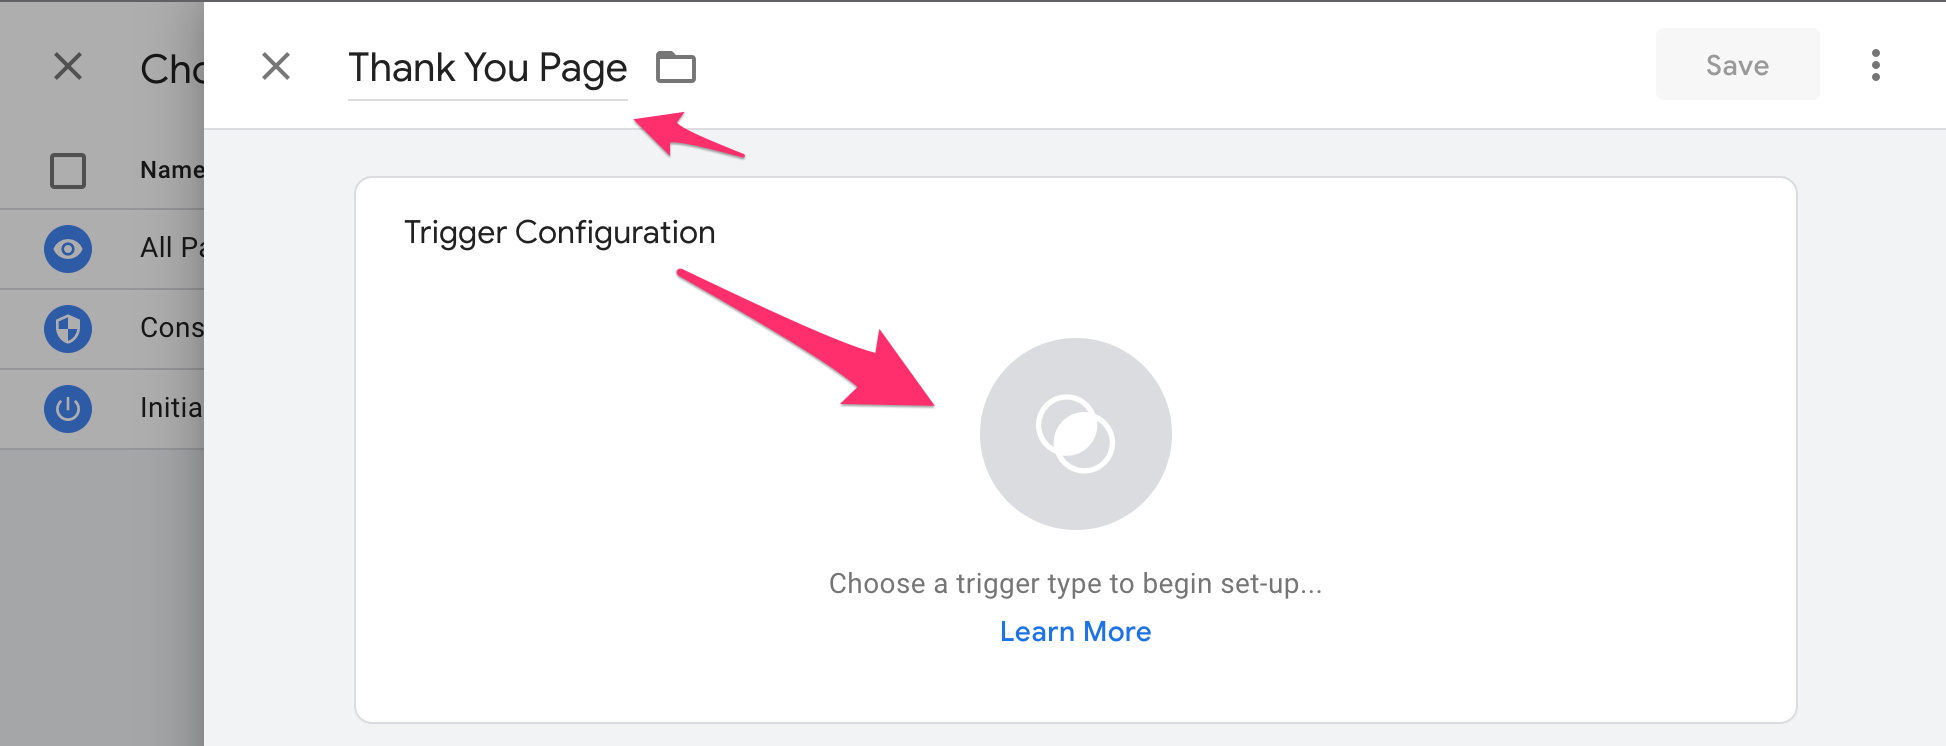
Give the trigger a name and click Trigger Configuration.
7. Set the Trigger Conditions
In this example, we set the trigger to fire when a user views the Thank You page:
- Trigger Type: Page View
- Trigger fires on: Some Page Views
- Condition: Page URL contains thank-you
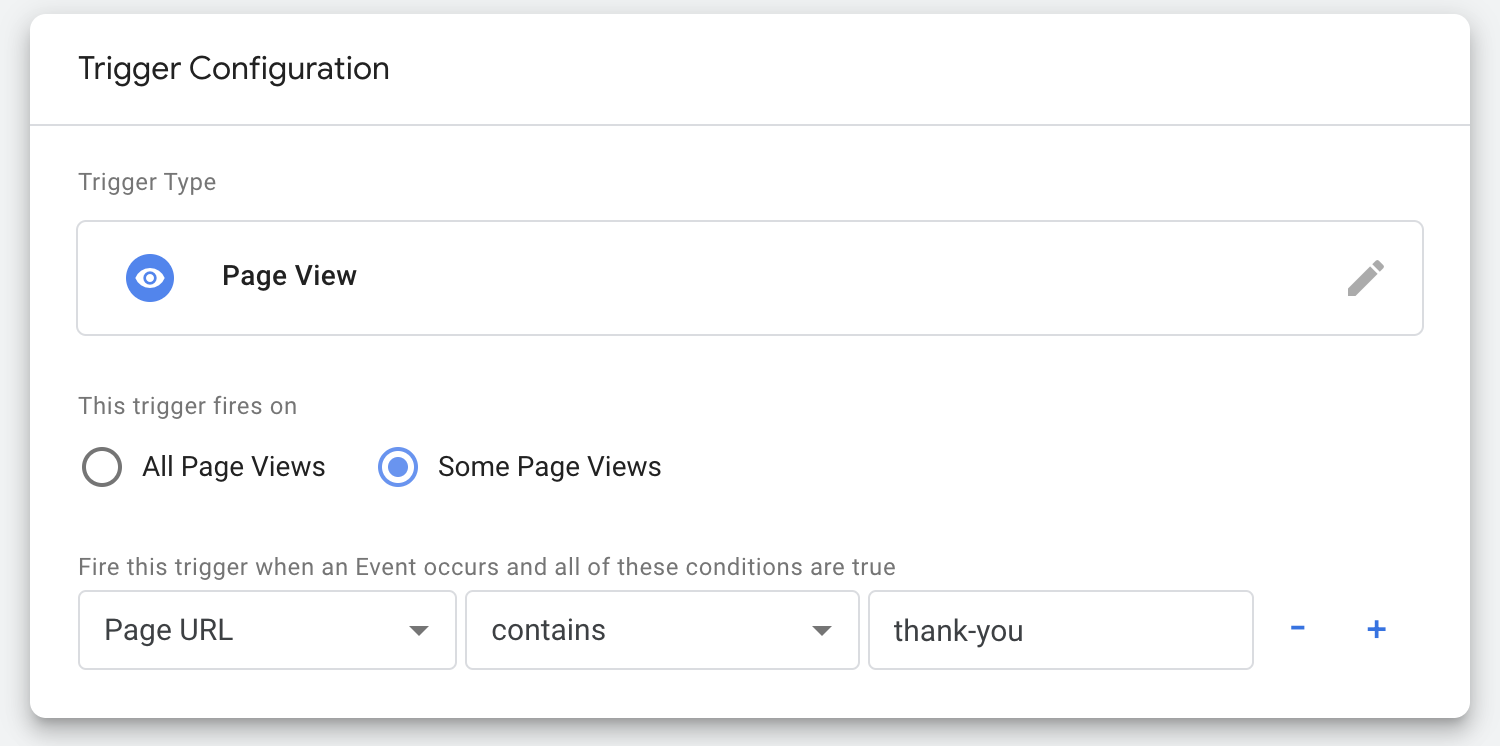
The trigger will fire the event when the URL contains “thank-you”. This assumes your site’s Thank You page includes that text in its URL.
Once the conditions are set, click the blue Save button twice – once for the trigger and once for the tag.
8. Verify the Event in GA4 Realtime
Go to your GA4 property and click Reports > Realtime. Visit the Thank You page on your site, and you should see the key event appearing in real time.
Importing Key Events as Google Ads Conversions
If you run Google Ads campaigns and want to optimize bidding based on your GA4 key events, you can import them as conversions into Google Ads.
To do this, your Google Ads and GA4 accounts must be linked. Then navigate to Advertising > Tools > Conversion management in GA4 and select the key events you want to import.
Once imported, these key events become “Conversions” in Google Ads and can be used for Smart Bidding and campaign optimization.
FAQs
Common questions about conversion tracking in GA4:
page_view occurs on that specific URL. Go to Admin > Data display > Events > Create event and set the condition to match the Thank You page path.Summary
GA4 gives you flexible, event-based conversion tracking. Any event – whether automatically collected or custom – can be marked as a key event to measure what matters to your business.
For events GA4 already tracks, a single toggle is all you need. For custom scenarios like Thank You page views, create the event in GA4 and use Google Tag Manager to fire it. If you run Google Ads, import your key events as conversions to optimize your campaigns.
With AI tools now driving measurable referral traffic, consider setting up AI traffic tracking in GA4 to measure this growing channel alongside your conversion data.