Update (February 2026): Mailchimp has significantly reduced its free plan limits. As of February 2026, the free plan allows only 250 contacts and 500 emails per month, with no automation. This guide remains relevant for the MC4WP plugin setup, but you should be aware of these limitations before choosing Mailchimp as your email platform. See the alternatives section below for other options.
Since I use Relevanssi (feel free to search the blog for the word), I have the option to conveniently view which searches were made on the sub-blog. It seems that many people are searching for the phrase “distribution list” and “Mailchimp.”
So, I decided to write a guide explaining how to open a distribution list in Mailchimp and how to add a form that allows visitors to subscribe to the distribution list on your WordPress site.
For this guide, make sure you have a Mailchimp account, as well as the mentioned plugin Mailchimp for WordPress, which I use on this blog.
Creating a Distribution List in Mailchimp
Whether you are starting from scratch or planning to import an existing list into Mailchimp, you need to create a new distribution list (Audience). This list is where you will store and manage all information about subscribers.
Note that in general, Mailchimp is designed to work with only one list, so there is no need to create more than one. Organizing that list is supposed to be done through tags, but that’s beyond the scope of this guide.
Creating a New Audience
If this is not the case, here’s an explanation of how to create a new audience in Mailchimp. Follow the instructions below:
- Go to the following page on Mailchimp and click on Create Audience. Please note that if you just signed up for Mailchimp, the registration process will already create the first Audience for you.
- Fill in the relevant settings in the form that appears.
- Under Form Settings, check the Enable double opt-in option if you want subscribers to confirm their subscription through a link sent to them via email.
- Click Save, and at this point, a new distribution list, or Audience, is created for you.
- Now, we need to create an API key to provide the necessary permissions for the MC4WP plugin (discussed in the next section). Go to this link and click on Create A Key.
- Under Your API Keys, you will find the new key that was created. Copy it and save it for later use.
Please note! The free Mailchimp plan is limited to one Audience, 250 contacts, and 500 emails per month. These limits have been reduced significantly since 2022 – if you need more, you will need a paid plan (starting at $13/month for 500 contacts).
The Mailchimp for WordPress Plugin
The Mailchimp for WordPress plugin, or MC4WP, connects your WordPress site with your Mailchimp account. It provides various signup options for your site visitors to add themselves to the distribution list.
Through this plugin, you can create responsive and user-friendly signup forms, with full control over the form’s design using shortcodes. You can easily embed these forms in posts and pages, as widgets in the sidebar, or anywhere you choose.
MC4WP also integrates with popular plugins like Contact Form 7, WooCommerce, and others. For example, you can add an option to subscribe to the distribution list for people who comment or complete a purchase in your digital store.
This is a reliable way to get more subscribers to your distribution list on your WordPress site.
The plugin also offers interesting extensions, which are beyond the scope of this post. Let’s see how to add a signup form that automatically adds every subscriber to the distribution list we just created in Mailchimp.
Installing the Mailchimp for WordPress Plugin
Go to the Plugins in the WordPress admin interface and search for Mailchimp for WordPress. Install and activate the plugin.

As you can see, the plugin has over a million active installations and a 5-star rating. It’s an excellent plugin.
After installation, go to the WordPress admin interface, to the new tab named Mailchimp for WP, and click on Mailchimp. Add the API key you wrote down earlier and click Save.

Note that under Status, there is a green checkmark indicating that you are connected properly to your Mailchimp account.
If that’s the case, scroll down on the same page and click on Renew MailChimp Lists to see all your distribution lists that the plugin detects and to ensure that the distribution list you just created in Mailchimp appears.
Now, let’s create a new form using the plugin (here’s an example of a live user form in this plugin).
Create a New Form in Mailchimp for WordPress
Go to the admin interface for Mailchimp for WP > Forms and create a new form. Note that you need to select the mailing list to which you want the form to add the subscriber details.
All you need to do is copy the shortcode (at the bottom of the screen) and paste it wherever you want in your posts and pages. It will work properly:
[[mc4wp_form id="123"]]If you want to add it in your theme files, you can do so just like adding any shortcode in WordPress templates:
<?php echo do_shortcode('[[mc4wp_form]]'); ?>At this point, you can also easily add the form through a new widget that will appear in your widget screen after installing the plugin. But let’s look at some of the form settings…
Form Settings – Mailchimp for WP
This is what the screen looks like with the default form after creating a form in MC4WP:

There are several tabs at the top, as you can see in the image. Here’s a brief explanation of each:
1. Fields
In this tab, you can add new fields to the form, such as lists, terms and conditions, radio boxes, and more. Clicking on any of the options under Form Fields will open a window with settings for that specific element you want to add to the form.
On the right side of the screen, there are two additional options. One is Form Variables, and the other is Add More Fields.
Form Variables allow you to add specific variables to the form and to error/success messages after form submission. For example, displaying the number of subscribers to the mailing list is done as follows:
<p>
    Join {subscriber_count} others, stay updated by subscribing to our newsletter.
</p>
.... (rest of sign-up form)
I won’t go into more detail, but you are welcome to check the excellent documentation for the MC4WP plugin.
Form Fields, on the other hand, allows you to add new fields that are not present in the standard form options. However, to make these fields appear, you need to add them through Mailchimp itself.
After adding the fields in Mailchimp, click on “Renew Mailchimp Lists” to see them.
2. Messages
In this tab, you can change the message text that will appear in specific situations during form submission. For example: “Thank you for registering” or “Successfully removed from the mailing list.”
3. Settings
In this tab, you will find the main settings of the form. You can determine whether subscribers must confirm their registration or not (Double Opt-in).
You can set whether to redirect after successful registration. You can also determine whether the registration will be done via Ajax so that there is no page reload (this option is only available in the Pro version).

4. Appearance
In this tab, you will find the option to determine how the form looks. You can set it to take the design from your theme or choose from pre-made layout templates.
Also, you can click on “Open Style Builder” and experiment with colors, form alignment, width, background image, and more.
5. Emails
In this tab, you can set whether an email will be sent to a specific address after a user registers for the mailing list through the form you created.
So, to summarize this part, configure the necessary settings, and let’s proceed to integrate with the Mailchimp for WordPress plugin.
Mailchimp for WordPress Plugin Integrations
As mentioned, the plugin allows integrations with a wide range of plugins. Popular ones include Contact Form 7, WooCommerce, Gravity Forms, and more.
If you go to the admin interface for Mailchimp for WP > Integrations, you will see the list of possible integrations and the option to enable each one.
If you take a look at the comments section in this blog, you will see below it the option to automatically subscribe to the mailing list with the commenter’s email and name. This option is achieved through the Comment Form Integration of the MC4WP plugin.
Let’s look at the integration option with Contact Form 7. Clicking on it will take you to a screen where you can configure the integration settings.
It will display a shortcode that you need to add in the CF7 form editor to integrate MC4WP with CF7:

Furthermore, if you have a WooCommerce store, building an email list of your customers is definitely something you’d want to do.
If you provide customers the option to subscribe to the Mailchimp mailing list during the checkout process, the chances of them joining the mailing list are much higher.
Clicking on the WooCommerce Checkout integration will take you to the next settings screen where you can enable the integration and define the list to which customers will be added:

If you are using a multilingual WordPress site through WPML, there is an extension that allows you to set a separate list for each language. It also supports translated emails based on the language in which the subscriber registered.
Javascript Events
The MC4WP plugin triggers several events when the user interacts with the form. You can use these events to execute your own code.
For example, to track successful sign-ups in Google Analytics, there are the following events:
| started | fired once user starts filling in a form |
|---|---|
| submitted | fired once user submits form |
| error | fired if form is submitted with errors |
| success | fired if form is submitted successfully |
| subscribed | fired if form is used to subscribe |
| unsubscribed | fired if form is used to unsubscribe |
| updated_subscriber | fired if form was used to update an existing subscriber |
Let’s see how to use these events. The following code listens for the Success Event and writes something to the browser console, but you can add any code you want:
mc4wp.forms.on('success', function(form, data) {
   // your code goes here
   console.log("Form successfully submitted. Name: " + form.name + " ID: " + form.id);
});
The above code will work on every form of the plugin on your site when a successful registration occurs.
If you want to target a specific form, add the form’s ID as a prefix to the Event name:
mc4wp.forms.on('15.success', function(form, data) {
   // your code goes here
   console.log("Form with ID 15 successfully submitted.");
});
If we give a real-life example, if we want to send an event to Google Analytics 4 on a successful subscription, we can use the following code:
mc4wp.forms.on('subscribed', function(form) {
	// GA4 via gtag.js
	gtag('event', 'sign_up', {
		method: 'Mailchimp',
		form_name: form.name,
		form_id: form.id
	});
});
Note: The old Universal Analytics (analytics.js / ga()) was sunset by Google in July 2023. If you are still using the old code, switch to GA4’s gtag() syntax as shown above. For help setting up GA4, see the post on how to add Google Analytics 4 to WordPress.
What about Spam and Junk Mail?
As you know, spam or “junk mail” is a problem that website owners in general, and WordPress site owners in particular, have to deal with.
If you have forms on your site collecting information from visitors, you will likely receive some spam in the best-case scenario, and a lot of spam in the worst-case scenario.
The situation is no different with the Mailchimp for WordPress plugin. Unlike comments or Contact Form 7 forms, where you can use the Anti-Spam plugin Akismet (recommended!), for MC4WP the recommendation is a plugin called WPBruiser.
However, WPBruiser has not been updated frequently in recent years. You should also consider alternatives like Cloudflare Turnstile or the built-in honeypot field that MC4WP offers (add a <input type="text" name="_mc4wp_honeypot" style="display:none" /> to your form).
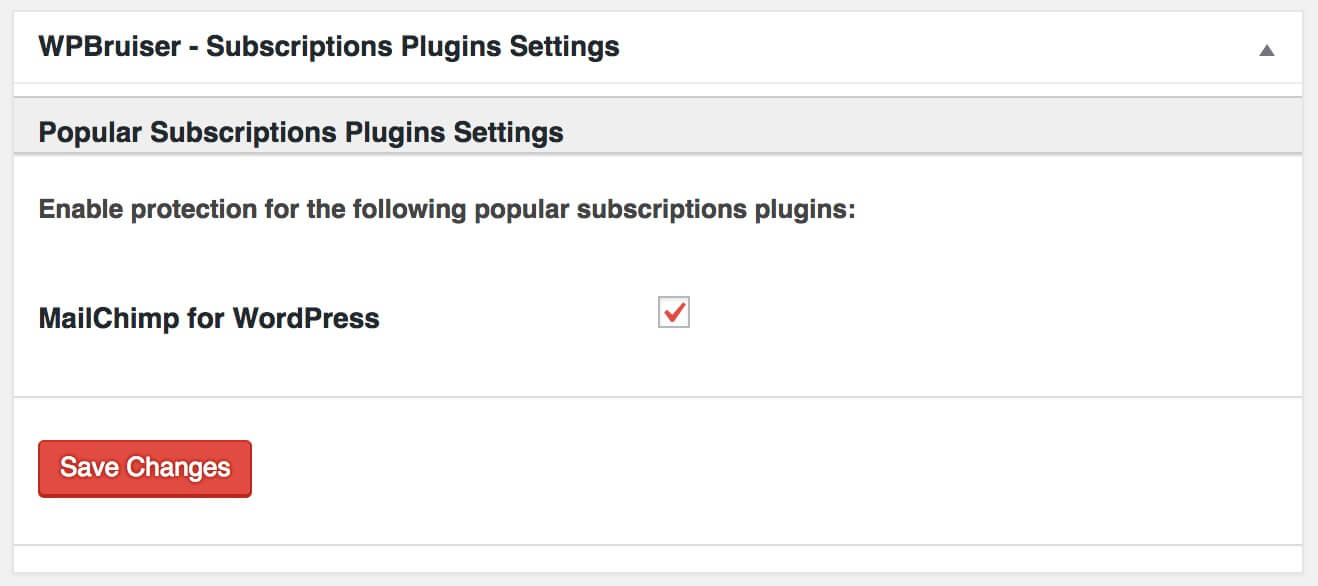
If you do choose to use WPBruiser, install the plugin, go to its settings under WPBruiser > Others, and check the option “MailChimp for WordPress” to prevent spam in these forms.
Mailchimp Alternatives Worth Considering
Given the increasingly restrictive free plan, it is worth knowing about alternatives to Mailchimp, especially if you are just starting out:
MailPoet – a WordPress-native email marketing plugin with over 600,000 active installations. It runs entirely inside your WordPress dashboard and supports newsletter creation, signup forms, automated welcome emails, and WooCommerce email automation.
Brevo (formerly Sendinblue) – offers 300 emails per day on its free plan with unlimited contacts. It also provides SMS marketing and a WordPress plugin for integration.
MailerLite – popular among bloggers and small businesses. The free plan supports up to 1,000 subscribers and 12,000 emails per month, which is far more than Mailchimp’s current limits.
BeeHiiv – a newsletter-first platform that has gained popularity quickly, with a generous free plan and a clean writing experience. Check out our guide on creating a custom BeeHiiv subscription form with PHP if you want to integrate it with WordPress.
If you already have your Mailchimp setup working and are on a paid plan, there is no urgent reason to switch.
But if you are starting fresh on a tight budget, these alternatives deserve a look.
FAQs
Common questions about using Mailchimp with WordPress:
subscribed event with the gtag() function to send a custom event to GA4 whenever someone subscribes through your form.In Conclusion
The Mailchimp for WordPress plugin is the most powerful plugin for managing Mailchimp forms on WordPress sites. You can modify its functionality through hooks and play with the JavaScript Events it provides.
If you want to take subscriber collection further, consider combining it with a custom popup to increase sign-up conversions.
If you have any questions or comments, feel free to share with us, as always… Wishing you lots of subscribers! 🙂