In this brief guide, I will explain about image sizes in WordPress. We will also see how to create new image sizes and how to prevent generating unnecessary images based on the content type.
As you probably know, when you upload an image to the media library in WordPress, multiple images are created from the original image in different sizes. Why does this happen? It occurs because typically, a single resolution of images is not used throughout your WordPress site. Different places can display the same image in varying resolutions.
There are many areas on the site where you might use the same image. This can be in posts, in portfolios, as thumbnails, images in widgets, and so on. Since you might want these images to appear in different sizes and resolutions in specific places, WordPress generates three default image sizes for you.
However, you may not want to end up creating redundant images in WordPress:
- As you define more sizes for images, you will have more files in the uploads directory, taking up more space on the server.
- As you have more images, it will take you more time (in the long run) to upload images to the media library.
Default Image Sizes in WordPress
By default, WordPress supports three image sizes. You can find and modify these sizes in the WordPress admin interface under Settings > Media.
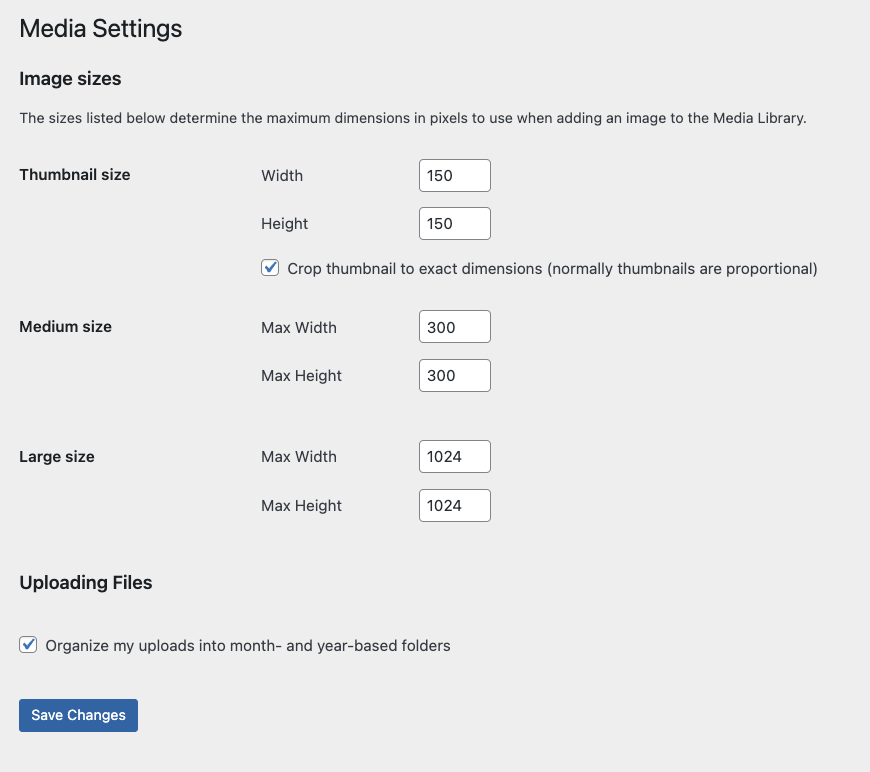
But what if you’re not interested in these specific sizes and you want WordPress not to generate an image for each of these sizes? In this case, you can use the following hook and add it to the functions.php file:
function sv_unset_image_sizes( $def_sizes) {
	unset( $def_sizes['thumbnail']); // turn off thumbnail size
	unset( $def_sizes['medium']); // turn off medium size
	unset( $def_sizes['large']); // turn off large size
	return $def_sizes;
}

add_filter('intermediate_image_sizes', 'sv_unset_image_sizes');
Using the Generated Image Sizes in Your Site
There are two ways to do this:
A. Through the WordPress Admin Interface
Very straightforward. After you upload an image to a post, you can select the size of the image to be displayed:

B. Using Code
There are plenty of functions that work with images in WordPress. If you’re building your own template, you’ve likely used one of these functions to display an image. In any case, when we want to print an image on a page, we can use functions like:
get_the_post_thumbnailthe_post_thumbnailwp_get_attachment_image_src
For most of them, you can use the parameter that specifies the image size to be printed by inserting the size name as a parameter. Here’s an example:
the_post_thumbnail('large');
Creating Your Own Image Sizes
The procedure for adding your custom image sizes in WordPress is fairly simple and consists of two steps (where the second step is optional):
Step 1: Using the add_image_size Function
Add the following code to the functions.php file:
function savvy_setup_images() {
	add_image_size( 'my-image-size-name', 244, 344, true );
}
add_action( 'after_setup_theme', 'savvy_setup_images' );
The add_image_size function has several parameters, as listed below:
- The name you choose for the new image size (my-image-size-name).
- The width of the image (244px).
- The height of the image (344px).
- Cropping of the image (Crop) – You can set this parameter to either a boolean or an array. False means the image won’t be cropped at all, and true means the image will be cropped to the center by default.
Stage Two: Adding the New Image Size to the Media Library
Now, after you’ve created the image, you can add it to the file upload window in the media library. As mentioned, this stage is optional, but it can be done very easily by adding the following code to the functions.php file:
function sv_new_image_sizes($sizes) {
	$addsizes = array(
		"my-image-size-name" => 'My New Size'
	);
	$newsizes = array_merge($sizes, $addsizes);
	return $newsizes;
}
add_filter('image_size_names_choose', 'sv_new_image_sizes');
Now, if you add an image to a specific post, you will have the option to choose the new image size you created.
How to Regenerate Image Sizes After Modification?
It’s reasonable to assume that you’ve encountered a situation where, after modifying the parameters in the add_image_size function, you didn’t see any changes on the site, and the image is still displayed in its old size.
If there are just a few images, you can simply re-upload them. However, if there are many images, it’s better to do it automatically and regenerate the image sizes without the need to re-upload the image.
You can use plugins like Ajax Thumbnail Rebuild or Force Regenerate Thumbnail which do an excellent job and will save you a lot of time in the process.
How to Remove Unnecessary Image Sizes?
Let’s say your WordPress site has 10 Custom Post Types, each using 2-3 different image sizes on the site pages. You can easily end up with WordPress generating between 20-30 images of various sizes for each image you upload!
Here’s a code snippet I use on the websites I build for my clients that partially solves the problem. The code determines when WordPress should create specific image sizes and when not, based on the content type:
function sv_reduce_image_sizes( $sizes ){
	/*
	 * $sizes - all image sizes array Array ( [0] => thumbnail [1] => medium [2] => large [3] => post-thumbnail )
	 * get_post_type() to get post type
	 */
	$type = get_post_type($_REQUEST['post_id']); // $_REQUEST['post_id'] post id the image uploads to

	foreach( $sizes as $key => $value ){

		/*
		 * use switch if there are a lot of post types
		 */
		if( $type == 'page' ) {
			if( $value == 'image-size-name-1' ){ // turn off 'image-size-name-1' for pages
				unset( $sizes[$key] );
			}
		} else if ( $type == 'portfolio' ) {
			if( !in_array( $value, array('image-size-name-2','image-size-name-3') ) ){ // for regions turn off everything except 'image-size-name-2' and 'image-size-name-3'
				unset( $sizes[$key] );
			}
		} else {
			if( $value != 'thumbnail' ){ // turn off everything except thumbnail
				unset( $sizes[$key] );
			}
		}
	}
	return $sizes;
}

add_filter( 'intermediate_image_sizes', 'sv_reduce_image_sizes' );
Tip – How to View the Generated Image Sizes by Your Theme and Plugins?
Unfortunately, there’s no direct way to see the generated image sizes by your theme and plugins through the WordPress admin interface.
I’m sure there are plugins that can do this, but if you prefer not to use one, you can add the following code to your theme to get the output of the generated image sizes:
<h4>Registered Images Sizes</h4>
<?php
print '<pre>';
  global $_wp_additional_image_sizes;
  print_r( $_wp_additional_image_sizes );
print '</pre>';
?>
In Conclusion
In this brief guide, we’ve seen how to remove image sizes in WordPress, how to create new image sizes, and a way to control which sizes are generated for different content types and more.
If you’re interested in the topic, take a look at the following guide about Optimizing WordPress Images for SEO.