As a WordPress developer working with large companies, I have encountered several times the need to dynamically change the email address to which the form is sent.
For example, a situation where a company wants a dropdown on the Contact page that allows the user to choose which department they want to contact, whether it’s sales, support, customer service, and so on.
So I’ve seen many ways to do this online using the Contact Form 7 plugin, but I found that most of them complicate the process unnecessarily.
Some use JavaScript to achieve this, while others rely on specific plugins to enable it, such as the Contact Form 7 – Dynamic Text Extension.
However, using JavaScript or such a plugin may be unnecessary in this case. You can dynamically set the email address to which the form is sent as part of the basic functionality of CF7. Here’s how to do it:
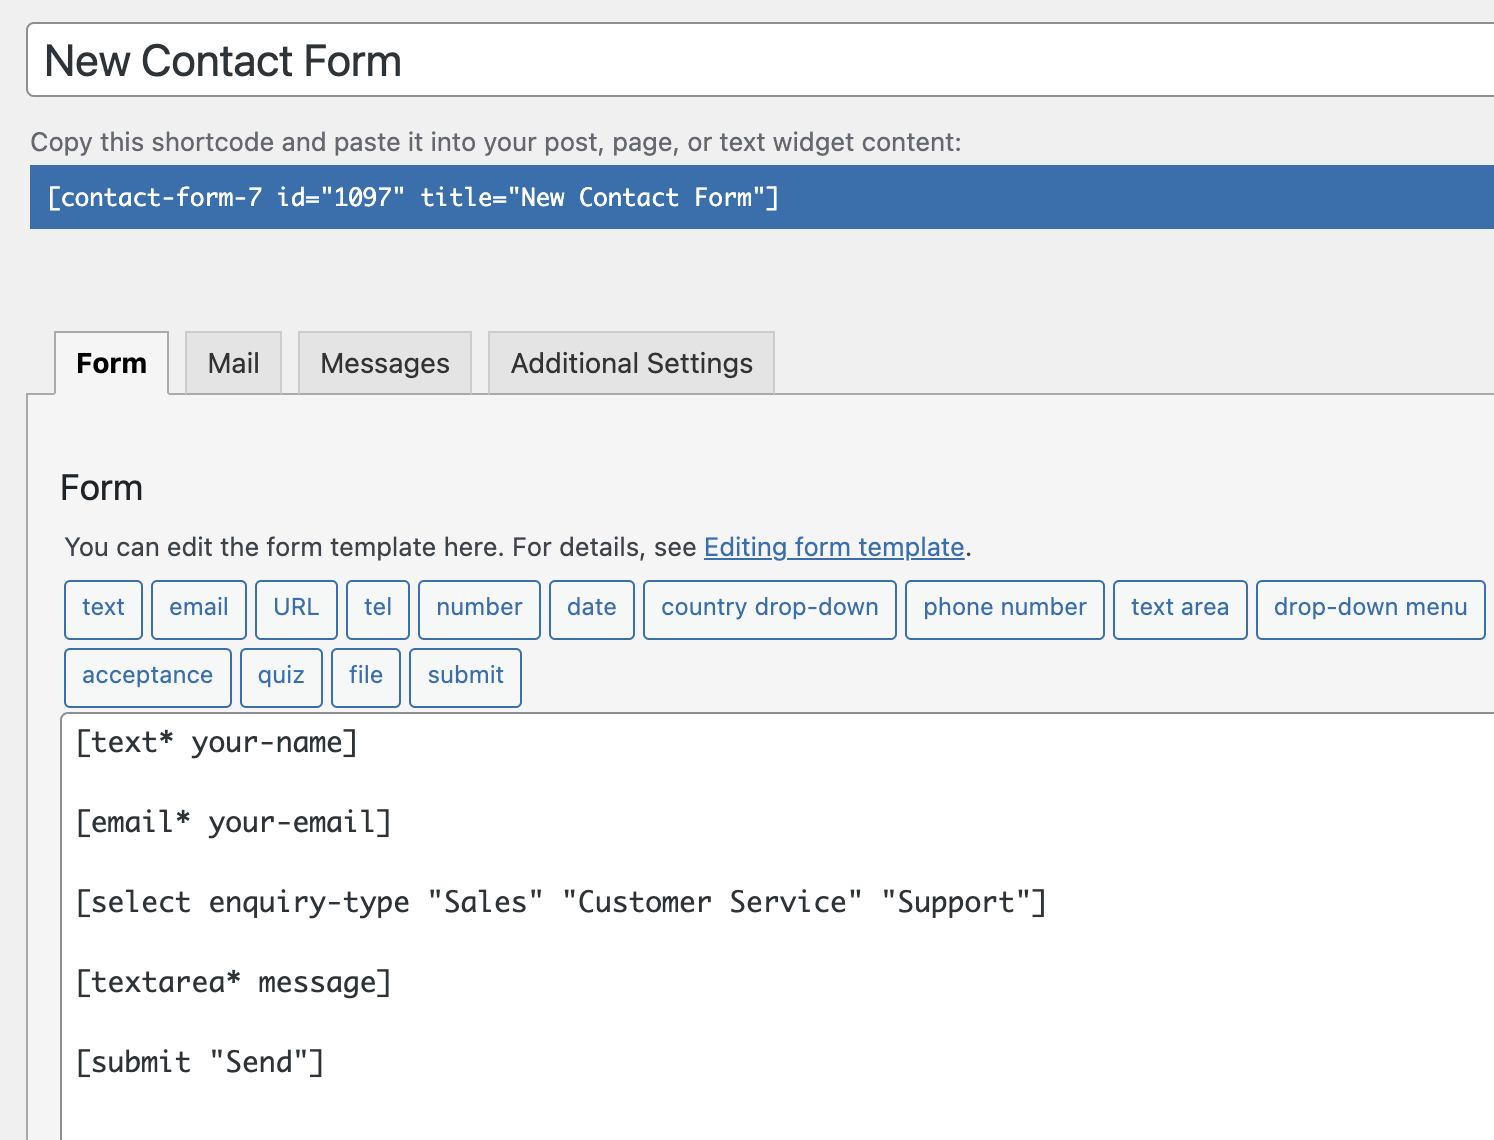
1. Create a new CF7 form
Create a simple CF7 form with a select tag that allows choosing which department the form will be sent to. For example, the following form:
[text* your-name]

[email* your-email]

[select enquiry-type "Sales" "Customer Service" "Technical Support"]

[textarea* message]

[submit "Submit"]
In line 6, as you can see, we create the same dropdown and assign it an identifier called enquiry-type, which I assume is nothing new to you in this case.
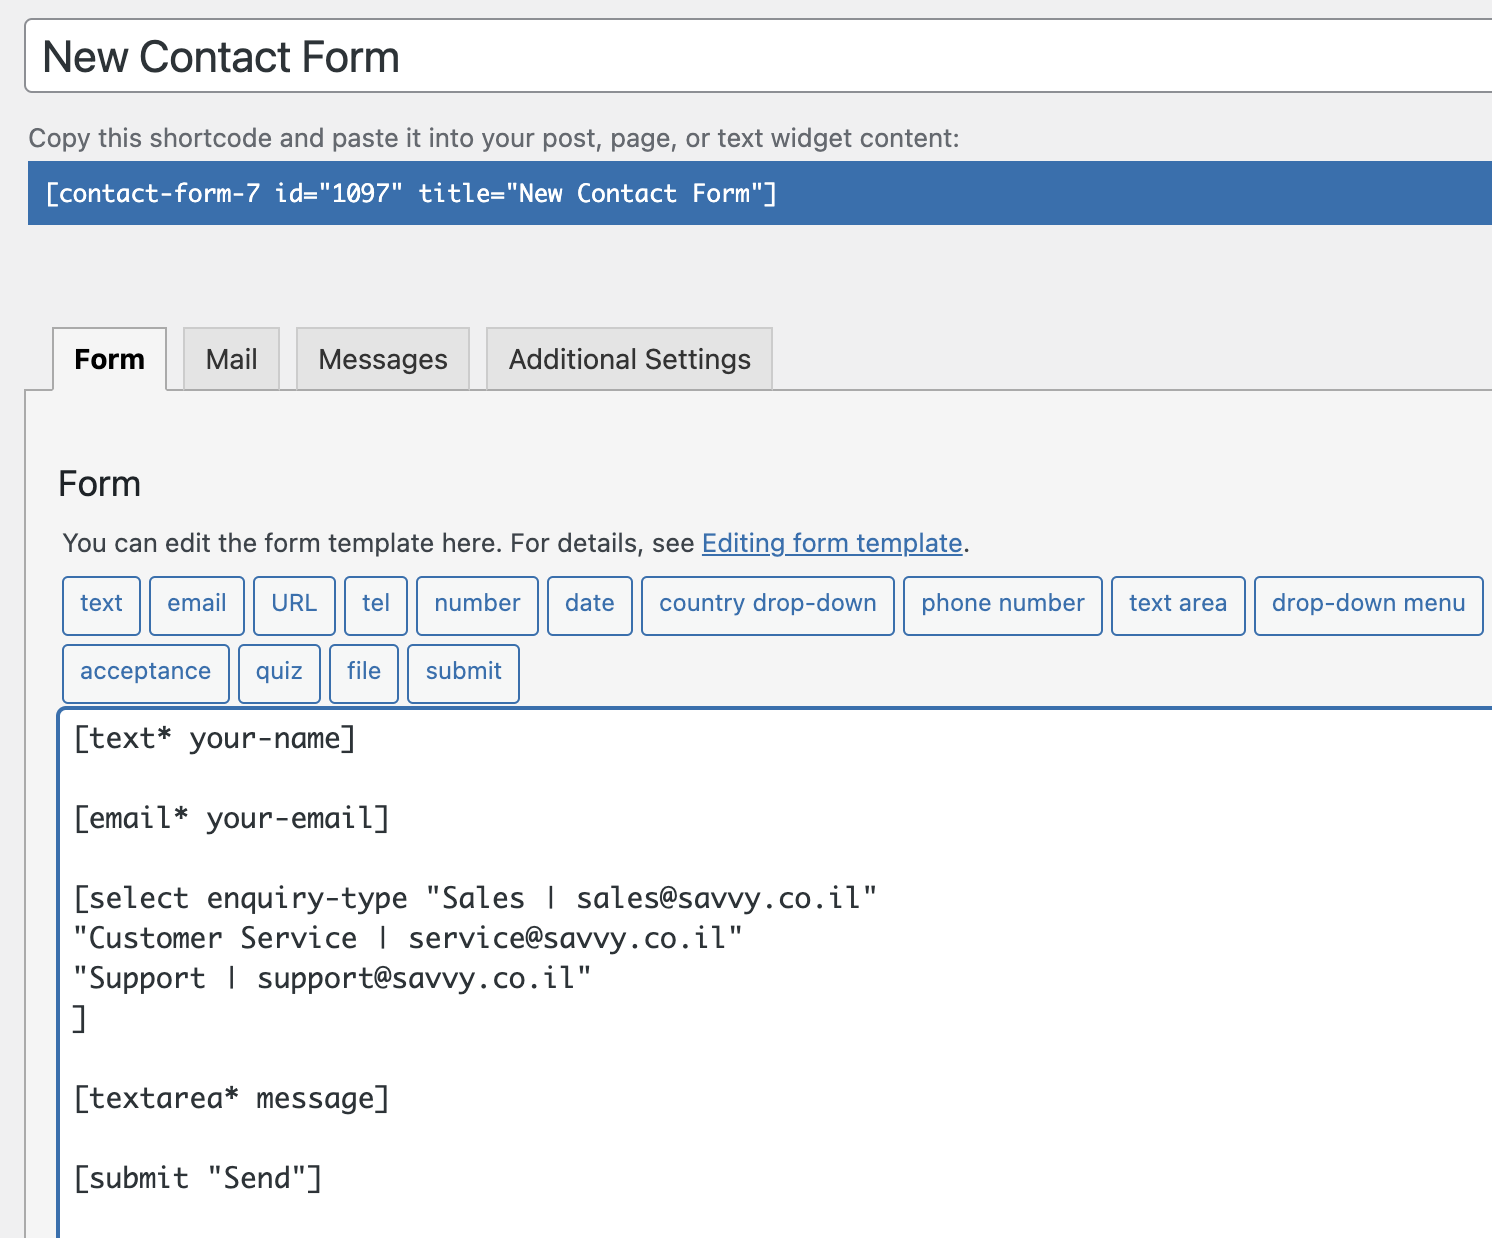
2. Use Pipes to specify the recipient for each option
What may be new to you, however, is using Pipes for each of the options in that dropdown, and using them looks like this:
[text* your-name]

[email* your-email]

[select enquiry-type "Sales | [email protected]" "Customer Service | [email protected]" "Technical Support | [email protected]"]

[textarea* message]

[submit "Submit"]
By adding a Pipe (‘|‘) in the middle of the value, only the part before that Pipe will be visible to the user, and the part after it will be the recipient for the form, meaning where the form will be sent.
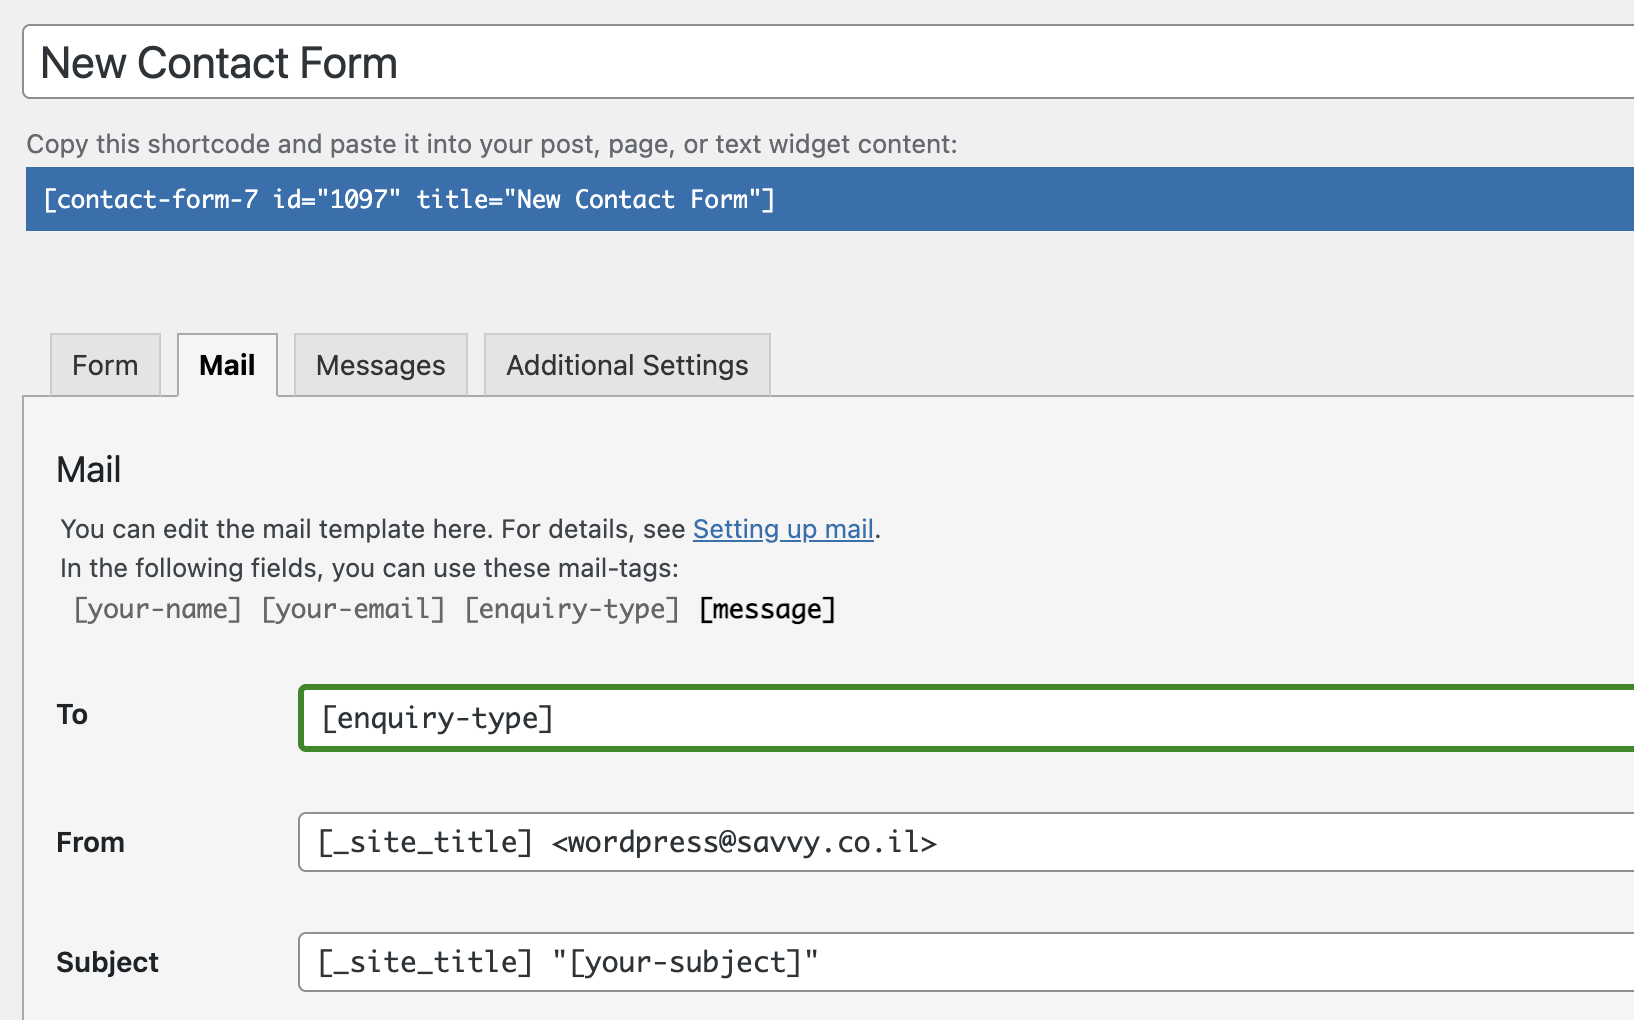
3. Insert the Dropdown identifier into the email template
All that’s left to do is go to the Mail tab and insert the identifier we defined earlier (enquiry-type) into the field that determines where the form will be sent, as shown in the following image:
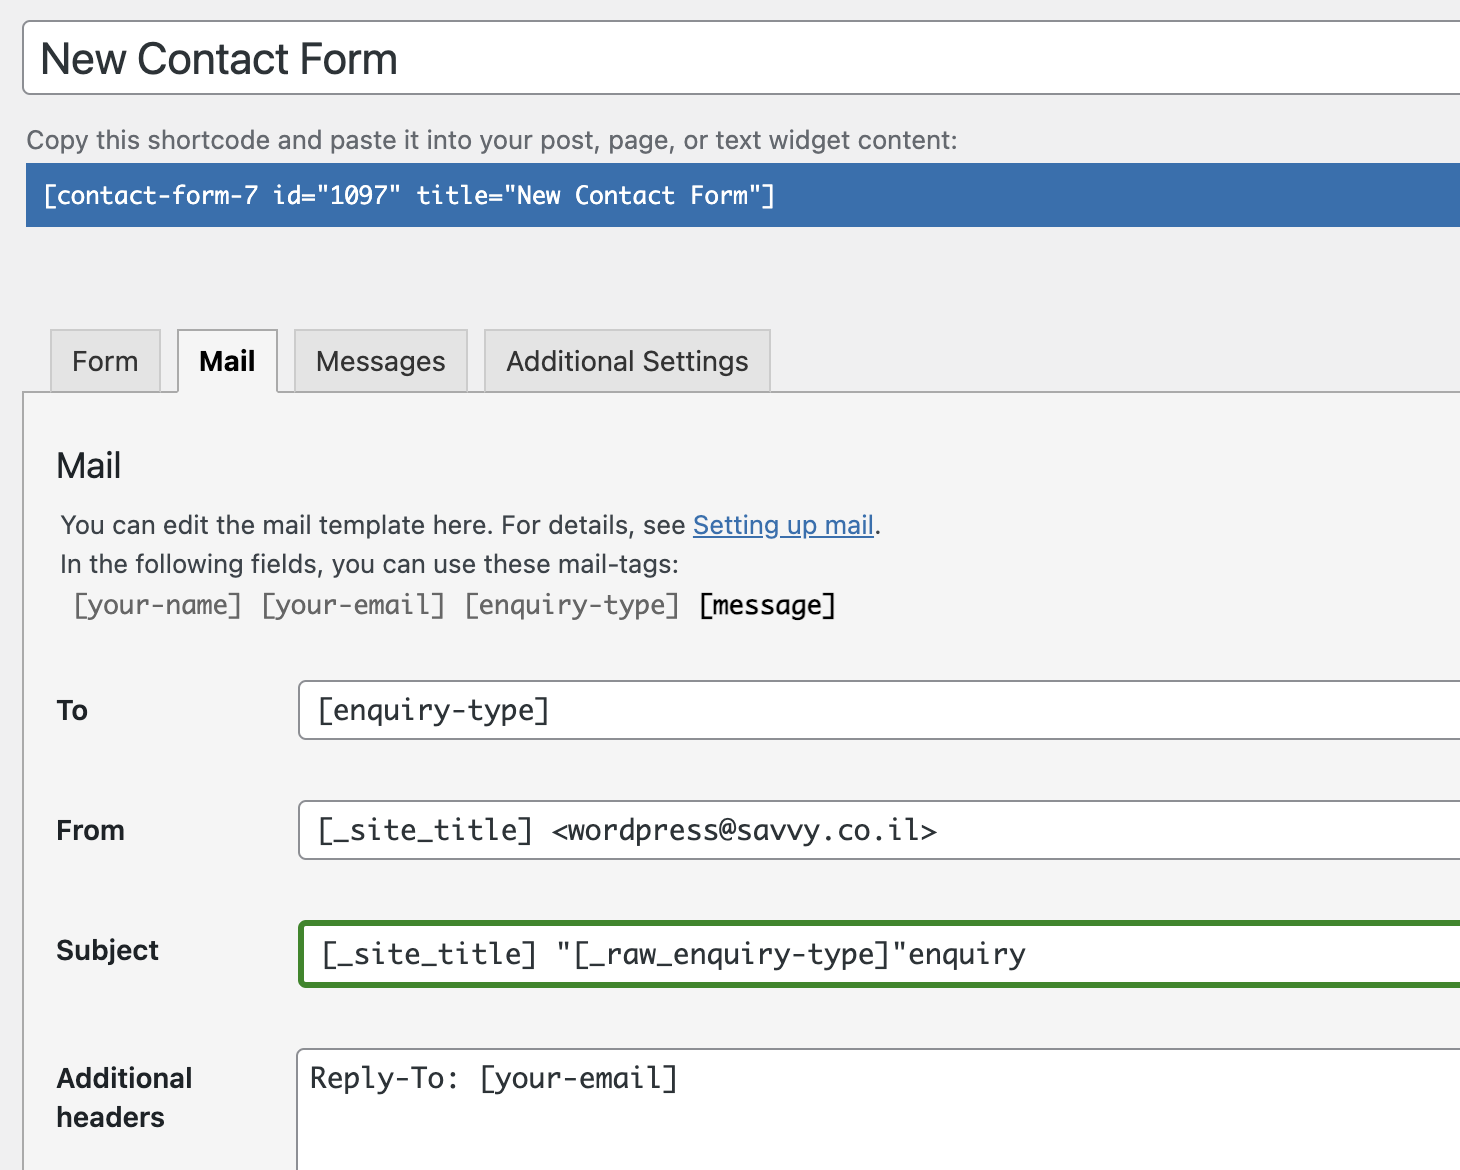
By the way, if you want to display the label itself in the email template, for example, to display the selected option in the dropdown in the email subject, you can do so by using the prefix called _raw_. The following image shows how it looks:
That’s it. Questions and ideas in the comments section…


Thank you! It works for me
Super! glad to hear 🙂
You are awesome! It works!