Headings, across all types of media – whether print or digital – help make your content more readable and clear. Headings act as visual cues so that the topic of your content is immediately clear to the reader.
Many readers simply skip through content to find the part they are interested in, and they can quickly catch it since it is displayed as a prominent heading within the article.
But it’s not just your readers who benefit from these headings; search engines use them too. In this guide, we’ll see how to use headings in WordPress to improve the readability of the article and its ranking in search engines.
It’s important to note that in this article, we will focus on the heading tags (H1, H2, etc.) rather than the <title> tag in the page header. The difference between them in brief: the title tag, which has its own importance (mainly in the context of SEO), is written as <title> in HTML, and it is the text you see on the browser tab of the page you’re viewing. You do not see this tag visually on the page itself.
On the other hand, the text within the heading tags, such as <H1>, is what visitors see as the title of the page, and we will discuss these headings in this post.
This is a good place to note how important it is to maintain a proper typographic hierarchy.
What are Heading Tags?
You could say that we think of headings as a way to style fonts – larger, bolder, and so on. But by using headings, we create a structured, hierarchical layout for our content. HTML heading tags are used to distinguish between headings, subheadings, and the body text within the content.
Heading tags represent a hierarchical structure in the page. There are six types of heading tags, with the most important being
<h1>, and the least important being<h6>.
The largest heading is H1, as mentioned, and it is typically reserved for the top-level heading of a page or post. Most content management systems, including WordPress, automatically add the H1 tag for the post title. However, sometimes a specific theme might change this setting. If this happens, you can adjust the tags in the code of your page templates.
The H2 tag is used to break down the content under the H1 into smaller sections. Similarly, the H3 tag divides the content under the H2. It is rare for heading tags to go below H4. Here’s an example of the correct heading tag hierarchy:
<h1>Post Title (H1)</h1>
    ├── <h2>Introduction (H2)</h2>
    │   └── <h3>Background Information (H3)</h3>
    ├── <h2>Main Content (H2)</h2>
    │   ├── <h3>Subtopic 1 (H3)</h3>
    │   │   └── <h4>Detailed Point 1 (H4)</h4>
    │   └── <h3>Subtopic 2 (H3)</h3>
    │       └── <h4>Detailed Point 2 (H4)</h4>
    ├── <h2>Conclusion (H2)</h2>
    └── <h3>Summary of Key Points (H3)</h3>
Why Use Heading Tags?
Headings on web pages behave similarly to headings in print. But unlike print, headings aren’t just for better visual display and readability. They also help search engines understand and rank your page.
Google scans the post for relevant content and refers to these headings to understand the content’s subject. As Google’s John Mueller has stated, “headings on a page help us to better understand the content on the page.” We should make it easier for Google and other search engines to find and understand these topics.
Headings inform visitors and search engines about the subjects of a particular content page on your site. Ideally, you should create a unique heading for every page on your site. Heading tags tell search engines how the different text blocks relate to each other.
Once this is clear, it becomes easier to understand why relevant keywords should appear naturally in these headings. Search engines recognize and prioritize these keywords when scanning the page, thus improving your site’s ranking for those phrases.
That said, heading tags alone won’t make or break your rankings. In recent years, content from a trustworthy and authoritative source (E-E-A-T) has carried more weight as a ranking factor.
Nevertheless, search engines more easily find keywords when wrapped in heading tags. Heading tags are an important part of On-Page SEO optimization, and you don’t want to overlook that.
Headings and Accessibility
Heading tags aren’t just for SEO – they are critical for accessibility. Screen readers rely heavily on heading tags to help users navigate the page. Users of assistive technology can jump between headings to quickly find the section they need, similar to how sighted users scan the page visually.
According to WCAG (Web Content Accessibility Guidelines), headings should describe the topic or purpose of their content, and they should follow a logical hierarchical order without skipping levels (e.g., don’t jump from H2 to H4).
Proper heading hierarchy isn’t just a nice-to-have for accessibility. Screen reader users depend on it to navigate your content. Skipping heading levels or using headings purely for styling breaks this navigation and can make your content inaccessible.
Heading Tags in WordPress – Best Practices
Here are a few tips for using heading tags on WordPress sites:
- Typically, we use the H1 tag once per page, usually at the top. Google has confirmed that using more than one H1 is perfectly fine, but sticking to one keeps the structure clear.
- Using H1-H3 tags should suffice in most situations. If the page has a lot of text, you can use H4-H6 tags as well.
- Maintain hierarchy in the headings. Use these tags in order – H2, followed by H3 and H4. Do not skip a level.
- Include relevant keywords in your H2 tags naturally. Google uses headings to understand what a section is about, so descriptive headings that reflect the content help both users and search engines.
- Keep headings concise. Do not include long sentences or entire paragraphs within heading tags.
- Do not use heading tags to make certain elements stand out visually. To style a particular element on your site, use CSS instead.
Heading tags also enable features like a Table of Contents, which automatically generates navigation links from the headings in your post. This improves user experience and can help your content appear as rich results in search engines.
Adding Heading Tags in WordPress
There are several ways to add heading tags in WordPress, both in the Block Editor (Gutenberg) and the Classic Editor.
1. You can manually write heading tags in the WordPress HTML Code editor.
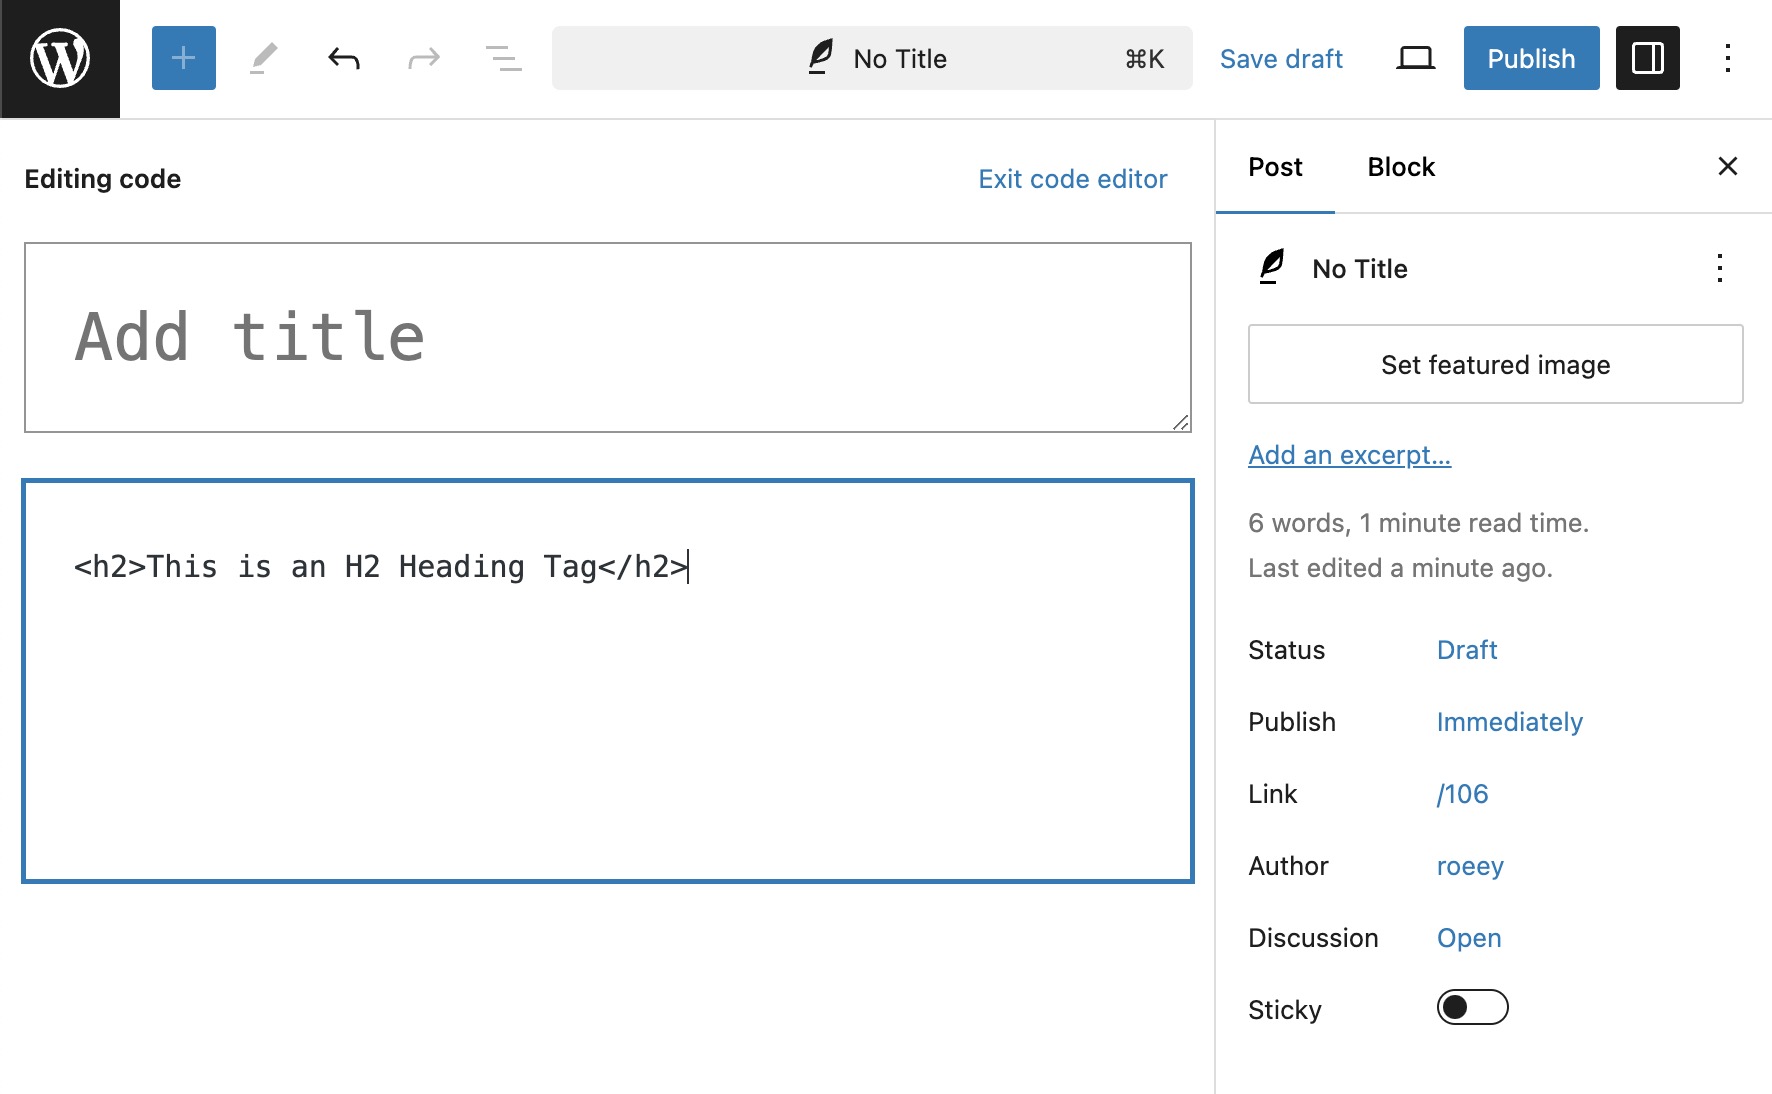
heading tags in the WordPress HTML Code editor
2. Alternatively, you can use the visual editor. Mark the text and change it to the appropriate heading tag.
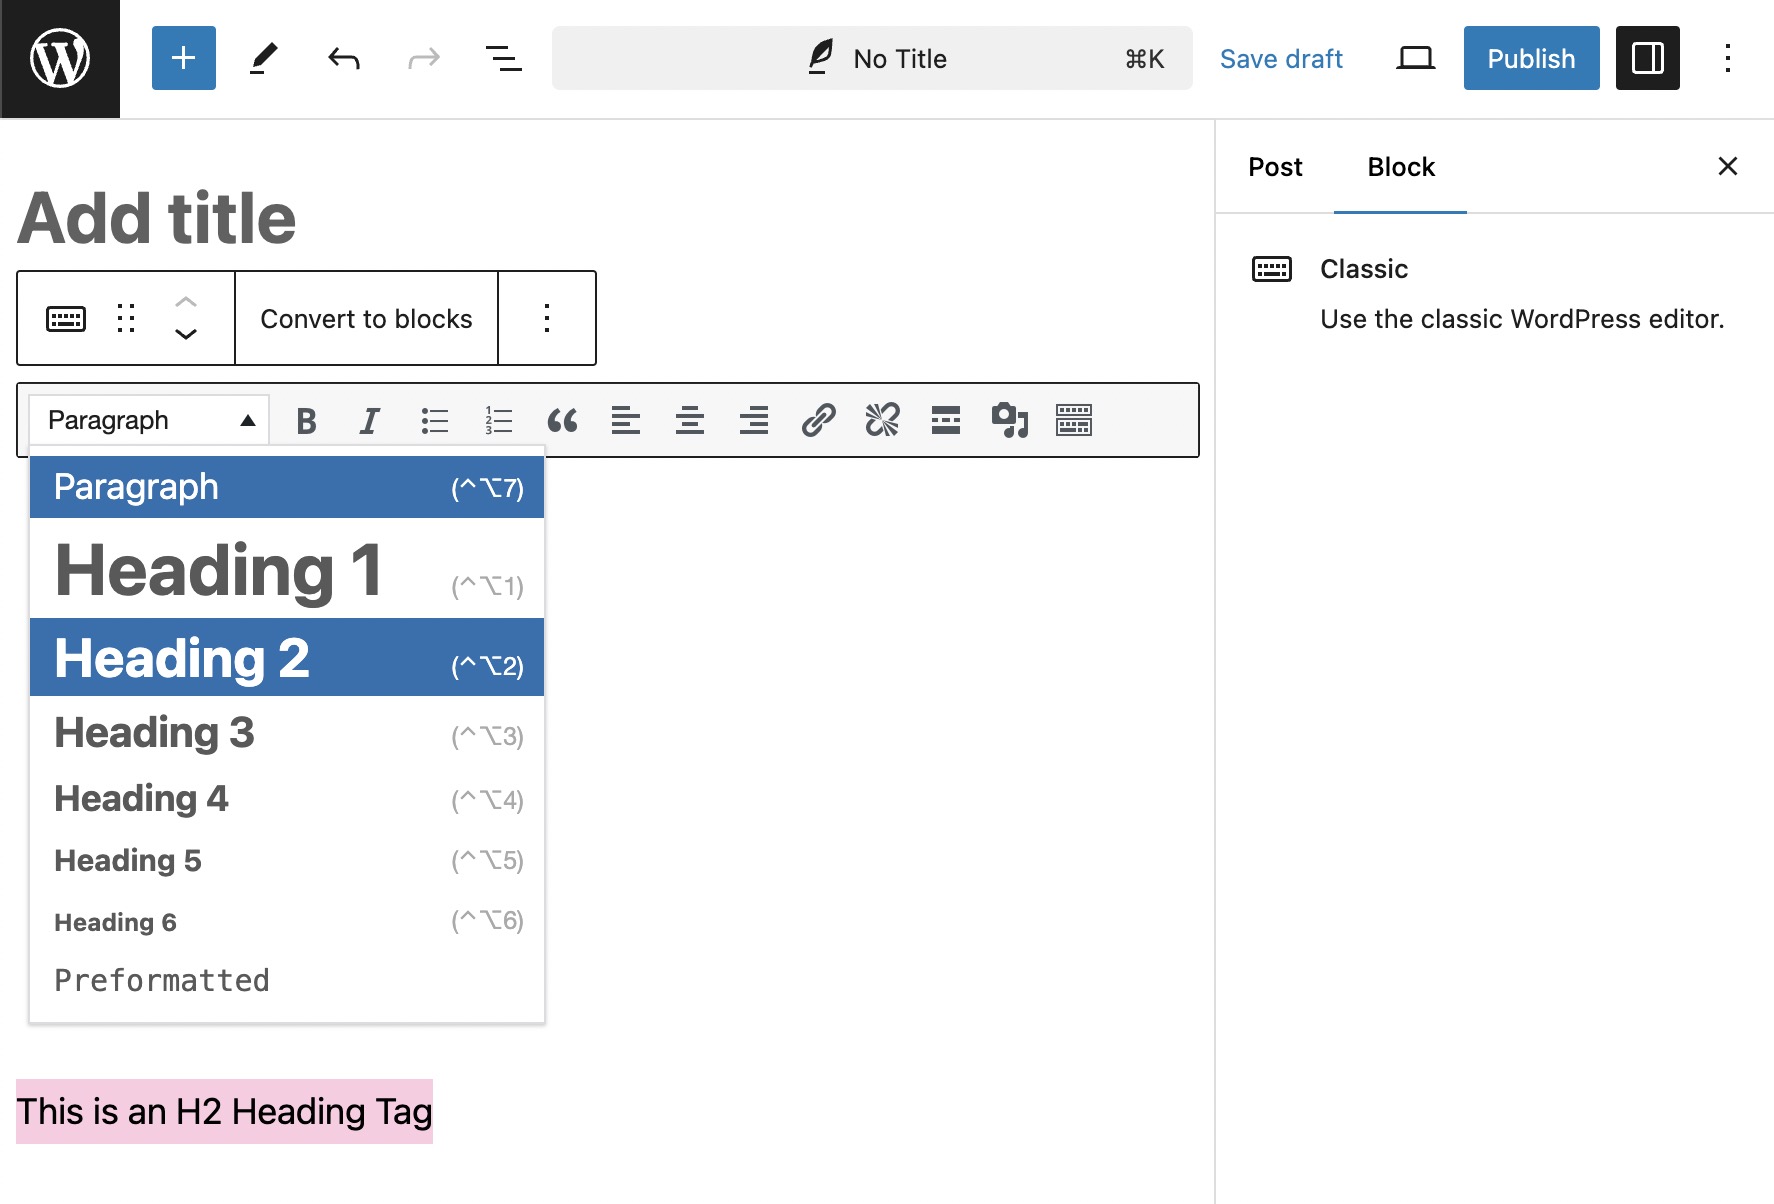
heading tags in the WordPress Visual editor
3. In the Classic Editor, highlight the text with your mouse and press Alt+Ctrl+Numbers 1-6. To remove the heading, repeat the action or use Alt+Ctrl+7.
4. In the Block Editor, you can type a slash command in a new block:
/heading– inserts a heading block (defaults to H2)./h2,/h3,/h4– inserts a heading block at the specified level.
5. Another keyboard option that works in both editors is using the pound sign (hash) followed by a space before the text:
- ## Heading Text – for an H2 heading.
- ### Heading Text – for an H3 heading.
- #### Heading Text – for an H4 heading.
FAQs
Common questions about heading tags in WordPress:
<title> tag and the H1 tag?
<title> tag is placed in the HTML <head> section and appears in the browser tab and search engine results. The H1 tag is a visible heading on the page itself. While they often contain similar text, they serve different purposes - the title tag targets search result display, while the H1 orients readers on the page.Summary
Heading tags are extremely important and can make a significant difference in the readability of your article, its accessibility for screen reader users, and its visibility in search engines.
They should be contextual to the content and divide it into a hierarchical and convenient structure for both readers and search engines. Use them wisely and sparingly to highlight the topic of your content with a short and impactful phrase.