From time to time, you may need to find the ID of a post or page in WordPress – whether for shortcodes, template building, or any other purpose. If you have worked with WordPress for any length of time, you have probably run into this need more than once.
Unfortunately, WordPress does not display these IDs by default in the admin panel.
One way to discover an ID is by visiting the edit screen for a specific post or page and checking its URL. It looks something like this:
https://savvy.co.il/wp-admin/post.php?post=XXXX&action=editIn this example, XXXX is the post ID – the unique identifier in WordPress’s database. However, this method is cumbersome and time-consuming. There should be an easier way to display these IDs, and fortunately, there is.
Displaying Post IDs Using Code
To display post IDs in a convenient way, take a look at the code below. This code should be placed in the functions.php file of your theme or in a site-specific plugin.
functions.php directly – your changes will be lost on the next theme update.Adding Columns to WordPress Admin Dashboard
WordPress provides excellent tools to modify the list of posts in the admin dashboard, making it easy to create new columns.
You need to use filters to add columns and actions to populate their content. Here is an example of how to add an ID column to the list of posts in the admin dashboard:
add_filter( 'manage_posts_columns', 'sv_add_id_column', 5 );
add_action( 'manage_posts_custom_column', 'sv_id_column_content', 5, 2 );

function sv_add_id_column( $columns ) {
    $columns['sv_id'] = 'ID';
    return $columns;
}

function sv_id_column_content( $column, $id ) {
    if ( 'sv_id' == $column ) {
        echo $id;
    }
}
That is essentially all you need. These hooks allow you to add a column by modifying the columns array. The array key is the column identifier, and its value is what appears as the column header in the admin dashboard.
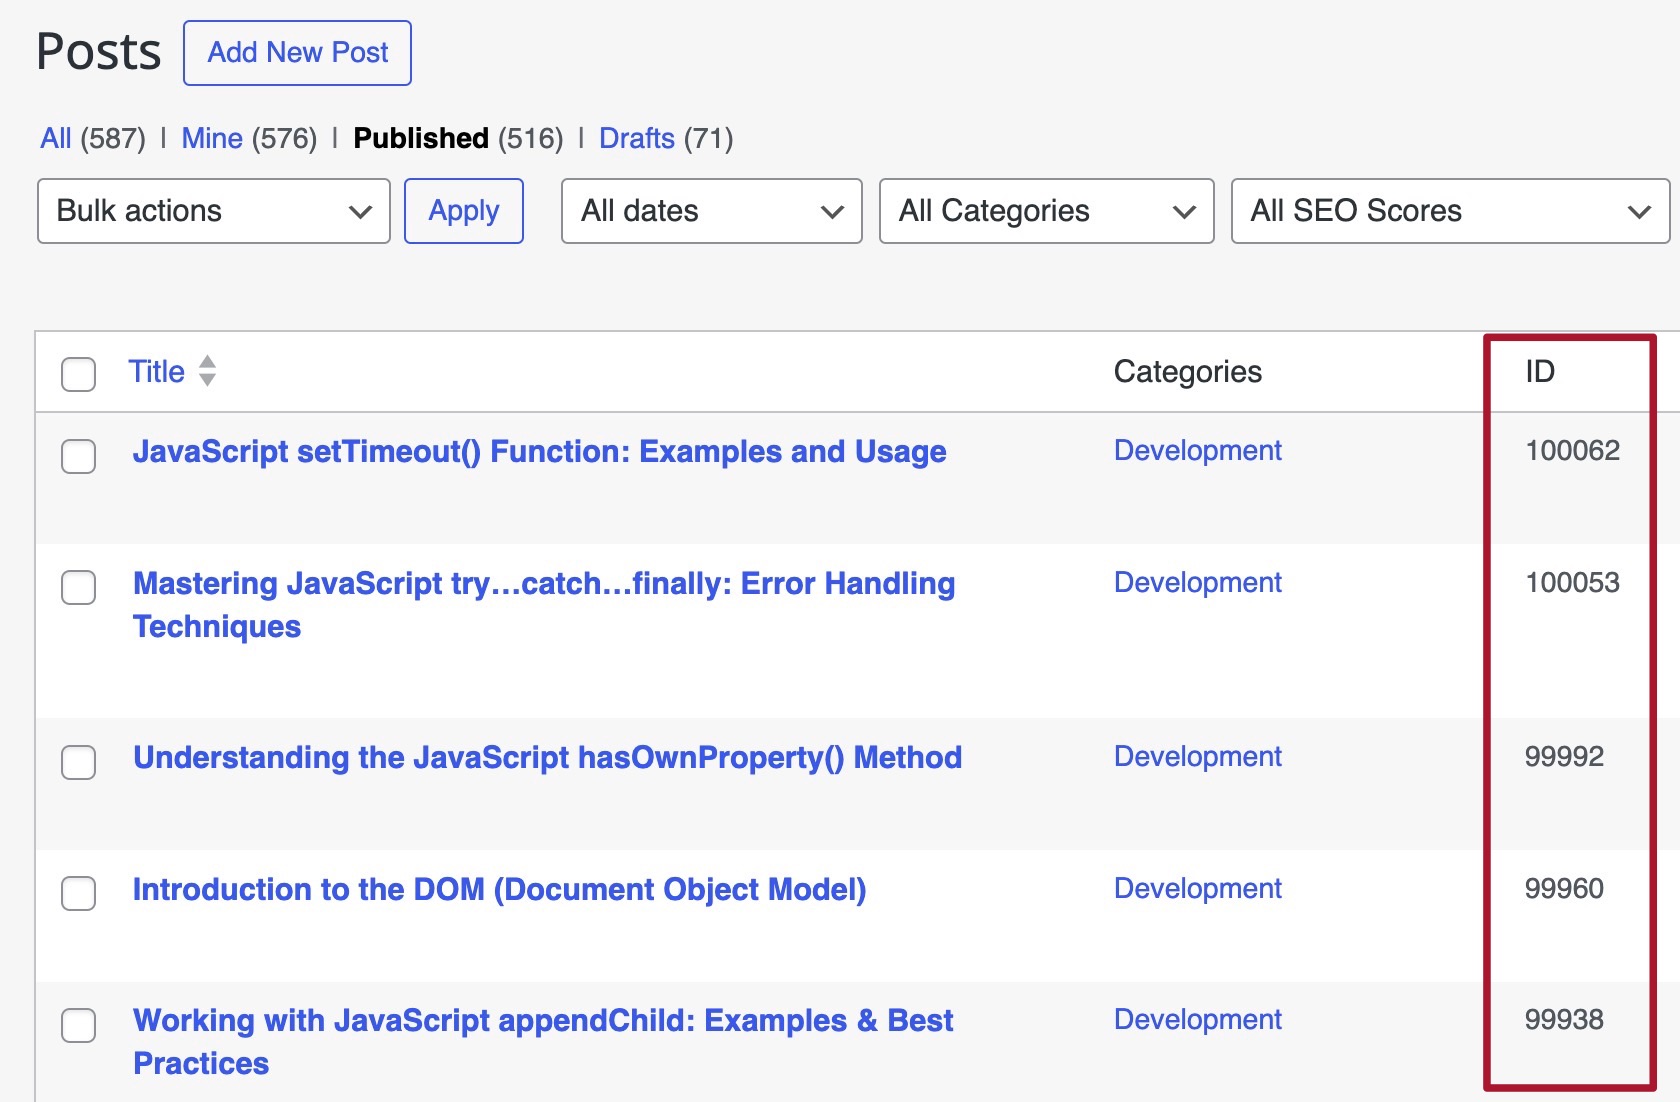
Notice that the sv_id_column_content function receives two parameters: the column name and the ID of the current post. All that remains is to print this ID in the column you created. Here is the result as it appears in the WordPress admin dashboard:
Finding the Right Hooks
The two functions above are all you need. The second part of the puzzle is knowing which hook to use. The hooks shown above target only regular posts, so the ID column will not appear for pages or any other content type.
These hooks are called “variable hooks” because they belong to a family of hooks whose names follow a pattern. Replace
[post_type_or_element]with the relevant content type:
manage_[post_type_or_element]_columnsmanage_[post_type_or_element]_custom_columnFor example, to target pages you would use
manage_pages_columnsandmanage_pages_custom_column.
Based on this pattern, you can work with posts, pages, and custom post types. To display the ID column for posts, pages, comments, media, and even users, use the following code:
function sv_add_id_column( $columns ) {
    $checkbox = array_slice( $columns, 0, 1 );
    $columns  = array_slice( $columns, 1 );

    $id['sv_id'] = 'ID';

    $columns = array_merge( $checkbox, $id, $columns );
    return $columns;
}

function sv_id_column_content( $column, $id ) {
    if ( 'sv_id' == $column ) {
        echo $id;
    }
}

// posts & post types
add_filter( 'manage_posts_columns', 'sv_add_id_column', 5 );
add_action( 'manage_posts_custom_column', 'sv_id_column_content', 5, 2 );

// pages
add_filter( 'manage_pages_columns', 'sv_add_id_column', 5 );
add_action( 'manage_pages_custom_column', 'sv_id_column_content', 5, 2 );

// users
add_action( 'manage_users_columns', 'sv_add_id_column', 5 );
add_filter( 'manage_users_custom_column', 'sv_id_column_content', 5, 2 );

// media
add_filter( 'manage_media_columns', 'sv_add_id_column', 5 );
add_action( 'manage_media_custom_column', 'sv_id_column_content', 5, 2 );

// comments
add_action( 'manage_edit-comments_columns', 'sv_add_id_column', 5 );
add_action( 'manage_comments_custom_column', 'sv_id_column_content', 5, 2 );
To add the ID column for all taxonomies – categories, tags, and any custom taxonomies – use a foreach loop:
// all taxonomies
function sv_id_taxonomy_columns( $columns ) {
    $columns['my_term_id'] = 'ID';
    return $columns;
}

function sv_id_taxonomy_columns_content( $content, $column_name, $term_id ) {
    if ( 'my_term_id' == $column_name ) {
        $content = $term_id;
    }
    return $content;
}

$taxonomies = get_taxonomies();
foreach ( $taxonomies as $taxonomy ) {
    add_action( 'manage_edit-' . $taxonomy . '_columns', 'sv_id_taxonomy_columns' );
    add_filter( 'manage_' . $taxonomy . '_custom_column', 'sv_id_taxonomy_columns_content', 10, 3 );
}
Displaying the ID in the Second Column
By default, the ID column appears as the last column. But what if you want to display it right after the checkbox column for convenience?
You could merge the columns array with your new array, but since the first column is the checkbox (the first element in the original array), it requires an extra step. You want the ID column to appear after the checkbox, so you need to split the array first.
The first array contains the checkbox (the first element), and the second array contains the rest. Then you merge the checkbox array with the ID array, followed by the remaining columns.
A look at the code should make this clearer. The result is shown in the image below:
add_filter( 'manage_posts_columns', 'sv_add_id_column', 5 );
add_action( 'manage_posts_custom_column', 'sv_id_column_content', 5, 2 );

function sv_add_id_column( $columns ) {
    $checkbox = array_slice( $columns, 0, 1 );
    $columns  = array_slice( $columns, 1 );

    $new['sv_id'] = 'ID';

    $columns = array_merge( $checkbox, $new, $columns );

    return $columns;
}
FAQs
Common questions about displaying post IDs in the WordPress admin:
post= is the ID. For example, post.php?post=42&action=edit means the ID is 42.manage_posts_columns and manage_posts_custom_column hooks apply to all public post types. For custom post types registered with specific settings, you can use the targeted hooks like manage_{post_type}_posts_columns.functions.php file or, even better, to a site-specific MU-Plugin. The advantage of an MU-Plugin is that it remains active regardless of which theme you use.Summary
This example perfectly reflects the modularity of WordPress. In older versions of WordPress (2.5 and below), the ID was displayed by default, but since it was not relevant to most users, it was removed. From that point on, various plugins emerged to display the ID, such as the Reveal IDs plugin.
Want to make the admin panel even more visual? You can also add a featured image column to the post list using a simple code snippet – no plugin required.