Google Maps integration on your website is a fantastic way to help visitors easily find your business location, events, or other points of interest. In this beginner-friendly guide, you’ll learn how to add Google Maps to your website quickly and effortlessly.
Step 1: Get Your Google Maps Embed Code
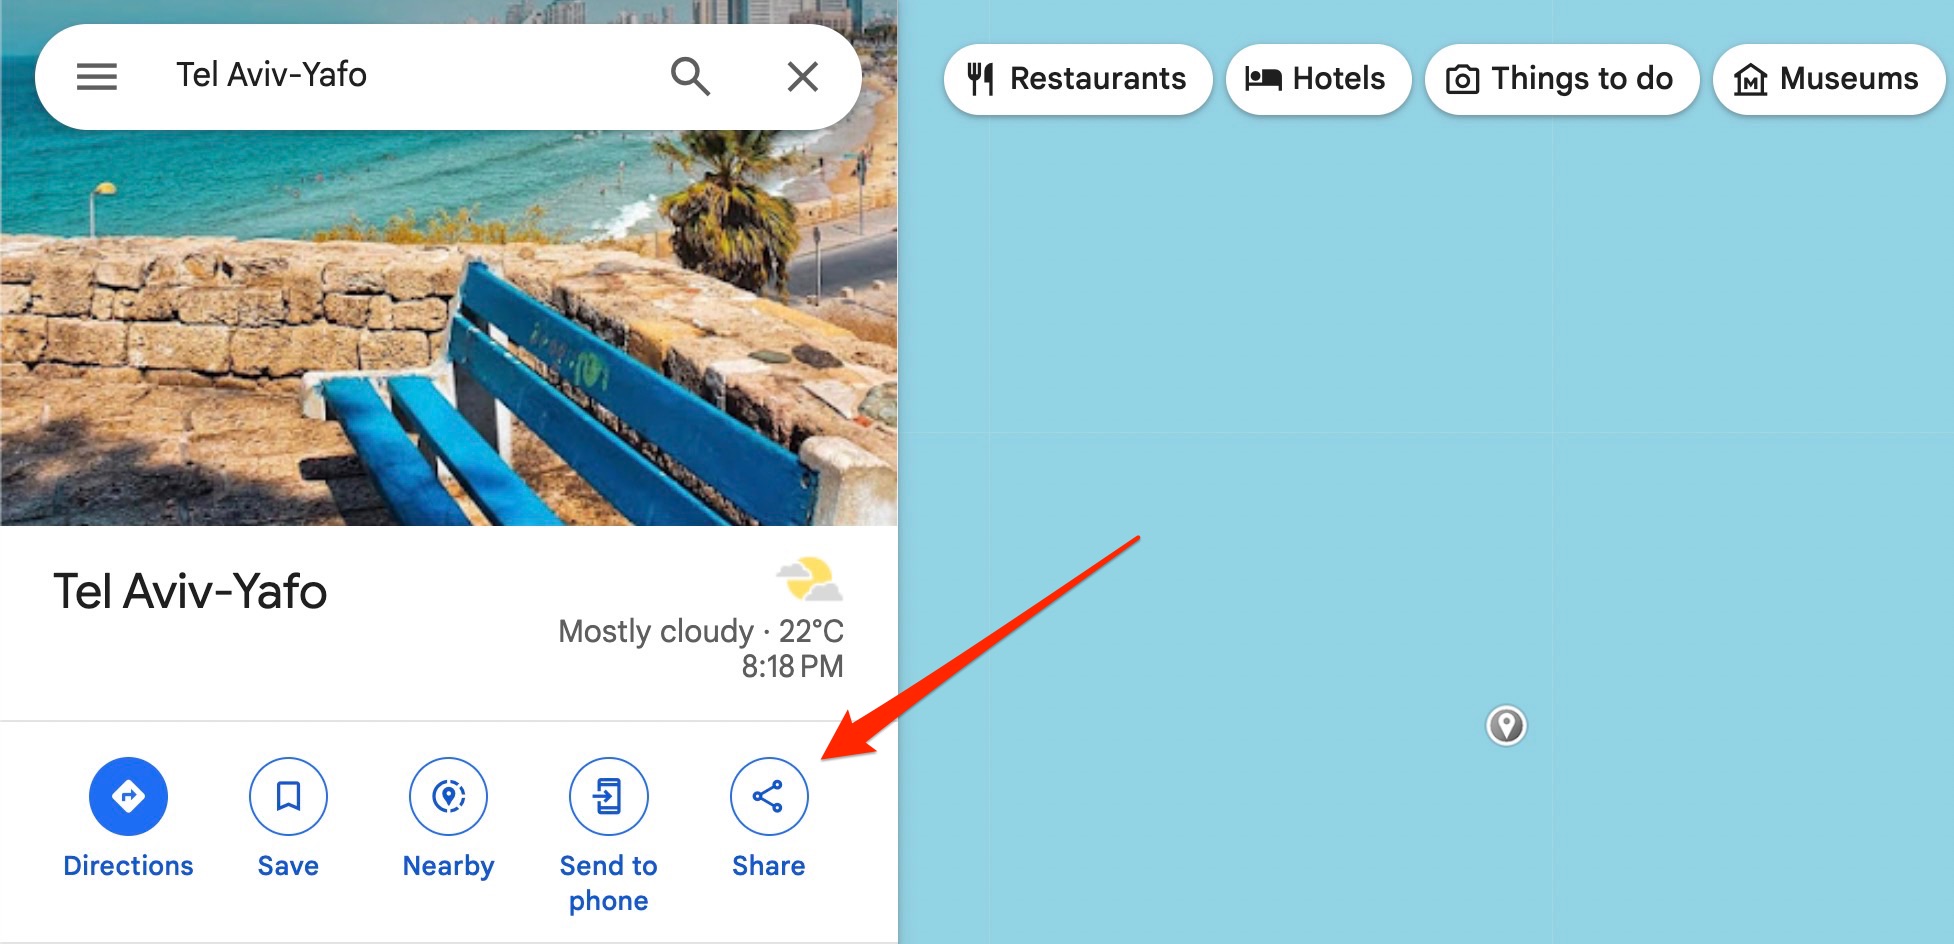
First, head over to Google Maps and search for the location you wish to embed.
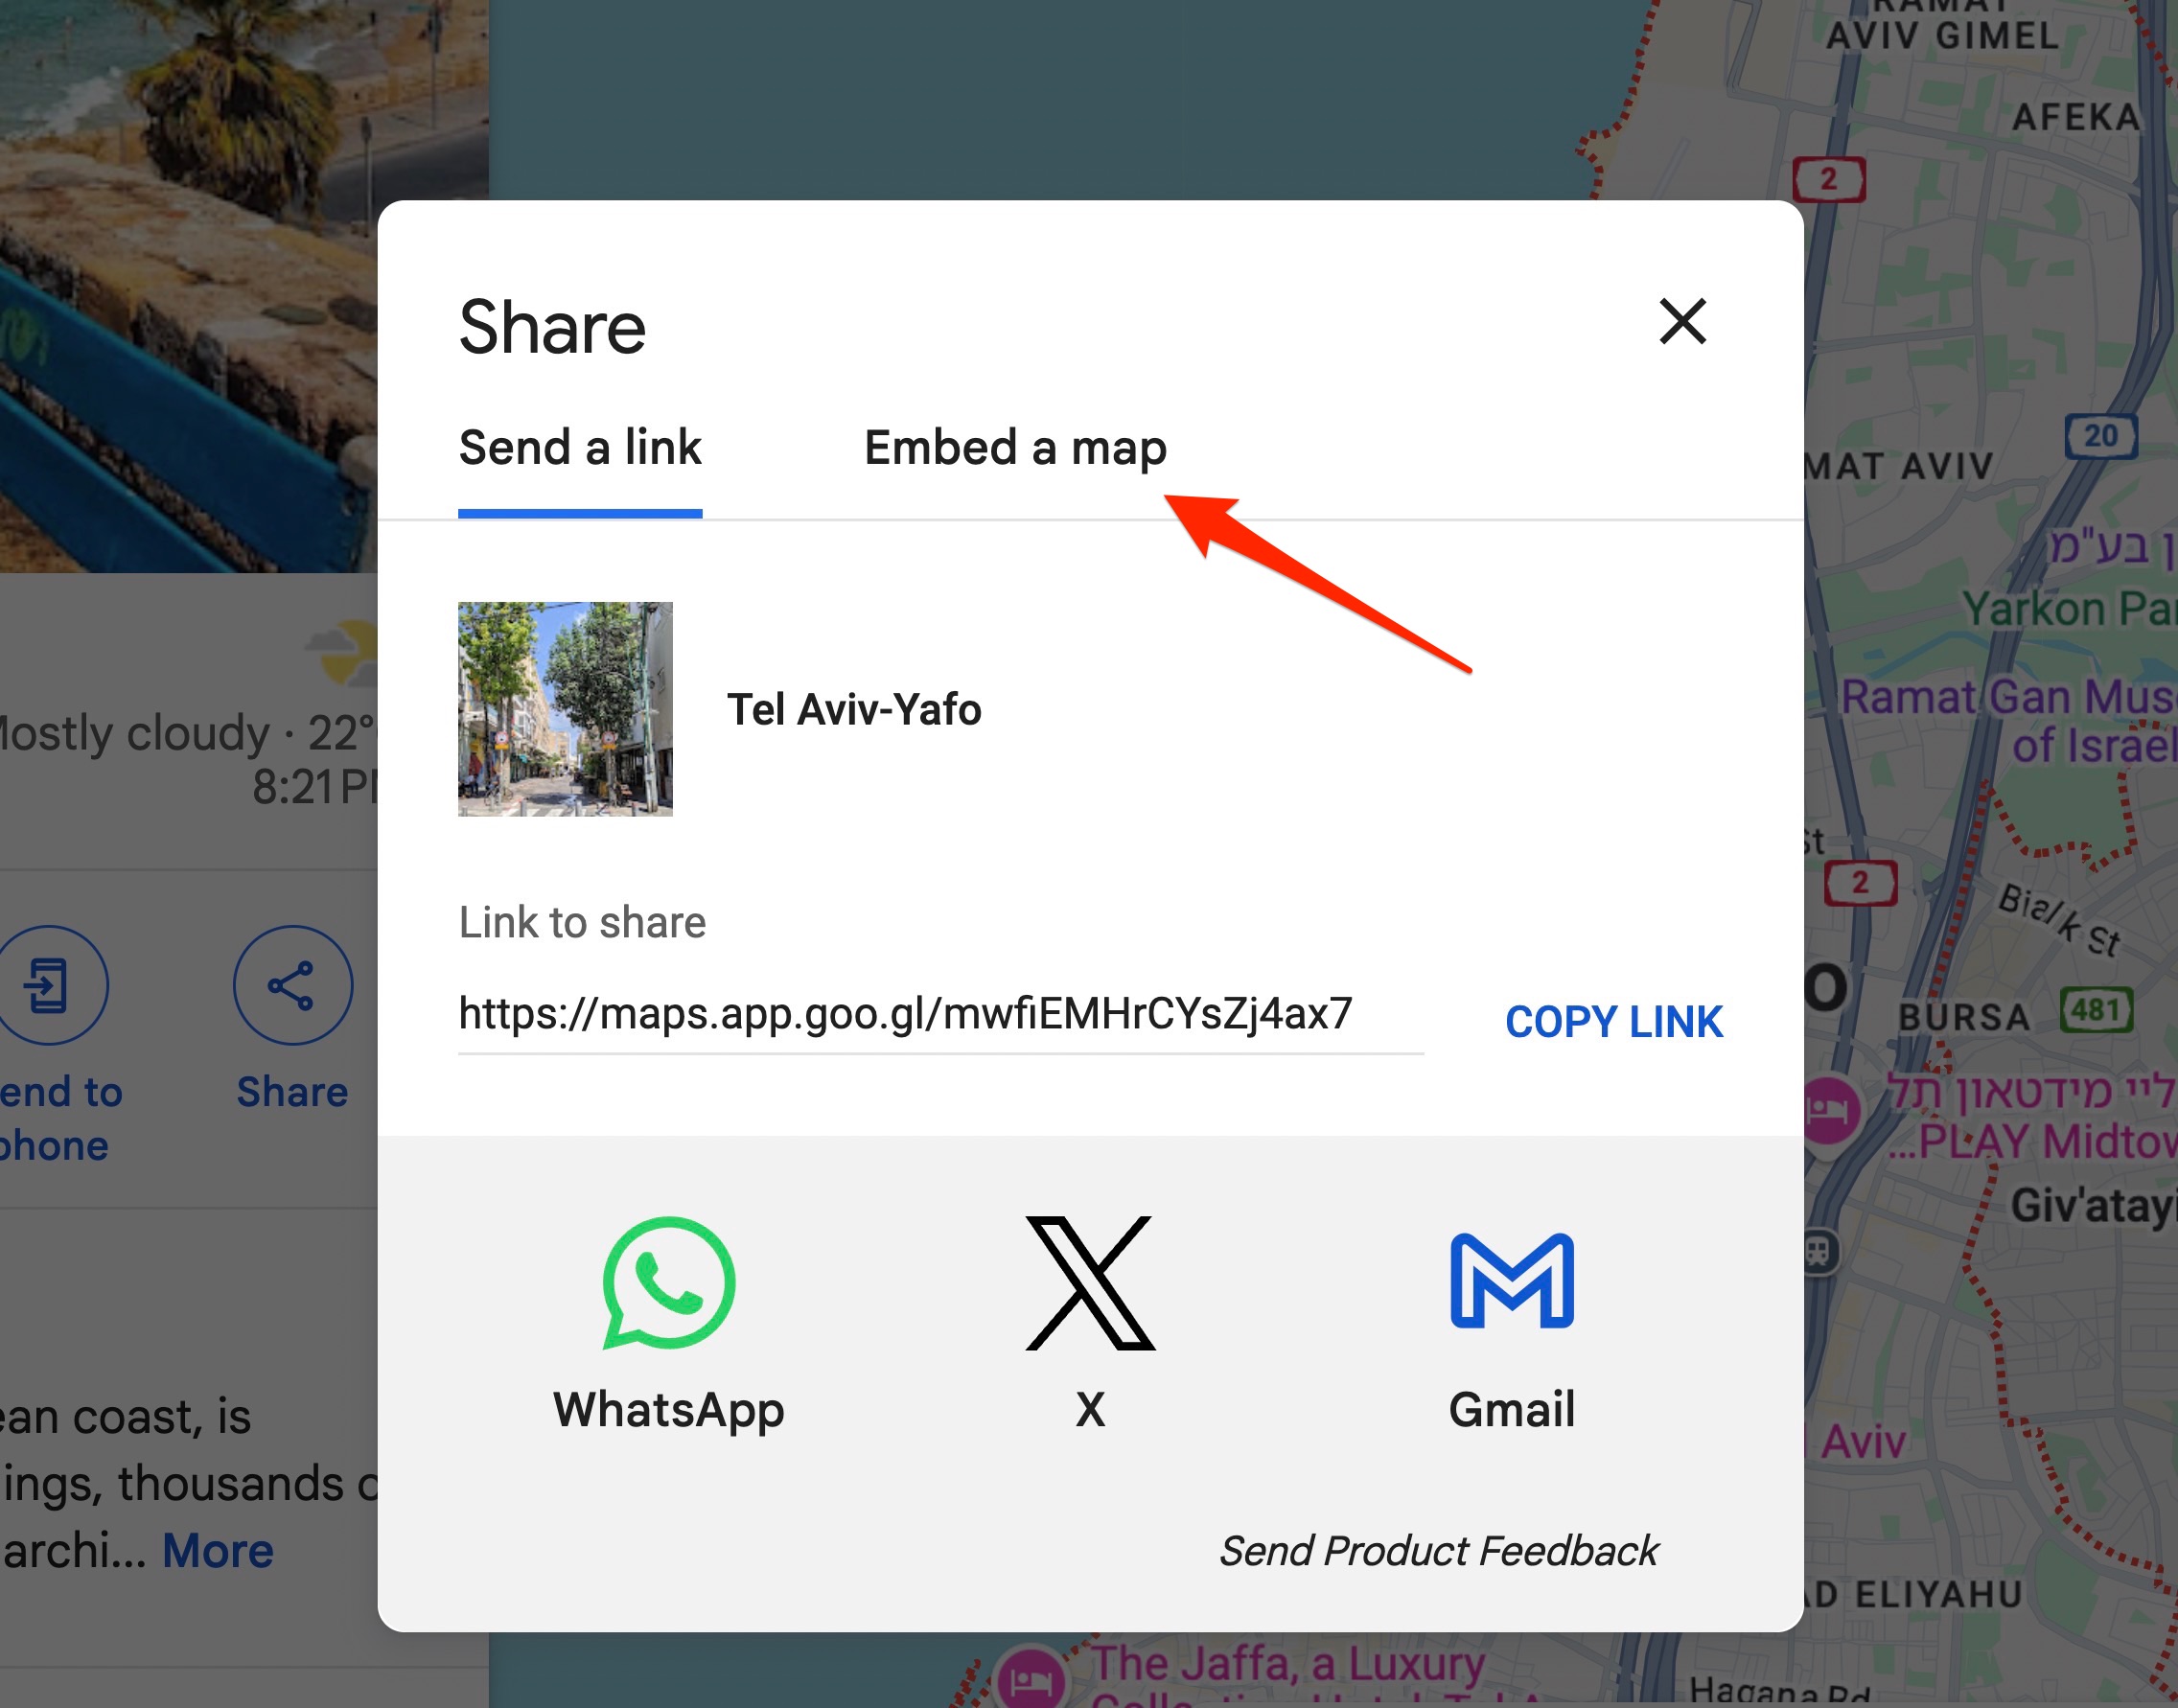
- After finding your location, click on “Share”.
- Select the “Embed a map” tab.
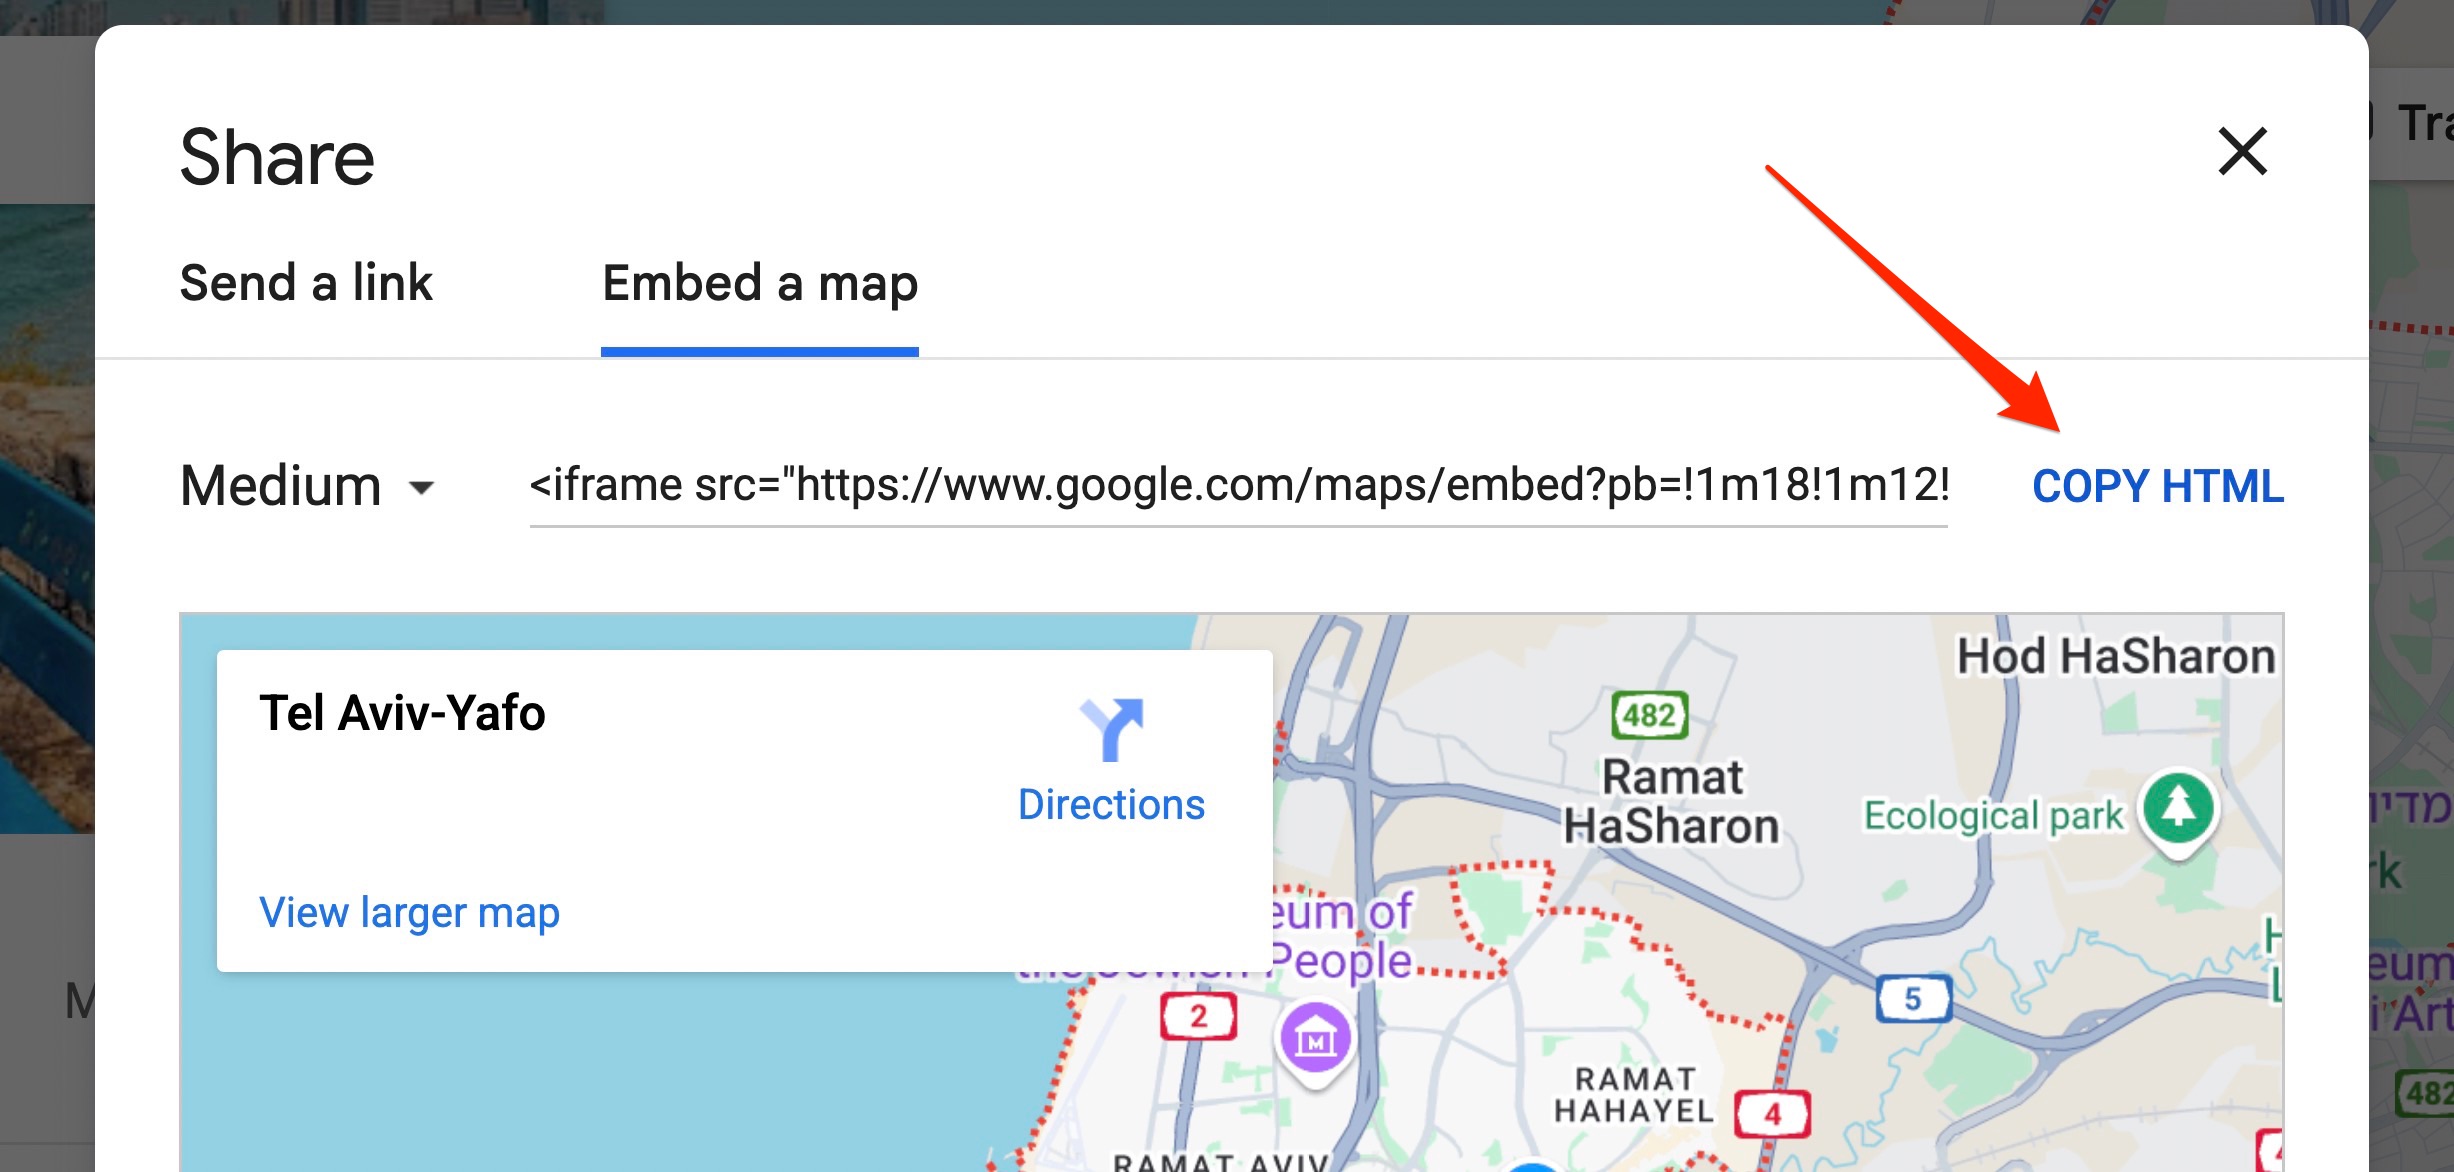
- Copy the provided iframe HTML code.
Tip: You can adjust the size of the map using the provided options under the embed code before copying it.
Step 2: Insert the Embed Code into Your Website
Next, place the iframe code into your HTML file at the desired location. Here’s an example of how your HTML could look:
<div class="map-container">
  <iframe src="https://www.google.com/maps/embed?...your-map-code..."
          width="600"
          height="450"
          style="border:0;"
          allowfullscreen=""
          loading="lazy"
          referrerpolicy="no-referrer-when-downgrade">
  </iframe>
</div>
Step 3: Customizing Your Map Appearance (Optional)
If you want to style your map container, you can add some basic CSS like this:
.map-container {
  max-width: 100%;
  overflow: hidden;
}

.map-container iframe {
  width: 100%;
  height: 100%;
}
How to Add Google Maps to a WordPress Website
If you’re using WordPress, embedding Google Maps is simple. Here’s how to do it:
- Go to Google Maps and find your location.
- Click “Share” → “Embed a map”, then copy the iframe code.
- In your WordPress dashboard, edit the page or post where you want the map.
- Switch to the “Text” tab (Classic Editor) or use a Custom HTML block (Block Editor).
- Paste the iframe code where you want the map to appear and update the page.
Adding Google Maps with Elementor
If you’re using Elementor, adding Google Maps is even easier with a visual interface. Here’s how to do it:
- Edit the desired page with Elementor.
- In the Elementor panel, search for the “HTML” widget.
- Drag the HTML widget to the section where you want the map to appear.
- Paste the Google Maps iframe code into the widget’s content area.
- Click “Update” to save the changes and preview your embedded map.
Elementor also offers a built-in Google Maps widget, but it requires setting an API key. If you’re looking for a quick solution, the HTML widget method is easier and doesn’t require any configuration.
Prefer Using the Google Maps API?
If you’re looking for more flexibility and advanced features, you might prefer using the Google Maps API. Check out our detailed guide on how to add Google Maps to your website using the Google Maps API.
That’s It!
Now, save and preview your webpage. Your visitors will see a fully functional Google Map directly on your site.
Adding Google Maps doesn’t need to be complicated. Using this straightforward method ensures your visitors can quickly access location details, making your website more useful and user-friendly.
Remember, embedding Google Maps enhances your site’s usability and can also positively influence your local SEO.
Happy coding!


