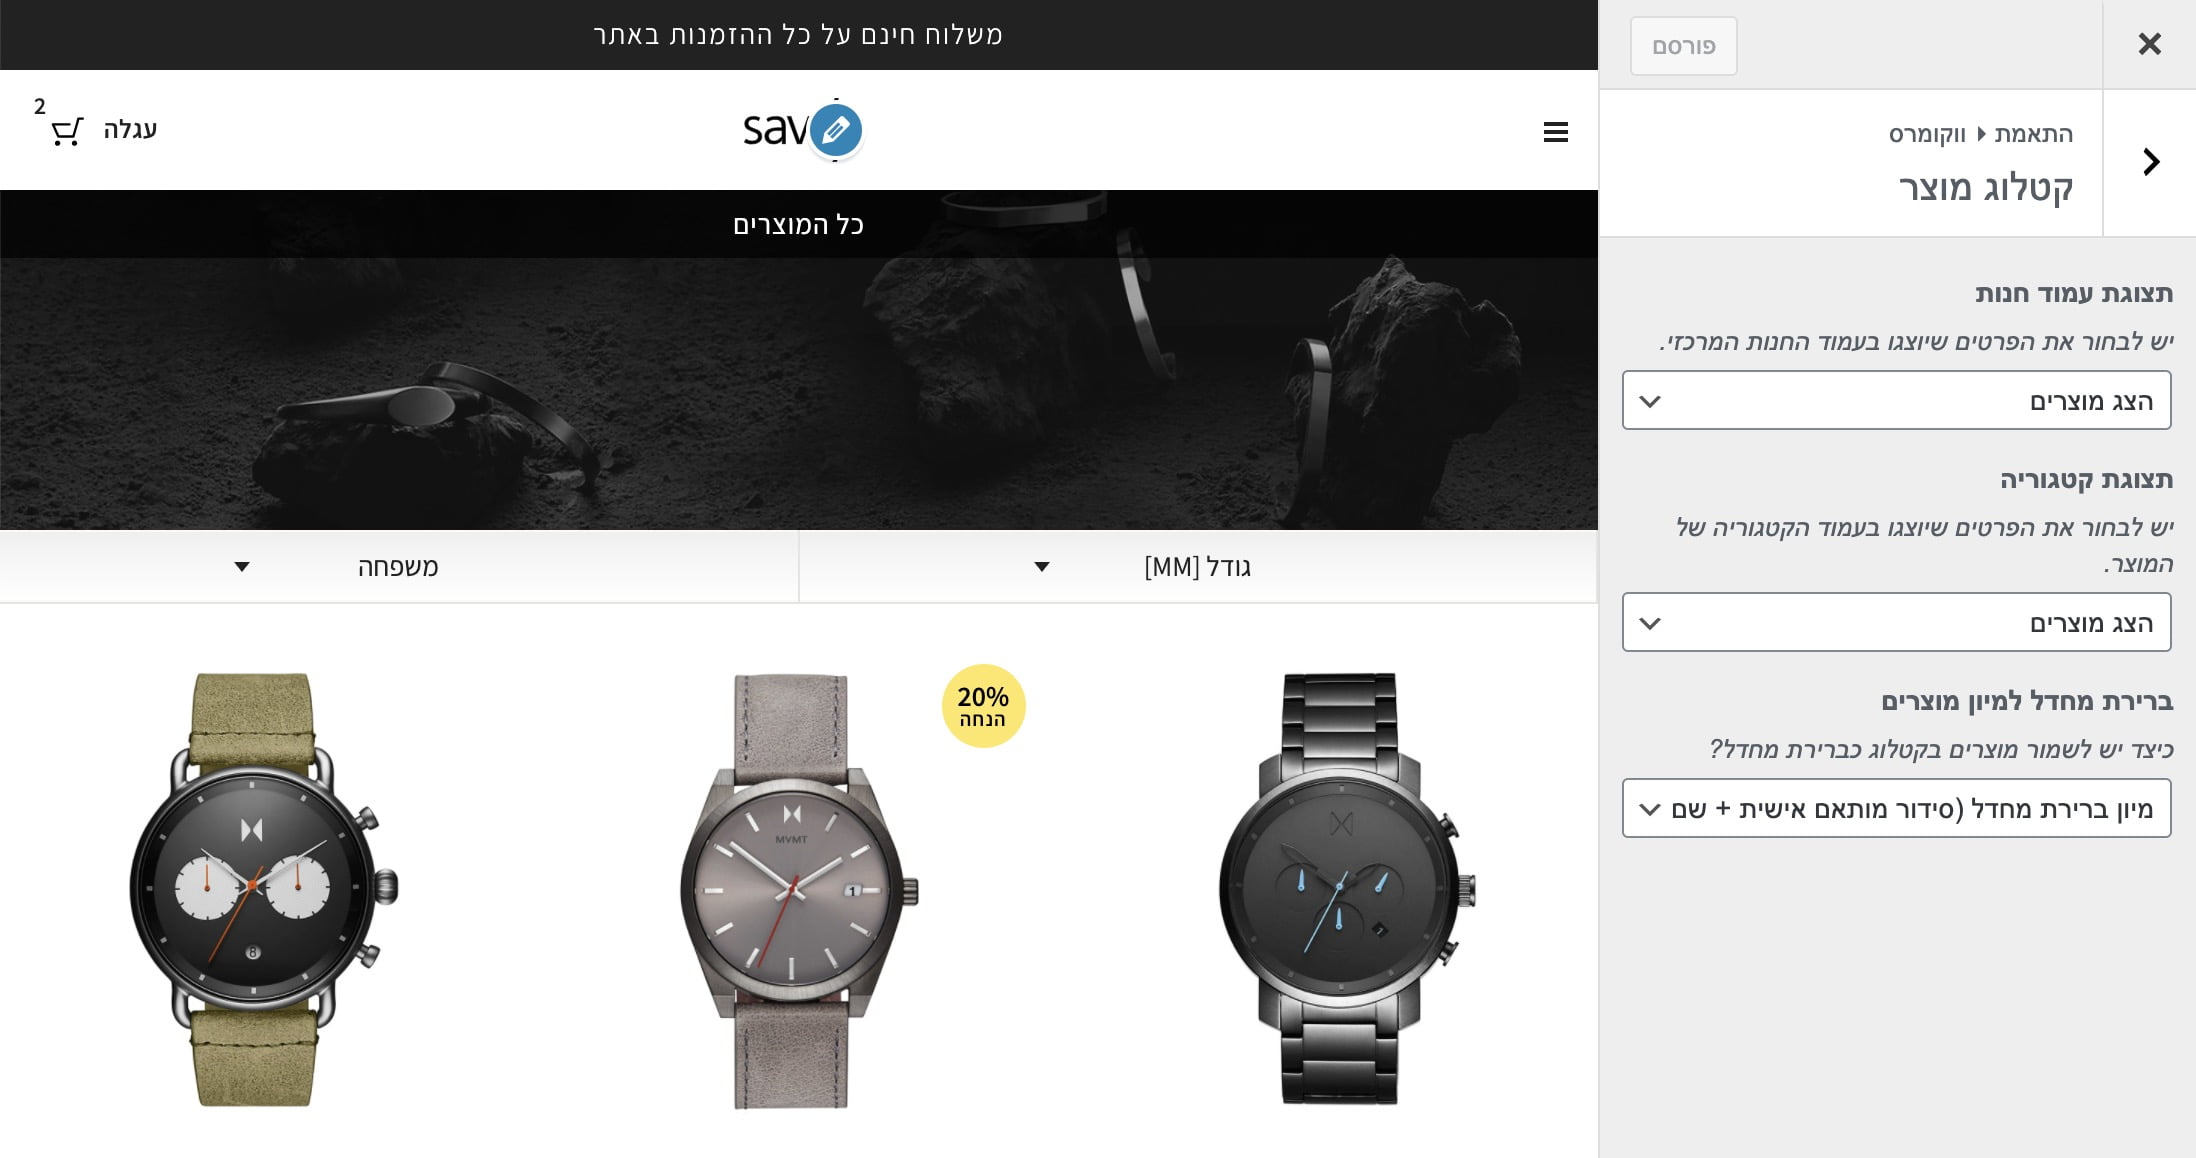
השתמשו בקוד הבא בכדי לשנות את מספר המוצרים שווקומרס מציגה בכל עמוד. בכדי שזה יעבוד עליכם לוודא כי האפשרות ״הצג מוצרים״ היא האפשרות הנבחרת בהתאמה אישית.
%27%20fill-opacity%3D%27.5%27%3E%3Cellipse%20fill%3D%22%23303030%22%20fill-opacity%3D%22.5%22%20rx%3D%221%22%20ry%3D%221%22%20transform%3D%22rotate(8.2%20-307.2%203247.5)%20scale(1047.96431%20457.09397)%22%2F%3E%3Cellipse%20fill%3D%22%23fdfdfd%22%20fill-opacity%3D%22.5%22%20rx%3D%221%22%20ry%3D%221%22%20transform%3D%22matrix(156.2035%20439.56778%20-2061.15016%20732.4442%201155%201090)%22%2F%3E%3Cellipse%20fill%3D%22%23fff%22%20fill-opacity%3D%22.5%22%20rx%3D%221%22%20ry%3D%221%22%20transform%3D%22matrix(-182.2831%20337.23423%20-284.35429%20-153.70024%202009.6%20124.8)%22%2F%3E%3Cellipse%20fill%3D%22%23919191%22%20fill-opacity%3D%22.5%22%20rx%3D%221%22%20ry%3D%221%22%20transform%3D%22matrix(-448.21247%2033.66252%20-17.4875%20-232.84402%201201.1%20569.7)%22%2F%3E%3C%2Fg%3E%3C%2Fsvg%3E)
והנה הקוד אותו יש להוסיף לקובץ functions.php של התבנית שלכם:
/**
 * Change number of products that are displayed per page (shop page)
 */
add_filter( 'loop_shop_per_page', 'new_loop_shop_per_page', 20 );

function new_loop_shop_per_page( $cols ) {
  // $cols contains the current number of products per page based on the value stored on Options –> Reading
  // Return the number of products you wanna show per page.
  $cols = 9;
  return $cols;
}
בכדי לבטל באופן מוחלט את אפשרות החיפוש בוורדפרס הוסיפו את הקוד הבא לקובץ functions.php של התבנית שלכם:
<?php function sv_filter_query($query, $error = true) {
    if (is_search()) {
        $query->is_search = false;
        $query->query_vars[s] = false;
        $query->query[s] = false;
        if ($error == true)
            $query->is_404 = true;
    }
}

add_action('parse_query', 'sv_filter_query');
add_filter('get_search_form', create_function('$a', "return null;"));

function remove_search_widget() {
    unregister_widget('WP_Widget_Search');
}

add_action('widgets_init', 'remove_search_widget');
האם תהיתם כיצד ניתן להגביל את תוצאות החיפוש לסוג תוכן ספציפי (Specific Custom Post Type)? זה מאד פשוט. כבר ראינו כיצד לבטל לגמרי את אפשרות החיפוש בוורדפרס על ידי מודיפיקציה לקובץ functions.php. כעת נעשה פעולה דומה בכדי לפלטר את תוצאות החיפוש שלנו.
גוש לקובץ functions.php והוסיפו את הקוד הבא:
function sv_search_filter($query) {

    if ($query->is_search && !is_admin() ) {
        $query->set('post_type',array('post','page'));
    }

return $query;
}

add_filter('pre_get_posts','sv_search_filter');
שימו לב לשורה הבאה:
$query->set('post_type',array('post','page'));
אתם יכולים לפלטר את תוצאות החיפוש על ידי שינוי הערכים במערך המדובר. כעת תוצאות החיפוש יציגו תוצאות אך ורק של עמודים ופוסטים, אך אתם יכולים לשנות מערך זה כך שיציג איזה סוג תוכן שתרצו.
כברירת מחדל, ווקומרס תציג את כל אפשרויות המשלוח בעמוד עגלת הקניות ובעמוד התשלום. אם תרצו להציג רק את אפשרות המשלוח חינם בעמודים אלו הוסיפו את הקוד הבא לקובץ functions.php:
/**
 * Hide shipping rates when free shipping is available.
 * Updated to support WooCommerce 2.6 Shipping Zones.
 *
 * @param array $rates Array of rates found for the package.
 * @return array
 * @link https://docs.woocommerce.com/document/hide-other-shipping-methods-when-free-shipping-is-available/
 */
function prefix_hide_shipping_when_free_is_available( $rates ) {
	$free = array();
	foreach ( $rates as $rate_id => $rate ) {
		if ( 'free_shipping' === $rate->method_id ) {
			$free[ $rate_id ] = $rate;
			break;
		}
	}
	return ! empty( $free ) ? $free : $rates;
}
add_filter( 'woocommerce_package_rates', 'prefix_hide_shipping_when_free_is_available', 100 );
WP-CLI הינו סט כלים המספקים פוקציונליות לניהול אתרי וורדפרס. במדריך זה, נתאר את יתרונות השימוש ב WP-CLI ונדגים מספר פקודות מתקדמות שיעשו לכם את החיים קלים יותר בסביבת הפיתוח של וורדפרס. ניתן להשתמש ב wp-cli בכדי או לשנמך או את הגירסה של וורדפרס לגירסה ספציפית.
עדכון לגירסה האחרונה של וורדפרס:
wp core update
עדכון לגירסה מסויימת של וורדפרס:
wp core update --version=5.5.3
התקנה או שנמול של גירסת וורדפרס:
wp core update --version=5.5.3 --force
בדיקה של גירסת וורדפרס שמותקנת:
wp core version
או עם מידע נוסף:
wp core version --extra
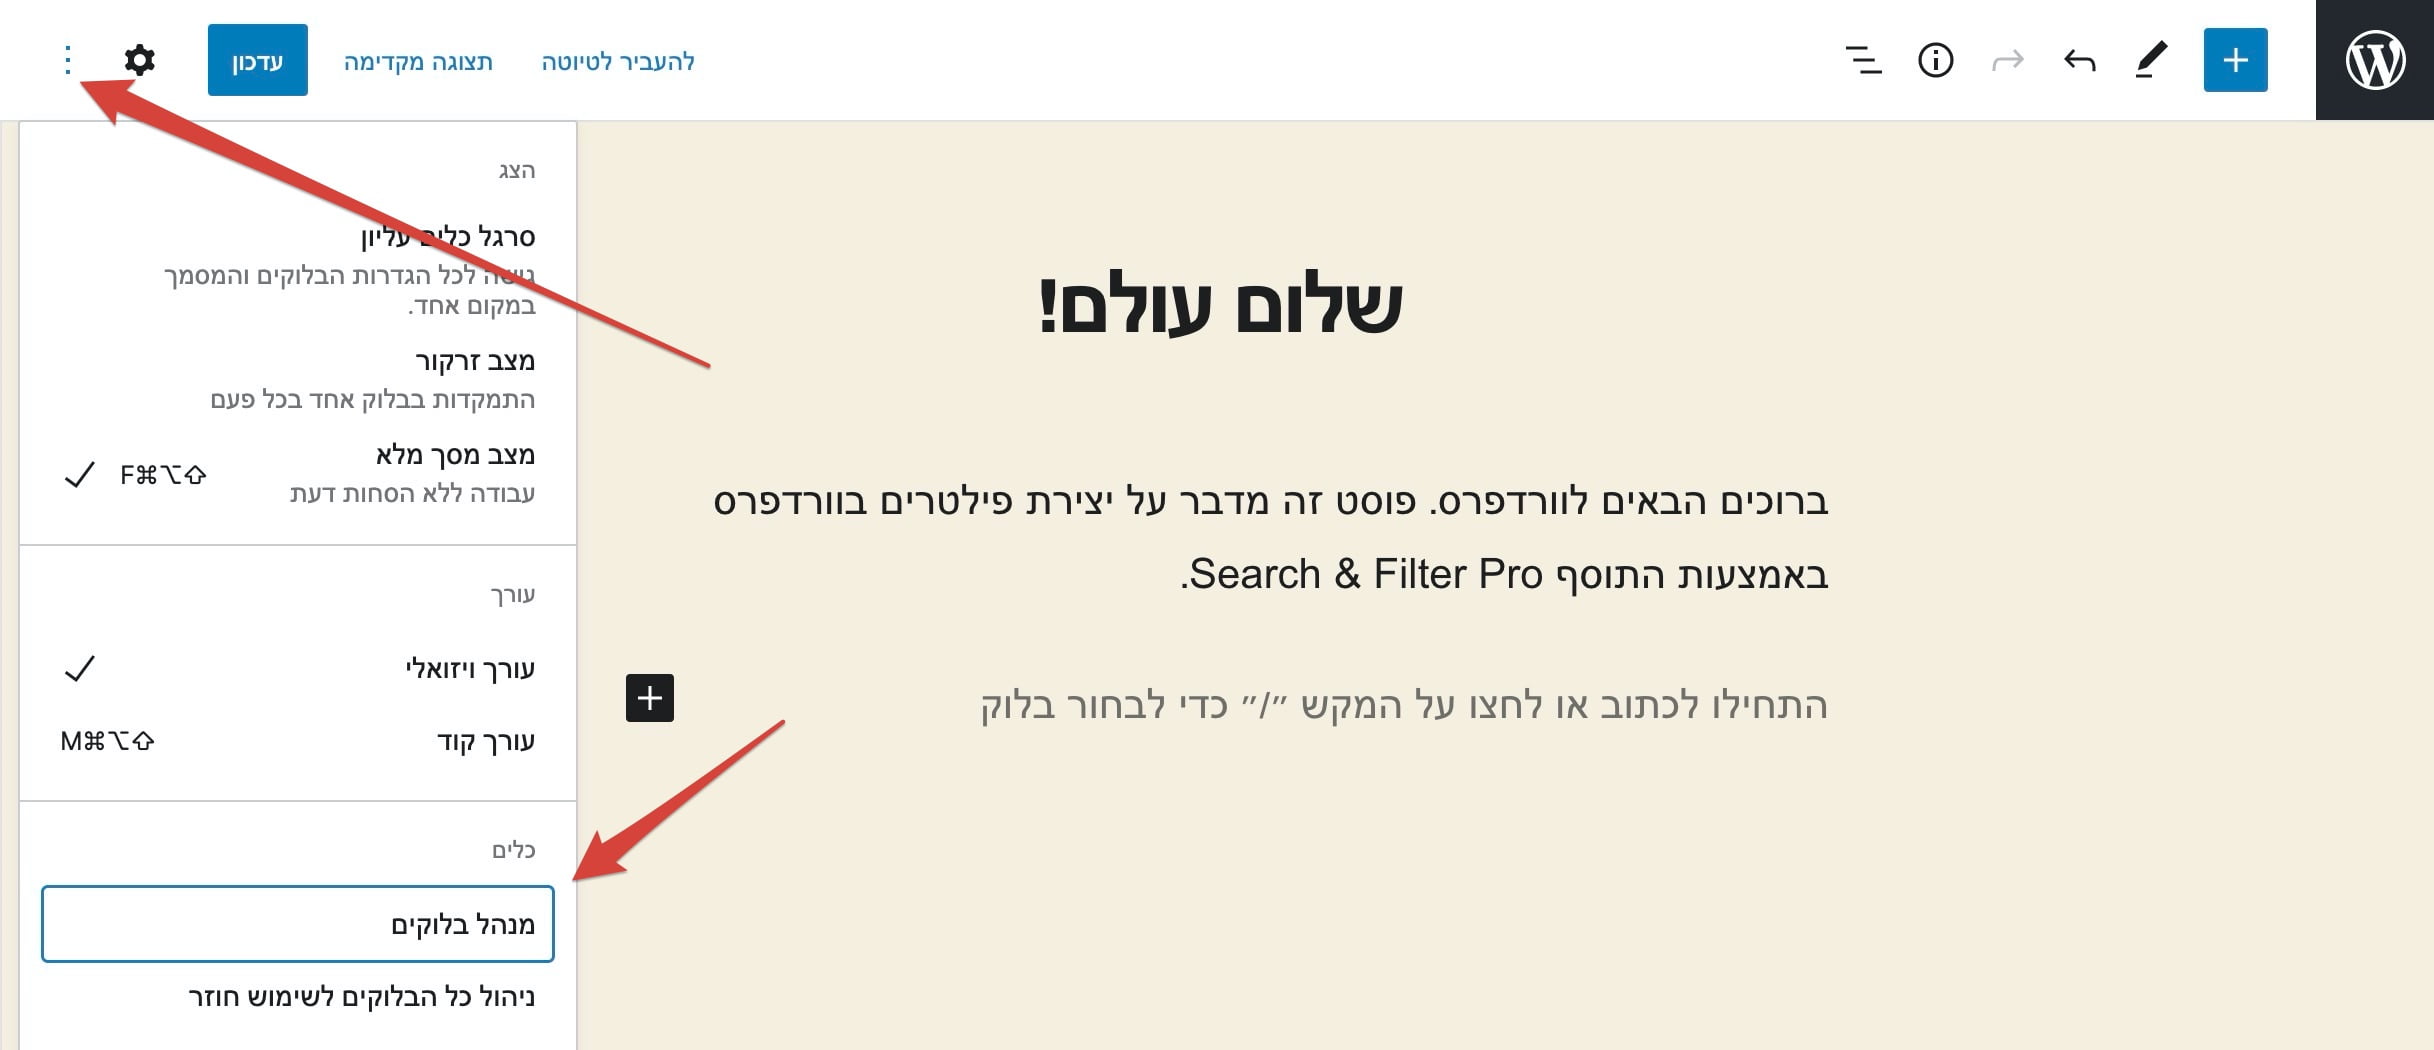
וורדפרס 5.2 הציגה עימה את מנהל הבלוקים המאפשר לקבוע איזה בלוקים יהיו פעילים וזמינים עבורכם (או עבור הלקוח) בתהליך עריכת התוכן בעורך של גוטנברג. הנה כיצד לפתוח את אותו מנהל בלוקים:
%22%20transform%3D%22translate(4.8%204.8)%20scale(9.50781)%22%20fill-opacity%3D%22.5%22%3E%3Cellipse%20fill%3D%22%23fff%22%20rx%3D%221%22%20ry%3D%221%22%20transform%3D%22matrix(41.89257%20-1.69643%202.36842%2058.48705%2012.2%2075.6)%22%2F%3E%3Cellipse%20fill%3D%22%23fff%22%20cx%3D%22124%22%20cy%3D%225%22%20rx%3D%2275%22%20ry%3D%2210%22%2F%3E%3Cellipse%20fill%3D%22%23fff%22%20cx%3D%2223%22%20cy%3D%2281%22%20rx%3D%2230%22%20ry%3D%2262%22%2F%3E%3Cpath%20fill%3D%22%23dadada%22%20d%3D%22M49.2%2017.3L267%209.7l3.8%20109L53%20126.3z%22%2F%3E%3C%2Fg%3E%3C%2Fsvg%3E)
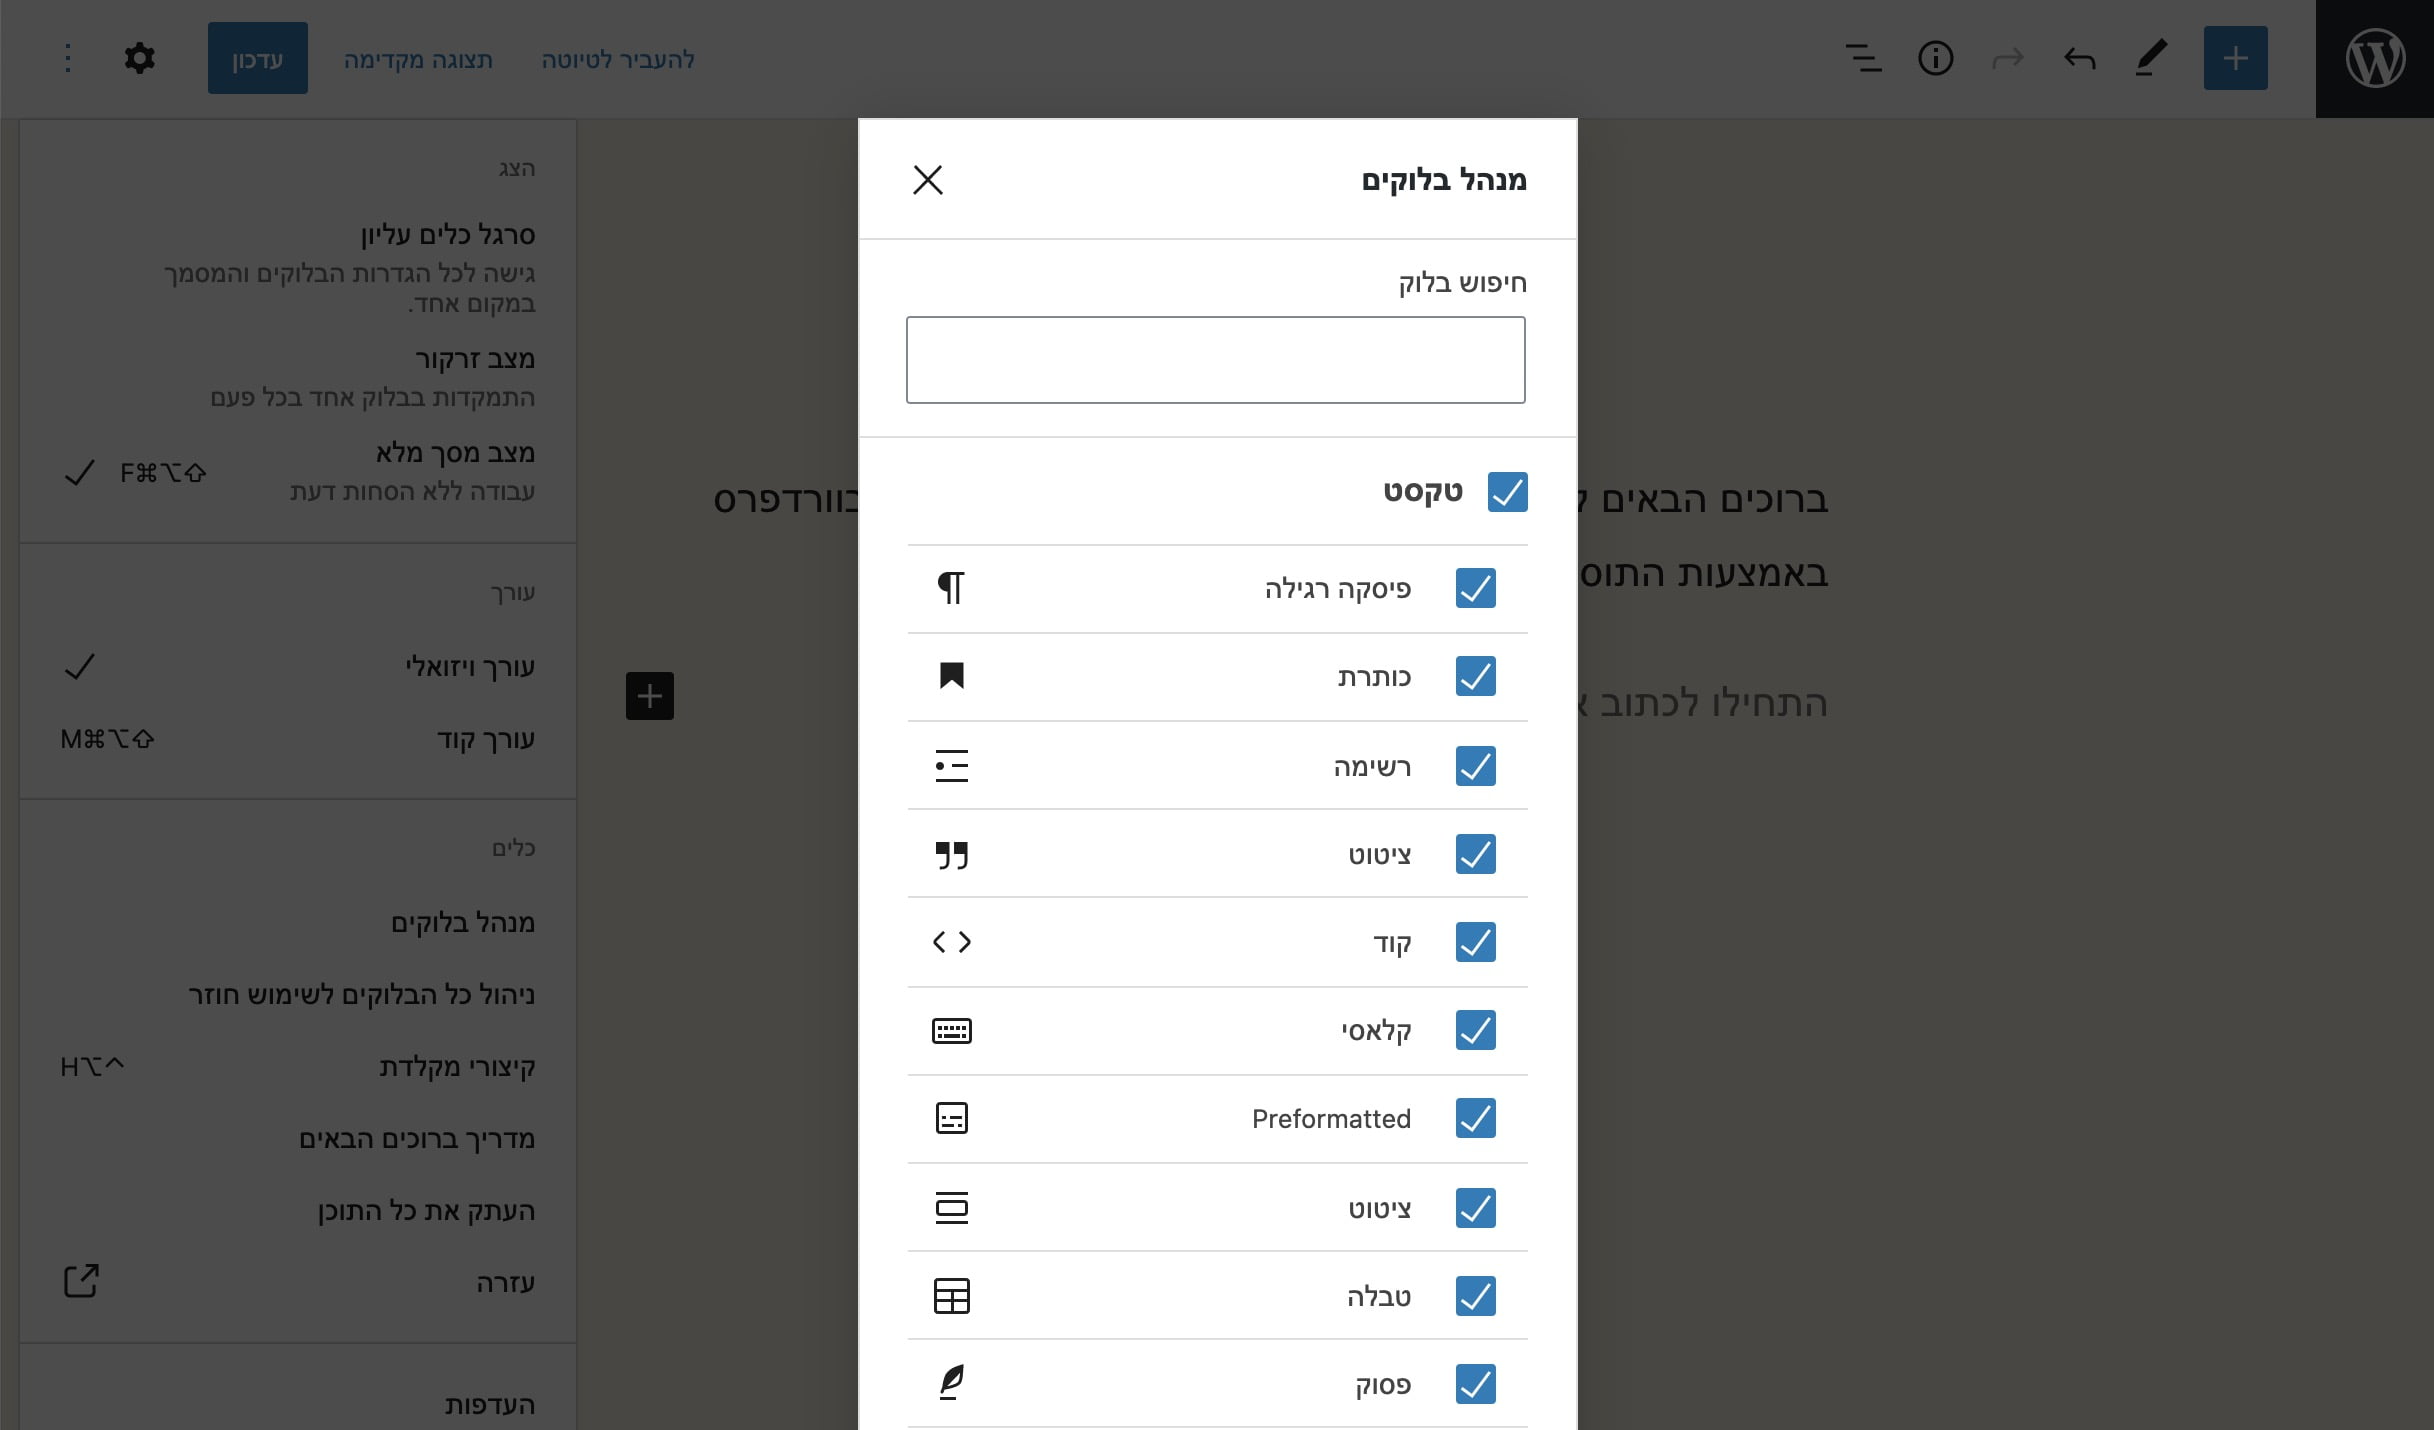
וכך נראה אותו מנהל הבלוקים. הסירו את הסימון מהבלוקים אותם אתם מעוניינים להסתיר:
%22%20transform%3D%22translate(4.8%204.8)%20scale(9.50781)%22%20fill-opacity%3D%22.5%22%3E%3Cellipse%20fill%3D%22%23fff%22%20cx%3D%22123%22%20cy%3D%22103%22%20rx%3D%2244%22%20ry%3D%22130%22%2F%3E%3Cellipse%20fill%3D%22%230e0e0e%22%20rx%3D%221%22%20ry%3D%221%22%20transform%3D%22matrix(-10.17442%20-224.21391%2039.2727%20-1.78212%20235%2071.1)%22%2F%3E%3Cellipse%20fill%3D%22%230f0f0f%22%20rx%3D%221%22%20ry%3D%221%22%20transform%3D%22matrix(-48.53856%20-2.48077%2011.16473%20-218.44823%200%2084.7)%22%2F%3E%3Cpath%20fill%3D%22%23fff%22%20d%3D%22M100.9%2034.4l40-.7%202.2%20128-40%20.6z%22%2F%3E%3C%2Fg%3E%3C%2Fsvg%3E)
לגרום לוורדפרס להיות מהירה יותר זה תהליך מתמשך. פעולה קטנה בעלת משמעות מינימלית היא הסרת DNS Prefetching של הכתובות הבאות (אם אתם מעוניינים להסיר אלו):
<link rel=’dns-prefetch’ href='//s.w.org'/>
<link rel='dns-prefetch' href='//fonts.googleapis.com'/>
בקוד המקור זה נראה כך לדוגמה:
%27%20fill-opacity%3D%27.5%27%3E%3Cellipse%20fill%3D%22%230d0d0d%22%20fill-opacity%3D%22.5%22%20rx%3D%221%22%20ry%3D%221%22%20transform%3D%22matrix(108.62291%20236.02014%20-363.27193%20167.18766%201288.3%20171.6)%22%2F%3E%3Cellipse%20fill%3D%22%234d4d4d%22%20fill-opacity%3D%22.5%22%20rx%3D%221%22%20ry%3D%221%22%20transform%3D%22matrix(512.7786%20-518.17671%20297.59087%20294.49071%20411.7%20181.6)%22%2F%3E%3Cpath%20fill%3D%22%23494949%22%20fill-opacity%3D%22.5%22%20d%3D%22M797.2%20415.3L906.3%20300l-12-91z%22%2F%3E%3Cpath%20fill%3D%22%23111%22%20fill-opacity%3D%22.5%22%20d%3D%22M1203.4-94l-194%20127.3%206-78.8z%22%2F%3E%3C%2Fg%3E%3C%2Fsvg%3E)
בכדי להסיר אלו הוסיפו את הקוד הבא לקובץ functions.php של התבנית שלכם:
function remove_dns_prefetch () {
    remove_action( 'wp_head', 'wp_resource_hints', 2, 99 );
}
add_action( 'init', 'remove_dns_prefetch' );
אם אינכם יודעים, הנה פוסט המסביר מה זה DNS.
סניפט מאד שימושי המאפשר להגביל את מספר השורות של טקסט מסויים באמצעות CSS בלבד. נעשה זאת באמצעות התכונה line-blamp ב CSS ובאופן הבא:
.text {
   overflow: hidden;
   text-overflow: ellipsis;
   display: -webkit-box;
   -webkit-line-clamp: 2; /* number of lines to show */
   -webkit-box-orient: vertical;
}
וזה ה Markup למשל:
<div class="text">
Lorem ipsum dolor sit amet, consectetur adipiscing elit. Aliquam consectetur venenatis blandit. Praesent vehicula, libero non pretium vulputate, lacus arcu facilisis lectus, sed feugiat tellus nulla eu dolor. Nulla porta bibendum lectus quis euismod. Aliquam volutpat ultricies porttitor. Cras risus nisi, accumsan vel cursus ut, sollicitudin vitae dolor. Fusce scelerisque eleifend lectus in bibendum. Suspendisse lacinia egestas felis a volutpat.
</div>
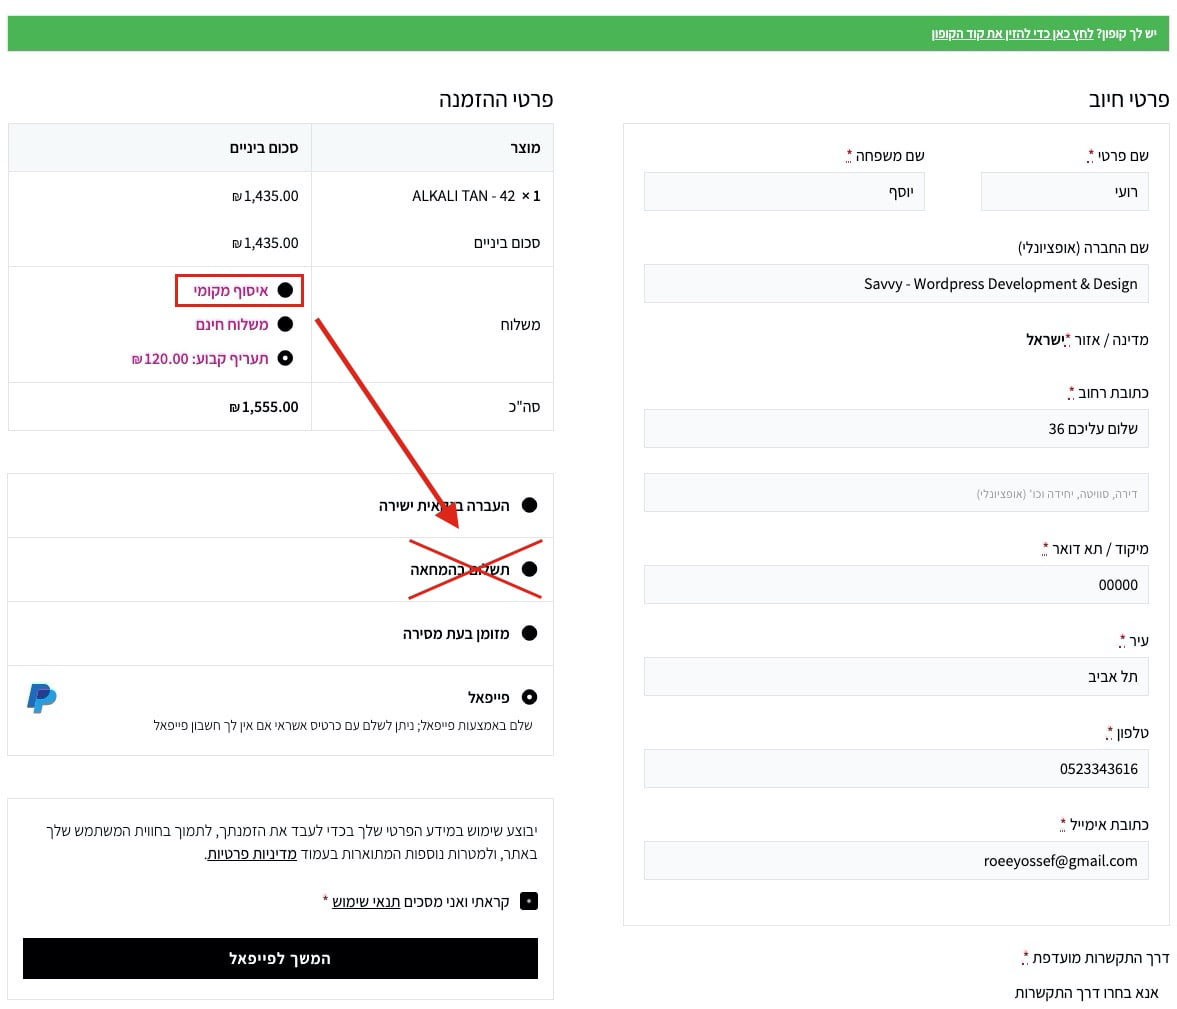
היום ניתן מבט על עמוד התשלום של ווקמורס וספציפית נראה כיצד לבטל צורת תשלום מסויימת לקוח בהתאם לשיטת המשלוח אותה הוא בחר. למשל ביטול ״תשלום בהמחאה״ לשיטת המשלוח ״איסוף מקומי״.
%22%20transform%3D%22translate(2.3%202.3)%20scale(4.59766)%22%20fill-opacity%3D%22.5%22%3E%3Cellipse%20fill%3D%22%23919191%22%20rx%3D%221%22%20ry%3D%221%22%20transform%3D%22matrix(70.87015%20-5.8002%201.98842%2024.29563%2040.3%20212.5)%22%2F%3E%3Cellipse%20fill%3D%22%23cdcdcd%22%20cx%3D%22126%22%20cy%3D%229%22%20rx%3D%22255%22%20ry%3D%2221%22%2F%3E%3Cpath%20fill%3D%22%23fff%22%20d%3D%22M-16%2053l287-27-46%20208z%22%2F%3E%3Cellipse%20fill%3D%22%23c9c9c9%22%20rx%3D%221%22%20ry%3D%221%22%20transform%3D%22matrix(-65.88504%20-13.37744%205.03916%20-24.8183%2071.6%20192.8)%22%2F%3E%3C%2Fg%3E%3C%2Fsvg%3E)
בכל מקרה הינה קוד סניפט המאפשר לעשות משהו בסגנון (functions.php):
/**
 * @snippet       ביטול צורת תשלום מסויימת עבור שיטת משלוח ספציפית
 * @author        Roee Yossef
 * @website       https://savvy.co.il
 */


function sv_gateway_disable_shipping_326( $available_gateways ) {

   if ( ! is_admin() ) {

      $chosen_methods = WC()->session->get( 'chosen_shipping_methods' );

      $chosen_shipping = $chosen_methods[0];

      if ( isset( $available_gateways['cod'] ) && 0 === strpos( $chosen_shipping, 'local_pickup' ) ) {
         unset( $available_gateways['cod'] );
      }

   }

   return $available_gateways;

}
add_filter( 'woocommerce_available_payment_gateways', 'sv_gateway_disable_shipping_326' );
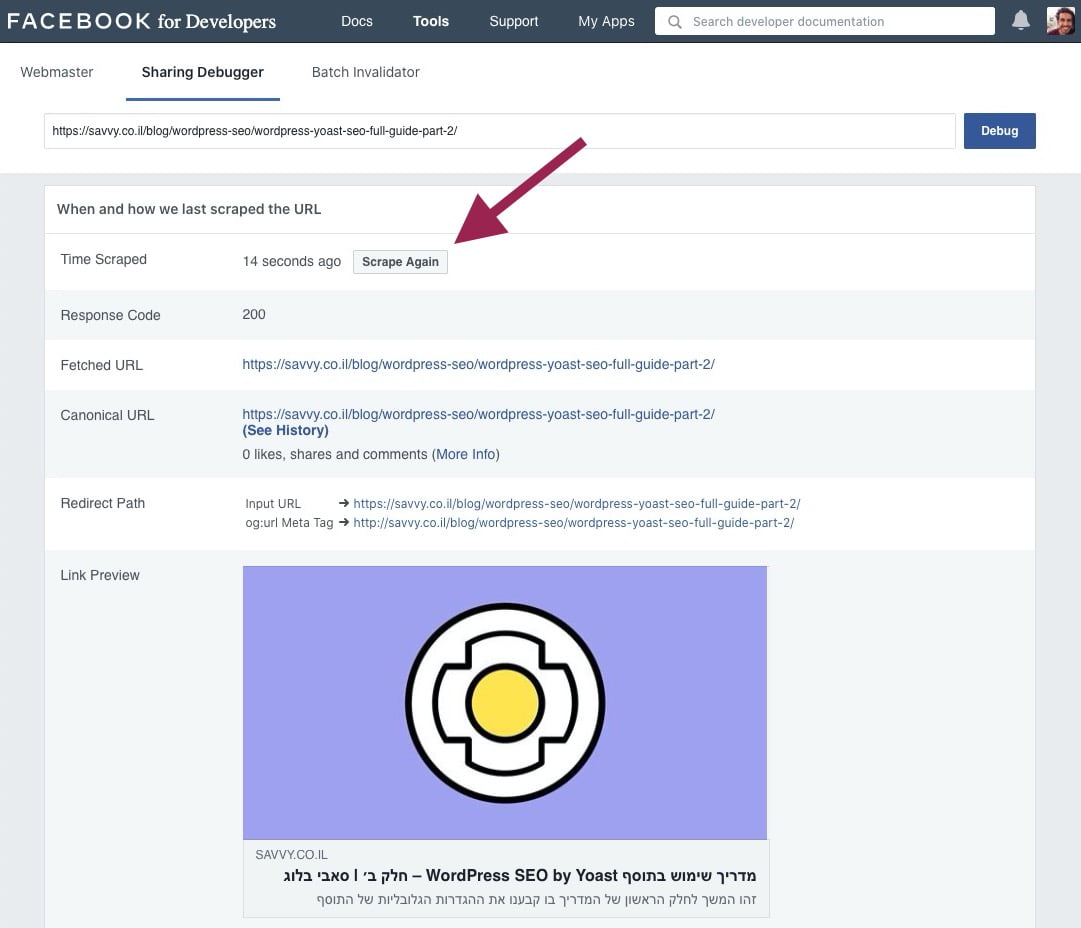
באפשרותכם לבדוק כיצד פייסבוק תציג פוסט בזמן שיתוף באמצעות ה Facebook Debugger (ולחיצה על כפתור ה Debug).
%22%20transform%3D%22translate(2.1%202.1)%20scale(4.21094)%22%20fill-opacity%3D%22.5%22%3E%3Cellipse%20fill%3D%22%239c9c9c%22%20cx%3D%2259%22%20rx%3D%2282%22%20ry%3D%2218%22%2F%3E%3Cellipse%20fill%3D%22%23fff%22%20rx%3D%221%22%20ry%3D%221%22%20transform%3D%22rotate(11.7%20-279.5%201002.6)%20scale(72.0785%2044.20114)%22%2F%3E%3Cellipse%20fill%3D%22%23fff%22%20rx%3D%221%22%20ry%3D%221%22%20transform%3D%22matrix(16.28915%20-27.49442%2017.01468%2010.0804%207.6%2078.4)%22%2F%3E%3Cellipse%20fill%3D%22%23fff%22%20rx%3D%221%22%20ry%3D%221%22%20transform%3D%22matrix(-22.18022%2042.66062%20-59.33884%20-30.8516%20198.7%2082.2)%22%2F%3E%3C%2Fg%3E%3C%2Fsvg%3E)
אם החלפתם תמונה ובזמן שיתוף עדיין מופיעה התמונה הישנה – בצעו Debug לפוסט ואחר מכן לחצו על Scrape Again על מנת שפייסבוק יזהו את התמונה החדשה.
רק נציין כי לפעמים יש צורך ללחוץ על Scrape Again יותר מפעם אחת על מנת שפייסבוק יזהו את השינויים.
%22%20transform%3D%22translate(2.1%202.1)%20scale(4.22266)%22%20fill-opacity%3D%22.5%22%3E%3Cellipse%20fill%3D%22%23a095d9%22%20rx%3D%221%22%20ry%3D%221%22%20transform%3D%22matrix(1.57912%20-41.82239%2060.2479%202.27483%20115%20166.5)%22%2F%3E%3Cellipse%20fill%3D%22%23fff%22%20rx%3D%221%22%20ry%3D%221%22%20transform%3D%22matrix(38.14734%20-40.53024%2082.97481%2078.09646%20226.5%20113.8)%22%2F%3E%3Cellipse%20fill%3D%22%239e9f99%22%20rx%3D%221%22%20ry%3D%221%22%20transform%3D%22matrix(.95283%20-18.9691%20101.91918%205.11946%2042.5%200)%22%2F%3E%3Cellipse%20fill%3D%22%23fff%22%20cx%3D%2272%22%20cy%3D%2273%22%20rx%3D%22255%22%20ry%3D%2223%22%2F%3E%3C%2Fg%3E%3C%2Fsvg%3E)
